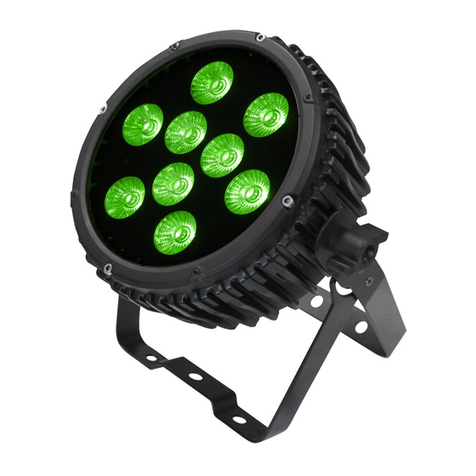
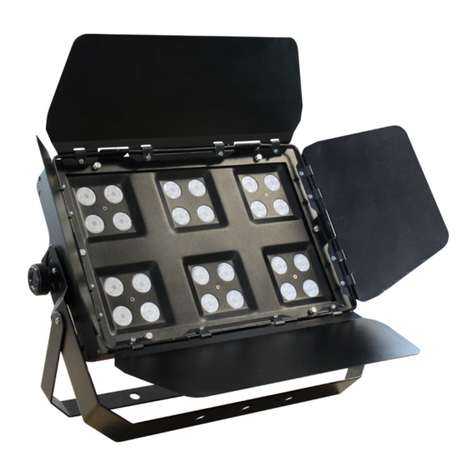
Ledj HEX Par 7 User manual

Order code: LEDJ228
HEX Par 7
Exterior Fixture
User Manual

www.prolight.co.uk HEX Par 7 User Manual
2
Safety advice
WARNING
FOR YOUR OWN SAFETY, PLEASE READ THIS USER MANUAL CARE-
FULLY BEFORE YOUR INITIAL START-UP!
• Beforeyourinitialstart-up,pleasemakesurethatthereisnodamagecausedduringtransportation.
• Shouldtherebeanydamage,consultyourdealeranddonotusetheequipment.
• Tomaintaintheequipmentingoodworkingconditionandtoensuresafeoperation,itisnecessary
fortheusertofollowthesafetyinstructionsandwarningnoteswritteninthismanual.
• Pleasenotethatdamagescausedbyusermodicationstothisequipmentarenotsubjecttowarranty.
IMPORTANT:
The manufacturer will not accept liability for any resulting damages caused by the non-observance
of this manual or any unauthorised modication to the equipment.
OPERATING DETERMINATIONS
Ifthisequipmentisoperatedinanyotherway,thanthosedescribedinthismanual,theproductmaysufferdamageand
thewarrantybecomesvoid.Incorrectoperationmayleadtodangere.g:short-circuit,burnsandelectricshocksetc.
Donotendangeryourownsafetyandthesafetyofothers!
Incorrectinstallationorusecancauseseriousdamagetopeopleand/orproperty.
CAUTION!
TAKE CARE USING
THIS EQUIPMENT!
HIGH VOLTAGE-RISK
OF ELECTRIC SHOCK!!
• Neverletthepowercablecomeintocontactwithother
cables.Handlethepowercableandallmainsvoltage
connectionswithparticularcaution!
• Neverremovewarningorinformativelabelsfromtheunit.
• Donotopentheequipmentanddonotmodifytheunit.
• Donotconnectthisequipmenttoadimmerpack.
• Donotswitchtheequipmentonandoffinshortintervals,
asthiswillreducethesystem’slife.
• Donotexposetoammablesourcesorgases.
• Alwaysdisconnectthepowerfromthemainswhen
equipmentisnotinuseorbeforecleaning!Onlyhandle
thepower-cablebytheplug.Neverpullouttheplugby
pullingthepower-cable.
• Makesurethattheavailablemainssupplyvoltageis
between100~240VAC,50/60Hz.
• Makesurethatthepowercableisnevercrimpedor
damaged.Checktheequipmentandthepowercable
periodically.
• Iftheequipmentisdroppedordamaged,disconnectthe
mainspowersupplyimmediatelyandhaveaqualied
engineerinspecttheequipmentbeforeoperatingagain.
• Ifyourproductfailstofunctioncorrectly,stopuse
immediately.Packtheunitsecurely(preferablyinthe
originalpackingmaterial),andreturnittoyourProLight
dealerforservice.
• Onlyusefusesofsametypeandrating.
• Repairs,servicingandpowerconnectionmustonlybe
carriedoutbyaqualiedtechnician.THISUNITCONTAINS
NOUSERSERVICEABLEPARTS.
• Thislightingxtureisforprofessionaluseonly-itis
notdesignedfororsuitableforhouseholduse.The
productmustbeinstalledbyaqualiedtechnicianin
accordancewithlocalterritoryregulations.Thesafetyof
theinstallationistheresponsibilityoftheinstaller.The
xturepresentsrisksofsevereinjuryordeathduetore
hazards,electricshockandfalls.
• Warning!RiskGroup2LEDproductaccordingto
EN62471.Donotviewthelightoutputwithoptical
instrumentsoranydevicethatmayconcentratethebeam.
• WARRANTY:Oneyearfromdateofpurchase.
www.prolight.co.uk HEX Par 7 User Manual
3
0m 1m 2m 3m 4m 5m
45° - Lux
FULL ON
R
G
B
W
A
UV
7600
1380
2960
920
3200
1680
496
1900
345
740
230
800
420
124
844
153
329
102
356
187
55
45°
475
86
185
57
200
105
31
304
55
118
36
128
67
19
Product overview & technical specications
•7x10Wsix-colourLEDs
(RGBWAUV)
•Beamangle:45°
•1900Lux@2m(fullon)
•2.2kHzrefreshrate
•DMXchannels:2/3/3/4/4/5/6
or9selectable
•Autoandmaster/slavemodes
•0-100%dimming
andvariablestrobe
•4pushbuttonmenu
withLEDdisplay
•IPratedpowerinput/output
•IPrated3-PinDMXinput/output
HEX Par 7
Specications HEX Par 7
Powerconsumption 70W
Powersupply 100~240V,50/60Hz
Dimensions 280x245x150mm
Weight 3.8kg
Ordercode LEDJ228
245mm 150mm
280mm
IP65
01-Hangingbracket
02-Hangingbracket
adjustmentknobs
03-LEDdisplay
04-Functionbuttons
05-IPratedpowerinput
06-IPratedpoweroutput
07-IPratedDMXinput
08-IPratedDMXoutput
Inthebox:
1 x xture, 1 x power cable
& 1 x user manual
TheexteriorHEXPar7features7x10Wsix-colourLEDs,
givingsmoothcolourmixingfromrichsaturatedhuestosubtle
pastelshades,controlledviaa4pushbuttonLEDmenuwhichallows
foreasyaccesstothemodesincludingDMX,autoandmaster/slave.
Thisxturecanbeusedforinteriorandexteriorapplications
(IP65rated)makingitsuitableforbotharchitectural
andstagelighting.
01 0307 08
0405 06
02 02

www.prolight.co.uk HEX Par 7 User Manual
4
MENU
JUNP
J500
J599 JF99
JF00
Colour change mode
ENTER ENTER
FAde
F500
F599 FF99
FF00
Colour fade mode
ENTER ENTER
StAt
St01
St15 SF99
SF00
Static colour mode
ENTER ENTER
C o L o
RGB colour
mix mode
ENTER
r255
UP/DOWN
ENTER
r000
ENTER
UP/DOWN
g000 g255
ENTER
UP/DOWN
b000 b255
ENTER
UP/DOWN
U000 U255
ENTER
UP/DOWN
y000 y255
ENTER
UP/DOWN
P000 P255
ENTER
UP/DOWN
CF00 CF99
uer
Software version
ENTER
u---
DMX channel mode
C h n d
ENTER
UP/
DOWN
2Ch
3Ch1
3Ch2
4Ch1
4Ch2
5Ch
6Ch
9Ch
Display timeout
d I s P
ENTER
UP/
DOWN
o n
10oF
30oF
60oF
Auto
Auto mode
A d d r
ENTER
d001
d512
DMX address mode
Blackout mode
b L n d
ENTER
UP/
DOWN
Auto
StoP
hoLd

www.prolight.co.uk HEX Par 7 User Manual
5
Operating instructions
DMX mode:
ToselecttheDMXaddress,pressthe“MENU”buttonontherearoftheunittoshowAddronthe
LEDdisplay.Nowpressthe“ENTER”buttonandusethe“UP”and“DOWN”buttonstoselecttheDMX
addressbetween001-512.
Toexitoutofanyoftheaboveoptions,pressthe“MENU”button.
DMX channel mode:
OperatinginaDMXcontrolmodeenvironmentgivestheuserthegreatestexibilitywhenitcomesto
customisingorcreatingashow.Inthismodeyouwillbeabletocontroleachindividualtraitofthexture
andeachxtureindependently.ToaccesstheDMXchannelmode,pressthe“MENU”buttonontherear
oftheunittoshowChndontheLEDdisplay.Nowpressthe“ENTER”buttonandusethe“UP”and
“DOWN”buttonstoselectbetween2/3/3/4/4/5/6or9channelmodes.
Toexitoutofanyoftheaboveoptions,pressthe“MENU”button.
2 channel mode:
Channel Value Function
1 000-255 Masterdimmer(0-100%)
2000-016 Red
017-033 Green
034-050 Blue
051-067 White
068-084 Amber
085-101 UV
102-118 Yellow(R:255,G:200,A:255)
119-135 Cyan(G:255,B:255)
136-152 Lavender(R:170,B:210)
153-169 Brightgreen(G:255,A:180)
170-186 Magenta(R:255,B:90,UV:255)
187-203 Turquoise(G:255,B:180,UV:255)
204-220 Orange(R:200,A:200)
221-237 Coolwhite(R:70,G:190,B:255,A:200)
238-255 Warmwhite(R:230,G:255,B:255,A:255,W:255)

www.prolight.co.uk HEX Par 7 User Manual
6
Operating instructions
3 channel mode 1:
Channel Value Function
1 000-255 Masterdimmer(0-100%)
2000-009 Nofunction
010-255 Strobe(slow-fast)
3000-005 Blackout
006-010 Red
011-015 Green
016-020 Blue
021-025 White
026-030 Amber
031-035 UV
036-040 Yellow(R:255,G:200,A:255)
041-045 Cyan(G:255,B:255)
046-050 Lavender(R:170,B:210)
051-055 Brightgreen(G:255,A:180)
056-060 Magenta(R:255,B:90,UV:255)
061-065 Turquoise(G:255,B:180,UV:255)
066-070 Orange(R:200,A:200)
071-075 Coolwhite(R:70,G:190,B:255,A:200)
076-080 Warmwhite(R:230,G:255,B:255,A:255,W:255)
081-170 Colourchange(slow-fast)
171-255 Colourfade(slow-fast)
3 channel mode 2:
Channel Value Function
1 000-255 Red(0-100%)
2000-255 Green(0-100%)
3000-255 Blue(0-100%)
4 channel mode 1:
Channel Value Function
1 000-255 Red(0-100%)
2000-255 Green(0-100%)
3000-255 Blue(0-100%)
4 000-255 White(0-100%)
4 channel mode 2:
Channel Value Function
1 000-255 Red(0-100%)
2000-255 Green(0-100%)
3000-255 Blue(0-100%)
4 000-255 Amber(0-100%)
5 channel mode:
Channel Value Function
1 000-255 Red(0-100%)
2000-255 Green(0-100%)
3000-255 Blue(0-100%)
4 000-255 White(0-100%)
5 000-255 Amber(0-100%)
6 channel mode:
Channel Value Function
1 000-255 Red(0-100%)
2000-255 Green(0-100%)
3000-255 Blue(0-100%)
4 000-255 White(0-100%)
5 000-255 Amber(0-100%)
6 000-255 UV(0-100%)

www.prolight.co.uk HEX Par 7 User Manual
7
Colour change mode:
Toaccesscolourchangemodepress“MENU”untilthedisplayshowsJUNPontheLEDdisplay.
Press“ENTER” toandusethe“UP”and“DOWN”buttonstoadjustthespeedbetween
J500~J599.Press“ENTER” toandusethe“UP”and“DOWN”buttonstoadjusttheash
speedbetweenJF00~JF99.Pressthe“ENTER” buttontoconrmthesetting.
Value: 0 - 99 (0 = slow speed, 99 = fast speed)
Toexitoutofanyoftheaboveoptions,pressthe“MENU”button.
Operating instructions
9 channel mode:
Channel Value Function
1 000-255 Masterdimmer(0-100%)
2000-009 Nofunction
010-255 Strobe(slow-fast)
3000-255 Red(0-100%)
4 000-255 Green(0-100%)
5 000-255 Blue(0-100%)
6 000-255 White(0-100%)
7 000-255 Amber(0-100%)
8000-255 UV(0-100%)
9 000-005 Blackout
006-010 Red
011-015 Green
016-020 Blue
021-025 White
026-030 Amber
031-035 UV
036-040 Yellow(R:255,G:200,A:255)
041-045 Cyan(G:255,B:255)
046-050 Lavender(R:170,B:210)
051-055 Brightgreen(G:255,A:180)
056-060 Magenta(R:255,B:90,UV:255)
061-065 Turquoise(G:255,B:180,UV:255)
066-070 Orange(R:200,A:200)
071-075 Coolwhite(R:70,G:190,B:255,A:200)
076-080 Warmwhite(R:230,G:255,B:255,A:255,W:255)
081-170 Colourchange(slow-fast)
171-255 Colourfade(slow-fast)

www.prolight.co.uk HEX Par 7 User Manual
8
Colour fade mode:
Toaccesscolourfademodepress“MENU”untilthedisplayshowsFadeontheLEDdisplay.
Press“ENTER” toandusethe“UP”and“DOWN”buttonstoadjustthespeedbetween
F500~F599.Press“ENTER” toandusethe“UP”and“DOWN”buttonstoadjusttheash
speedbetweenFF00~FF99.Pressthe“ENTER” buttontoconrmthesetting.
Value: 0 - 99 (0 = slow speed, 99 = fast speed)
Toexitoutofanyoftheaboveoptions,pressthe“MENU”button.
Auto mode:
Toaccessautomodepress“MENU”untilthedisplayshowsAutoontheLEDdisplay.Press“ENTER”
toconrmthesetting.Thexturewillnowrunthroughitscolourchangeandcolourfadeprograms.
Toexitoutofanyoftheaboveoptions,pressthe“MENU”button.
Static colour mode:
Toaccesscolourfademodepress“MENU”untilthedisplayshowsStatontheLEDdisplay.
Press“ENTER” toandusethe“UP”and“DOWN”buttonstochoosethestaticcolourbetween
St01~St15.Press“ENTER” toandusethe“UP”and“DOWN”buttonstoadjusttheash
speedbetweenSF00~SF99.Pressthe“ENTER” buttontoconrmthesetting.
Value: 0 - 99 (0 = slow speed, 99 = fast speed)
Toexitoutofanyoftheaboveoptions,pressthe“MENU”button.
RGB colour mix mode:
ToaccesstheRGBcolourmixmodepress“MENU”untilCoLoshowsontheLEDdisplay.
Pressthe“ENTER” buttonandusethe“UP”and“DOWN”buttonstoselectthebrightnessbetween
r.000~r.255.Pressthe“ENTER” buttonandrepeatforgreen(g),blue(b),white(U),amber(y)
andUV(P).Press“ENTER” toandusethe“UP”and“DOWN”buttonstoadjusttheash
speedbetweenCF00~CF99.Pressthe“ENTER” buttontoconrmthesetting.
Value: 000 - 255 (000 = low brightness, 255 = high brightness)
Toexitoutofanyoftheaboveoptions,pressthe“MENU”button.
Operating instructions
St01-Red
St02-Green
St03-Blue
st04-White
st05-Amber
st06-UV
St07-Yellow
St08-Cyan
St09-Lavender
st10-BrightGreen
st11-Magenta
St12-Turquoise
St13-Orange
St14-CoolWhite
st15-WarmWhite

www.prolight.co.uk HEX Par 7 User Manual
9
DMX signal interruption:
DMXsignalinterruptionwillallowtheusertochoosewhatthexturedoeswhenitlosesDMXsignal.
ToaccessDMXsignalinterruptionpress“MENU”untilthedisplayshowsbLndontheLEDdisplay.
Press“ENTER” toandusethe“UP”and“DOWN”buttonstochoosebetweenAutomode(Auto),
Holdmode(hoLd)andStopmode(StoP).Pressthe“ENTER” buttontoconrmthesetting.
Toexitoutofanyoftheaboveoptions,pressthe“MENU”button.
Display timeout:
Displaytimeoutallowstheusertochooseafterwhatperiodoftimethedisplaygoesoff.
Tochangethedisplaytimeoutpress“MENU”untilthedisplayshowsdISPontheLEDdisplay.
Press“ENTER” toandusethe“UP”and“DOWN”buttonstochoosebetweenon(on),10second
timout(10oF),30secondtimout(30oF)and60secondtimout(60oF).
Pressthe“ENTER” buttontoconrmthesetting.
Toexitoutofanyoftheaboveoptions,pressthe“MENU”button.
Software version:
Toseewhatversionthextureispress“MENU”untilthedisplayshowsverontheLEDdisplay.
Press“ENTER” toandthextureversionwillbedisplayed.
Toexitoutofanyoftheaboveoptions,pressthe“MENU”button.
Operating instructions

www.prolight.co.uk HEX Par 7 User Manual
10
Setting the DMX address:
TheDMXmodeenablestheuseofauniversalDMXcontroller.Eachxturerequiresa“startaddress”
from1-512.Axturerequiringoneormorechannelsforcontrolbeginstoreadthedataonthechannel
indicatedbythestartaddress.Forexample,axturethatoccupiesoruses7channelsofDMXandwas
addressedtostartonDMXchannel100,wouldreaddatafromchannels:100,101,102,103,104,105
and106.Chooseastartaddresssothatthechannelsuseddonotoverlap.E.g.thenextunitinthe
chainstartsat107.
DMX 512:
DMX(DigitalMultiplex)isauniversalprotocolusedasaformofcommunicationbetweenintelligent
xturesandcontrollers.ADMXcontrollersendsDMXdatainstructionsformthecontrollertothexture.
DMXdataissentasserialdatathattravelsfromxturetoxtureviatheDATA“IN”andDATA“OUT”
XLRterminalslocatedonallDMXxtures(mostcontrollersonlyhaveadata“out”terminal).
DMX linking:
DMXisalanguageallowingallmakesandmodelsofdifferentmanufacturestobelinkedtogether
andoperatefromasinglecontroller,aslongasallxturesandthecontrollerareDMXcompliant.
ToensureproperDMXdatatransmission,whenusingseveralDMXxturestrytousetheshortest
cablepathpossible.TheorderinwhichxturesareconnectedinaDMXlinedoesnotinuencethe
DMXaddressing.Forexample;axtureassignedtoaDMXaddressof1maybeplacedanywherein
aDMXline,atthebeginning,attheend,oranywhereinthemiddle.Whenaxtureisassigneda
DMXaddressof1,theDMXcontrollerknowstosendDATAassignedtoaddress1tothatunit,
nomatterwhereitislocatedintheDMXchain.
DATA cable (DMX cable) requirements (for DMX operation):
ThisxturecanbecontrolledviaDMX-512protocol.TheDMXaddressissetonthebackoftheunit.
DMX setup
FurtherDMXcablescanbepurchasedfromallgoodsoundandlightingsuppliersorProlightConceptsdealers.
Pleasequote:
LEDJ1mInterior-
ExteriorDMXcable
LEDJ1mExterior
DMXcable
LEDJ2mExterior
DMXcable
LEDJ5mExterior
DMXcable
LEDJ10mExterior
DMXcable
Ordercode:LEDJ91 Ordercode:LEDJ141 Ordercode:LEDJ142 Ordercode:LEDJ143 Ordercode:LEDJ144
LEDJ1mExterior
Powercable
LEDJ2mExterior
Powercable
LEDJ5mExterior
Powercable
LEDJ10mExterior
Powercable
Ordercode:LEDJ146 Ordercode:LEDJ147 Ordercode:LEDJ148 Ordercode:LEDJ149
Also remember
that DMX cable
must be daisy
chained and
cannot be split.

www.prolight.co.uk HEX Par 7 User Manual
11
Notice:
Besuretofollowthediagramsbelowwhenmakingyourowncables.Donotconnectthecables
shieldconductortothegroundlugorallowtheshieldconductortocomeincontactwiththeXLRs
outercasing.Groundingtheshieldcouldcauseashortcircuitanderraticbehaviour.
Special note:
Line termination:
Whenlongerrunsofcableareused,
youmayneedtouseaterminatoron
thelastunittoavoiderraticbehaviour.
Using a cable terminator will decrease
the possibilities of erratic behaviour.
(3-pin - Order ref: CABL9O, 5-pin - Order ref: CABL89)
5-pin XLR DMX connectors:
Somemanufacturesuse5-pinXLRconnectorsfordatatransmissioninplaceof3-pin.5-pinXLRxtures
maybeimplementedina3-pinXLRDMXline.Wheninsertingstandard5-pinXLRconnectorsintoa
3-pinlineacableadaptormustbeused.Thediagrambelowdetailsthecorrectcableconversion.
Terminationreducessignaltransmission
problemsandinterferance.itisalways
advisabletoconnectaDMXterminal,
(resistance120Ohm1/4W)betweenpin2
(DMX-)andpin3(DMX+)ofthelastxture.
5-pin XLR (socket)
Pin 1: GND (screen)
Pin 2: Signal (-)
Pin 3: Signal (+)
Pin 4: N/C
Pin 5: N/C
3-pin XLR (socket)
Pin 1: GND (screen)
Pin 2: Signal (-)
Pin 3: Signal (+)
3-pin XLR (socket)
Pin 1: GND (screen)
Pin 2: Signal (-)
Pin 3: Signal (+)
5-pin XLR (socket)
Pin 1: GND (screen)
Pin 2: Signal (-)
Pin 3: Signal (+)
Pin 4: N/C
Pin 5: N/C
DMX setup

www.prolight.co.uk HEX Par 7 User Manual
12
WEEE notice
Correct Disposal of this Product
(Waste Electrical & Electronic Equipment)
(Applicable in the European Union and other European countries
with separate collection systems)
Thismarkingshownontheproductoritsliterature,indicatesthatitshouldnotbedisposedof
withotherhouseholdwastesattheendofitsworkinglife.Topreventpossibleharmtothe
environmentorhumanhealthfromuncontrolledwastedisposal,pleaseseparatethisfromother
typesofwastesandrecycleitresponsiblytopromotethesustainablereuseofmaterialresources.
Householdusersshouldcontacteithertheretailerwheretheypurchasedthisproduct,ortheir
localgovernmentofce,fordetailsofwhereandhowtheycantakethisitemforenvironmentally
saferecycling.
Businessusersshouldcontacttheirsupplierandcheckthetermsandconditionsofthe
purchasecontract.Thisproductshouldnotbemixedwithothercommercialwastesfordisposal.
Table of contents
Other Ledj Floodlight manuals

Ledj
Ledj ALU ZOOM PAR 64 User manual

Ledj
Ledj Slimline 36 RGBW User manual

Ledj
Ledj ALU ZOOM PAR 64 User manual

Ledj
Ledj Spectra Par 6HEX10 User manual

Ledj
Ledj STAR18 User manual

Ledj
Ledj Q Colour User manual

Ledj
Ledj STAGE COLOUR 24 TRI User manual

Ledj
Ledj Slimline 7T3 User manual

Ledj
Ledj ALU ZOOM PAR 64 User manual

Ledj
Ledj Stage Wash 18 User manual

Ledj
Ledj PERFORMER 54 RGBW User manual

Ledj
Ledj Slimline 9Q8 User manual

Ledj
Ledj UV 100W COB Flood LEDJ185 User manual

Ledj
Ledj Q Pix Batten LEDJ97 User manual

Ledj
Ledj LEDJ252B User manual

Ledj
Ledj 19T3 User manual

Ledj
Ledj PERFORMER 36 RGB User manual

Ledj
Ledj Stage Wash 36 User manual

Ledj
Ledj LEDJ98 User manual

Ledj
Ledj Slimline 229 User manual