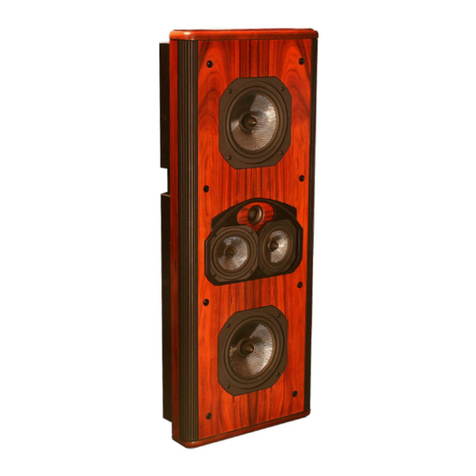
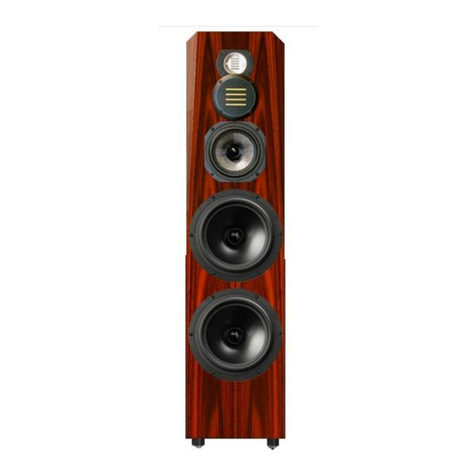
Legacy Harmony Center User manual

Owners Manual For The
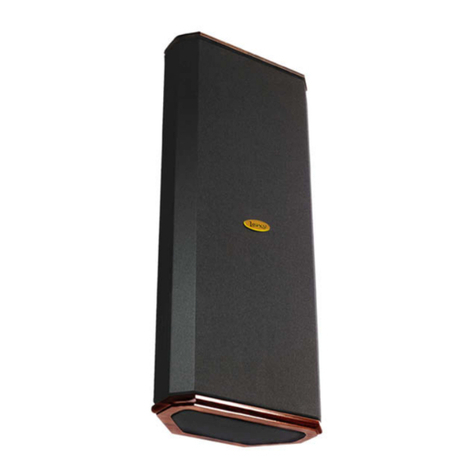
Harmony Center
Loudspeaker System

2
Registration
Owners Record 3
The Cabinetry Our Commitment 4
Setup
Unpacking Your Speakers 5
Speaker Installation 6-11
Hooking Up Cables 12-14
Amplification 15-19
Technology
Designer’s Note 18
Specifications 19
Table of Contents
Page

3
The serial number is located on the rear of the unit. Record this
number in the space provided below. Refer to this when calling your
dealer regarding this product.
Model: Harmony Center HD
Serial No: _________________________
Date of purchase: ___________________
Thank you for selecting a Legacy Loudspeaker System. These hand-
crafted instruments will provide you with many years of listening en-
joyment.
Owners Record

4
Handcrafted
Beneath the surface of Harmony Center elegant exterior lies rigid MDF
construction. Interlocking joinery maximizes the strength of the cabinet
parts. Polyester fiberfill is selected for internal damping. A sharp rap on
the enclosure will leave you with little more than bruised knuckles.
Each cabinet is impeccably finished on all exposed surfaces with select
veneers. The exquisite finish is hand-rubbed several times to assure a
patina at home with the most elegant decor.
Our Commitment
A great deal of forethought, love and satisfaction is instilled in each piece
of Legacy workmanship. We take pride in getting to know many of our
customers on a first name basis.
Your purchase of this product is backed by the renowned “Legacy
Satisfaction Guarantee”.
The Cabinetry / Our Commitment

5
Your new speaker system has been very carefully packaged to insure
that it travels to you safely. Each speaker is protected by a double-
wall outer carton with heavy V-board corner protectors. Molded foam
end caps are used to protect the elegant cabinetry, and a plastic liner
is provided as waterproofing. Please save this packing for future
transportation. If cartons become damaged or misplaced, new ones
can be purchased from Legacy Audio.
Unpacking Your Speakers

6
recautions
If you have any doubts about your ability to properly install in-wall loud-
speakers, you should consider the services of a custom installer. If you
plan to install them yourself, always use high quality tools to save time
and make the installation go more smoothly.
The Harmony In-Wall Loudspeaker mounts into standard 4-inch (or
greater) stud depth walls. Determine the final location of the speaker
before cutting any holes since changes to one speaker may affect the
others either aesthetically or acoustically. Look for pipes, wiring or any
other conflicting material that might be damaged before beginning the
installation.
WARNING: Wear Eye Protection when cutting drywall.
Also be certain there are no electrical, water, heating, or gas lines inside
the wall in the location you plan to mount your Harmony loudspeakers.
Speaker Installation

7
Installing the Harmony In-Wall Loudspeakers
acking List
Harmony Center Speaker
Installation Manual
(2) Support Blocks
(4) Support Block Screws
(2) Tensioning Screws
Tools Required
Pencil
Drywall Saw
Level
Phillips Screwdriver
Tape Measure
Mallet
Speaker Installation

8
Due to Harmony’s unique patented design, Installation is identical for new or existing construc-
tion. The Harmony speaker is designed to perform at its best when the bottom of the speaker is
located well off the floor. When wiring, it is useful to leave several extra feet of speaker cable at
the speaker end.
Select the wall locations for the Har-
mony system. Legacy has designed
the Harmony Center to be located
either above or below a thin profile
wall monitor.
Speaker Installation

9
1. Locate and cut opening through drywall centering it on two
studs with the standard 16” spacing. Refer to drawing for
dimensions. In new construction you want to frame the opening
and place the studs at a more convenient location.
Speaker Installation

10
2. Securely attach the two rubber lined wooden locks
to the inside face of the studs, using the two 2 ½”
long screws supplied. Use a bubble level to insure
that they are level with each other and square with
the wall. Refer to drawing for location of the blocks
relative to the opening. Use the supplied spacers to
adjust the separation between the blocks
3. Temporarily place cabinet in the wall, so that the
two recesses on its back rest on the rubber covered
hanger blocks protruding from the wall. Make sure
the cabinet hangs plumb and the small rubber
bumpers on the back of its rim are just touching the
face of the wall. Using an awl or other suitable
device mark the locations of the two cabinet
mounting holes on the face of the hanger blocks.
Speaker Installation

11
4. Remove the cabinet from wall to expose the hanger blocks.
5. Drill a 1 8” pilot hole, 1 ½” to 2” at each marked location.
6. Connect the wires to the terminal plate located at the bottom of the cabinet and re-
place the cabinet in the hanger blocks as before.
a) Strip and terminate speaker cable with spade lugs, banana plugs or twisted bare
wire.
b) Connect each Harmony to the appropriate +, - output terminals of your amplifier
or receiver. Harmony should not be connected in parallel with another speaker to
same amplifier channel.
7. Drive the two 1 ½” screws through the rubber grommets into the cabinet mounting
hole and into the hanger blocks. Do not over tighten and be careful no to dislodge the
rubber grommets. Their function is to prevent cabinet vibrations from being transmitted
to the wall.
Speaker Installation

12
Before you purchase loudspeaker wire, check local building codes to
make sure that the wire is rated to comply with applicable local
safety codes such as UL or CL-2. Use only stranded wire no thinner
than AWG 16. For runs longer than 100 feet, we recommend mini-
mum of AWG 14. When pulling wire, take care not to pull the wire
too fast to prevent stretching the wire or scorching the insulation
from friction. Leave 2 to 3 feet of excess loudspeaker wire at both
ends; it is easier to trim off excess wire than to splice additional wire.
When securing the wire inside the walls, be careful not to pierce the
insulation with nails or staples.
Hooking Up Cables

13
The ideal conductor would have negligible resistance, inductance
and capacitance. The table below shows how a few actual speaker
cables measure up.
Cable Ωs ft pF ft µH ft
12 ga. 0.0033 24 0.21
14 ga. 0.0048 17 0.13
16 ga. 0.0079 16 0.18
18 ga. 0.0128 28 0.21
Capacitance is considered insignificant in each cable because its ef-
fect is well out of the audio bandwidth; inductance can be de-
creased (at the expense of increased capacitance) by keeping the
conductor pair closely spaced.
How long would a cable have to be before inductance effects would
impinge on the audio spectrum? Approximately 300 feet of 12 gauge
would be required to establish a corner frequency of 20 kHz with an
8 Ohm loudspeaker. As you see, inductance is not a problem for
most of us.
Hooking Up Cables

14
What about phase shift due to frequency dependent travel times down the speaker
cable? Measurements show that 100 Hz waves will be delayed about 20 billionths of a
second behind 10 kHz waves when traveling to the end of a 10 foot speaker cable.
Since the cilia of the ear requires 25,000 times longer than this just to transmit phase
information, phase shifting is obviously not the primary concern when considering
speaker cables.
What about resistance? Finally we are getting somewhere. Resistance is the control-
ling factor of the amplifier loudspeaker interface. Excessive resistance can cause ma-
jor shifts of speaker crossover frequencies. The lower the impedance of the loud-
speaker, the greater the effects of series resistance. A 20 foot run of 18 gauge cable
can cause up to 10% deviations of crossover center frequencies. That same 20 feet
can un-damp your damping factor and reduce your systems’ output by onehalf deci-
bel.
In summary, there are no perfect cables. The best way to approximate the ideal
would be to keep loudspeaker leads as short as is practical.
Hooking Up Cables

15
Ideally the loudspeaker would be among the first components selected when assembling a play-
back system. This would allow the user to choose an amplifier capable of delivering adequate
amounts of current into the frequency dependent load presented by the loudspeaker. However,
when upgrading a system, audiophiles may find themselves matching their new loudspeakers to
their existing amplification. For this reason, extensive measures have been taken to ensure that
each Legacy speaker system represents a smooth, non-reactive load to virtually any amplifier.
Often there is much confusion regarding amplification and loudness levels. It should be under-
stood that the role of the amplifier goes beyond that of driving loudspeakers to a given sound
pressure level. The amplifier should be able to CONTROL the loudspeakers across the entire mu-
sic spectrum. This means that parameters such as damping factor (values greater than 60 are
acceptable) and dynamic headroom should not be overlooked when comparing amplifiers.
Amplification

16
How much power will your new speakers need? That ultimately depends on
your listening environment and musical tastes. As little as five watts per
channel should drive them to a level satisfactory for background music. A
typical 45 watt per channel receiver may fill a room with the compressed
mid-band energy of “heavy metal,” but seem to lack weight or control with
classical recordings. Some audiophiles feel that 200 watts per channel is the
bare minimum to avoid audible clipping distortion when reproducing music
at “live” playback levels. Your Legacy speakers are designed to take advan-
tage of “high-powered” amplifiers, so don’t be afraid to put them through
their paces.
How much is too much power? Rarely is a drive unit damaged by large
doses of music power. More often than not the villain is amplifier clipping
distortion. Even through decades of refinement, loudspeakers are still noto-
riously inefficient transducers, requiring huge amounts of power to recreate
the impact of the live performance. Typically less that 1% of electrical
power is converted into acoustic output. (For example, an omnidirectional
transducer with an anechoic sensitivity of 90 dB @ 1w 1m has a full space
efficiency of only 0.63%)
Amplification

17
When an amplifier is unable to fulfill your loudspeakers demands, a
damaging harmonic spike may be leaked to the high frequency drivers.
Another important point regarding loudness is that the dB scale is a
logarithmic one. This means that a 150 Watt amplifier will potentially sound
only twice as loud as a 15 Watt amplifier. If all of this discussion of power
and loudness seems a bit abstract, consider the example below.
The average acoustical power developed by a person speaking in a
conversational tone corresponds to a mere 0.00001 Watts. The power that
would be developed by the entire population of the city of New York
speaking at once would barely illuminate a single 100 Watt light bulb.
Amplification

18
Placing a loudspeaker’s baffle in the same plane as a room boundary
imparts a dramatic change In the overall transfer function. While low
frequency gain is welcomed, care must be taken in crossover design to
avoid amplitude anomalies introduced by the wall itself.
The Harmony center was developed using the finest loudspeaker and
crossover components available. Countless hours of computer modeling
were spent to insure accurate audio reproduction in a variety of
installations where placement compromises must sometimes be made.
The Harmony In-Wall Loudspeakers deliver the high-fidelity audio
reproduction you have come to expect from high-end loudspeakers in a
cabinet.
Designer’s Note
(From Bill Dudleston)

19
System Type: 5 drivers, 3 way
Tweeter: 1” Silk Dual Diaphragm W
Quadra-Pole Neodymium Motor
Midwoofer: 2 x 5.25” Silver Graphite
Woofer: 2 x 8” Silver Graphite
Low Frequency Alignment: 3rd Order Assisted
Frequency Response: 49Hz – 25 kHz
Impedance: 4 Ohms
Sensitivity: 91 dB
Recommended Amplification: 15-150 Watts
Crossover Frequency: 300, 3K
Dimensions (H x W x D): 40.75”x16.2”5x6”
Weight: 54 pounds
Specifications

20
Notes:
Other manuals for Harmony Center
2
Table of contents
Other Legacy Speakers System manuals

Legacy
Legacy Focus HD User manual

Legacy
Legacy Helix User manual

Legacy
Legacy Harmony Center User manual

Legacy
Legacy Classic User manual

Legacy
Legacy Phantom User manual

Legacy
Legacy Classic HD User manual

Legacy
Legacy Deco User manual
Legacy
Legacy Focus User manual

Legacy
Legacy Helix User manual
Legacy
Legacy Deep Impact User manual

Legacy
Legacy Mist User manual

Legacy
Legacy Focus HD User manual

Legacy
Legacy Whisper HD User manual

Legacy
Legacy Empire User manual

Legacy
Legacy Signature SE User manual

Legacy
Legacy VALOR User manual

Legacy
Legacy Classic HD User manual
Legacy
Legacy Sconce Surround User manual
Legacy
Legacy Skyline User manual

Legacy
Legacy CALIBRE User manual