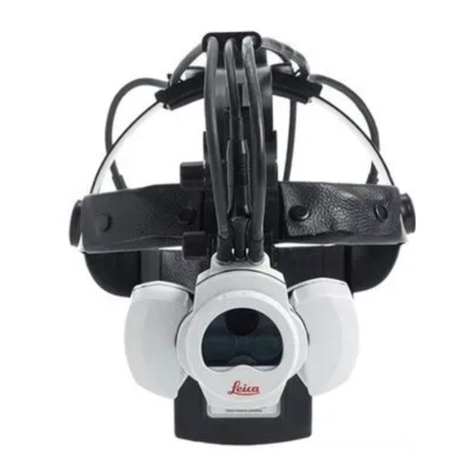
Leica Microsystems M620 F20 User manual

MEDICAL DIVISION
User Manual
10 714 371 - Version 01
Leica MF

Thank you for purchasing a Leica surgical microscope system.
In developing our systems, we have placed great emphasis on
simple, self-explanatory operation. Nevertheless, we suggest
studying this user manual in detail so that you know and are able
to utilize all the benefits of your Leica surgical microscope in an
optimum way.
For valuable information about Leica Microsystems products and
services and the address of your nearest Leica representative,
please visit our website,
www.leica-microsystems.com
Thank you for choosing our products. We hope that you will enjoy
the quality and performance of your new LeicaMicrosystems
surgical microscope.
Leica Microsystems (Schweiz) AG
Medical Division
Max Schmidheiny-Strasse 201
CH-9435 Heerbrugg
Phone: +41 71 726 3333
Fax: +41 71 726 3334
Leica M620F20 / Ref. 10 714 371 / Version 01
II

Chapter overview
1 Introduction 3
2 Product identication 3
3 Safety notes 4
4 Design 11
5 Functions 11
6 Controls 13
7 Preparation before surgery 16
8 Operation 26
9 Components and accessories 32
10 Care and maintenance 40
11 Disposal 44
12 What to do if ...? 44
13 Technical data 46
Leica M620F20 / Ref. 10 714 371 / Version 01 1

Contents
1 Introduction 3
1.1 About this user manual/installation manual .............3
1.2 Symbols in this user manual......................................3
2 Product identification 3
2.1 Optional product features .........................................3
3 Safety notes 4
3.1 Intended use of instrument.......................................4
3.2 Indications for use.....................................................4
3.3 Contraindications......................................................4
3.4 Directions for the person responsible
for the instrument.....................................................4
3.5 Directions for the operator of the instrument............5
3.6 Dangers of use ..........................................................7
3.7 Signs and labels ........................................................9
4 Design 11
5 Functions 11
5.1 Illumination ............................................................11
5.2 Balancing System....................................................12
5.3 Footbrakes..............................................................12
6 Controls 13
6.1 Control unit.............................................................13
6.2 Lamp housing .........................................................13
6.3 Tilt head/focus unit.................................................13
6.4 Footswitch (standard configuration).......................14
6.5 Stand ......................................................................14
6.6 Optics carrier...........................................................15
6.7 Binocular tube, eyepiece, secondobserver tubes.....15
6.8 User interface of the control panel ..........................15
7 Preparation before surgery 16
7.1 Transporting the surgical microscope......................16
7.2 Positioning the surgical microscope
at the operating table .............................................17
7.3 Installing binocular tube, eyepiece and objective....18
7.4 Fitting adapters for accessories ...............................19
7.5 Adjusting the second-observer tube .......................20
7.6 Fitting documentation accessories..........................21
7.7 Selecting documentation accessories......................22
7.8 Adjusting the eyebase and eyepoint........................23
7.9 Adjusting the parfocality ........................................23
7.10 Changing accessories of the surgical microscope
and balancing the swing arm..................................24
7.11 Installing sterile components..................................24
7.12 Preparing the surgical microscope for use...............25
7.13 Checking the function of the lamp ..........................25
7.14 Show/switch footswitch type..................................25
7.15 Reversing + and – directions of the XY unit............26
8 Operation 26
8.1 Positioning the microscope .....................................26
8.2 Adjusting the focus .................................................27
8.3 Adjusting the magnification ...................................27
8.4 Adjusting the illumination ......................................27
8.5 Switching from main to spare illumination .............28
8.6 Setting the illumination type and
working distance ....................................................28
8.7 Operating the control panel ....................................29
8.8 Decomissioning.......................................................31
9 Components and accessories 32
9.1 Observer side ..........................................................32
9.2 Patient-side ............................................................35
9.3 Video accessories for LeicaM620F20 ......................37
9.4 Load table...............................................................38
10 Care and maintenance 40
10.1 Care instructions .....................................................40
10.2 Cleaning the control panel ......................................40
10.3 Maintenance...........................................................40
10.4 Care and Maintenance of the Leica Footswitch........41
10.5 Changing the fuse...................................................41
10.6 Changing the bulb...................................................41
10.7 Function check........................................................41
10.8 Notes on reprocessing ofresterilizable products .....42
11 Disposal 44
12 What to do if ...? 44
12.1 General malfunctions..............................................44
12.2 Microscope..............................................................44
12.3 TV, photography......................................................45
13 Technical data 46
13.1 Electrical data .........................................................46
13.2 Surgical microscope ................................................46
13.3 Stand ......................................................................46
13.4 Optical data.............................................................46
13.5 Control unit ............................................................47
13.6 Configurations and Weights....................................47
13.7 Ambient conditions.................................................47
13.8 Electromagnetic compatibility (EMC)......................47
13.9 Standards fulfilled...................................................48
13.10 Limitations of use....................................................48
13.11 Dimensions .............................................................49
Leica M620F20 / Ref. 10 714 371 / Version 01
2

Introduction
1 Introduction
1.1 About this user manual/
installation manual
In this user manual the surgical microscope Leica M620 F12 is
described.
In addition to notes on the use of the instruments
thisuser manual gives important safety information
(see chapter 3).
X Read this user manual carefully before operating
theproduct.
1.2 Symbols in this user manual
The symbols used in this user manual have the following meaning:
Symbol Warning
word
Meaning
WARNING
Indicates a potentially hazardous situation
or improper use that could result in serious
personal injuries or death.
CAUTION
Indicates a potentially hazardous situation
or improper use which, if not avoided, may
result in minor or moderate injury.
NOTE
Indicates a potentially hazardous situation
or improper use which, if not avoided, may
result in appreciable material, financial
and environmental damage.
Information about use that helps the user
to employ the product in a technically
correct and efficient way.
X Action required; this symbol indicates that
you need to perform a specific action or
series of actions.
2 Product identification
The model and serial numbers of your product are located on the
identification label on the underside of the horizontal arm.
X Enter this data in your user manual and always refer to it when
you contact us or the service workshop regarding any questions
you may have.
Type Serial no.
...
...
2.1 Optional product features
Different product features and accessories are optionally available.
The availability varies from country to country and is subject
tolocal regulatory requirements. Please contact your local
representative for availability.
Leica M620F20 / Ref. 10 714 371 / Version 01 3

Safety notes
3 Safety notes
The Leica M620 F20 surgical microscope is state-of-the-art
technology. Nevertheless, hazards can arise during operation.
• Always follow the instructions in this user manual, and in
particular the safety notes.
3.1 Intended use of instrument
• The Leica M620F20 surgical microscope is an optical instrument
for improving the visibility of objects through magnification and
illumination. It can be applied for observation and
documentation and for human and veterinary medical
treatment.
• The Leica M620 F20 surgical microscope may be used only in
closed rooms and must be placed on a solid floor.
• The Leica M620F20 surgical microscope is subject to special
precautionary measures for electromagnetic compatibility.
• Portable and mobile as well as stationary RF communications
equipment can have a negative effect on the reliability of the
LeicaM620F20 surgical microscope's functionality.
• The Leica M620 F20 is intended for professional use only.
3.2 Indications for use
• The Leica M620 F20 surgical microscope is suitable for
ophthalmic applications such as Retina, Cornea and Cataract
surgery in hospitals, clinics or other human medical instituations.
• The Leica M620 surgical microscope may only be used in closed
rooms and must be placed on a solid floor or mounted to the
ceiling.
• This User Manual is intended for physicians, nurses and other
medical and technical staff who prepare, operate or maintain the
device after appropriate training. It is the duty of the device
owner / operator to train and brief all the operating personnel.
3.3 Contraindications
No known contraindications for use.
3.4 Directions for the person
responsible for the instrument
• Ensure that the surgical microscope is used only by qualified
personnel.
• Ensure that this user manual is always available at the place
where the surgical microscope is used.
• Carry out regular inspections to make certain that the authorized
users are adhering to safety requirements.
• When instructing new users, do so thoroughly and explain the
meanings of the warning signs and messages.
• Allocate responsibilities for commissioning, operation and
maintenance. Monitor compliance with this.
• Do not use the surgical microscope unless it is in proper
condition.
• Inform your Leica Microsystems representative or
Leica Microsystems (Schweiz) AG, Medical Division,
9435 Heerbrugg, Switzerland, immediately if you detect a
product defect that could potentially cause injury or harm.
• If you use accessories from other manufacturers with the surgical
microscope system, make sure that these manufacturers confirm
that the combination is safe to use. Follow the instructions in the
user manual for those accessories.
• Modifications to or service on the surgical microscope may be
carried out only by technicians who are explicitly authorized by
Leica to do so.
• Use only original Leica Microsystems parts in maintenance work.
• After service work or technical modifications, the device must be
readjusted in accordance with our technical specifications.
• If the instrument is modified or serviced by unauthorized
persons, is improperly maintained (as long as maintenance was
not carried out by us), or is handled improperly, Leica will not
accept any liability.
• The effect of the surgical microscope on other instruments has
been tested as specified in EN 60601-1-2. The system has passed
the tests relating to emissions and immunity. Comply with the
usual precautionary and safety measures relating to
electromagnetic and other forms of radiation.
• Only the supplied power cord may be used.
• The power cord must have a protective conductor and must be
undamaged.
• The power cord must be mechanically secured with the "Power
Input" socket to prevend accidental disconnection.
• All parts of the Leica M620 F20 surgical microscope shall not be
serviced or maintained while in use with a patient.
• Lamps shall not be changed while in use with a patient.
• Use of this equipment adjacent to other equipment should be
avoided because it could result in improper operation. If such use
is necessary, this equipment and the other equipment should be
observed to verify that they are operating normally.
Leica M620F20 / Ref. 10 714 371 / Version 01
4

Safety notes
• Use of accessories and cables other than those specified or
provided by the manufacturer of his equipment could result in
increased electromagnetic emissions or decreased
electromagnetic immunity of this equipment and result in
improper operation.
• The Leica M620 F20 surgical microscope may be used only in
closed rooms and must be placed on a solid floor.
• Portable RF communications equipment (including peripherals
such as antenna cables and external antennas) should be used no
closer than 30 cm (12 inches) to any part of the Leica M620 F20,
including cables specified by the manufacturer. Otherwise,
degradation of the performance of this equipment could result.
The emissions characteristics of this equipment make it
suitable for use in industrial areas and hospitals (CISPR11
class A). If it is used in a residential environment (for which
CISPR 11 class B is normally required), this equipment
might not offer adequate protection to radio-frequency
communication services. The user might need to take
mitigation measures, such as re-locating or re-orienting
the equipment.
User qualifications
The Leica surgical microscope may only be used by physicians and
medical assistance personnel with appropriate qualifications who
have been instructed in the use of the instrument. Specific training
is not required.
3.5 Directions for the operator of the
instrument
• Follow the instructions described here.
• Follow the instructions given by your employer regarding the
organization of work and safety at work.
• Check the illumination intensity before and during surgery.
• Do not move the system without released brakes.
• Operate the system only with all equipment in its proper
position (all covers fitted, doors closed).
• To avoid the risk of electric shock, this equipment must only be
connected to a supply mains with protective earth.
• All parts of the instrument shall not be serviced or maintained
while in use with a patient.
• Lamps shall not be changed while in use with a patient.
Phototoxic damage to the retina during eye surgery
WARNING
Damage to the eyes due to prolonged exposure!
The light of the instrument may be harmful. Risk of eye
damage increases with the duration of exposure.
X During exposure to the light from this instrument, do
not exceed the hazard reference values. For this
instrument, an exposure time of over 3 min 35 seconds
at maximum output power exceeds the hazard
reference value.
The following table is intended to serve as a guideline and make
the surgeon aware of the potential hazard.
The data have been calculated for the worst-case scenario:
• Eye with aphakia
• Completely unmoving eye (continuous irradiation of the same
region)
• Uninterrupted light exposure, e.g. no surgical instruments in the
eye
• Pupils dilated to 7 mm
The calculations are based on the corresponding ISO standards1) 2)
and the exposure limit values recommended in them. Published
literature shows that a moving eye may allow for increased time of
exposure 3).
Leica M620F20 / Ref. 10 714 371 / Version 01 5

Safety notes
Main Light
Light
setting
Recommended maximum exposure time
according to 1) [min.]
Without filter With GG435
filter
With GG475
filter
25 % 1 h 21 min 1 h 33 min 4 h 22 min
50 % 19 min 23 min 1 h 08 min
75 % 7 min 39 s 9 min 10 s 28 min 46 s
100 % 3 min 35 s 4 min 30 s 14 min 42 s
With retina protection filter 5× (10448676)
100% 25 min 52 s
Use the protection filter 5× (10448676) to increase the
operation duration by at least a factor of 5 compared to the
standard configuration without a filter.
Sources:
1) DIN EN ISO 15004-2:2007 Optical instruments – Fundamentals
requirements and test methods – Part 2: Light hazard
protection.
2) ISO 10936-2:2010 Optics and photonics – Operation
microscopes/
Part 2: Light hazard from operation microscopes used in ocular
surgery.
3) David Sliney, Danielle Aron-Rosa, Francois DeLori, Franz
Fankhauser, Robert Landry, Martin Mainster, John Marshall,
Bernhard Rassow, Bruce Stuck, Stephen Trokel, Teresa Motz
West and Michael Wolffe, Adjustment of guidelines for
exposure of the eye to optical radiation from ocular
instruments: statement from a task group of the International
Commission on Non-Ionizing Radiation Protection (ICNIRP),
APPLIED OPTICS Vol. 44, No 11, p2162 (10 April 2005)
Protect the patient with the following safeguards:
• Short exposure times
• Low brightness settings
• Use of protective filters
• Switching off the illumination during breaks in the operation
It is recommended to adjust the brightness to the minimum
necessary for the surgery. Infants, patients with aphakia (whose
eyelens has not been replaced by an artificial lens with a UV
protection screen), small children and persons with diseases of
theeye are at greater risk. The risk is also increased if the person
being treated or operated on has, within the last 24 hours,
alreadybeenexposed to illumination from the same or any other
ophthalmological instrument that uses a bright visible light source.
This applies especially to patients that have been examined via
retinal photography.
The decision with regard to the light intensity to be used must be
made on a case-by-case basis. In any event, the surgeon must
evaluate the risks and benefits of the used light intensity. Despite
all efforts to minimize the risk of retinal injury by surgical
microscopes, damage may still occur. Photochemical retinal
damage is a possible complication of the necessity to use bright
light to make eye structures visible during difficult
ophthalmological processes.
Stability (floor stands only)
When moved in OP, the swing arm must be folded up and locked
and the brakes must be applied, otherwise the swing arm may drift
out of control and the stand could topple.
Hazards due to movable parts
This section describes uses that, inadvertently, could lead to
hazardous situations.
• Add accessories and balance the stand before the operation, and
never over the field of operation.
• Do not put your fingers between the microscope and the
focusing drive; they could get crushed.
Floor stand:
• Always push the microscope to move it; never pull it. Feet in
lightweight shoes could become trapped beneath the casing of
the base.
• The footbrakes must remain engaged throughout the operation.
Electrical connections
The control unit may be opened only by a Leica-approved service
technician.
Accessories
Only the following accessories may be used with the
LeicaM620F20 surgical microscope:
• The Leica Microsystems accessories described in this
UserManual.
• Other accessories, provided that these have been expressly
approved by Leica Microsystems as being technically safe in
thiscontext.
Leica M620F20 / Ref. 10 714 371 / Version 01
6

Safety notes
3.6 Dangers of use
WARNING
Risk of injury from downward movement of surgical
microscope!
X Never change the accessories or attempt to rebalance
the microscope while it is above the field of operation.
X After every modification, balance the swing arm.
WARNING
Risk of injury through falling binocular tube!
X Tighten the clamping screw securely.
WARNING
Risk of injury through falling surgical microscope!
X Check the mounting of the assistant's stereomicroscope
before every use.
WARNING
Risk of injury from parts falling down!
X Complete all preparations and adjustments to the
optics carrier before the operation.
X Never rebalance or re-equip the optical components
and accessories with the instrument over the operation
area.
X Check that the optical components and accessories fit
well and are fastened securely before the operation.
X Before changing equipment during an operation,
swivel the microscope away from the operation area.
WARNING
Risk of injury from:
• Uncontrolled lateral movement of the swing arm.
• Tilting of the stand.
• Feet in lightweight shoes could become trapped
beneath the casing of the base.
• Abrupt braking of the surgical microscope at a
threshold that cannot be crossed.
X For transportation, always move the Leica M620F20
surgical microscope into the transport position.
X Never move the stand while the unit is extended.
X Never roll over cables lying on the floor.
X Always push the Leica M620F20 surgical microscope -
never pull it.
CAUTION
Surgical microscope can move without warning!
X Always secure the footbrakes when you are not moving
the system.
CAUTION
Danger of fatal electrical shock!
X The surgical microscope may be connected to a
grounded socket only.
CAUTION
Risk of infection!
X Leave sufficient space around the stand to prevent
contact with non-sterile components.
WARNING
Light that is too intense can damage the retina!
X Observe the warning messages in the "Safety Notes"
chapter on page 5.
WARNING
Failure of the illumination can be dangerous for the
patient!
X If the main illuminator fails, switch to the auxiliary
illuminator immediately.
WARNING
Damage to the eyes due to prolonged exposure!
The light of the instrument may be harmful. Risk of eye
damage increases with the duration of exposure.
X During exposure to the light from this instrument, do
not exceed the hazard reference values. For this
instrument, an exposure time of over 8 minutes at
maximum output power exceeds the hazard reference
value.
CAUTION
Damage to the control panel!
The light of the instrument may be harmful. Risk of eye
damage increases with the duration of exposure.
X Only operate the control panel using your fingers.
X Never use hard, sharp or pointed objects made out of
wood, metal or plastic.
X Never clean the control panel using cleaning agents
that contain abrasive substances. These substances can
scratch the surface and cause it to be become dull.
Leica M620F20 / Ref. 10 714 371 / Version 01 7

Safety notes
WARNING
Danger of fatal electric shock!
X Disconnect the power cable from the instrument power
socket before changing fuses.
CAUTION
Risk of burns!
The lamp and illumination mount get very hot.
X Check that the lamp and illumination mount have
cooled before you remove the lamp.
WARNING
Risk of infection!
This antimicrobial coating is no substitute for the
usual cleaning and sterilization procedures
according to the applicable regulations.
X Clean and sterilize the instrument as usual according to
the applicable regulations.
WARNING
Risk of injury through surgical microscope moving
down!
X Do not exceed the max. load when equipping
components and accessories.
X Check the total weight using the "Load table"
(seepage
38
).
Leica M620F20 / Ref. 10 714 371 / Version 01
8

Safety notes
3.7 Signs and labels
1
2
13
56789
12
12
10
11
3
4
12
Leica M620F20 / Ref. 10 714 371 / Version 01 9

Safety notes
1
ANVISA Registration
number (only Brazil)
2
OCP 0004
INMETRO label
(onlyBrazil)
3
Transport position
(F20 floor stand)
4
270 KG
System weight label
(F20)
5
Type label
6
MET label
(only USA and
Canada)
7
REF
SN
Fabrication label
a Prefix number
b Leica system article no.
c Serial number
d Incremental number starting at 1 for
each batch
e JJ = year (2 digits)
f MM = month (2 digits)
g TT = day (2 digits)
h Production starting date
8
Grounding label
9
Mandatory label -
read the user manual
carefully before
operating the
product.
Web address for
electronic version of
the user manual.
Medical Device
10
Max. 6.50 kg (14.33 lb) Max. load for optics
carrier
11
Danger sign for hot
surface
12
Tilt Label
13
UDI Label
Production Identifier (PI)
Serial number
Date of manufacturing
GS1 Data Matrix Code
Device Identifier (DI)
Leica M620F20 / Ref. 10 714 371 / Version 01
10

Design
4 Design
9
1
2
3
4
5
6
7
8
10
1 Swing arm
2 XY-unit (optional)
3 Tilt head
4 Focus unit
5 Binocular tube
6 Eyepieces
7 Optics carrier
8 Lens
9 Control unit
10 Base
5 Functions
5.1 Illumination
The illumination of the surgical microscope Leica M620 is a Halogen
light system with 2 bulbs (1), where the second is only a spare.
Both bulbs are located in the optics carrier.
In case of a failure of the lamp in use, the other lamp can be
selected with the slide button (3) for quick-change lamp mount (2).
The 6° illumination or inclined and vertical light (indication with
2bulbs at the optics carrier) can be adjusted with the rotary button
to obtain red reflex and more contrast.
The 0° light or vertical light (indication with 1 bulb at the optics
carrier) will remain permanently.
Leica M620F20 / Ref. 10 714 371 / Version 01 11

Functions
5.2 Balancing System
With a balanced surgical microscope Leica M620 F20 you can move
the optics carrier in any position without tilting or falling down.
After balancing, all movements during operation only need a minor
force.
With the rotary knob (3) on the swing arm the drifts will be
adjusted.
3
–
+
Balancing the swing arm
X Hold the microscope firmly.
X Pull the retaining pin (2).
The swing arm is now released.
Check whether or not the microscope drifts.
Microscope drifts downwards:
X Turn the rotary knob (3) clockwise (+).
Microscope drifts upwards:
X Turn rotary knob (3) counter-clockwise (-).
5.3 Footbrakes
Footbrakes are attached to each of the four wheels on the stand.
The wheel is engaged and released with the footbrake engage/
release lever (1).
X Press the footbrake engage/release lever down (3):
The footbrake is engaged.
X Lift the footbrake engage/release lever (2):
The footbrake is released.
12
3
Leica M620F20 / Ref. 10 714 371 / Version 01
12

Controls
6 Controls
6.1 Control unit
12
1 Main switch
2 Control Panel
3 Socket for potential equalization for connecting the
Leica M620F20 to a potential equalization device.
This is part of the customer's building installation.
Observe the requirements of EN 60601-1 (§ 8.6.7).
4 Power cable strain relief device
5 Power socket
6 Connection for footswitch
Here, only foot and hand switches delivered by
LeicaMicrosystems (Schweiz) AG, Medical Division may be
connected.
6.2 Lamp housing
1
2
1 Lamp replacement cover
2 Slide button for quick-change lamp mount
6.3 Tilt head/focus unit
1
23
Tilt head
1 Tilt head fine adjustment
Focus unit
2 Reset button, XY-unit
3 Reset button, focus
Leica M620F20 / Ref. 10 714 371 / Version 01 13

Controls
6.4 Footswitch (standard
configuration)
4
5
1
7
6
3
2
1 XY adjustment
2 Microscope illumination darker
3 No Function
4 Microscope illumination on/off
5 Zoom up/down
6 Focus bottom and top
7 Microscope illumination brighter
See page
30
for alternative footswitches and free
programming of footswitches.
6.5 Stand
1
2
1
1
4
5
3
1 Articulation brakes
2 Rotary knob for balancing
3 Retaining pin
4 Footbrake release lever
5 Footbrake
Leica M620F20 / Ref. 10 714 371 / Version 01
14

Controls
6.6 Optics carrier
3
1
2
1 Insert for filter (UV protection filter GG475, protection
filter 5×)
2 Jalousie blind rotary knob for fade out/fade in 6° illumination
3 Handles
6.7 Binocular tube, eyepiece,
secondobserver tubes
1
+5 –5 –5+5
2
2
1 Drive knob for interpupillary distance adjustment
2 Diopter adjustment
3 Knurled ring for image correction
6.8 User interface of the control panel
For information on operating the control panel, see page
29.
"Main" menu
1 2
3 4 5
6 7 8
9
1 Illumination lighter/darker
2 Zoom up/down
3 Defective lamp warning
4 XY reversal active
5 "Speed" menu
6 Reset All
7 Reset XY
8 Reset focus
9 User selection 1-4
"Speed" menu
1 2 3
4
5
1 Zoom speed setting
2 Focus speed setting
3 XY-speed setting
4 Back to the "Main" menu
5 Switch to the service area (password-protected)
Leica M620F20 / Ref. 10 714 371 / Version 01 15

Preparation before surgery
7 Preparation before surgery
7.1 Transporting the surgical
microscope
WARNING
Risk of injury from:
• Uncontrolled lateral movement of the swing arm.
• Tilting of the stand.
• Feet in lightweight shoes could become trapped
beneath the casing of the base.
• Abrupt braking of the surgical microscope at a
threshold that cannot be crossed.
X For transportation, always move the
Leica M620F20 surgical microscope into the transport
position.
X Never move the stand while the unit is extended.
X Never roll over cables lying on the floor.
X Always push the Leica M620F20 surgical microscope -
never pull it.
Transport position
Locking the swing arm
X Position the swing arm approximately horizontally.
X Press in the retaining lever (1), rotate it horizontally and move
the swing arm up and down until the retaining lever snaps into
place.
The swing arm is now locked.
X Release the articulation brakes (2), fold the swing arm.
X Move the surgical microscope into transport position and
tighten the articulation brakes.
1
Transport the surgical microscope and secure it in its
installation location
X Pull the power plug from the socket and wrap the power cable
around the handle.
X Hook in the footswitch to the clip.
X Step on the footbrake release lever (4) to release the footbrakes.
X Push the surgical microscope to its new location by the handle
(3).
X Lock the footbrakes at the installation location.
CAUTION
Surgical microscope can move without warning!
X Always secure the footbrakes when you are not moving
the system.
2
2
2
3
4
4
4
Leica M620F20 / Ref. 10 714 371 / Version 01
16

Preparation before surgery
7.2 Positioning the surgical
microscope at the operating table
CAUTION
Danger of fatal electrical shock!
X The surgical microscope may be connected to a
grounded socket only.
X Carefully move the surgical microscope to the operating table
using the handle and position it for the forthcoming operation.
X Tighten the footbrakes.
X Plug the power cable (3) into the socket and secure it with cable
ties (2).
X Connect the potential equalization to the socket (1) on the
control unit.
X Connect the footswitch to the socket (4) on the control unit.
1
34
2
1
1
1
2
X Adjust the tilt of the footswitch. Rotate the footrest in or out.
X Check that all accessories are correctly connected and securely
attached.
X Release the articulation brakes and set them to a light
resistance.
Make the joint easier to move:
X Release the articulation brake (1).
Make the joint more difficult to move:
X Tighten the articulation brake (1).
X Pull the retaining lever (2).
X Extend the swing arm.
X Check the weight setting on the swing arm by raising and
lowering the microscope and correct as necessary, see
page24.
CAUTION
Risk of infection!
X Leave sufficient space around the stand to prevent
contact with non-sterile components.
Leica M620F20 / Ref. 10 714 371 / Version 01 17

Preparation before surgery
7.3 Installing binocular tube, eyepiece
and objective
A range of options enables the surgical microscope to be matched
to the requirements of the task at hand.
Installing the binocular tube
WARNING
Risk of injury through falling binocular tube!
X Tighten the clamping screw securely.
1
X Tighten the clamping screw (1).
X Push the binocular tube into the dovetail ring.
X Tighten the clamping screw securely.
Fitting the eyepiece
X Set the eyepiece in place.
X Tighten the rotary ring (1).
Eyepieces
Eyepiece 8.33×, adjustable
Eyepiece 10×/21B, adjustable
Eyepiece 12.5×/17B, adjustable
Fitting the objective protection glass
X Screw the holder for the objective protection glass (2) into the
objective and position it such that the mark (3) faces
backwards.
X Position the objective protection glass (5) and turn it slightly to
the right.
The objective protection glass will snap into place and the markings
(3) and (4) will match.
The objective protection glass is not autoclavable.
23
4
5
Inserting additional filters
The Leica M620F20 features two slots for additional filters.
Temperature-resistant 32 mm diameter filters may be
used. For further information, please contact your Leica
Microsystems representative.
X Remove cover (1) of the filter slots.
X Mount the filter in the filter holder with a tension ring.
Leica M620F20 / Ref. 10 714 371 / Version 01
18
Table of contents
Other Leica Microsystems Medical Equipment manuals