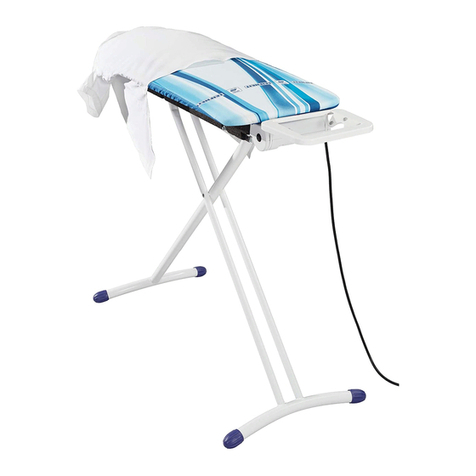
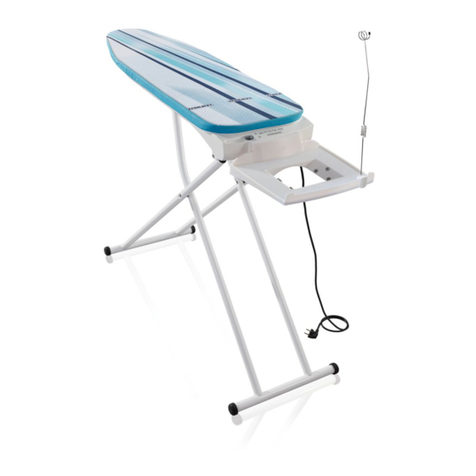
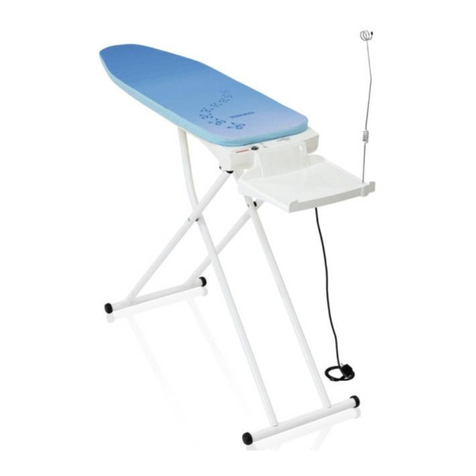
Leifheit Air Active L Professional User manual

5
GB
Complete pressurised steam ironing system Air Active L Professional Technical data
Electricity supply . . . . . . . . . . . . . . . . .230V ~ 50 Hz
Input steam iron . . . . . . . . . . . . . . . . . . . . . . 850 W
Input steam station . . . . . . . . . . . . . . . . . . . .1350 W
Max. pressure . . . . . . . . . . . . . . . . . . . . . . . 6,5 bar
Capacity steam station . . . . . . . . . . . . . . . . . ca. 1,0 l
Weight (when full) . . . . . . . . . . . . . . . . . . . ca. 14 kg
(station components 4.8 kg)
Steam volume . . . . . . . . . . . . . . . .max.150 g / min
Dimensions . . . . . . . . . . . . . . . . . 165 x 55 x 35 cm
All figures are approximate values!
AProduct overview
English
Table of Contents:
Product overview . . . . . . . . . . . . . . . . . . . . . . . . . 5
Security instructions . . . . . . . . . . . . . . . . . . . . . . . 6
Turning the iron on . . . . . . . . . . . . . . . . . . . . . . . 8
Ironing instructions . . . . . . . . . . . . . . . . . . . . . . . 9
Ironing tips . . . . . . . . . . . . . . . . . . . . . . . . . . . . . 10
Turning off and storing the iron . . . . . . . . . . . . . . 11
Maintenance and care . . . . . . . . . . . . . . . . . . . . . 11
Accessories and information . . . . . . . . . . . . . . . . . 12
Problems and solutions . . . . . . . . . . . . . . . . . . . . . 12
Customer complaint procedures . . . . . . . . . . . . . . 13
Warranty. . . . . . . . . . . . . . . . . . . . . . . . . . . . . . . 14
. . . . . . . . . . . . . . . . . . . . . . . . . . . . . . . . . . . . . . . .
English version =
Original operating instructions for the
complete pressurised ironing system
Air Active L Professional
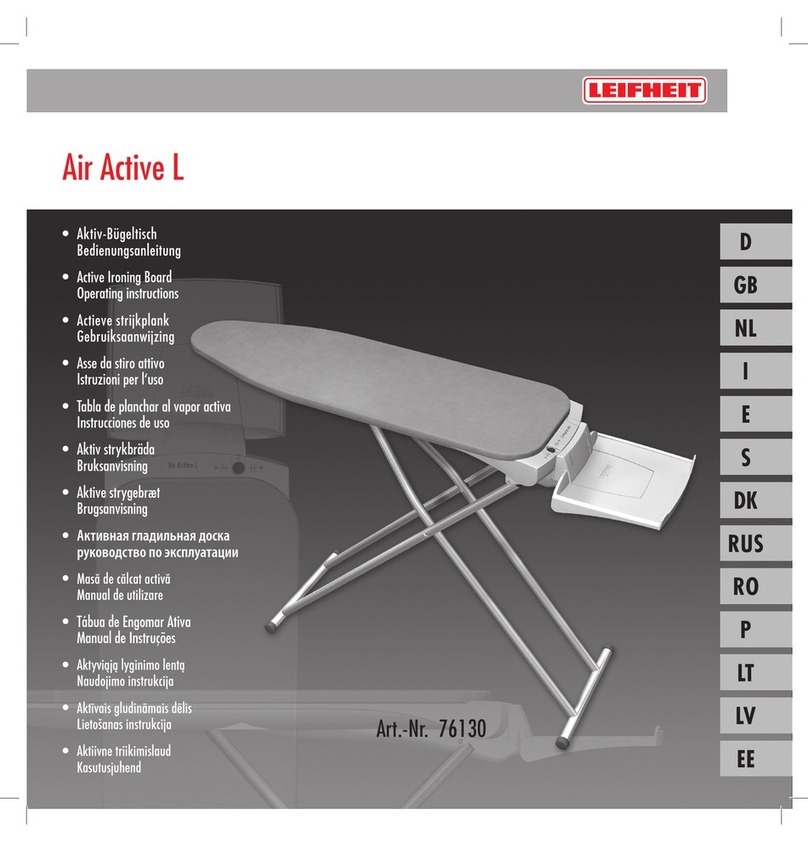
[1] Feed cable steam ironing board
[2] Plug socket steam ironing board
[3] ON/OFF switch ironing board
(steam extraction and air intake function)
[4] Special ironing board cover
[5] Handle to set height
[6] Foot caps
[7] Rubberised castors
[8] Rollaway protection
[9] Feed cable steam station
[10] ON/OFF switch for steam station
and steam iron
[11] Warning light when water is low
[12] Warning light when steam is available
[13] Holding belt
[14] Iron station tray with silicon nubs
[15] Steam hose
[16] Temperature regulator
[17] Steam pressure button
[18] Iron warning light
[19] Removable water container
[20] Water drainage lid and locking bolt
[21] Condense water drip protection
Accessories
[22] Cable holder
[23] Operating instructions
Dear customer,
Congratulations on buying the Leifheit Air Active L Professional complete pressurised steam ironing system!
You have made a good choice, as you have decided on a complete system which will make your ironing much
easier. Please read the operating instructions carefully before using your complete system.
This will help you to correctly use the complete system from the start and avoid making mistakes.
Pay particular attention to the safety instructions provided in these operating instructions.
We very much hope that you are happy with your complete Air Active L Professional complete pressurised
steam ironing system.
If you have any questions or comments about our product, please give us a call.
The Leifheit team will be happy to help.
Regards,
your Leifheit team
Please be aware that this product is only intended for household use. Leifheit provides
no manufacturer’s warranty for commercial use (e.g. laundrettes, sewing studios, tailors etc…).
Please make sure you carefully read through the operating instructions before use and keep the instructions for
future reference! Pay particular attention to the safety notes!
Westendstraße 2 A
D-35753 Greifenstein
+49 (0) 180 5782754
+49 (0) 180 5546378
E-Mail: [email protected]

6
Safety instructions
The packaging material (plastic bag, polysty-
rene etc.) is a potential hazard and must be
kept out of reach of children.
Check that the equipment is undamaged
when removing from its packaging. In cases
of doubt, do not use the equipment and get in
contact with an expert.
The complete pressurised steam ironing
system complies with recognised technical
requirements and the Equipment Safety Act
(Gerätesicherheitsgesetz) 2006/95/EC.
Only connect the equipment to alternating
current (voltage according to label on the
bottom of the extraction collection pan)
The complete pressurised steam ironing sys-
tem is fitted with noise suppression pursuant
to EC Regulation 2004/108/EC.
Caution: When using the system, the
electrical connection and, if applicable, the
extension cable must be protected against 16
A. Use only appropriate types of extension
cables.
If the equipment’s plug does not fit the
socket, arrange for it to be changed by a
specialist.
The safety of the equipment is only gua-
ranteed if it has been earthed according to
electrical safety regulations.
The manufacturer accepts no liability for
any damages resulting from the incorrect
earthing of the equipment. In cases of
doubt, contact a specialist for advice.
The complete system can only be used at a
maximum of 2000 m above sea level.
Avoid using adapters, multiple sockets and/
or extension cables where possible. If this
cannot be avoided, only use those adapters,
multiple sockets and/or extension cables
which comply with safety regulations and
never exceed the maximum load displayed
on the adapter.
Electrical equipment is not a toy.
During the start-up and cool-down process,
the iron and its connection cable must be
out of reach of children under the age of 8
years.
This device may be used by child-
ren as of the age of eight years
and persons with reduced physical,
sensory or mental capacities or lack
of experience and/or knowledge, if
they are supervised or have received
instructions regarding the safe use of
the device, and have understood the
resulting risks. Children may not play
with the device.
Cleaning and maintenance of the device
may not be performed by children without
supervision.
Do not insert any objects into the openings on
the equipment.
Do not touch the equipment with wet hands or
feet or pull on the electricity cable.
Only hold the cable at the plug; do not pull the
lead out of the plug.
Caution: The network voltage will continue
to circulate in the complete ironing system
until the equipment is disconnected from the
electricity supply.
Do not use the equipment in close proximity
to caustic or explosive substances to avoid
explosions and short circuits.
Do not allow electrical components (on/off
switch for ventilation function, plug etc.) to
come into contact with water.
If the equipment is accidently dropped into
water, the plug should immediately be dis-
connected from the supply. Never reach into
the water to retrieve the equipment. There is
a risk of electrical shock!
Wind up the complete pressurised steam
ironing system cable in large loops.
Avoid bending the cable. Check the cable for
damage.
Turn off the equipment before pulling out
the plug.
Remove the plug
• beforeleavingtheroom,
• beforecleaningandmaintaining
the equipment,
• beforerefilling
• afteruse.
Never expose the equipment to the effects of
weather such as rain, sun, frost etc. to avoid
damage.
Never store the equipment at temperatures
of 0 °C or lower when it is filled with water.
Never use the complete system if the equip-
ment, connecting hose or protective rubber
sleeve are damaged.
If the connecting hose is damaged, please
contact customer services. Signs of wear and
tear on the connecting hose cover are normal
and will not affect function.

7
GB
Caution: Never allow the hot sole of the
iron to touch electrical cables.
The network lead must not come into contact
with sharp corners or hot surfaces under any
circumstances.
Caution: If the connection lead of this
equipment is damaged, it must be replaced
by the manufacturer, customer services or a
similar qualified individual to avoid hazards.
The iron and its connection lead must be kept
out of the reach of children while warming
up or cooling.
Incorrect use and incorrect repairs may result
in significant risks for the user and will void
the warranty.
Caution: Allow only Leifheit customer
services or authorised personnel to carry out
repairs.
Caution: The iron is hot when put down.
There is a risk of burning if handled incor-
rectly.
Only use the complete system as instructed
and do not use as a storage area, seat etc.
The complete system must only be used in
dry rooms and not outside. It must be placed
on a solid flat surface and locked in position.
Only use the complete system if the steam
iron station is attached to the ironing board
according to the instructions.
Do not place the iron on the ironing surface -
use only the silicon area of the integrated
steam station provided for this purpose.
When the steam iron is placed on its support
device, you should make sure that the surface
the support device is resting on is stable.
The steam iron must be used and placed on a
stable surface.
The iron must not be used of it has been drop-
ped, has visible damage or is not watertight.
Do not move the complete system while
ironing.
The resting hook used to set the height of the
ironing board must not be unhooked while
the steam iron is unsecured and on the shelf
provided. The steam ironing board would
then close and the unsecured iron could fall
off and be damaged.
When the iron is heating up and cooling
down, the steam station may make noises
which are caused by the normal expansion of
the materials used.
Use only the removable water container
provided to fill the pressurised steam station.
Do not add any chemical additives to the
water in the container.
Do not iron wet laundry, only iron-dry or dry
laundry.
Never point the stream of steam at people, as
it can be dangerous.
Do not allow water to make contact with any
electrical parts when using the steam iron.
If the equipment is used for inappropriate
purposes or incorrectly / illegally operated,
no liability will be accepted for any resulting
damage.
After ironing, allow the iron sole to cool
down completely before putting the equip-
ment away.
If the steam station overheats, a thermal
safety device will turn the equipment off for
safety reasons.
The device must be reset by a member of
Leifheit customer services before reusing it.
Caution: If individual parts of the complete
ironing system are exchanged, always use
original Leifheit replacement parts.
To clean the device, first take out the power
plug, let the equipment cool down and wipe
the surface only with a damp cloth.
Do not leave the complete system (in parti-
cular the steam iron) unattended while it is
connected to the power supply.
If the equipment is scrapped, it should be
rendered unusable (e.g. by cutting the cable
and removing the plug).
Do not “park” the iron on the ironing
surface. Instead, always park it on the
grey silicone rest provided for that
purpose on the integrated steam station.
You might otherwise cause deformation
of the ironing surface, which is not
covered by the guarantee.
Use the complete system only if the steam
ironing station is properly connected to the
ironing board.

8
III Filling with water
(before ironing)
1. Pull the water container [19] backwards along the
track.
2. Fill the water container to the maximum level
(see MAX marker on the scale).
(see information about filling the
steam station on)
Push the water container [19] back into the original
position, applying slight pressure. The water container
has not been correctly positioned until you hear a
double click.
If you are using the equipment for the first time or
after decalcification, a particularly large amount of
water will be pumped into the steam station from the
removable water container. For this reason, refill the
tank if required.
Avoid over-filling the steam station (max. 800 - 900
ml). If the container is too full, hot water maybe
ejected rather than steam.
If water escapes or if the tank is too full, please pour
some water out and dry the equipment thoroughly.
For technical reasons the unit is equipped with a
pump. At irregular times this pump moves water as
necessary from the removable tank to the boiler and
facilitates uninterrupted, convenient ironing.
III Power supply
1. Connect the feed cable plug [9] of the steam iron
station to the socket [2] of the ironing board.
This will ensure that the steam iron station
is supplied with power.
2. Then connect the feed cable plug [1] for the
complete system to a wall socket.
IV Ironing procedure
1. 1. Turn on the iron and steam system switch
[10] on.
Please keep in mind:
The steam system must only be used if there is enough
water in the steam system (but max. 800 - 900 ml).
We therefore recommend topping up the water before
each ironing session. In this way, you will avoid delays
while you refill the container during ironing.
Wait for a few minutes until the warning light
turns on to show that the steam is ready [12].
2. Then turn on the on/off switch [3] for the steam
extraction on the ironing board.
The steam extraction should be on constantly
whenever possible to remove excess steam from
the ironing board and the inside of the casing. This
ensures that the ironing board remains warm and
dry. (Please refer to the instructions for extraction
and air intake function on page 10).
3. Set the temperature control [16] on the steam
iron to the desired level.
Make sure that the set temperature of the iron
does not fall below the marker while ironing
with steam.
As soon as the control light [18] turns off, the
steam iron is ready for use.
4. Steam will then be released from the iron sole
when you press the steam button [17].
VNotes on ironing
Preparation
To ensure that enough ventilation is available, the
back of the equipment must be at least 15 cm and
the sides at least 15 cm away from the wall or other
objects.
The complete system must be set up on a solid flat
surface!
When folded the system can be easily moved
to the desired position using the casters [7].
Pull the system along, do not try to push.
1. Remove the cord to the complete system [1] and
carefully move the pedestal forward. The complete
system folds out and you can then stop it at the
desired position. Then, you can move the complete
system forward and lower it onto the ground.
In the unfolded condition gently lift the pointed
end of the ironing board, then pull the system
along on the castors.
2. The complete system can be adjusted in height to
six different levels (maximum height
approx. 100 cm) and this makes it possible to
iron either standing up or sitting.
To adjust the height, hold the ironing board with
both hands, lift the ironing table gently and lift up
the activation lever (5) with one hand (the slight
lift on the ironing table is intended as a safety
measure to prevent unintended activation). As
soon as you hear an audible click, you know that
the ironing table is locked in place again.
Using the adjustable foot caps (6), you have the
option to compensate for any unevenness of the floor.
3. Set down the steam iron exclusively on the silicon
mat (14) that is part of the complete system.
4. The cable holder (22) should be clipped onto the
mount supplied for this purpose on the railing of
the complete system.
5. Insert the connection hose (15) into the cable
holder.
BImplementation
I
Information about filling the steam system:
Either cold or hot mains water can be used.
(max. 35 °C)
To increase the lifetime of your complete pressure
iron system you should always use additional distilled
water.
Hard water in particular (water containing calcium)
makes the use of distilled water necessary.
Your water supplier will be able to inform you about
the water hardness in your household.
When using distilled water, mains water needs to be
mixed in (mixture ratio 1:1).
Do not use any decalcifying or chemical substances or
ironing water additives in the water! This will damage
the steam system and steam iron.
9
GB
During ironing, water can be topped up as follows:
1. Warning light will turn on when the water supply is
low [11]!
2. Turn the steam off by pressing the steam button
[17] and place the iron in the placement area.
The complete system must not be turned off.
3. Remove the water container, fill with fresh water
and reinsert. (see information about filling the
steam system)
As soon as the warning light turns off [11], the
complete steam iron system is ready to use again.
The complete steam iron system is intended for
ironing with steam.
It is also suitable for dry ironing.
(ironing without steam)
The steam button is not used for this.
Ensure that the iron temperature regulator is always
set to the right temperature for the steam iron.
• Duringironing,waterdropletsmayescapealong
with the steam if the right temperature has not yet
been reached or there was condensation water in
the feed cable.
• Toachieveagoodironingresult,werecommend
pressing the steam pressure button [17] at regular
intervals to steam and dry the ironed item.
• Openthefabricwithsteamandfixitwithoutsteam.
• Thewarninglightforsteamavailability[12]will
turn off during ironing with steam and will light up
during work breaks.
• Whenironingwithsteam,donotsetthetempe-
rature regulator [16] of the steam iron under the
marking as otherwise, water may escape from
the iron sole.
Caution: This continuous use in this mode
may damage to the iron sole.
• Allcommontextilescanbesteam-ironed.
• Makesurethatthesettemperatureoftheirondoes
not fall below the marker while ironing with
steam. Protect delicate textiles by covering them
with a Leifheit ironing cloth (72415), for example.
• Whenironingdelicatematerialsorincasesof
doubt, test the ironing result beforehand in an
unnoticeable location.
• Whenironingwithoutsteam(steambutton[17]not
on) ensure that the temperature regulator [16]
of the steam iron is placed on the laundry item to be
ironed.
Note: If the temperature is too low, water may
escape from the iron sole.
• Irontheseams,foldsoffabricandfoldsfirst.
• Donotironanyplastic-coatedmaterialsordecora-
tions or use the special care iron sole.
• Itisnotnecessarytospraythefabricwithwaterand
starch; from this point of view, steam ironing is very
environmentally friendly.
• Carpetsarelikenewandpressuremarksfromfurni-
ture are removed when the compressed pile is
treated with steam and then carefully brushed.
• Whiteandlightlaundrycanbeironedfromthe
right. Fabrics with dark or strong colours should be
turned inside out before being ironed so that they
do not fade.
• Werecommendironingwool,cottonandfinelinen
fabrics from the left or place a thin ironing cloth
on top so that no shiny areas are created.
Reinforced materials require more moisture.
Stitching is effectively accentuated by ironing from
the left.
• Linencanbeironedwithplentyofsteam.Lapelscan
be accentuated by ironing from the right.
When using the extra case iron sole, everything can
be ironed from the right.
• Velvetandwoolfabrics(includingmohair),gloves
and bags can be very effectively freshened up
through gentle steaming. Do this by moving the
steam iron slowly across the material in steam
mode, leaving a slight gap.
• Donotironoverorplacetheirononzips,hooks
etc., as these might scratch the sole.
• Theironsolemustalwaysbekeptclean(see
cleaning instructions).
• Afteruse,waitfortheequipmenttocooldown.
Ensure that the cable does not come into contact
with hot parts.
• Alwaysstorethesteamironinadrylocation.
• Whenusingaspecialcareironsole,allmaterialscan
be ironed from the right without creating shiny
areas.
• Eachtimetheironisused(forthefirsttime)andif
you have not used the iron with steam for several
minutes. Press the steam button several times to
remove cold water from the steam circuit and clear
the inner circulation.
When the steam iron is used for the first time, there
may be a slight smell of burning and some smoke,
which are quite normal. This is caused by adjustments
of densities and the material to the temperature.
Therefore test the iron on a piece of cloth before
ironing your fabric.
Please follow the recommendations and instructions
for the best possible performance of the
• steam extraction and
• expansion functions under ironing tips on page 10!
Ironing instructions
Make sure you always check the ironing instructions
on your clothing labels.
Protection of your clothes and optimal ironing results
are only guaranteed if the special Leifheit ironing
board cover for AirActive ironing boards is used.

10
Ironing tips
Men’s shirts, mixed fabrics
Take the shirt on the hanger, hold it by the cuff and
inflate the arms of the shirt with steam from the
inside of the shirt using point of the iron. Always iron
the button stays from the left.
Pure silk
The air intake function can be used to iron the most
delicate of fabrics without any problems. To achieve
optimal ironing results, we recommend the use of a
special care ironing sole.
Angora wool
Hold the steam iron about 2 -3 cm over the piece of
clothing, steam the fabric and then give the clothing a
quick shake. The fabric will become fleecy and full.
Suit trousers
Turn on the steam extraction, then dampen the waist-
band on the ironing surface. Place the trouser legs on
top of each other and iron from one side. Gently iron
with the point of the iron.
Frilly blouses
There is no need to iron the frills and seamed folds -
simply dampen the frills to remove flat areas.
Jeans
Place the trouser legs on top of each other and iron
the jeans from one side.
The inner sides will be ironed at the same time.
Dry linen / cotton
Setthetemperaturecontrolto•••,todirectmore
heat into the iron sole.
Pleated slacks
Place the slacks on the steam ironing board, lift the
waistband slightly and dampen from the outside.
Pillowcases, covers, cloths
Fold the laundry ready for storage and perfectly
smooth the material with slow ironing movements
across the folds, front and back sides.
The use of the special care ironing sole is
recommended when ironing delicate laundry
(see accessories).
= extraction function
0 = Dry ironing without steam (ventilation function remains switched off)
= air intake function
We recommend that these instructions be followed to ensure the best possible use of the complete pressurised steam ironing system:
Shirts
Trousers with ironed creases
Pleated skirts
Sports jackets with inner lining
Tablecloths
... fixes the fabric to the board, avoiding the formation of folds.
... allows the steam to penetrate the fibres more effectively, reducing the time required and
improving the ironing result.
... removes the excess steam from the steam ironing board for user-friendly operation
... guarantees a fresh and low-moisture ironing room
... should always be turned on to remove excess steam from the steam ironing board and
its structure
... guarantees a dry ironing board and helps to dry the material while still ironing
Extraction function
(extraction of steam)
Benefits and recommendations Specific uses
Very delicate fabrics
Silk blouses
Creases (pleats)
Back sections
Ruffles
Sports jackets with inner lining
... ensures that delicate materials and items of clothing can be ironed on a cushion without the
formation of creases
... protects delicate laundry
... can be cooled more quickly due to the subsequent flow of fresh air, protecting the fabric
Air intake function
The ventilation functions of the
ironing board can be activates
using the ON/OFF switch [3].

11
GB
DMaintenance and care
CTurning the iron off and storage
The steam system can be separated from the ironing
board for storage or when cleaning and carrying out
maintenance. (see maintenance and care)
4. The equipment can be folded up and stored:
Hold the complete pressurised steam ironing system
with both hands and fold it up using the lever [5].
Store the complete steam pressure ironing system
on the rollaway protection [8] provided to prevent
the ironing board from rolling away or tipping.
The rollaway protection [8] is automatic. The rolla
way protection is not a manual foot-operated brake.
The transport guard can be used to fix the base
when the board is folded.
1. Place the iron on the steam station holder [14].
Turn off the steam station and steam iron using
the ON/OFF switch [10]. The warning lights will
turn off.
Turn off the ventilation function on the ironing
board using the switch [3].
2. Remove both power supply plugs for the steam
system and steam iron [9] and [1] from the
sockets. Then allow the complete pressu-
rised steam ironing system to cool down
completely.
Remove the water container [19] from the steam
system, empty it, rinse it out with water and then
replace it.
Completely empty the water container when-
ever you put the system away and refill the
container with fresh water before your next
ironing session.
This will help to lengthen the lifetime of your
ironing station and achieve an optimal ironing
result.
3. Open the cable holder [22].
The steam iron should be fixed to the holding
belt [13] in the placement area.
Wind up the feed cable [1] and connecting
hose [15] in large loops, do not squash or bend
the cable!
Rinsing out the steam system (decalcification):
For maintenance purposes, simply rinse out the steam system once or twice a
month. Please take the following into account.
• Firstturnoffthecompletepressurisedsteamironingsystem(seeturningoff
and storage) and allow the steam station and iron to cool down
completely.
• Takeouttheremovablewatercontainer.
• Holdthesteamstationwithbothhandsandcarefullyreleasethetworedgripson
the bottom of the steam station by pushing them gently apart. Then lift out
through the guide.
• Removethedecalcificationopeninglidwhichwillbevisiblebehind/underthe
water supply container, open the locking screw [20] for cleaning/decalcification
with a coin and completely empty the steam station.
• Still,thesteamstationthroughthedecalcificationopeningwithfreshwaterusing
a filling jug, give it a good shake and empty again.
• Replacethelockingscrew[20]onthesteamstationandsecureitwithacoin.Also
replace the lid.
• Afterrinsingoutthewatertankdecalcifytheiron.Todothisllwithfreshwater
and restart the unit as described in the starting instructions. Adjust the iron sole
temperature to the lowest setting, hold the iron over a bowl and press the steam
button.
Thesystemisdecalciedwhenclearwatercomesoutofthesteamnozzles.
Then switch off the unit and clean the sole of the iron with a damp cloth once it
has cooled down. Ideally, after using the system, the condense water drip
protection sponge [21] should be wrung out.
Useanormalmetalpolishtoremoveanynishingagentresidues.
Never submerge the equipment in water or any other fluid.
Cleaning the complete pressurised steam ironing system
• Wipethesurfacesoftheequipmentwithadampcloth.
• Theironsoleshouldbecleanedasfollows:
Remove any dirt on the surface with a damp cloth. If the damp cloth is not enough,
we recommend that you use a sponge with a rough side (non-metallic) to tho
roughly clean the iron sole from the top to the bottom. Use this method to also
remove superficial scratches.
• Toremovenishingagentdeposits,useanormalwirepotscourer.
• Dustshouldberemovedfromtheironingboardonamonthlybasistoguarantee
the ventilation function.
•
Never immerse the appliance in water.
Never use sharp, scratching objects or corrosive chemicals to clean the ironing board.
Never submerge the equipment in water or any other fluid.
Maintenance and servicing work must always be carried out when the equipment has cooled down and has been disconnected from the power supply.
Do not open the locking screw [20] for cleaning if the steam system is still hot!

12
Accessories and information
The ironing pressure and the collection of dust parti-
cles and dust reduces the permeability of the special
ironing board cover and therefore the performance of
the complete pressurised steam ironing system.
The special ironing board cover [4] is particularly
permeable to air and steam.
Therefore, only use original accessories.
If you order additional accessories or would like to know
more about Leifheit’s complete pressurised steam iro-
ning systems, please contact your local Leifheit retailer
or find out more at:
Special ironing board cover
Article number: 76085/86
126 x 55 cm
Special care iron sole
Article number: 76123
Cable holder
Article number: 76023
The following additional accessories can also be ordered:
Problems and solutions
Water droplets will escape from the steam
iron when there is long interval between
ironing.
In the event of longer breaks from ironing, the steam
may condense in the feed cable to the steam iron. As
a result, several drops of water may escape when you
start ironing again.
Recommendation: Do not start ironing your laundry
immediately.
Creases may develop despite steam ironing.
When ironing with steam work in one direction and
back without steam to “fix” the material. When
ironing laundry with traces of starch (after washing)
in the fabric, you can obtain good results by making it
damper, i.e. adding more steam before “fixing”.
The steam iron is only producing hot water.
The steam iron is too full. Evaporate the excessive
hot water and empty the steam station (see notes on
ironing, page 9). The complete system does not need
to be turned off to do this. Then fill the steam station
with a maximum of 800 - 900 ml of water and turn
it back on.
The handle is hot.
It is normal for the handle of the steam iron to
become warm during use. However, if the handle is
so hot that it is no longer possible to hold it, turn off
the complete system and inform Leifheit customer
services.
Quick ironing start-up
(short-term heating time for pressurised steam).
Fill the water container with hot water (approx. 800 -
900 ml). After a short time, you can iron with steam.
The steam iron is not heating up.
Check whether the plug is inserted into the socket and
at the device is turned on. Set the temperature control
of the steam iron to zone . If the problem has
not been solved, please inform our Leifheit customer
services..
Falling pressure
Each time you start the complete system there will
be a large volume of steam when initially pressing
the steam button, which will then reduce during the
ironing session. This is a normal process and does not
affect the functioning of the complete system.
Water is escaping.
When the system cools down condensation water coll-
ects in the extraction container. Ensure that steam is
being constantly extracted during ironing. Remove the
special ironing cover from the ironing board to dry.
An excessive production of steam will also result in an
increased development of moisture. Please read the
ironing instructions on page 9: Iron in one direction
with steam and in the other direction with no steam!
The system will not stop producing steam.
The steam button on the steam iron is stuck. Push
the button several times quickly. If the problem has
not been solved, please inform our Leifheit customer
services.
The steam iron is no longer producing steam.
Check whether all switches are turned on. Check that
the steam station is filled with water. If the problem
has not been solved, please inform our Leifheit
customer services.
Leifheit AG
E-Mail: [email protected]
www.leifheit.de

13
Leifheit complete pressurised steam
ironing system AirActive L Professional
Manufacturer’s warranty card Model:
Name
First name
Street / number
Post code / town:
Telephone
Please enter the device
number (label)!
Signature of buyer
The date on the invoice is the
beginning of the warranty period
To be completed by the parcel collection service:
collected on
by
Signature
GB

14
Warranty
Disposal
If the equipment is to be scrapped, it should be rendered
unusable (e.g. by cutting the cable and removing the plug)
and should be disposed of
according to current regulations.
Your local authority will be able to
provide you with more information.
Please recycle the packaging!
6. If a product cannot be repaired or replaced with
an identical product because the line has been
discontinued, it will be replaced, as far as possible,
with a product of the same value. The purchase
price cannot be refunded under the warranty.
7. Claims will not be honoured under the warranty
if the product has been repaired or assembled by
unauthorised persons or service centres.
8. The warranty does not cover claims for damages.
No liability can be accepted for such damage as
may arise if the product is used incorrectly or
improperly or for purposes other than intended
while it is covered by the manufacturer’s warranty.
9. The warranty does not cover damage in transit.
10. The term of guarantee will not be extended if a
claim is made on the warranty. This also applies to
any parts which are replaced or repaired.
11. Your statutory rights, especially your warranty
rights, will not be affected or restricted by the
warranty.
12. This warranty is valid worldwide.
You can still use the after-sales repair service after
the manufacturer’s warranty period has expired
(pleasecallcustomerservicesrsttodiscussyour
requirements).
The after-sales service staff may also be able to help
with remote diagnosis of problems, additional ironing
tips and advice.
Please note the following information:
Whenever you have a warranty claim or a
service request, please get in contact with the
LEIFHEIT customer service centre
(available every day except Saturdays, Sundays
and public holidays):
+49 (0) 1805 782754
email: [email protected]
Dear customer,
Our products are subject to the strict Leifheit quality
control standards. Please follow the steps below if the
AirActive Ironing Board you have purchased does not
work perfectly due to unexpected defects or if it gives
cause for complaint in any other way:
1. Call the Leifheit customer service hotline and
explain the problems which have arisen.
The customer service staff will perform a remote
diagnosis and, where applicable, discuss with you
what further steps need to be taken.
2. If the AirActive complete pressurised steam ironing
system needs to be sent in to the after-sales
servicecentrefordiagnosisorrepair,pleasell
out the warranty card and enclose it along with a
copy of the receipt in the return package.
Pleasealsoobtainconrmationofcollectionofthe
package from the parcel service.
Claims on the manufacturer’s warranty in respect
of material defects and faulty manufacture are
subject to the following terms and conditions:
1. Leifheit AG, Leifheitstraße, 56377 Nassau/Lahn,
Germany supplies its products with a two-year
warranty.
2. The warranty period starts on the date on the
receipt. Please keep the receipt carefully as proof
of purchase.
3. Claims must be made on the warranty as soon
as the defect occurs within the warranty period.
Any obvious damage and defects visible on un-
packing the product must be reported immediately.
4. The guarantee relates to the condition of the
products, i.e. the warranty is only for defects
arising as a result of faults in the material or faulty
manufacture.
The following instances are not covered
by the warranty:
a) Defects caused by use or by other naturally
occurring wear and tear;
b) Damage caused by improper use or handling
(e.g. knocks, impact sustained by falls, undue
force);
c) Damage caused by failure to follow the instruc-
tions for the use of the product.
5. It is left to the discretion of the manufacturer to
choose whether to replace or to repair the defec-
tive parts free of charge during the warranty
period.
1
Westendstraße 2 A
D-35753 Greifenstein
+49 (0) 180 5782754
+49 (0) 180 5546378
使用德国座机 0.14 欧元/分钟
使用移动电话 最高收费为 0.42 欧元/分钟
中文
致以最真诚的问候
Leifheit 团队
目录
产品概览 . . . . . . . . . . . . . . . . . . . . . . . . . . . . 5
安全提示 . . . . . . . . . . . . . . . . . . . . . . . . . . . . 6
开始使用 . . . . . . . . . . . . . . . . . . . . . . . . . . . . 8
熨烫指南 . . . . . . . . . . . . . . . . . . . . . . . . . . . . 9
熨烫提示 . . . . . . . . . . . . . . . . . . . . . . . . . . . . 10
停止使用和存放 . . . . . . . . . . . . . . . . . . . . . 11
保养和护理 . . . . . . . . . . . . . . . . . . . . . . . . . 11
配件和信息 . . . . . . . . . . . . . . . . . . . . . . . . . 12
问题和解决方案 . . . . . . . . . . . . . . . . . . . . 12
保修卡 . . . . . . . . . . . . . . . . . . . . . . . . . . . . . 13
保修 . . . . . . . . . . . . . . . . . . . . . . . . . . . . . . . 14
. . . . . . . . . . . . . . . . . . . . . . . . . . . . . . . . .
德语版本 =
压力蒸汽熨斗全套系统
Air Active L Professional 的
原装操作说明书
请您注意,该产品仅限于家庭使用。
Leifheit
不对工商业用途提供生产商保修(例如洗衣店、缝纫工作室、裁缝店等等)。
在使用前务必认真阅读操作说明并将其保存好以备以后阅读。请特别注意安全
提示!
PRC
压力蒸汽熨斗全套系统 Air Active L Professional 技术数据:
供电 . . . . . . . . . . . . . . . . . . . . . . . . 230V ~ 50 Hz
蒸汽熨斗的输入功率 . . . . . . . . . . . . . 850 W
蒸汽腔的输入功率 . . . . . . . . . . . . . . . 1350 W
最大压力 . . . . . . . . . . . . . . . . . . . . . . . . 5.5 bar
蒸汽腔的容量 . . . . . . . . . . . . . . . . . 约1.0 升
重量(装满水时). . . . . . . . . . . . . 约13.5 kg
(蒸汽腔组件 4.8 kg)
排出蒸汽量 . . . . . . .. . . 最多为 120 g /分钟
尺寸. . . . . . . . . . . . . . . . . . . . . . 165 x 55 x 35 cm
所有数值都为大概值!
A产品
-
概览
[1] 蒸汽熨斗桌的输入导管
[2] 蒸汽熨斗桌的插座
[3]
熨斗桌的开/关
(蒸汽抽取和充气功能)
[4] 特殊-熨斗桌外罩
[5] 高度调节杆
[6] 可调脚帽
[7] 涂胶轮
[8] 防滚动装置
[9] 蒸汽腔的输入导管
[10]
蒸汽腔和蒸汽熨斗
的开/关
[11] 表示缺水的控制灯
[12] 表示蒸汽准备好的控制灯
[13] 系绳
[14] 带硅质颗粒的熨斗摆放处
[15] 蒸汽软管
[16] 温度控制器
[17] 蒸汽压力按键
[18] 熨斗控制灯
[19] 可取下的水箱
[20] 排水盖和螺旋塞
[21] 冷凝水防护装置
配件
[22] 电线支架
[23] 操作说明
尊敬的各位客户,
我们对您购买了 Leifheit 的Air Active L Professional 压力蒸汽熨斗全套系统表示祝贺!
您做出了一个正确的选择,因为您选择了一种能够极大地方便您熨平衣物的全套系统。
请您在使用该全套系统前仔细阅读该操作说明。
该说明书帮助您从一开始就有效正确地操作这一全套系统,避免出现操作失误。
请您要特别留意该操作说明中所给出的安全提示。
我们非常希望您能对 Air Active L Professional 压力蒸汽熨斗全套系统感到满意。
如果您对我们的产品存在问题或建议,尽管致电我们。
Leifheit 团队很乐意为您效劳。

15
PRC
1
Westendstraße 2 A
D-35753 Greifenstein
+49 (0) 180 5782754
+49 (0) 180 5546378
使用德国座机 0.14 欧元/分钟
使用移动电话 最高收费为 0.42 欧元/分钟
中文
致以最真诚的问候
Leifheit 团队
目录
产品概览 . . . . . . . . . . . . . . . . . . . . . . . . . . . . 5
安全提示 . . . . . . . . . . . . . . . . . . . . . . . . . . . . 6
开始使用 . . . . . . . . . . . . . . . . . . . . . . . . . . . . 8
熨烫指南 . . . . . . . . . . . . . . . . . . . . . . . . . . . . 9
熨烫提示 . . . . . . . . . . . . . . . . . . . . . . . . . . . . 10
停止使用和存放 . . . . . . . . . . . . . . . . . . . . . 11
保养和护理 . . . . . . . . . . . . . . . . . . . . . . . . . 11
配件和信息 . . . . . . . . . . . . . . . . . . . . . . . . . 12
问题和解决方案 . . . . . . . . . . . . . . . . . . . . 12
保修卡 . . . . . . . . . . . . . . . . . . . . . . . . . . . . . 13
保修 . . . . . . . . . . . . . . . . . . . . . . . . . . . . . . . 14
. . . . . . . . . . . . . . . . . . . . . . . . . . . . . . . . .
德语版本 =
压力蒸汽熨斗全套系统
Air Active L Professional 的
原装操作说明书
请您注意,该产品仅限于家庭使用。
Leifheit
不对工商业用途提供生产商保修(例如洗衣店、缝纫工作室、裁缝店等等)。
在使用前务必认真阅读操作说明并将其保存好以备以后阅读。请特别注意安全
提示!
PRC
压力蒸汽熨斗全套系统 Air Active L Professional 技术数据:
供电 . . . . . . . . . . . . . . . . . . . . . . . . 230V ~ 50 Hz
蒸汽熨斗的输入功率 . . . . . . . . . . . . . 850 W
蒸汽腔的输入功率 . . . . . . . . . . . . . . . 1350 W
最大压力 . . . . . . . . . . . . . . . . . . . . . . . . 5.5 bar
蒸汽腔的容量 . . . . . . . . . . . . . . . . . 约1.0 升
重量(装满水时). . . . . . . . . . . . . 约13.5 kg
(蒸汽腔组件 4.8 kg)
排出蒸汽量 . . . . . . .. . . 最多为 120 g /分钟
尺寸. . . . . . . . . . . . . . . . . . . . . . 165 x 55 x 35 cm
所有数值都为大概值!
A产品
-
概览
[1] 蒸汽熨斗桌的输入导管
[2] 蒸汽熨斗桌的插座
[3]
熨斗桌的开/关
(蒸汽抽取和充气功能)
[4] 特殊-熨斗桌外罩
[5] 高度调节杆
[6] 可调脚帽
[7] 涂胶轮
[8] 防滚动装置
[9] 蒸汽腔的输入导管
[10]
蒸汽腔和蒸汽熨斗
的开/关
[11] 表示缺水的控制灯
[12] 表示蒸汽准备好的控制灯
[13] 系绳
[14] 带硅质颗粒的熨斗摆放处
[15] 蒸汽软管
[16] 温度控制器
[17] 蒸汽压力按键
[18] 熨斗控制灯
[19] 可取下的水箱
[20] 排水盖和螺旋塞
[21] 冷凝水防护装置
配件
[22] 电线支架
[23] 操作说明
尊敬的各位客户,
我们对您购买了 Leifheit 的Air Active L Professional 压力蒸汽熨斗全套系统表示祝贺!
您做出了一个正确的选择,因为您选择了一种能够极大地方便您熨平衣物的全套系统。
请您在使用该全套系统前仔细阅读该操作说明。
该说明书帮助您从一开始就有效正确地操作这一全套系统,避免出现操作失误。
请您要特别留意该操作说明中所给出的安全提示。
我们非常希望您能对 Air Active L Professional 压力蒸汽熨斗全套系统感到满意。
如果您对我们的产品存在问题或建议,尽管致电我们。
Leifheit 团队很乐意为您效劳。
1
Westendstraße 2 A
D-35753 Greifenstein
+49 (0) 180 5782754
+49 (0) 180 5546378
使用德国座机 0.14 欧元/分钟
使用移动电话 最高收费为 0.42 欧元/分钟。
压力蒸汽熨斗全套系统 Air Active L Advanced 技术数据:
A产品概览
中文
[1] 蒸汽熨斗桌的输入导管
[2] 蒸汽熨斗桌的插座
[3]
熨斗桌的开/关
(抽气和充气功能)
[4] 特制熨斗桌外罩
[5] 高度调节杆
[6] 可调脚帽
[7] 涂胶轮
[8] 防滚动装置
[9] 蒸汽腔的输入导管
[10] 保险扣
[11] 蒸汽腔的开关
[12] 熨斗的开关
[13] 表示缺水的控制灯
[14] 表示蒸汽准备好的控制灯
[15] 系绳
[16] 带硅质颗粒的熨斗摆放处
[17] 蒸汽软管
[18] 温度控制器
[19] 蒸汽压力按键
[20] 熨斗控制灯
[21] 冷凝水防护装置
配件
[22] 电线支架
[23] 水瓶
[24] 操作说明
供电 . . . . . . . . . . . . . . . . . . . . . . . . 230V ~ 50 Hz
蒸汽熨斗的输入功率 . . . . . . . . . . . . . 850 W
蒸汽腔的输入功率 . . . . . . . . . . . . . . . 1350 W
最大压力 . . . . . . . . . . . . . . . . . . . . . . . . 5.5 bar
蒸汽腔的容量 . . . . . . . . . . . . . . . . . 约1.0 升
重量(装满水时). . . . . . . . . . . . . 约13.5 kg
(蒸汽腔组件 4.8 kg)
排出蒸汽量 . . . . . . .. . . 最多为 120 g /分钟
尺寸. . . . . . . . . . . . . . . . . . . . . . 165 x 55 x 35 cm
所有数值都为大概值!
尊敬的各位客户,
我们对您购买了 Leifheit 的 Air Active L Advanced 压力蒸汽熨斗全套系统表示祝贺!
您做出了一个正确的选择,因为您选择了一种能够极大地方便您熨烫衣物的全套系统。
请您在使用该全套系统前仔细阅读该操作说明。
该说明书帮助您从一开始就有效正确地操作这一全套系统,避免出现操作失误。
请您要特别留意该操作说明中所给出的安全提示。
我们非常希望您能对 Air Active L Advanced 压力蒸汽熨斗全套系统感到满意。
如果您对我们的产品存在问题或建议,尽管致电我们。
Leifheit 团队很乐意为您效劳。
致以最真诚的问候
Leifheit 团队
目录
产品概览 . . . . . . . . . . . . . . . . . . . . . . . . . . . . 5
安全提示 . . . . . . . . . . . . . . . . . . . . . . . . . . . . 6
开始使用 . . . . . . . . . . . . . . . . . . . . . . . . . . . . 8
熨烫指南 . . . . . . . . . . . . . . . . . . . . . . . . . . . . 9
熨烫提示 . . . . . . . . . . . . . . . . . . . . . . . . . . . . 10
停止使用和存放 . . . . . . . . . . . . . . . . . . . . . 11
保养和护理 . . . . . . . . . . . . . . . . . . . . . . . . . 11
配件和信息 . . . . . . . . . . . . . . . . . . . . . . . . . 12
问题和解决方案 . . . . . . . . . . . . . . . . . . . . 12
保修卡 . . . . . . . . . . . . . . . . . . . . . . . . . . . . . 13
保修 . . . . . . . . . . . . . . . . . . . . . . . . . . . . . . . 14
. . . . . . . . . . . . . . . . . . . . . . . . . . . . . . . . .
德语版本 =
压力蒸汽熨斗全套系统
Air Active L Professional 的
原装操作说明书
请您注意,该产品仅限于家庭使用。
Leifheit
不对商业用途提供生产商保修(例如洗衣店、缝纫工作室、裁缝店等等)。
在使用前务必认真阅读操作说明并将其保存好以备以后阅读。请特别注意安全
提示!
PRC

16
2
安全提示
包装材料(塑料袋、聚苯乙烯
等)是一种潜在的危险源,不能
让孩子接触。
在拆装后检查设备是否完好无
损。在存在疑问时不要使用设备
而是咨询一位专业人员。
该压力蒸汽熨斗全套系统符合
现行的技术规章和设备安全法
2006/95/EG。
设备只能接入交流电(根据设备
底部的型号铭牌上给出的电压)。
根据 EMV 条例 2004/108/EG 该熨斗
全套系统是不受无线电干扰的。
注意:在使用该系统时必须保证
电气连接,必要时包括延长电线
的电流为 16 A。仅采用符合规定
的延长电线。
如果设备插头不匹配插座,则由
一名专业人员进行更换。
只有在根据有关电路安全的规章
进行设备接地才能保证设备的电
路安全。
生产商不对由于设备错误接地所
可能造成的损失承担责任。在存
在疑问时咨询一位专业人员。
该全套系统仅能在海拔最高为
2000 米的地区使用。
尽可能不要使用适配器、多头插
座和/或延长电线。如果必须使
用,仅能使用符合安全规章的适
配器、多头插座和/或延长电线,
决不能超过适配器所允许的最大
功率。
电气设备不是儿童玩具。
熨斗以及接线线路在启动或冷却
时必须位于不满 8 岁的儿童的可
接触范围之外。
在有人看管或被教会如何安全使
用设备并已了解使用设备所产生
的危险的情况下,8岁及 8岁以
上的儿童以及行为、感知或智商
能力较低或缺乏经验和/或知识的
人可以使用该设备。儿童不得用
该设备玩耍。
不得在无人看管的情况下由儿童
进行设备的清洁和用户保养。
不得往设备的开口装入物品。
不得用沾水或潮湿的手或脚拔
电线。
不得用沾水或潮湿的手接触
设备。
只能握住电线的插头而不得握住
电线将其从插座拔出。
注意:只要设备接入电网,熨斗
全套系统就始终具有电压。
不要在靠近腐蚀性或爆炸性物
品的地方使用设备,以防爆炸和
短路。
电子组件(通风功能的开关、插
座等)不得接触水。
如果设备不小心落入水中,必须
立刻拔出电源插头。您决不能将
手伸入水中将设备取出。这样存
在电击危险!
以大圈缠绕熨斗全套系统的电
线。避免电线折叠。注意电线是
否开裂。
在拔出电源插头前关闭设备。
在下列情况中拔出电源插头
•每次离开房间前,
•每次清洗和护理前,
•每次加水前,
•使用后。
决不能将设备置于雨中、阳光
下、雾中等,使其受到天气影
响,以防出现损坏。
装水的设备不能放置在温度为 0 °C
及0 °C 以下的环境中。
如果设备的蒸汽软管或弯曲保护
套损坏,则不能启动全套系统。
在蒸汽软管损坏时,请您和客服
联系。
3
缠绕蒸汽软管时出现磨损是正常
现象,并不会导致影响功能。
注意:不要用烫热的熨斗底部接
触电线。
电线不得和尖角以及烫热的表面
接触。
注意:如果设备的接线损坏,必
须由生产商、客服或类似的专
业人员进行更换,以避免出现
危险。
不恰当的使用以及维修可能对使
用者造成严重的危险,使用者也
会失去提出保修的权利。
注意:只能由Leifheit 的客服或经授
权的人员进行维修。
注意:放置着的蒸汽熨斗是烫热
的。在不恰当使用时存在烧伤的
危险。
仅按照规定使用该全套系统,不
得当做存放处、座椅等使用。
不能将设备浸入水中。
仅允许在干燥的房间里使用该全
套系统,不得在户外使用。
必须具有安全水平的支撑场所并
且位于固定的位置。
只能在蒸汽腔按照规定固定于熨
斗桌上时才能使用该全套系统。
如果熨斗位于搁架上,必须确保
搁架所处平面稳固。
如果熨斗掉落,出现明显的损坏
或密封不严,不得再使用熨斗。
在运转期间不要移动全套系统。
当蒸汽熨斗未稳固放置在停放
处时不得取下用于调整熨斗高度
的吊钩。否则蒸汽熨斗桌将自动
收合,未固定的熨斗可能掉落并
受损。
在加热和冷却时蒸汽腔可能出现
声音,但这是所采用的材料正常
延展所引起的。
在往蒸汽腔中加水时只能使用所
配备的可取下的水箱。
不要在容器的水中使用化学添
加剂。
不能熨烫湿的异物,只能对熨烫
湿度或干燥的衣物进行熨烫。
不得将蒸汽流对准他人,因为这
很危险。
在使用蒸汽熨斗时不得用蒸汽喷
射电子组件。
如果将设备用于其它用途或错误/
未按照规定使用设备,生产商不
对可能造成的损失承担责任。
熨平衣物后,在收起设备前让熨
斗底部完全降温。
在蒸汽腔过度加热时温度保险丝
会出于安全考虑自动关闭设备。
在重新启动时必须由 Leifheit 的客服
修复设备。
注意:如果需要更换熨斗全套系
统的个别零件,务必采用Leifheit 的
原装备件。
在清洁时先拔出电源插头,让设
备降温,再用湿布擦拭表面。
在全套系统(尤其是熨斗)接电
时必须有人看管。
不要将熨斗放置在熨衣台上,
而是始终放在为此所配备的内
置蒸汽腔的灰色硅质支架上。
否则可能造成熨衣台的变形,
这种情形不包括在保修范
围内。
只能在蒸汽腔按照规定固定
于熨斗桌上时才能使用该全
套系统。
PRC

17
PRC
2
安全提示
包装材料(塑料袋、聚苯乙烯
等)是一种潜在的危险源,不能
让孩子接触。
在拆装后检查设备是否完好无
损。在存在疑问时不要使用设备
而是咨询一位专业人员。
该压力蒸汽熨斗全套系统符合
现行的技术规章和设备安全法
2006/95/EG。
设备只能接入交流电(根据设备
底部的型号铭牌上给出的电压)。
根据 EMV 条例 2004/108/EG 该熨斗
全套系统是不受无线电干扰的。
注意:在使用该系统时必须保证
电气连接,必要时包括延长电线
的电流为 16 A。仅采用符合规定
的延长电线。
如果设备插头不匹配插座,则由
一名专业人员进行更换。
只有在根据有关电路安全的规章
进行设备接地才能保证设备的电
路安全。
生产商不对由于设备错误接地所
可能造成的损失承担责任。在存
在疑问时咨询一位专业人员。
该全套系统仅能在海拔最高为
2000 米的地区使用。
尽可能不要使用适配器、多头插
座和/或延长电线。如果必须使
用,仅能使用符合安全规章的适
配器、多头插座和/或延长电线,
决不能超过适配器所允许的最大
功率。
电气设备不是儿童玩具。
熨斗以及接线线路在启动或冷却
时必须位于不满 8 岁的儿童的可
接触范围之外。
在有人看管或被教会如何安全使
用设备并已了解使用设备所产生
的危险的情况下,8岁及 8岁以
上的儿童以及行为、感知或智商
能力较低或缺乏经验和/或知识的
人可以使用该设备。儿童不得用
该设备玩耍。
不得在无人看管的情况下由儿童
进行设备的清洁和用户保养。
不得往设备的开口装入物品。
不得用沾水或潮湿的手或脚拔
电线。
不得用沾水或潮湿的手接触
设备。
只能握住电线的插头而不得握住
电线将其从插座拔出。
注意:只要设备接入电网,熨斗
全套系统就始终具有电压。
不要在靠近腐蚀性或爆炸性物
品的地方使用设备,以防爆炸和
短路。
电子组件(通风功能的开关、插
座等)不得接触水。
如果设备不小心落入水中,必须
立刻拔出电源插头。您决不能将
手伸入水中将设备取出。这样存
在电击危险!
以大圈缠绕熨斗全套系统的电
线。避免电线折叠。注意电线是
否开裂。
在拔出电源插头前关闭设备。
在下列情况中拔出电源插头
•每次离开房间前,
•每次清洗和护理前,
•每次加水前,
•使用后。
决不能将设备置于雨中、阳光
下、雾中等,使其受到天气影
响,以防出现损坏。
装水的设备不能放置在温度为 0 °C
及0 °C 以下的环境中。
如果设备的蒸汽软管或弯曲保护
套损坏,则不能启动全套系统。
在蒸汽软管损坏时,请您和客服
联系。
3
缠绕蒸汽软管时出现磨损是正常
现象,并不会导致影响功能。
注意:不要用烫热的熨斗底部接
触电线。
电线不得和尖角以及烫热的表面
接触。
注意:如果设备的接线损坏,必
须由生产商、客服或类似的专
业人员进行更换,以避免出现
危险。
不恰当的使用以及维修可能对使
用者造成严重的危险,使用者也
会失去提出保修的权利。
注意:只能由Leifheit 的客服或经授
权的人员进行维修。
注意:放置着的蒸汽熨斗是烫热
的。在不恰当使用时存在烧伤的
危险。
仅按照规定使用该全套系统,不
得当做存放处、座椅等使用。
不能将设备浸入水中。
仅允许在干燥的房间里使用该全
套系统,不得在户外使用。
必须具有安全水平的支撑场所并
且位于固定的位置。
只能在蒸汽腔按照规定固定于熨
斗桌上时才能使用该全套系统。
如果熨斗位于搁架上,必须确保
搁架所处平面稳固。
如果熨斗掉落,出现明显的损坏
或密封不严,不得再使用熨斗。
在运转期间不要移动全套系统。
当蒸汽熨斗未稳固放置在停放
处时不得取下用于调整熨斗高度
的吊钩。否则蒸汽熨斗桌将自动
收合,未固定的熨斗可能掉落并
受损。
在加热和冷却时蒸汽腔可能出现
声音,但这是所采用的材料正常
延展所引起的。
在往蒸汽腔中加水时只能使用所
配备的可取下的水箱。
不要在容器的水中使用化学添
加剂。
不能熨烫湿的异物,只能对熨烫
湿度或干燥的衣物进行熨烫。
不得将蒸汽流对准他人,因为这
很危险。
在使用蒸汽熨斗时不得用蒸汽喷
射电子组件。
如果将设备用于其它用途或错误/
未按照规定使用设备,生产商不
对可能造成的损失承担责任。
熨平衣物后,在收起设备前让熨
斗底部完全降温。
在蒸汽腔过度加热时温度保险丝
会出于安全考虑自动关闭设备。
在重新启动时必须由Leifheit 的客服
修复设备。
注意:如果需要更换熨斗全套系
统的个别零件,务必采用Leifheit 的
原装备件。
在清洁时先拔出电源插头,让设
备降温,再用湿布擦拭表面。
在全套系统(尤其是熨斗)接电
时必须有人看管。
不要将熨斗放置在熨衣台上,
而是始终放在为此所配备的内
置蒸汽腔的灰色硅质支架上。
否则可能造成熨衣台的变形,
这种情形不包括在保修范
围内。
只能在蒸汽腔按照规定固定
于熨斗桌上时才能使用该全
套系统。
PRC

18
4
准备
为了保证有足够的通风,设备背面和墙
或其它物体的距离必须至少为 15 cm,侧
面则为 15 cm。
全套系统必须放置在固定水平的表
面上!
借助轮子 [7] 可以将系统在折叠起来的状
态下拉至目标位置。不要推而是拉。
1.
将全套系统的输入导管 [1] 卷起来。小
心地将底架往前移动。将全套系统展
开并可以固定在目标位置。紧接着将
全套系统往前搬到地板上。
在折叠状态下可以轻松抬起熨平台顶
端,接着借助轮子推动系统。
2.
全套系统有 6 个级别的可调高度(最
高约为 100 cm),这样既可以站着也可
以坐着熨烫物品。
在调整高度时用双手握住熨衣台,稍
微抬起熨斗桌并用一只手将调节杆 [5]
拉高。(稍微抬高熨斗桌是为了防止
不小心调错高度。)在听到齿咬合的
声音后才再次锁定熨斗桌。
借助可调的脚帽 [6] 可以解决地面不水
平的问题。
3.
仅将蒸汽熨斗放置在全套系统的硅质
颗粒垫 [14] 上。
4.
电线支架 [22] 夹在全套系统杆子上所
预配的固定设备上。
5.
蒸汽软管 [15] 接入电线支架。
II
注水 (在开始熨烫前)
1.
将水箱[19]沿导轨往后取下。
2.
往水箱中注水到最大高度(见刻度上
的MAX-标记)。(此外注意“注水入蒸
汽腔的提示”!)
用一点力将水箱 [19] 再次推回原先的位
置。在听到两次齿咬合的声音后才说明
水箱已正确放置。
如果是第一次或在除钙后使用设备,必
须从可拆下的水箱中往蒸汽腔打入大量
的水。因此在必要时装满水箱。
避免蒸汽腔的水注入过满(最多
800-900
ml)。水过满可能导致热水溢出而不是
蒸汽。
如果水溢出或水箱过满,请您倒出一些
水并仔细擦干设备。
从技术方面考虑设备配置了一个泵。按
照需求,这根泵可以以不规律的间隔将
水从可拆下的水箱里打入加热器中,从
而实现无间断便捷地熨烫物品。
III 供电
1.
将蒸汽腔输入导管 [9] 的电源插头插入
熨斗桌的插座 [2] 里。由此将保证蒸汽
腔的电源供应。
2.
紧接着将全套系统输入导管 [1] 的电源
插头插入墙上的一个插座里。
IV 熨烫过程
1.
打开熨斗和蒸汽腔 [10] 的开关。
请注意:
只有在注入足够水时,才能启动蒸汽
腔。(但最多为 800-900 ml)。
因此我们建议在每次开始熨烫前注满
水。这样一来就可以避免在熨烫期间由
于加水需要等待。
等待几分钟直到显示蒸汽准备好的控制
灯[12] 亮起。
2.
紧接着通过 开/关[3] 启动熨斗桌的蒸
汽抽取系统。
蒸汽排放应尽可能始终保持启动以
避免剩余蒸汽残留在熨斗桌和机体
内部。
这样可以保证熨斗桌温热干燥。(注
意第 10 页的抽气和充气功能提示)
3.
将蒸汽熨斗的温度控制器 [16] 调到所
需的温度。
在用蒸汽熨烫时注意所设置的熨斗温
度不要低于标记。
一旦控制灯 [18] 熄灭, 则表示蒸汽熨斗
已经可以使用。
4.
通过按下蒸汽压力按键 [17] , 蒸汽现在
就能从熨斗底部溢出。
B开始使用
I
务必要注意缝制在衣物内的熨烫规定。
只有使用用于
Air Active L
熨斗桌的特制
Leifheit-
熨斗桌外罩才能保证保护衣物和
最佳的熨烫效果。
注水入蒸汽腔的提示:
既可以使用冷的也可以使用温的自来
水(最高
35 °C
)。
为了提高压力蒸汽熨斗全套系统的使
用寿命,还应始终使用经净化的水。
尤其是硬化水(含钙的水)更需要使
用经净化的水。
负责的水厂会告知您家中的水硬度。
在使用经净化的水时需要混合自来水
(混合比例为
1
:
1
)。
除了水以外请不要使用加入了去钙和
化学物质或熨烫用水添加剂的水。这
会造成蒸汽腔和蒸汽熨斗的损坏。
5
熨烫指南
•
在熨烫衣物时水珠可能和蒸汽一起溢
出,原因可能是还未达到所需的温度或
在输入导管中还存在冷凝水。
•
为了达到满意的熨烫效果,建议间断
性按下蒸汽压力按键 [17] 以蒸汽熨烫
衣物并使其变干。
•
在有蒸汽时展开衣物,无蒸汽时固定
衣物。
•
在进行蒸汽熨烫时表示蒸汽准备好的
控制灯 [12] 会熄灭,在工作停止间隙
时再次亮起。
•
所有市场上常见的纺织品都可以用蒸
汽熨烫。
•
敏感的纺织品采用 Leifheit 熨布 (72415)
覆盖。
•
如果是敏感材料或在不确定情况下,
在一个不显眼的位置事先进行试熨。
•
在进行蒸汽熨烫时不要将蒸汽熨斗
的温度控制器 [16] 调到刻度以下,否
则可能有水从熨斗底部溢出。
注意:如果一直这样操作可能造成熨
斗底部损坏。
•
在无蒸汽熨烫时(没有按下蒸汽压力
按键 [17])必须注意,蒸汽熨斗的温
度控制器 [16] 必须调整到适合待熨衣
物的温度。
提示:在低温时水可能从熨斗底部
溢出。
•
先熨平接缝、材料褶皱和褶皱。
•
不要熨烫含塑料的材料或装饰物或使
用塑料的熨斗保护底板
•
不要用水喷射以及给待熨物品上浆,
这样的蒸汽熨烫非常不环保。
•
如果用蒸汽处理被压平的绒毛并紧接
着小心地梳理,地毯将焕然一新而家
具的压痕处会消失。
•
白色和浅色的衣物可以从右边开始熨
烫。带暗色或鲜艳颜色的材料在背面
熨烫,以使其保持光泽。
•
羊毛、棉和精细亚麻布制的材料建议
从左边开始熨烫或铺上一张薄熨布以
免产生发亮的地方。经强化的材料需
要更多蒸汽。编织物从左边开始熨烫
效果更佳。
•
亚麻材料可以采用大量蒸汽熨烫。经
纱材料从右边开始熨烫效果更佳。
在使用熨斗保护底板时所有物品都可
以从右边开始熨烫。
•
丝绒和羊毛材料(又称马海毛)以及
手套和袋子可以通过小心地用蒸汽熨
烫从而变得焕然一新。此时蒸汽熨斗
在蒸汽功能下近距离地在材料上方缓
慢移动。
•
不要在拉链、钩子等物体上移动熨斗
或将其放置在这些物体上,以免底部
被刮坏。
•
熨斗底部必须始终保持干净(参见清
洗提示)。
•
使用完毕后等待设备降温:确保电线
不要接触到烫热的部分。
•
始终将蒸汽熨斗存放在一个干燥的
地方。
•
在使用熨斗保护底板时所有物品都可
以从右边开始熨烫而不会产生发亮的
地方。
•每次重新(第一次)使用时以及持续
几分钟没有用蒸汽熨烫时,多次按下
蒸汽压力键,以除去蒸汽循环装置中
的冷水并清洁内部循环装置。
V熨烫的备注
在熨烫过程中可以按如下方式加水:
1.
表示缺水的控制灯 [11] 亮起!
2.
通过蒸汽压力按键 [17] 排出蒸汽。
全套系统不需停止运转。
3.
取下水箱,注入新的水,再把水箱推
回原位。(参见注水入蒸汽腔的提示)
一旦控制灯 [11] 熄灭,则表示蒸汽熨
斗全套系统可以再次启动。
压力蒸汽熨斗全套系统是预设为用于蒸
汽熨烫的。
它同样也可用于干燥熨烫。
(无蒸汽熨烫)
此时不需按下蒸汽压力按键。
注意始终根据纺织物的材料调节熨斗的
温度控制器。
在第一次启动蒸汽熨斗时出现轻微
的灼烧味和烟是正常的。这是密封
圈和材料适应温度所造成的。
因此在第一次使用蒸汽时不要用于
待熨的织物而要用于破布上。
请注意位于第
10
页的熨平提示下
方的
•
抽气和
•
充气功能中为保证最佳使用效果
的建议和提示!
PRC

19
PRC
4
准备
为了保证有足够的通风,设备背面和墙
或其它物体的距离必须至少为 15 cm,侧
面则为 15 cm。
全套系统必须放置在固定水平的表
面上!
借助轮子 [7] 可以将系统在折叠起来的状
态下拉至目标位置。不要推而是拉。
1.
将全套系统的输入导管 [1] 卷起来。小
心地将底架往前移动。将全套系统展
开并可以固定在目标位置。紧接着将
全套系统往前搬到地板上。
在折叠状态下可以轻松抬起熨平台顶
端,接着借助轮子推动系统。
2.
全套系统有 6 个级别的可调高度(最
高约为 100 cm),这样既可以站着也可
以坐着熨烫物品。
在调整高度时用双手握住熨衣台,稍
微抬起熨斗桌并用一只手将调节杆 [5]
拉高。(稍微抬高熨斗桌是为了防止
不小心调错高度。)在听到齿咬合的
声音后才再次锁定熨斗桌。
借助可调的脚帽 [6] 可以解决地面不水
平的问题。
3.
仅将蒸汽熨斗放置在全套系统的硅质
颗粒垫 [14] 上。
4.
电线支架 [22] 夹在全套系统杆子上所
预配的固定设备上。
5.
蒸汽软管 [15] 接入电线支架。
II
注水 (在开始熨烫前)
1.
将水箱[19]沿导轨往后取下。
2.
往水箱中注水到最大高度(见刻度上
的MAX-标记)。(此外注意“注水入蒸
汽腔的提示”!)
用一点力将水箱 [19] 再次推回原先的位
置。在听到两次齿咬合的声音后才说明
水箱已正确放置。
如果是第一次或在除钙后使用设备,必
须从可拆下的水箱中往蒸汽腔打入大量
的水。因此在必要时装满水箱。
避免蒸汽腔的水注入过满(最多
800-900
ml)。水过满可能导致热水溢出而不是
蒸汽。
如果水溢出或水箱过满,请您倒出一些
水并仔细擦干设备。
从技术方面考虑设备配置了一个泵。按
照需求,这根泵可以以不规律的间隔将
水从可拆下的水箱里打入加热器中,从
而实现无间断便捷地熨烫物品。
III 供电
1.
将蒸汽腔输入导管 [9] 的电源插头插入
熨斗桌的插座 [2] 里。由此将保证蒸汽
腔的电源供应。
2.
紧接着将全套系统输入导管 [1] 的电源
插头插入墙上的一个插座里。
IV 熨烫过程
1.
打开熨斗和蒸汽腔 [10] 的开关。
请注意:
只有在注入足够水时,才能启动蒸汽
腔。(但最多为 800-900 ml)。
因此我们建议在每次开始熨烫前注满
水。这样一来就可以避免在熨烫期间由
于加水需要等待。
等待几分钟直到显示蒸汽准备好的控制
灯[12] 亮起。
2.
紧接着通过 开/关[3] 启动熨斗桌的蒸
汽抽取系统。
蒸汽排放应尽可能始终保持启动以
避免剩余蒸汽残留在熨斗桌和机体
内部。
这样可以保证熨斗桌温热干燥。(注
意第 10 页的抽气和充气功能提示)
3.
将蒸汽熨斗的温度控制器 [16] 调到所
需的温度。
在用蒸汽熨烫时注意所设置的熨斗温
度不要低于标记。
一旦控制灯 [18] 熄灭, 则表示蒸汽熨斗
已经可以使用。
4.
通过按下蒸汽压力按键 [17] , 蒸汽现在
就能从熨斗底部溢出。
B开始使用
I
务必要注意缝制在衣物内的熨烫规定。
只有使用用于
Air Active L
熨斗桌的特制
Leifheit-
熨斗桌外罩才能保证保护衣物和
最佳的熨烫效果。
注水入蒸汽腔的提示:
既可以使用冷的也可以使用温的自来
水(最高
35 °C
)。
为了提高压力蒸汽熨斗全套系统的使
用寿命,还应始终使用经净化的水。
尤其是硬化水(含钙的水)更需要使
用经净化的水。
负责的水厂会告知您家中的水硬度。
在使用经净化的水时需要混合自来水
(混合比例为
1
:
1
)。
除了水以外请不要使用加入了去钙和
化学物质或熨烫用水添加剂的水。这
会造成蒸汽腔和蒸汽熨斗的损坏。
5
熨烫指南
•
在熨烫衣物时水珠可能和蒸汽一起溢
出,原因可能是还未达到所需的温度或
在输入导管中还存在冷凝水。
•
为了达到满意的熨烫效果,建议间断
性按下蒸汽压力按键 [17] 以蒸汽熨烫
衣物并使其变干。
•
在有蒸汽时展开衣物,无蒸汽时固定
衣物。
•
在进行蒸汽熨烫时表示蒸汽准备好的
控制灯 [12] 会熄灭,在工作停止间隙
时再次亮起。
•
所有市场上常见的纺织品都可以用蒸
汽熨烫。
•
敏感的纺织品采用 Leifheit 熨布 (72415)
覆盖。
•
如果是敏感材料或在不确定情况下,
在一个不显眼的位置事先进行试熨。
•
在进行蒸汽熨烫时不要将蒸汽熨斗
的温度控制器 [16] 调到刻度以下,否
则可能有水从熨斗底部溢出。
注意:如果一直这样操作可能造成熨
斗底部损坏。
•
在无蒸汽熨烫时(没有按下蒸汽压力
按键 [17])必须注意,蒸汽熨斗的温
度控制器 [16] 必须调整到适合待熨衣
物的温度。
提示:在低温时水可能从熨斗底部
溢出。
•
先熨平接缝、材料褶皱和褶皱。
•
不要熨烫含塑料的材料或装饰物或使
用塑料的熨斗保护底板
•
不要用水喷射以及给待熨物品上浆,
这样的蒸汽熨烫非常不环保。
•
如果用蒸汽处理被压平的绒毛并紧接
着小心地梳理,地毯将焕然一新而家
具的压痕处会消失。
•
白色和浅色的衣物可以从右边开始熨
烫。带暗色或鲜艳颜色的材料在背面
熨烫,以使其保持光泽。
•
羊毛、棉和精细亚麻布制的材料建议
从左边开始熨烫或铺上一张薄熨布以
免产生发亮的地方。经强化的材料需
要更多蒸汽。编织物从左边开始熨烫
效果更佳。
•
亚麻材料可以采用大量蒸汽熨烫。经
纱材料从右边开始熨烫效果更佳。
在使用熨斗保护底板时所有物品都可
以从右边开始熨烫。
•
丝绒和羊毛材料(又称马海毛)以及
手套和袋子可以通过小心地用蒸汽熨
烫从而变得焕然一新。此时蒸汽熨斗
在蒸汽功能下近距离地在材料上方缓
慢移动。
•
不要在拉链、钩子等物体上移动熨斗
或将其放置在这些物体上,以免底部
被刮坏。
•
熨斗底部必须始终保持干净(参见清
洗提示)。
•
使用完毕后等待设备降温:确保电线
不要接触到烫热的部分。
•
始终将蒸汽熨斗存放在一个干燥的
地方。
•
在使用熨斗保护底板时所有物品都可
以从右边开始熨烫而不会产生发亮的
地方。
•每次重新(第一次)使用时以及持续
几分钟没有用蒸汽熨烫时,多次按下
蒸汽压力键,以除去蒸汽循环装置中
的冷水并清洁内部循环装置。
V熨烫的备注
在熨烫过程中可以按如下方式加水:
1.
表示缺水的控制灯 [11] 亮起!
2.
通过蒸汽压力按键 [17] 排出蒸汽。
全套系统不需停止运转。
3.
取下水箱,注入新的水,再把水箱推
回原位。(参见注水入蒸汽腔的提示)
一旦控制灯 [11] 熄灭,则表示蒸汽熨
斗全套系统可以再次启动。
压力蒸汽熨斗全套系统是预设为用于蒸
汽熨烫的。
它同样也可用于干燥熨烫。
(无蒸汽熨烫)
此时不需按下蒸汽压力按键。
注意始终根据纺织物的材料调节熨斗的
温度控制器。
在第一次启动蒸汽熨斗时出现轻微
的灼烧味和烟是正常的。这是密封
圈和材料适应温度所造成的。
因此在第一次使用蒸汽时不要用于
待熨的织物而要用于破布上。
请注意位于第
10
页的熨平提示下
方的
•
抽气和
•
充气功能中为保证最佳使用效果
的建议和提示!
PRC

20
6
熨烫提示
男式衬衫和混合织物
将衬衫悬挂着从外堵住袖口并用熨斗顶
端从衬衫内侧用蒸汽往衬衫袖充气。纽
扣条始终从左开始熨平。
纯丝绸
充气功能可以用于熨平最敏感的材料
而不会产生问题。我们建议使用熨斗
保护底板以达到最佳的熨烫效果(参见
配件)。
安哥拉羊毛
将蒸汽熨斗置于衣服上方 2-3 cm 处,用蒸
汽喷射后再抖一抖衣服。熨过的衣服将
变得蓬松饱满。
西装裤
启动蒸汽抽取系统,紧接着在熨衣台用
蒸汽喷射腰边。裤腿叠在一起后从一边
开始熨烫。用熨斗顶端轻轻熨平熨痕。
褶皱套衫
不要熨褶皱和接缝线
—
简单地用蒸汽喷
射褶皱就不会产生压平的地方。
牛仔裤
裤腿叠在一起后从一边开始熨烫。内侧
一起熨烫。
干燥的亚麻布/棉
将温度控制器调到 •••级,从而为熨斗
底部供应更多热量。
腰边褶皱裤
将裤子放在蒸汽熨斗桌上,轻轻提起裤
子腰边并从外侧用蒸汽喷射。
外罩、毯子、布
这些小件衣物放入柜中时会产生褶痕,
通过在褶痕部位、正面和背面以及内侧
缓慢移动熨斗可以完美地熨平褶痕。
敏感衣物建议使用
Schon
熨斗底部。
(参见配件)
= 抽气功能
0 = 无蒸汽的干燥熨烫(通风功能保持关闭)
= 充气功能
为了能最佳地使用该压力蒸汽熨斗全套系统,我们建议您遵照这些提示:
衬衫
带熨痕的裤子
褶皱连衣裙
男士西服
桌布
....
如果将织物固定在桌子上将不会产生褶痕。
....
使蒸汽更充分地渗透丝线,从而降低所需时间并改善熨烫效果。
....
将多余的蒸汽从蒸汽熨斗桌抽出以方便用户操作。
....
保证清新、潮湿度低的熨衣空间。
....
应保持启动以除去蒸汽熨斗桌和外壳的蒸汽残留。
....
保证熨斗桌干燥并有利于织物在熨烫期间变干。
抽气功能
(蒸汽抽取系统)
优点和建议 特殊应用
非常敏感的材料
丝绸套衫
褶皱(腰边褶皱)
后背的部分
蓬松皱边
带内衬的男士西装
....
保证气垫上的敏感材料和衣物不会产生熨痕。
....
保护敏感的衣物
....
通过涌入的新鲜空气更快的冷却衣物并由此保护织物。
充气功能
通过开/关[3] 可以启动
熨斗桌的通风功能。
7
C停止使用和存放
蒸汽腔在存放时或出于清洁和服务
目的时可以从熨斗桌分离。(参见保
养和护理)
决不能使用尖锐、划刮的物品或腐蚀性化学品进行清洁。
D保养和护理
PRC
将压力蒸汽熨斗全套系统放在为此预
制的防滚动装置 [8] 上,防止滚动或
熨斗桌倾倒!
防滚动装置 [8] 自动运转。此处不是
人工操作的脚刹。
运输保险装置用于固定折叠状态下的
底架。
1.
将熨斗放在蒸汽腔 [14] 的放置处。
通过开/关[10] 关闭蒸汽腔和蒸汽熨
斗。控制灯熄灭。
通过开关 [3] 关闭熨斗桌的通风功能。
2.
将蒸汽腔和蒸汽熨斗桌的输入导管的
两个电源插头 [9] 和[1] 从插座中拔
出。
紧接着让压力蒸汽熨斗全套系统 完全
冷却。
将水箱 [19] 从蒸汽腔拆下、把水倒
空、用水清洗在紧接着重新放回去。
在每次将设备存放起来前都要完全倒
空可拆下的水箱并在下一次使用前倒
入新的水。由此可以延长熨斗蒸汽腔
的寿命并获得最佳的熨烫效果。
3.
将线路支架 [22] 折叠。
蒸汽熨斗应该用系绳 [13] 固定在放置
的位置上。
以大圈缠绕输入导管 [1] 和蒸汽软管
[15],不要挤压或折叠线路!
5.
设备可以在折叠的状态下存放。
用双手握住压力蒸汽熨斗全套系统并
用杠杆 [5] 合上。
清洗蒸汽腔(除钙):
每月简单清洗蒸汽腔一到两次以进行保养。注意以下几点:
•
首先关闭压力蒸汽熨斗全套系统(参见停止运转和存放),
让蒸汽腔和熨斗完全冷却。
•
取下可拆下的水箱。
•
用双手握住蒸汽腔并小心地将位于蒸汽腔底部的两个红色
把手轻轻往两边拉从而把蒸汽腔拉开;紧接着将蒸汽腔向
上提起从设备分离。
•
将水箱后面
/
下面露出的除去钙质开口的盖子拆下,用一枚硬
币打开用于清洁/除去钙质的螺旋塞 [20] 并完全倒空蒸汽腔。
•
借助注水盆通过除去钙质开口往蒸汽腔注入新的水,来回
用力摇晃并再次倒空。
•
重新将螺旋塞 [20] 放入蒸汽腔并用一枚硬币拧紧,同样再
次放入盖子。
•
在清洗完水箱后同样可以除去熨斗的钙质。此时请注入新
的水并在此按照开始运转中的描述启动设备,同时将熨斗
底部的温度调到最低,将熨斗置于一个盆上方,按下蒸汽
按键。
如果从蒸汽喷嘴中流出的是清水,则系统已经去除钙质。
然后将设备再次关闭并在冷却状态下用一条湿布清洁熨斗
底部。
在理想状态下,在使用完系统后将冷凝水防护装置 [21] 的
海绵拧干。
压力蒸汽熨斗全套系统的清洁
•
用湿布擦拭设备的表面。
•
熨斗底部的清洁应按照如下方式进行:
用湿布擦掉表面的污渍。如果湿布无法擦去,我们建议您
使用具有粗糙面的海绵(非金属),您可以用它用力从上到
地清洁熨斗底部。也可以用这种方式除去表面的刮痕。
•
使用一种普通的金属光泽去污剂以除去上浆残余物。
•
必须每月一次除去熨斗桌上的灰尘以保证通风功能。
•
绝不能将设备浸入水中。
保养和护理工作必须始终在设备冷却以及电源插头拔出时才能进行。
在蒸汽腔还烫热时不要打开用于清洁
/
除去钙质的螺旋塞
[20]
!

21
PRC
6
熨烫提示
男式衬衫和混合织物
将衬衫悬挂着从外堵住袖口并用熨斗顶
端从衬衫内侧用蒸汽往衬衫袖充气。纽
扣条始终从左开始熨平。
纯丝绸
充气功能可以用于熨平最敏感的材料
而不会产生问题。我们建议使用熨斗
保护底板以达到最佳的熨烫效果(参见
配件)。
安哥拉羊毛
将蒸汽熨斗置于衣服上方 2-3 cm 处,用蒸
汽喷射后再抖一抖衣服。熨过的衣服将
变得蓬松饱满。
西装裤
启动蒸汽抽取系统,紧接着在熨衣台用
蒸汽喷射腰边。裤腿叠在一起后从一边
开始熨烫。用熨斗顶端轻轻熨平熨痕。
褶皱套衫
不要熨褶皱和接缝线
—
简单地用蒸汽喷
射褶皱就不会产生压平的地方。
牛仔裤
裤腿叠在一起后从一边开始熨烫。内侧
一起熨烫。
干燥的亚麻布/棉
将温度控制器调到 •••级,从而为熨斗
底部供应更多热量。
腰边褶皱裤
将裤子放在蒸汽熨斗桌上,轻轻提起裤
子腰边并从外侧用蒸汽喷射。
外罩、毯子、布
这些小件衣物放入柜中时会产生褶痕,
通过在褶痕部位、正面和背面以及内侧
缓慢移动熨斗可以完美地熨平褶痕。
敏感衣物建议使用
Schon
熨斗底部。
(参见配件)
= 抽气功能
0 = 无蒸汽的干燥熨烫(通风功能保持关闭)
= 充气功能
为了能最佳地使用该压力蒸汽熨斗全套系统,我们建议您遵照这些提示:
衬衫
带熨痕的裤子
褶皱连衣裙
男士西服
桌布
....
如果将织物固定在桌子上将不会产生褶痕。
....
使蒸汽更充分地渗透丝线,从而降低所需时间并改善熨烫效果。
....
将多余的蒸汽从蒸汽熨斗桌抽出以方便用户操作。
....
保证清新、潮湿度低的熨衣空间。
....
应保持启动以除去蒸汽熨斗桌和外壳的蒸汽残留。
....
保证熨斗桌干燥并有利于织物在熨烫期间变干。
抽气功能
(蒸汽抽取系统)
优点和建议 特殊应用
非常敏感的材料
丝绸套衫
褶皱(腰边褶皱)
后背的部分
蓬松皱边
带内衬的男士西装
....
保证气垫上的敏感材料和衣物不会产生熨痕。
....
保护敏感的衣物
....
通过涌入的新鲜空气更快的冷却衣物并由此保护织物。
充气功能
通过开/关[3] 可以启动
熨斗桌的通风功能。
7
C停止使用和存放
蒸汽腔在存放时或出于清洁和服务
目的时可以从熨斗桌分离。(参见保
养和护理)
决不能使用尖锐、划刮的物品或腐蚀性化学品进行清洁。
D保养和护理
PRC
将压力蒸汽熨斗全套系统放在为此预
制的防滚动装置 [8] 上,防止滚动或
熨斗桌倾倒!
防滚动装置 [8] 自动运转。此处不是
人工操作的脚刹。
运输保险装置用于固定折叠状态下的
底架。
1.
将熨斗放在蒸汽腔 [14] 的放置处。
通过开/关[10] 关闭蒸汽腔和蒸汽熨
斗。控制灯熄灭。
通过开关 [3] 关闭熨斗桌的通风功能。
2.
将蒸汽腔和蒸汽熨斗桌的输入导管的
两个电源插头 [9] 和[1] 从插座中拔
出。
紧接着让压力蒸汽熨斗全套系统 完全
冷却。
将水箱 [19] 从蒸汽腔拆下、把水倒
空、用水清洗在紧接着重新放回去。
在每次将设备存放起来前都要完全倒
空可拆下的水箱并在下一次使用前倒
入新的水。由此可以延长熨斗蒸汽腔
的寿命并获得最佳的熨烫效果。
3.
将线路支架 [22] 折叠。
蒸汽熨斗应该用系绳 [13] 固定在放置
的位置上。
以大圈缠绕输入导管 [1] 和蒸汽软管
[15],不要挤压或折叠线路!
5.
设备可以在折叠的状态下存放。
用双手握住压力蒸汽熨斗全套系统并
用杠杆 [5] 合上。
清洗蒸汽腔(除钙):
每月简单清洗蒸汽腔一到两次以进行保养。注意以下几点:
•
首先关闭压力蒸汽熨斗全套系统(参见停止运转和存放),
让蒸汽腔和熨斗完全冷却。
•
取下可拆下的水箱。
•
用双手握住蒸汽腔并小心地将位于蒸汽腔底部的两个红色
把手轻轻往两边拉从而把蒸汽腔拉开;紧接着将蒸汽腔向
上提起从设备分离。
•
将水箱后面
/
下面露出的除去钙质开口的盖子拆下,用一枚硬
币打开用于清洁/除去钙质的螺旋塞 [20] 并完全倒空蒸汽腔。
•
借助注水盆通过除去钙质开口往蒸汽腔注入新的水,来回
用力摇晃并再次倒空。
•
重新将螺旋塞 [20] 放入蒸汽腔并用一枚硬币拧紧,同样再
次放入盖子。
•
在清洗完水箱后同样可以除去熨斗的钙质。此时请注入新
的水并在此按照开始运转中的描述启动设备,同时将熨斗
底部的温度调到最低,将熨斗置于一个盆上方,按下蒸汽
按键。
如果从蒸汽喷嘴中流出的是清水,则系统已经去除钙质。
然后将设备再次关闭并在冷却状态下用一条湿布清洁熨斗
底部。
在理想状态下,在使用完系统后将冷凝水防护装置 [21] 的
海绵拧干。
压力蒸汽熨斗全套系统的清洁
•
用湿布擦拭设备的表面。
•
熨斗底部的清洁应按照如下方式进行:
用湿布擦掉表面的污渍。如果湿布无法擦去,我们建议您
使用具有粗糙面的海绵(非金属),您可以用它用力从上到
地清洁熨斗底部。也可以用这种方式除去表面的刮痕。
•
使用一种普通的金属光泽去污剂以除去上浆残余物。
•
必须每月一次除去熨斗桌上的灰尘以保证通风功能。
•
绝不能将设备浸入水中。
保养和护理工作必须始终在设备冷却以及电源插头拔出时才能进行。
在蒸汽腔还烫热时不要打开用于清洁
/
除去钙质的螺旋塞
[20]
!

22
8
问题和解决方案
在长时间暂停熨烫时水滴从蒸汽熨斗
流出。
在长时间暂停熨烫时蒸汽可能在连接蒸
汽熨斗的输入导管里冷凝。因此在这种
条件下在开始熨烫时会出现一些水珠。
建议:第一二股蒸汽流不要直接对准待
熨的物体。
尽管是蒸汽熨烫也会形成褶皱。
先用蒸汽朝一个方向熨烫,再关掉蒸汽
往回熨烫以“固定”材料。
在熨织物中存在上将残余物(清洗后)
的衣物时您可以通过在“固定”前将衣
物弄得更湿或加大蒸气喷射力度获得良
好的熨烫效果。
蒸汽熨斗只喷出热水。
蒸汽腔过满。将多余的热水以蒸汽形式
排出并倒空蒸汽腔(参见第 9 页的熨斗
提示)此时全套系统必须停止运转。
紧接着往蒸汽腔里注入最多 800-900 ml 水
并再次启动设备。
把手很热。
蒸汽熨斗的把手变热是正常的。但如果
把手热得无法握住,关闭全套系统并咨
询Leifheit 客服。
熨斗启动过快
(压力蒸汽的加热时间缩短)。
往水箱中注入热水(约 800-900 ml)。短时
间后可以用蒸汽熨烫。
蒸汽熨斗没有变热。
检查电源插头是否插入插座以及设备是
否启动。将蒸汽熨斗的温度控制器跳到
规定区域。
如果问题没有解决,请咨询我们的 Leifheit
客服。
压力减小。
在每次启动全套系统时,在按下蒸汽
压力按键后会产生较大量的蒸汽,
在熨烫期间会逐渐减少。这是正常的
过程,并不会影响全套系统的功能。
水溢出。
在冷却时抽气盆里会形成冷凝水。在熨
衣时保证蒸汽持续排出。取走特制熨斗
桌外罩以干燥熨斗桌。过量的蒸汽排放
也会导致水汽增多。
请注意第 9页的熨斗提示:朝一个方向
蒸汽熨烫,反方向无蒸汽熨烫!
持续出现蒸汽。
蒸汽熨斗的压力蒸汽按键被堵住。多次
快速按下按键。如果问题依然存在,请
咨询我们的 Leifheit 客服。
蒸汽熨斗不再产生蒸汽。
检查所有开关是否已开启。确保蒸汽腔
已装水。如果问题依然存在,请咨询我
们的 Leifheit 客服。
配件和信息
由于熨斗压力和灰尘颗粒以及绒毛的粘
附降低了特制熨斗桌布的渗透性,由此
降低了压力蒸汽熨斗全套系统的功率。
特制熨斗桌布 [4] 非常透气。
因此仅使用原装配件。
如果您希望增订配件或了解 Leifheit 压力
蒸汽熨斗全套系统的更多信息,请咨询
您周边的 Leifheit 经销商或通过以下方式
了解:
Leifheit 股份公司
www.leifheit.de
熨斗保护底板
商品代码:76123
电线支架
商品代码:76023
以下配件可以增订:
特制熨斗桌外罩
商品代码:76085/86
126 x 55 cm
9
Leifheit 压力蒸汽熨斗全套系统
Air Active L Professional
生产商保修卡 型号:
姓
名
街道/房间号
邮编/地址
电话
请填写
(见铭牌)
设备号!
购买人签名
保修期的起算时间
是购买凭证上的日期
由取设备的包裹邮递人员填写:
取于
取设备人
签名
19
19

23
8
问题和解决方案
在长时间暂停熨烫时水滴从蒸汽熨斗
流出。
在长时间暂停熨烫时蒸汽可能在连接蒸
汽熨斗的输入导管里冷凝。因此在这种
条件下在开始熨烫时会出现一些水珠。
建议:第一二股蒸汽流不要直接对准待
熨的物体。
尽管是蒸汽熨烫也会形成褶皱。
先用蒸汽朝一个方向熨烫,再关掉蒸汽
往回熨烫以“固定”材料。
在熨织物中存在上将残余物(清洗后)
的衣物时您可以通过在“固定”前将衣
物弄得更湿或加大蒸气喷射力度获得良
好的熨烫效果。
蒸汽熨斗只喷出热水。
蒸汽腔过满。将多余的热水以蒸汽形式
排出并倒空蒸汽腔(参见第 9 页的熨斗
提示)此时全套系统必须停止运转。
紧接着往蒸汽腔里注入最多 800-900 ml 水
并再次启动设备。
把手很热。
蒸汽熨斗的把手变热是正常的。但如果
把手热得无法握住,关闭全套系统并咨
询Leifheit 客服。
熨斗启动过快
(压力蒸汽的加热时间缩短)。
往水箱中注入热水(约 800-900 ml)。短时
间后可以用蒸汽熨烫。
蒸汽熨斗没有变热。
检查电源插头是否插入插座以及设备是
否启动。将蒸汽熨斗的温度控制器跳到
规定区域。
如果问题没有解决,请咨询我们的 Leifheit
客服。
压力减小。
在每次启动全套系统时,在按下蒸汽
压力按键后会产生较大量的蒸汽,
在熨烫期间会逐渐减少。这是正常的
过程,并不会影响全套系统的功能。
水溢出。
在冷却时抽气盆里会形成冷凝水。在熨
衣时保证蒸汽持续排出。取走特制熨斗
桌外罩以干燥熨斗桌。过量的蒸汽排放
也会导致水汽增多。
请注意第 9页的熨斗提示:朝一个方向
蒸汽熨烫,反方向无蒸汽熨烫!
持续出现蒸汽。
蒸汽熨斗的压力蒸汽按键被堵住。多次
快速按下按键。如果问题依然存在,请
咨询我们的 Leifheit 客服。
蒸汽熨斗不再产生蒸汽。
检查所有开关是否已开启。确保蒸汽腔
已装水。如果问题依然存在,请咨询我
们的 Leifheit 客服。
配件和信息
由于熨斗压力和灰尘颗粒以及绒毛的粘
附降低了特制熨斗桌布的渗透性,由此
降低了压力蒸汽熨斗全套系统的功率。
特制熨斗桌布 [4] 非常透气。
因此仅使用原装配件。
如果您希望增订配件或了解 Leifheit 压力
蒸汽熨斗全套系统的更多信息,请咨询
您周边的 Leifheit 经销商或通过以下方式
了解:
Leifheit 股份公司
www.leifheit.de
熨斗保护底板
商品代码:76123
电线支架
商品代码:76023
以下配件可以增订:
特制熨斗桌外罩
商品代码:76085/86
126 x 55 cm
9
Leifheit 压力蒸汽熨斗全套系统
Air Active L Professional
生产商保修卡 型号:
姓
名
街道/房间号
邮编/地址
电话
请填写
(见铭牌)
设备号!
购买人签名
保修期的起算时间
是购买凭证上的日期
由取设备的包裹邮递人员填写:
取于
取设备人
签名

24
10
6.
如果无法进行维修而备件部没有可供
更换的同一型号产品,您将得到一件
价值尽可能相同的替换产品。在保修
情况下不能要求退回购买款项。
7.
如果由未经授权的人员或服务点进
行了维修和设备安装,则不再提供
保修。
8.
此外保修情况下不接受赔偿要求。如
果设备在生产商保修期内用于其他
目的或进行了错误或违反规定的操
作,生产商不对可能出现的损失承担
责任。
9.
保修范围不包括运输损坏。
10.保修期不因保修服务的进行而延长。
该规定同样适用于被更换和维修的
零件。
11.您的法律权利,尤其是产品质量保障
权利仍然继续生效,不会因保修而受
到限制。
12.保修全球有效。
即使在生产商保修期到期后您也可以
要求客服进行维修。(请提前致电客服
协商)。
此外您可以在客服处获得其它熨斗提
示,在可能出现的问题上通过远程诊断
获得建议和帮助。
请注意下列信息:
在需要保修和服务时始终和 LEIFHEIT 的客
服进行联系。
(除了周六日和周五外每天都可以接通)
+49 (0) 1805 782754
使用德国座机 0.14 欧元/分钟
使用移动电话 最高收费为 0.42 欧元/分钟
尊敬的各位客户,
我们的 Leifheit 产品受到严格的质量终端
监控。如果您所购买的压力蒸汽熨斗全
套系统没有如期正常运转或出现了其
他故障需要投诉,请您按如下方式采取
措施:
1.
致电 Leifheit 客服的服务热线并描述所
出现的问题。客服将做出远程诊断
并在必要时和您就进一步措施进行
商讨。
2.
如果需要将压力蒸汽熨斗全套系统寄
给客服以进行检修,请您在寄送时附
上填写好的保修卡和购买凭证的复印
件并让包裹邮递人员签字证明已取
设备。
保修
由于材料和制造问题所提出的由生产
商保修的要求根据以下的保修条件进行
规定:
1. Leifheit 股份公司,Leifheitstraße,56377
Nassau/Lahn,德国,为您提供为期两年
的保修。
2.
保修期的起算时间是购买凭证上的日
期。请您务必保管好购买凭证作为购
买的证明。
3.
您必须在保修期内故障出现后立即提
出保修要求。如果在购买时已经出现
明显的损坏或缺陷必须在拆装后立即
告知。
4.
保修范围包括产品的性能,即仅在出
现由于材料和制造问题造成的故障时
才提供保修。
保修范围不包括:
a)
使用造成或其他自然原因造成的
磨损;
b)
由于不当操作以及处理造成的损
坏(例如敲打、撞击、掉落、暴力
冲击);
c)
由于未注意所给出的操作提示造成
的损坏。
5.
在保修期内由生产商酌情自主决定
免费更换出现故障的零件还是进行
维修。
废弃
如果要扔掉设备必须使其无法再使用(例
如通过将输入导管和插头分离)并根据
现行规定进行处理。
您所在的市镇会告知您
这方面的信息。
请您分类
处理包装!
3
Sistem penyeterikaan stim bertekanan lengkap AirActive L Profesional; Data Teknikal
Bekalan elektrik . . . . . . . . . . . . . . . . .230V ~ 50 Hz
Seterika stim input . . . . . . . . . . . . . . . . . . . . 850 W
Stesen seterika input . . . . . . . . . . . . . . . . . . 1350 W
Tekanan Maksimum . . . . . . . . . . . . . . . . . . 6,5 bar
Stesen stim kapasiti . . . . . . . . . . . lebih kurang 1,0 l
Berat (bila penuh) . . . . . . . . . . . lebih kurang 14 kg
(komponen stesen 4.8 kg)
Isipadu stim . . . . . . . . . . . . . . . . maks.150 g / min
Dimensi . . . . . . . . . . . . . . . . . . . 165 x 55 x 35 cm
Semua angka adalah nilai anggaran!
AGambaran keseluruhan produk
Bahasa Melayu
Isi Kandungan:
Gambaran keseluruhan produk . . . . . . . . . . . . . . 15
Arahan keselamatan . . . . . . . . . . . . . . . . . . . . . . 16
Hidupkan seterika . . . . . . . . . . . . . . . . . . . . . . . . 18
Arahan penseterikaan . . . . . . . . . . . . . . . . . . . . . 19
Petua penyeterikaan . . . . . . . . . . . . . . . . . . . . . . 20
Mematikan dan menyimpan seterika . . . . . . . . . . 21
Penyelenggaraan dan penjagaan . . . . . . . . . . . . . 21
Aksesori dan maklumat . . . . . . . . . . . . . . . . . . . . 22
Masalah dan penyelesaian . . . . . . . . . . . . . . . . . . 22
Prosedur aduan pelanggan . . . . . . . . . . . . . . . . . . 23
Waranti . . . . . . . . . . . . . . . . . . . . . . . . . . . . . . . . 24
. . . . . . . . . . . . . . . . . . . . . . . . . . . . . . . . . . . . . . . .
Versi Bahasa Inggeris =
Arahan pengendalian asal untuk sistem
penyeterikaan bertekanan lengkap
AirActive L Profesional
[1] Papan penyeterikaan stim kabel suapan
[2] Papan penyeterikaan stim soket palam
[3] Suis ON/OFF untuk papan penyeterikaan
(pengekstrakan stim dan fungsi pengumpulan
udara)
[4] Pelindung papan penyeterikaan khas
[5] Hendal untuk menetapkan ketinggian
[6] Pelapik kaki
[7] Lereng-lereng bergetah
[8] Perlindungan lipat simpan
[9] Stesen stim kabel suapan
[10] Suis ON/OFF switch untuk stesen stim dan
seterika stim
[11] Lampu amaran apabila air kurang
[12] Lampu amaran apabila stim ada
[13] Pemegang tali pinggang
[14] Talam stesen seterika dulang dengan nub
silikon
[15] Hos stim
[16] Pengawal suhu
[17] Butang tekanan stim
[18] Lampu amaran seterika
[19] Bekas air boleh alih
[20] Tudung saliran air dan bolt mengunci
[21] Perlindungan titisan air tumpat
Aksesori
[22] Pemegang kabel
[23] Arahan pengendalian
Kepada pelanggan,
Tahniah kerana membeli sistem penyeterikaan stim bertekanan lengkap AirActive L Professional Leifheit!
Anda telah membuat pilihan yang bijak, kerana memilih untuk membeli sistem lengkap yang bakal memudah-
kan penyeterikaan anda. Sila baca arahan penggunaan dengan teliti sebelum menggunakan sistem lengkap ini.
Ia akan membantu anda dalam mengendalikannya dengan betul sejak mula tanpa melakukan sebarang
kesilapan.
Berikan lebih perhatian kepada arahan keselamatan yang disediakan di dalam arahan pengendalian.
Kami sangat berharap supaya anda berpuas hati dengan sistem penyeterikaan stim bertekanan
lengkap AirActive L Professional
Jika anda ada sebarang soalan atau komen tentang produk ini, sila hubungi kami.
Pasukan Leifheit tidak sabar untuk membantu anda.
Salam mesra,
Pasukan Leifheit Anda
Sila ambil maklum bahawa produk ini hanya untuk kegunaan di rumah. Leifheit tidak
menyediakan jaminan pengilang untuk kegunaan komersial (contohnya dobi, studio jahit, tukang jahit dsb...).
Sila pastikan anda membaca dengan teliti arahan pengendalian sebelum digunakan dan menyimpannya untuk
rujukan masa hadapan! Beri perhatian khusuu pada nota keselamatan!
Westendstraße 2 A
D-35753 Greifenstein
+49 (0) 180 5782754
+49 (0) 180 5546378
MY
Other manuals for Air Active L Professional
1
Table of contents
Languages:
Other Leifheit Iron manuals

Leifheit
Leifheit Air Active L User manual

Leifheit
Leifheit AirActive M Express User manual

Leifheit
Leifheit AirActive M User manual

Leifheit
Leifheit Air Active M User manual

Leifheit
Leifheit AirActive L Steamer User manual

Leifheit
Leifheit Air Flow M Solid Plus User manual

Leifheit
Leifheit Air Active L Professional User manual

Leifheit
Leifheit Air Active M User manual