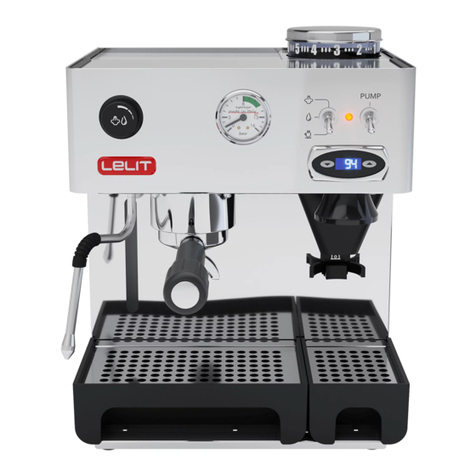
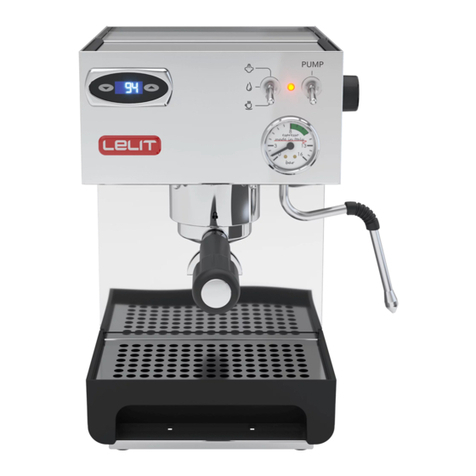
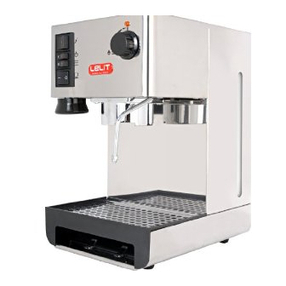
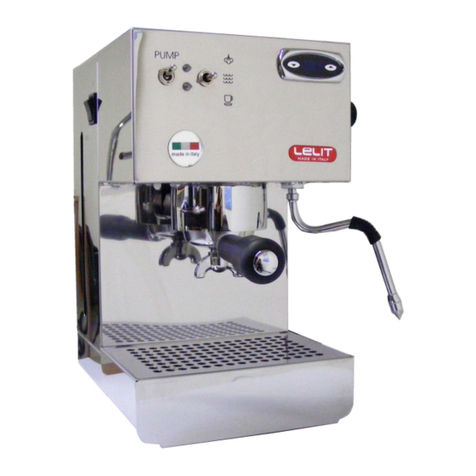
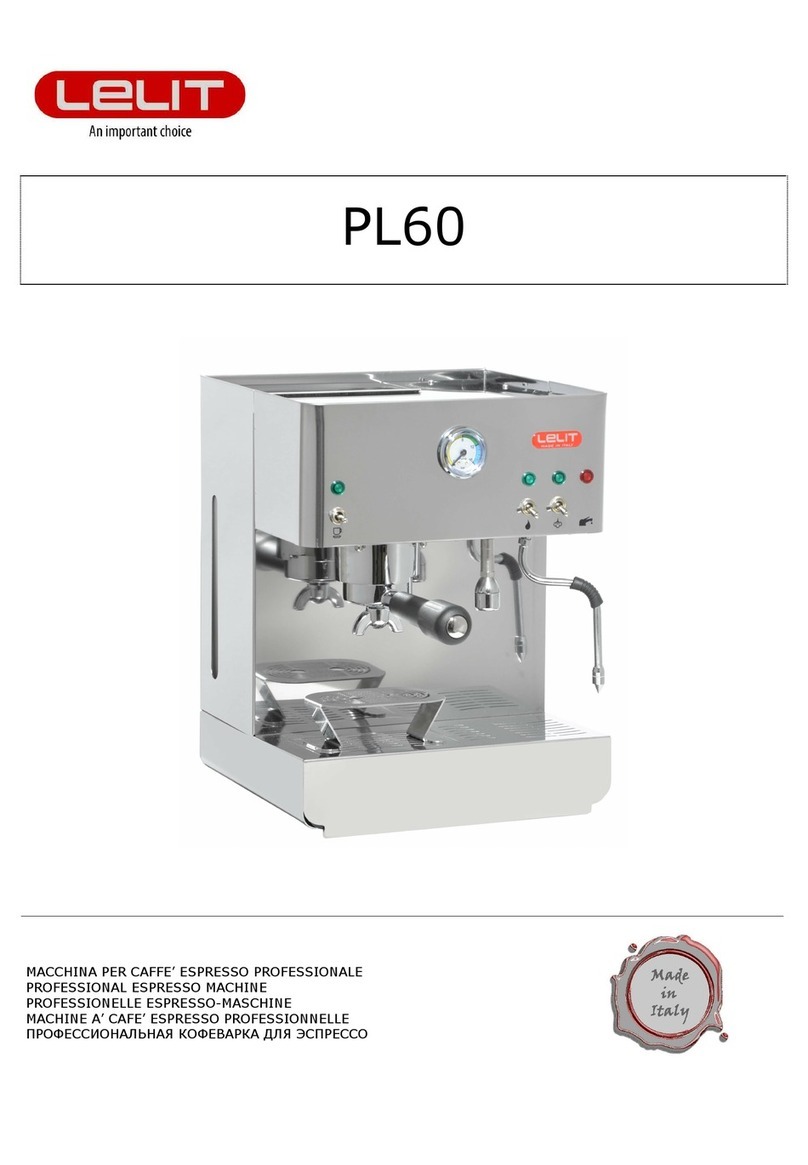
Lelit PL042TEMD User manual

PL042TEMD
SPRESSOE
КОФЕВАРКА
ПАРА И КОФЕДЛЯ
PID
И КОФЕМОЛКОЙ ВСТРОЙНОЙ СО ЭСПРЕССО
PIDDOUBLEAND GRINDER BUILT-IN WITH MACHINE

Pag. 9
English
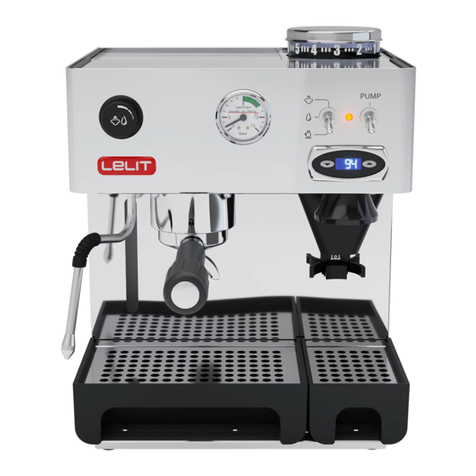
COMPONENTS :
1. Cold water tank
2. Cup warmer
3. \
4. Steam/hot water knob
5. Strainer holder retaining ring
6. Steam/hot water tube
7. Removable cup rest
8. Strainer holder
9. Single cup strainer
10. Two cup strainer
11. On/off switch
12. \
13. Coffee/hot water/steam lever switch
14. Indicator light: machine ready
15. Coffee press
16. \
17. Coffee beans container
18. Filter for pods
19. Removable water drainage tray
20. Removable ground coffee tray
21. Ground coffee switch
22. Grinding degree scale
23. Grinding regulation knob
24. Ground coffee distributor
25. Manometer
26. Pump lever switch
27. Double PID
GENERAL WARNINGS
This manual is an integral and essential part of the product. Please read all these warnings carefully as they
provide important information on safe installation, use and maintenance. These instructions should be carefully
retained for future reference.
- This appliance can be used by children aged from 8 years and above and persons with reduced physical, sensory or mental
capabilities or lack of experience and knowledge if they have been given supervision or instruction concerning use of the
appliance in a safe way and understand the hazards involved. Children shall not play with the appliance. Cleaning and user
maintenance shall not be made by children without supervision.
- This appliance can be used by children aged from 8 years and above if they have been given supervision or instruction
concerning use of the appliance in a safe way and if they understand the hazards involved. Cleaning and user maintenance
shall not be made by children unless they are older than 8 and supervised. Keep the appliance and its cord out of reach of
children aged less than 8 years.
- Appliances can be used by persons with reduced physical, sensory or mental capabilities or lack of experience and knowledge
if they have been given supervision or instruction concerning use of the appliance in a safe way and understand the hazards
involved. Children shall not play with the appliance.
- This appliance is intended to be used in household and similar applications such as: staff kitchen areas in shops, offices and
other working environments; farm houses; by clients in hotels, motels and other residential type environments; bed and break-
fast type environments.
- The appliance is only designed for making espresso coffee or hot drinks using the hot water or steam tubes and for pre-
heating cups.
- Store the packaging material (plastic bags, polystyrene, etc.) out of the reach of children.
- The appliance is only designed for making espresso coffee or hot drinks using the hot water or steam wands and for pre-
heating cups.
- Any use other than that described above is improper and could be ha-zardous; the manufacturer accepts no liability whatso-
ever for any damage arising from improper use of the appliance.
- This appliance is not intended for use by persons (including children) with reduced physical, sensory or mental capabilities,
or lack of experience and knowledge, unless they have been given supervision or instruction concerning use of the appliance
by a person responsible for their safety.
- Children must not be allowed to play with the appliance.
- The appliance must not be left unattended or used outdoors.
- The appliance should not be immersed in water or cleaned by spraying
- The appliance must not be exposed to atmospheric agents (rain, sun, ice).
- If the appliance is stored in rooms where the temperature can go below freezing, the tank and the water pipes must be
emptied.
- All the packing material (plastic bags, polystyrene, etc.) should be keep out of the reach of children.
- No liability is accepted for the use of unauthorized spares and/or accessories.
- No liability is accepted for repairs not carried out by authorized service centres.
- The manufacturer accepts no liability for tampering with any of the appliance components.
In all the above cases the warranty will be void.

Pag. 10
English
ESSENTIAL SAFETY WARNINGS
As with all electrical appliances, the risk of electric shock cannot be excluded, therefore, the following safety
warnings should be carefully observed.
To avoid spilling the connector, never pull the power cord.
- Always attach plug to appliance first, then plug cord into the wall outlet.
- To disconnect the appliance, turn any control to “off”, then remove plug from wall outlet.
- In the event of any fault or malfunction, do not attempt to carry out repairs. Switch the appliance off, remove the plug and
contact the Service Centre.
- In the event of damage to the plug or the power cord, do not operate the appliance, these should be replaced only and
exclusively by the Service Centre.
- Unplug from outlet when not in use.
- Before cleaning the exterior surfaces of the appliance, putting on or taking off parts, switch it off, remove the plug from the
outlet and allow to cool.
- To reduce the risk of injury do not drape cord over the counter top or table top where it can be pulled on by children or tripped
over unintentionally.
- Do not let cord touch hot surfaces.
- Do not let cord hang over edge of table or counter.
- The use of accessory attachments not recommended by the appliance manufacturer may result in fire, electric shock or injury
to persons.
- Do not place on or near a hot gas or electric burner, or in a heated oven.
- Before switching on, ensure that the power supply voltage corresponds to that indicated on the plate on the base of the
appliance and that the power supply is properly earthed.
- Do not tamper with the appliance. Contact an authorized technician or the nearest service centre for any problem.
- Do not touch the appliance if your hands or feet are wet.
- Do not touch the plug with wet hands.
- Ensure that the electrical outlet is always freely accessible so that the plug can be easily removed when necessary.
- When removing the plug, always hold it directly. It should never be removed by pulling on the power cord, as this can cause
damage.
- To protect against fire, electric shock and injury to persons do not immerse cord, plugs in water or other liquid.
- Avoid splashing or dripping water since this can dampen electrical elements, plugs, sockets and machine cables.
- Do not use adapters, multiple so-ckets or extension cords. If their use is unavoidable, use simple adapters or multiple sock-
ets and extension cords that conform to current safety standards, taking care not to exceed the current limit marked on the
simple adapter or extension cord, or the ma-ximum capacity of the multiple socket.
WARNING ABOUT BURN/SCALD RISKS
This appliance produces hot water and steam; therefore, the following safety warnings should be strictly ob-
served
- Warning: hot surfaces remain hot for a certain time also after use.
- Take care to avoid contact with water spray or jets of steam.
- When the appliance is switched on, do not touch the cup warming plate as it is hot.
- Never direct the steam or water spray towards your body.
- Be careful when touching the steam/ hot water dispensing wand (6).
- Never remove the filter holder (8) during operation.
- The parts labelled “CAUTION HOT” are very hot, so approach and ope-rate them with maximum caution.
- Only place cups and glasses for use with the coffee machine on the cup warmer (2). Other objects should not be placed there.
- Dry the cups thoroughly before pla-cing them on the cup warmer (2).
Pag. 11
English
USER INSTRUCTIONS
Starting the machine:
1. Remove the machine from its packing and make sure all packing parts have been taken off (including the
protection bags).
2. Lay the machine on a flat and steady surface far away from hot places and from the water taps.
3. Remove the water tank cover on the back of the machine and take out the water tank (1) paying attention
not to damage the water tubes inside it.
4. Fill the tank (1) with cold water.
5. Replace the water tank back in the machine and check that the water tubes are not bent and that the filter
is well set on one of them.
6. Plug in the machine in the mains. Make sure that the wall socket is of the right voltage.
7. Place the filter holder (8) under the brewing group (5) and turn it from the left to the right. Leave it there
so that it can get warm and it gets ready for use.
8. Switch the machine on by pressing the on/off switch (11). The integrated indicator light comes on to confirm
the power supply.
9. Open the steam/hot water knob (4).
10. Position the lever switch (13) on coffee mode and press the pump switch (26).
11. When water comes out of the steam nozzle (6), push the pump switch down (26) and close the steam/hot
water knob (4).
12. After completing all these operations, leave the machine on.
13. The PID (27) will visualize the degrees inside the boiler and will control the boiler’s heating.
14. The PID is already set from the producer on 95°C for coffee mode, i.e. the ideal temperature for a good cup
of coffee. (If you want to change the PID’s temperature, please follow the instructions written under How
to set the temperature inside the boiler by means of the PID).
Grinding adjustment:
15. As a reference for the grinding degree, a grinding degree scale (20) has been placed on the coffee beans
container (19): “7.6.5.4.3.2.1”
16. By taking as a point of reference the tally mark in the machine frame and by turning grinding regulation
knob (23), the grinding degree scale will turn accordingly.
17. Choose higher degrees to get coarse-ground coffee, or smaller degrees to get fine-ground coffee.
18. A correct grinding degree (taking into consideration the various coffee blends) is essential to get a good cup
of coffee. We suggest degree 3 to get a medium grinding.
Preparing an espresso coffee:
19. Check that the tank (1) contains water by looking at the water level indicator.
20. Press the on/off switch (11): the indicator light of the switch (11) will come on. Do this operation only if the
machine is off. If it’s on pass to the following point.
21. As soon as the PID’s display shows the set temperature and the indicator light (14) goes on, the machine
is ready for use.
22. Place the single cup strainer (9) or the two-cup strainer (10) in the strainer holder (8) as described in point
7.
23. Drop the bean coffee in the bowl (17)
24. Press the button (21) with the strainer holder (8) to activate the coffee grinder. When you have got the
desired coffee quantity, take the strainer holder (8) off.
25. Pack the coffee in the strainer against the press (15).
26. Insert the strainer holder (8) in the retaining ring (5) and turn it hard to the right; place the cups on the
removable cup rest (7).
27. Position the lever switch (13) on coffee mode and lift up the pump switch (26). The manometer (25) will
show the reached pressure, between 8 and 14 bar.
28. Once you get the desired quantity of coffee, push the pump switch (26) down again.
29. Remove the filter holder (8) and throw away the coffee grounds. Make sure that the filter holder is clean
and reposition it in the brewing group to warm up again.

Pag. 12
English
Preparing an espresso with the use of coffee pods:
30. Check that the water tank (1) has been filled in with water by looking at the water level indicator.
31. Press the on/off switch (11): the indicator light of the switch (11) will come on. Do this operation only if the
machine is off. If it’s on pass to the following point.
32. As soon as the PID’s display shows the set temperature and the indicator light (14) goes on, the machine
is ready for use.
33. Fit the pod filter (18) into the strainer holder (8) that has been warmed up by leaving it attached to the
brewing group as described in point 7.
34. Open the single packed pod not damaging the pod.
35. Place the pod in its filter (18).
36. Insert the strainer holder (8) in the brewing group ring (5), turn it from left to right with force, then put the
cup on the removable water drainage tray (7).
37. Position the lever switch (13) on coffee and lift the pump switch (26). The manometer (25) will show the
reached pressure, between 8 and 14 bar.
38. Once you get the desired quantity of coffee, push the pump switch (26) down again.
39. Remove the strainer holder (8) and throw away the used pod.
Steam:
40. Check that the water tank (1) has been filled in with water by looking at the water level indicator.
41. Press the on/off switch (11): the indicator light of the switch (11) will come on. Do this operation only if the
machine is off. If it’s on pass to the following point.
42. Position the lever switch (13) on steam mode. NB: the PID’s display will automatically show the writing STE
and alternatively the set temperature degree for steam. The PID is already set from the producer on 125°C,
i.e. the ideal temperature for steam distribution. (If you want to change the PID’s temperature, please follow
the instructions written under How to set the temperature inside the boiler by means of the PID).
43. As soon as the light (14) goes on, the machine is ready for use.
44. Open the steam/hot water knob (4). First some water will flow out and then the steam.
45. Put the cup with the desired infusion under the steam tube (6) and turn the knob (4) completely.
46. When the drink has been suitably frothed, close the steam/hot water knob (4).
47. IMPORTANT: after you have frothed your milk, reopen the steam/hot water knob (4) and position the
steam switch (13) on hot water, and lift the pump switch up (26). When the water flows out of the steam
tube (6), close the steam/hot water knob (4) again and at the same time push the pump switch down (26)
and re-position the switch (13) on coffee again. Clean carefully the steam/hot water tube (6). This operation
is needed in order to restore the water circuit inside the machine’s tubes.
Hot water:
48. Check that the water tank (1) has been filled in with water by looking at the water level indicator.
49. Press the on/off switch (11): the indicator light of the switch (11) will come on. Do this operation only if the
machine is off. If it’s on pass to the following point.
50. Position the lever switch (13) on hot water mode.
51. As soon as the PID’s display (27) shows the set temperature and the indicator light (14) goes off, the
machine is ready for use.
52. Open the steam/hot water knob (4) and lift the pump switch (26).
53. Hot water will flow out from the steam arm (6) immediately.
54. Once you have got the desired quantity of water, repress the switch (26) and close the steam/water knob
(4).
55. After obtaining hot water from the arm (6), make sure that there is still water in the tank (1).

Pag. 13
English
HOW TO SET THE BOILER’S TEMPERATURE BY MEANS OF THE PID:
The PID has been set by the producer of this machine on a temperature of 95°C for coffee mode and on 125°C
for steam mode. In order to change the temperatures please proceed as follows:
-press the button once: the display will show the writing “t1”that refers to the coffee thermostat set
on 95°C
-press the button twice: the display will show the writing “t2”that refers to the steam thermostat
set on 125°C
-as soon as the display shows the writing t1 or t2 press the button to change the previously set
temperature. NB: in order to change the temperature’s value it’s necessary to press the button
first and only afterwards you can help yourself with the buttons and in order to set the
desired temperature, decreasing or increasing it.
-after 3 sec. from pressing the last button, the inserted temperature is memorized and the display shows
the set temperature for coffee or steam.
-the temperature’s value can be set starting from a min. of 80C° up to a max. of 130C° for coffee mode
and from a min. of 120°C up to a max. of 140°C for steam mode. NB: the display will flash while changing
from steam mode to coffee mode and it will automatically stop only after reaching the set temperature for
coffee mode.
Useful Tips:
−The strainers (9 and 10) do not need to be washed after every single use but we suggest checking that
the holes are not obstructed.
−For a better result, we suggest keeping the cups warm on the cup-warmer (2) which only operates by
machine on.
−The PID (27) is already set by the producer on the right temperature for an excellent espresso and a
constant steam distribution. During heating and coffee or water distribution, the temperature can oscillate
(+/- 10/12°C). Also, a warning has been inserted for coffee mode (t1): after 108°C the PID’s display shows
the temperature but intermittently; this is normal and it warns the user that the temperature is too high
for a good espresso.
CLEANING AND MAINTENANCE
Cleaning and maintenance of the machine are essential for the quality of the coffee and the durability of the
appliance.
The machine must be cleaned at least once a week.
Before starting, remove the plug from the electrical outlet and allow the machine to cool.
Use a soft cloth, preferably microfiber, like the Lelit cloth (code MC972 - not included), and moisten
it with plain water. Do not use abrasive detergents and do not immerse the machine in water.
For thorough maintenance, we suggest you use the Lelit brush (code PL106 - not included), which will help you
clean the nozzles and the spaces between the ga-skets more effectively, removing stains and coffee residues
from even the smallest cracks.
Warm running water can be used to clean the removable parts of the machine. The filters and filterholder should
never be washed in a dishwasher.
There is no need to clean the filters after each use, but just to ensure they are not clogged.
However, to ensure the best performance from your machine, it is essential to thoroughly clean the steam wand
and filterholder after each use.
The filterholder should be cleaned to remove the greasy coffee residues that can negatively affect the taste of
your espresso.
Wash the exterior part of the steam wand with a damp cloth and release a little steam to remove any milk
residues from inside the tube, as these could obstruct the steam output, making it more difficult to froth milk
properly.

Pag. 14
English
BACKFLUSHING:
It is recommended to perform this cleaning at least once a week and / or at least every 100 brewed coffees
The following instructions apply to all types of groups fitted to our espresso machines.
Material needed:
•Blind filter (code MC002/C for portafilters with 57mm diameter)
•Brush (code PL106)
•Detergent powder for espresso machine (code PL103)
Group cleaning. Follow these steps:
1. Place the blind filter in the portafilter
2. Add 1 tea spoon of detergent powder (3-5 grams) in the blind filter
3. Insert the portafilter into the brewing group
4. Switch the espresso switch on for about 10 seconds
5. Stop the espresso brewing and wait for 10 seconds
6. Without removing the portafilter, repeat this operation 5 times
7. Remove the portafilter, switch the espresso switch on again and rinse the portafilter under the hot wa-
ter that comes out of the group. Turn the switch off
8. Clean the brew group and the brew gasket first with the brush and then with a damp cloth in order to
remove all coffee powder rests
9. Insert the portafilter into the brew group again and repeat points 4-5-6 without detergent powder
10. Throw away the first espresso you’ll brew
Cleaning of the accessories through immersion. Follow these steps:
1. Place the filters and portafilter in a jug with the portafilter handle upwards
2. Pour 3 tea spoons of detergent powder in the jug (10 grams)
3. Pour 1 liter of hot water in the jug until the metallic part of the portafilter is completely immerged
4. Wait at least 15 minutes
5. Remove the immerged parts and rinse them with plenty of warm tap water
6. Throw away the first espresso you’ll brew
DESCALING THE MACHINE
Use of the machine creates a natural formation of lime scale, over a time period depending on how frequently
the machine is used and on the hardness of the water.
Lime scale deposits can obstruct the tubes and decrease the brewing temperature, altering the quality of the
coffee and reducing the lifetime of your machine.
To avoid the formation of limescale, which can also deposit in the internal circuits, we recommend the use of our
Lelit resin filter (code MC747 - MC747PLUS - not included) to soften the water. Please insert the filter in the tank
following the instructions on the packaging. The filter purifies the water from the calcium and magnesium salts
which are deposited to form lime scale and affect the taste of your coffee. Remember that the filter loses its
effectiveness after a certain number of gallons treated, so replace it periodically. Instructions for the use and
replacement of the filter are given on the box.
To avoid any possibility of damaging the machine’s components, ADD ONLY NATURAL DESCALING PRODUCTS
INTO THE WATER TANK.
TECHNICAL DATA:
Voltage: 230 V - 50 Hz; PL042TEMD-120: 120v: 60Hz -- Power: 1200 W
Pump pressure: 15 bar -- Heating time: ca. 3 min.
PID regulation: from min 80° C to max 130° C for the coffee mode;
from min 120° C to max 140° C for the steam mode
Water tank: 2.7 litres
Dimensions: 31,5*25*37 cm
Weight: 10.2 kg
To be operated with ground coffee and coffee pods

Pag. 15
English
TROUBLESHOOTING:
Dear Customer,
We thank you for buying one of our products, made in accordance with the most up-to date technological innovations.
Following carefully the simple operations of use contained in this manual, which comply with essential safety regulations, you
will get the best performances and notice the remarkable reliability of this product along the years.
You find here below an easy table describing some malfunctioning of the machine with its solutions:
PROBLEM
CAUSE
SOLUTION
Coffee is produced
without “cream”.
1. Coffee not suitable for machine
2. Improper grind
3. Too little coffee in filter
4. The filter holder has not be tightened
under the brewing group ring
1. Use different coffee
2. Adjust coffee grind
3. Put more coffee in the filter
4. Tighten better the filter holder
Coffee too cold
1. The machine had not reached the
proper temperature
2. Filter-holder not preheated
3. Cups not preheated
4. Pressure switch malfunction.
1. See section “Starting the Machine” and “Making an
Espresso Coffee”
2. Filter-holder must be heated together with the wa-
ter –see section “Starting the Machine”
3. Properly heat the cups on the cup-warmer
4. Contact the nearest SERVICE CENTER
Coffee produced too
quickly
1. Coffee too coarsely ground
2. Not enough coffee in the filter
3. Coffee not pressed enough
4. Coffee/pod old or unsuitable
1. Use a finer grind
2. Put more coffee in the filter
3. Press coffee more firmly
4. Use different coffee/pod
Coffee leaks be-
tween the coffee
group and the filter-
holder
1. Filter-holder not properly inserted
2. Too much coffee in the filter
3. Edge of the filter-holder not clean
4. The douche seal is worn or damaged
1. Insert the filter-holder correctly
2. Put less coffee in the filter
3. Clean the edge of the filter-holder
4. Contact the nearest SERVICE CENTER
Coffee is produced in
drops
1. Coffee too finely ground
2. Too much coffee in the filter
3. Coffee too firmly pressed
1. Use a coarser grind
2. Put less coffee in the filter
3. Press the coffee more gently
The machine does
not produce steam
1. Obstructed outlet hole at end of steam
pipe
2. Too little water in tank
1. Clean the outlet hole with a needle
2. See section “Starting the Machine”
No coffee produced
during the coffee cy-
cle
1. Too little water in tank
2. Steam switch on
3. Coffee too finely ground
4. Too much coffee in the filter
5. Coffee too firmly pressed
6. Shower plate obstructed
1. Fill tank
2. Turn off the steam switch
3. Use a coarser grind
4. Put less coffee in the filter
5. Press the coffee more gently
6. Contact the nearest SERVICE CENTER
The machine does
not work and the ON
light does not go on
1. No electricity
2. The main cable is not properly plugged
in
3. The main cables damaged
1. Restore electrical power
2. Plug the main cable in correctly
3. Contact the nearest SERVICE CENTER for a replace-
ment cable
The ON light is on
and the steam light
does not go off after
10 minutes
1. Thermostat malfunction,
2. Heating element malfunction
1. Contact the nearest SERVICE CENTER
2. Contact the nearest SERVICE CENTER
The inserted data and pictures can be subject to changes without previous notice for the improvement of the machine’s per-
formances.
LEGAL WARRANTY
This product is covered by the warranty laws valid in the country where the product has been sold; specific information about
the warranty terms can be given by the seller or by the importer in the country where the product has been purchased. The
seller or importer is completely responsible for the product.
The importer is completely responsible also for the fulfillment of the laws in force in the country where the importer distributes
the product, including the correct disposal of the product at the end of its working life.
Inside the European countries the laws in force are the national laws implementing the EC Directive 44/99/CE.

Pag. 30
Русский
КОМПОНЕНТЫ:
1. Контейнер для воды
2. Платформа для подогрева чашек
3. \
4. Регулятор подачи горячего пар/вода
5. Место установки фильтродержателя
6. Трубка выдачи горячей воды/пара
7. Съемный поддон
8. Фильтродержатель
9. Фильтр на 1 порцию
10. Фильтр на 2 порции
11. Общий выключатель “on/off”
12. \
13. Рычаг включатель «вода/пар/кофе»
14. Сигнальная лампочка: кофеварка готова кработе
15. Прессователь-темпер
16. \
17. Контейнер для кофе взернах
18. Фильтр для таблетированного кофе
19. Съемный поддон для слива воды
20. Съемный поддон сбора молотого кофе
21. Кнопка включения кофемолки
22. Обозначение степени помола
23. Регулятор степени помола кофе
24. Контейнер выдачи молотого кофе
25. Манометр
26. Рычаг выключатель насоса
27. Двойной PID на кофе/пар
Общие указания
Настоящее руководство является неотъемлемой исоставной частью изделия. Внимательно прочитайте
руководство, так как оно содержит важные указания, относящиеся кбезопасности устройства, его
эксплуатации иобслуживанию. Сохраните руководство для обращения вбудущем.
- Храните упаковочные материалы (пластиковые пакеты, пенопласт ит.д.) внедоступном для детей месте.
- Устройство предназначено исключительно для приготовления кофе эспрессо, горячих напитков спомощью горячей
воды или пара, для подогрева чашек.
- Любая эксплуатация, отличная от описанной выше, является эксплуатацией не по назначению иможет представлять
опасность.
- Это устройство предназначено для бытового ианалогичного применения, например: персоналом кухни вмагазинах,
офисах идругих рабочих местах; сообществом, клиентами вотелях, мотелях идругих жилых помещениях; вместах типа
«ночлег изавтрак» ит.п. Оно не предназначено для непрерывного, професионального применения.
- Храните устройство ишнур внедоступном месте длядетей.
- Предупреждения оненадлежащей эксплуатации.
- Не устанавливаете устройство вместах где может быть струя воды.
- Устройство может быть использовано людьми сограниченными физическими, сенсорными или психическими
недостатками, или при отсутствии опыта изнаний только под присмотром, или после ознакомления спринципами
безопасного использования устройства иинформацией осуществующих опасностях.
- Устройство может быть установлено только там, где есть люди, которые знают иимеют опыт относительно его
безопасности игигиены.
- Производитель не несет ответственности за несанкционированное вмешательство вкакой-либо из компонентов
устройства.
- Чистка итехническое обслуживание не должны проводиться детьми без присмотра.
- Любая эксплуатация, отличная от описанной выше, является эксплуатацией не по назначению иможетпредставлять
опасность; производитель не несет ответственности за ущерб, причиненный врезультате ненадлежащей эксплуатации
устройства.
- Производитель не несет ответственности за использование неоригинальных запасных частей и/или аксессуаров.
- Производитель не несет ответственности за ремонт, выполненный неуполномоченными сервисными центрами.
- Запрещается оставлять устройство без присмотра ипользоваться им вне помещения.
- Не допускайте нахождения прибора под воздействием атмосферных явлений (дождь, солнце, мороз).
- Если устройство хранится впомещениях, где температура может упасть ниже точки замерзания, опорожните бойлер и
трубки циркуляции воды.
- Не мойте устройство под струей воды ине погружайте его вводу.
При нарушении всех вышеперечисленных указаний гарантия теряет свою силу.

Pag. 31
Русский
Общие требования кбезопасности
Так как устройство работает от электричества, не исключена опасность поражения электрическим током,
поэтому следует внимательно относиться кприводимым ниже указаниям по технике безопасности.
- Перед включением убедитесь, что величина напряжения сети соответствует напряжению, указанному на шильде ичто
розетка, оснащена заземлением.
- Не вскрывайте устройство. Вслучае какой-либо проблемы, пожалуйста, обратитесь кавторизованному сервисному
персоналу или ближайшему сервисному центру.
- Никогда не прикасайтесь кустройству мокрыми руками или ногами.
- Не прикасайтесь квилке питания мокрыми руками.
- Убедитесь, что обеспечен удобный доступ крозетке, так, как только вэтом случае можно быстро вытащить вилку в
случае необходимости.
- Если вы хотите вытащить вилку из розетки, прилагайте силу непосредственно кней, ане кпроводу. Никогда не тяните
за провод, это может привести кего повреждению. Чтобы полностью отключить устройство, отключите его от
электрической розетки.
- Вслучае неисправностей, не пытайтесь устранить их самостоятельно. Выключите устройство, вытащите вилку из
розетки иобратитесь вслужбу технической помощи.
- Вслучае повреждения электрической вилки или шнура, их должна заменять исключительно служба технической
поддержки.
- Не используйте адаптеры, тройники и/или удлинители. Если их использование абсолютно необходимо, следует
использовать только простые или множественные переходники иудлинители, соответствующие действующим стандартам
безопасности, следя за тем, чтобы не превышать величину тока, указанную на простом переходнике иудлинителе, и
совокупную величину тока, указанную на множественном переходнике.
- Вытащите вилку из розетки, если устройство находится без присмотра, во время монтажа, разборки или чистки.
- Избегайте брызг или капель воды, которые могут ослабить электрические элементы, вилки, розетки икабели машины.
- Во избежание риска травмы, не допускайте, чтобы шнур питания свободно свисал со стола, ине допускайте его
нахождения вблизи горячих поверхностей, острых или режущих предметов.
Предупреждения об опасности ожогов
Данное устройство производит горячую воду ипар, поэтому необходимо тщательно соблюдать приводимые
ниже указания по технике безопасности.
- Следите за тем, чтобы на вас не попадали брызги воды или струя пара.
- При работе устройства не прикасайтесь кнагреваемым поверхностям.
- Никогда не направляйте струю пара или горячей воды на части тела.
- Осторожно выполняйте манипуляции струбкой для выпуска пара/ горячей воды (6).
- Никогда не снимайте фильтродержатель (8) во время выпуска кофе.
- Детали, отмеченные этикеткой «ОСТОРОЖНО ГОРЯЧО», очень горячие, работать сними нужно смаксимальной
осторожностью.
- Устанавливайте на поверхность для подогрева чашек (2) только чашки, кружки истаканы для работы скофеваркой.
Не допускается установка других предметов на поверхность для подогрева чашек.
- Устанавливать на поверхность для подогрева чашек (2) нужно только сухие чашки.

Pag. 32
Русский
ИНСТРУКЦИЯ ПО ИСПОЛЬЗОВАНИЮ:
Подключение иналадка функционирования кофеварки
ВНИМАНИЕ покупателей из России: кофеварки, поставляются сбойлерами полностью освобожденными от воды, в
связи склиматическими условиями; для того, чтобы избежать перегрева нагревательного элемента, после
подключения кофеварки бойлер нужно сразу заполнить водой, для этого выполняйте пункты 8-11 немедленно без
перерыва!
1. Достаньте кофеварку для приготовления кофе эспрессо из коробки иосвободите все предметы воснащении от
полиэтиленовой упаковки.
2. Установите электроприбор на прочной горизонтальной поверхности вдали от источников тепла иводоснабжения.
3. Снимите крышку контейнера для воды, установленную сверху кофеварки. Осторожно выньте контейнер для воды
(1) из кофеварки, контролируя сохранность трубочек, находящихся внутри него.
4. Наполните контейнер (1) холодной водой.
5. Вставьте контейнер (1) вего место расположения вкофеварке, контролируя, чтобы трубочки не погнулись ифильтр,
установленный на краю одного из них, был прочно закреплен.
6. Вставьте вилку шнура электропитания вэлектророзетку (проверьте напряжение).
7. Вставьте фильтродержатель (8) вкольцо сцепления вместе установки фильтродержателя (5), поворачивая слева
направо. Таким образом, он подогреется исократит время готовности киспользованию.
8. Включите электроприбор, нажав на кнопку общего выключателя (11). Световая индикация кнопки общего
выключателя подтверждает наличие электроснабжения.
9. Откройте регулятор подачи горячего пара/воды (4).
10. Переключите выключатель рычага (13) на рисунок «кофе» ипереключите насос вверх (26).
11. Когда вода выйдет из паровой трубки (6), переключите насос вниз (26) изакройте регулятор пара (4).
12. Проделав вышеуказанные операции, кофеварка может быть оставлена включенной.
13. PID –температурный контроль бойлера (27), будет отображать иуправлять температурой вбойлере.
14. PID уже установлен производителем на 95°C, это идеальная температура для лучшего эспрессо (если Вы хотите
изменить температуру PID, пожалуйста, следуйте за инструкциями, написанными под разделом: «как изменить
температуру вбойлере, используя PID»).
Регулировка степени помола кофе:
15. На контейнере для кофе взернах (17) имеется этикетка (22), сномерами, которые служат ориентиром степени
помола кофе: «.7.6.5.4.3.2.1»
16. Взяв как исходное засечку, находящуюся на корпусе кофеварки, нужно повернуть регулятор степени помола (23),
масштаб степени размола повернется соответственно.
17. Выберите более высокие степени помола для получения грубого помола кофе или меньшие степени помола для
мелкого помола кофе.
18. Чтобы получить хороший кофе «эспрессо», очень важно правильно отрегулировать степень помола. Также
необходимо отрегулировать степень помола взависимости от различных типов кофе, присутствующих на рынке. Мы
рекомендуем степень помола №3.
Приготовление кофе эспрессо:
19. Убедитесь, что вконтейнере (1) есть вода, проверяя ее уровень через специальное окошко контроля уровня воды.
20. Включите электроприбор, нажав на кнопку общего выключателя (11): световая индикация кнопки общего
выключателя подтверждает наличие электроснабжения. Проделайте эту операцию, только втом случае, если машина
была выключена. Если она была уже включена, переходите кследующему пункту.
21. Как только PID покажет на дисплее температуру вбойлере иконтрольная лампочка (14) загорится - кофеварка
готова киспользованию.
22. Вставьте фильтр для 1 порции кофе (9) или для 2-хпорций кофе (10) вподогретый фильтродержатель (8), как
описано впункте 7.
23. Наполните контейнер (22) кофе взернах.
24. Фильтродержателем (8) нажмите кнопку выдачи молотого кофе (21). По достижении необходимого количества
молотого кофе, отпустите фильтродержателем (8), кнопку выдачи молотого кофе (21).
25. Прессовать содержимое фильтра нужно, предназначенным для этого прессователем (15).
26. Вставьте фильтродержатель (8) вкольцо сцепления вместе установки фильтродержателя (5), поворачивая его с
силой слева направо, поставьте чашечку для кофе на съемный поддон (7).
27. Переключите выключатель рычага (13) на способ «кофе» ивыключатель насоса вверх (26). Манометр (25) покажет
достигнутое давление между 8 и14 бар.
28. Как только Вы получите нужное количество эспрессо, переключите выключатель насоса (26) вниз.
29. Удалите из фильтродержателя (8) кофейную гущу. Проверьте, чтобы фильтродержатель был чистым иустановите
его вкольцо сцепления (5), чтобы продолжал нагреваться.
Приготовление кофе эспрессо из таблетированного кофе:
30. Убедитесь, что вконтейнере (1) есть вода, проверяя ее уровень через специальное окошко контроля уровня воды.
31. Включите электроприбор, нажав на кнопку общего выключателя (11): световая индикация кнопки подтверждает
наличие электроснабжения. Проделайте эту операцию, только втом случае, если машина была выключена. Если она
была уже включена, переходите кследующему пункту.
32. Как только PID покажет на дисплее температуру вбойлере иконтрольная лампочка (14) будет постоянно гореть -
машина готова киспользованию.
33. Вставьте фильтр для таблетированного кофе (18) вфильтродержатель (8), который был заранее подогрет, как
указано впункте 7 данной инструкции.

Pag. 33
Русский
34. Аккуратно откройте упаковку таблетированного кофе, стараясь не повредить саму таблетку.
35. Вставьте таблетку скофе вфильтр для таблетированного кофе (18).
36. Вставьте фильтродержатель (8) вкольцо сцепления вместе установки фильтродержателя (5), поворачивая его с
силой слева направо, затем поставьте чашечку для кофе на съемный поддон (7).
37. Переключите выключатель рычага (13) на способ «кофе» ивыключатель насоса (26) вверх. Манометр (25) покажет
достигнутое давление между 8 и14 бар.
38. По достижении необходимого количества кофе вчашечке, снова переключите рычаг насоса вниз (26).
39. Снять фильтродержатель (8) ивыбросить из него использованную таблетку.
Пар:
Пар:
40. Убедитесь, что вконтейнере (1) есть вода, проверяя ее уровень через специальное окошко контроля уровня воды.
41. Включите электроприбор, нажав на кнопку общего выключателя (11): световая индикация кнопки подтверждает
наличие электроснабжения. Проделайте эту операцию, только втом случае, если машина была выключена. Если она
была уже включена, переходите кследующему пункту.
42. Переключите выключатель рычага (13) на способ «пар». NB: дисплей PID автоматически покажет STE итемпературу,
установленную для пара. Производителем PID установлен на 125°C, это идеальная температура для производства
пара (если Вы хотите изменить температуру PID, пожалуйста, следуйте инструкциям, написанным под пунктом: «как
изменить температуру вбойлере посредством PID»).
43. Как только лампочка (14) загорится, машина готова кработе.
44. Откройте регулятор пара/горячей воды (4). Сначала выйдет немного воды , затем начнет выходить пар.
45. Подставьте под трубку выдачи горячей воды/пара (6) емкость (питчер) смолоком иповерните до конца регулятор
подачи горячего пара/вода (4).
46. Когда молоко будет приготовится, закройте регулятор пара/горячей воды (4).
47. ВАЖНО: сразу после того, как Вы приготовили молоко, вновь откройте регулятор пара/горячей воды (4),
переключите выключатель (13) на способ «вода» ивключите насос (26). Когда из паровой трубки (6) выйдет вода,
закройте регулятор пара/горячей воды (4) , выключите насос переключив его вниз (26), апереключатель (13)
переключите на способ «кофе». Эта операция необходимая, чтобы восстановить водный кругооборот втрубах
кофеварки изаполнить бойлер водой!!!! Тщательно очистите от остатков молока трубку (6) влажной тканью.
Горячая вода:
48. Убедитесь, что вконтейнере (1) есть вода, проверяя ее уровень через специальное окошко контроля уровня воды.
49. Включите электроприбор, нажав на кнопку общего выключателя (11): световая индикация кнопки подтверждает
наличие электроснабжения. Проделайте эту операцию, только втом случае, если машина была выключена. Если она
была уже включена, переходите кследующему пункту.
50. Как только на дисплее PID (27), установится температура иконтрольная лампа (14) загорится, кофеварка готова к
работе.
51. Переключите выключатель рычага (13) на способ «горячая вода».
52. Откройте регулятор пара/горячей воды (4) ивключите насос (26).
53. Горячая вода сразу пойдет из паровой трубки (6).
54. Как только Вы получили желаемое количество воды, выключите насос (26), закройте регулятор пара/воды (4) и
переключите выключатель рычага (13) на способ «кофе».
55. После слития некоторого количества горячей воды, рекомендуется контролировать наличие воды вконтейнере (1)
кофеварки.
КАК ИЗМЕНИТЬ ТЕМПЕРАТУРУ БОЙЛЕРА СПОМОЩЬЮ PID:
Температура PID был установлена производителем этой кофеварки на 95°C для производства кофе и125°C для пара.
Чтобы изменить температуру, пожалуйста, поступайте следующим образом:
- нажмите один раз на кнопку - дисплей покажет надпись “t1”вы обратились ктермостату кофе на 95°C;
- нажмите кнопку дважды - дисплей покажет надпись “t2”вы обратились ктермостату пара на 125°C;
- как только дисплей покажет надписи “t1”или “t2”нажмите один раз кнопку итолько после этого можете
менять ранее установленную температуру.
BНИМАНИЕ: чтобы изменить температуру, необходимо нажать один раз кнопку итолько после этого Вы
должны управлять кнопками и, выбирая нужную Вам температуру, уменьшая или увеличивая ее.
- через 3 секунды, после последнего нажима кнопки, PID запомнит выставленную температуру ипокажет выбранную
Вами температуру для кофе или пара.
- значение температуры может быть установлено: для приготовления эспрессо начиная сmin. температуры 80°C до
max. 130°C; для приготовления пара смин. температуры 120°C до максимальной 140°C.
BНИМАНИЕ: после перехода от "приготовления пара" к"приготовлению кофе" при понижении температуры дисплей
будет мигать иавтоматически остановится после достижения установленной температуры для кофе.

Pag. 34
Русский
Чистка иуход
Очистка иобслуживание кофеварки необходимы, как для качественного выпуска кофе, так идля длительного срока службы устройства.
Очистку кофеварки необходимо выполнять не реже одного раза внеделю.
Перед началом очистки вытащите вилку из розетки иподождите, пока устройство не остынет.
Используйте мягкую ткань, предпочтительно из микрофибры, как Lelit (код MC972 не входит вкомплект), исмочите её простой водой. Не
используйте абразивные моющие средства ине погружайте аппарат вводу.
Для более тщательного ухода рекомендуем использовать щетку Lelit (код PL106 вкомплект не входит), которая позволяет идеально очистить все
форсунки ипространства между уплотнениями, удалить все пятна иостатки молотого кофе из самых мелких щелей. Для очистки съемных частей
кофеварки можно воспользоваться теплой проточной водой. Ни вкоем случае не мойте фильтры ифильтродержатель впосудомоечной машине.
Нет необходимости очищать фильтры после каждого использования, если только их отверстия не будут забиты. Напротив, для поддержания
высоких рабочих показателей кофеварки важно, чтобы трубка для пара ифильтродержатель тщательно очищались после каждого использования.
Очищайте фильтродержатель для удаления жирных остатков кофе, которые отрицательно влияют на вкус эспрессо.
Вымойте наружную часть трубки для пара влажной тканью ипропустите немного пара через трубку для удаления внутренних остатков молока,
которые могут помешать прохождению пара, что, всвою очередь, мешает регулировать пену.
Обратная промывка
Рекомендуется выполнять эту чистку по крайней мере раз внеделю и/ или по крайней мере каждые 100 свежесваренный кофе.
Следующие инструкции относятся ко всем типам групп, установленных на наших эспрессо-машин .
Необходимые:
· Глухой фильтр (код MC002 / C для портафильтров с57 диаметром)
· Щетка (код PL106 )
· Чистящий порошок для эспрессо (код PL103 )
Чистка группы. Выполните следующие действия:
1. Установите слепой фильтр впортафильтр.
2. Добавьте 1 чайную ложку чистящего порошка (3-5 г) вслепой фильтр.
3. Вставьте портафильтр вкофейную группы.
4. Включите пролив группы на 10 секунд.
5. Остановите пролив группы иподождите 10 секунд.
6. Не снимая портафильтр повторите эту операцию 5 раз.
7. Снимите портафильтр, включите пролив ипусть горячая воды, которая выходит из группы промоет группу ипортафильтр. Выключите пролив.
8. Очистите кофейную группу ипрокладку при помощи щетки, азатем при помощи влажной ткани, чтобы удалить все остатки кофейных масел и
жиров
9. Вставьте портафильтр вкофейную группу иповторите пункты 4-5-6 без чистящего порошка.
10. Приготовьте ивылейте первый эспрессо.
Чистка аксессуаров через погружение вчистящий раствор. Выполните следующие действия:
1. Поместите фильтры ипортафильтр вконтейнер (портавильтр ручками вверх).
2. Залейте 3 чайные ложки чистящего порошка вконтейнере (10 грамм).
3. Залить достаточное количество горячей воды вконтейнер до конца металлической части портафильтра (портафильтр не полностью
погружать).
4. Подождите минимум 15 минут.
5. Выньте погруженые части ипромойтеь их большим количеством теплой водопроводной водой.
6. Приготовьте ивылейте первый эспрессо.
Удаление накипи скофеварки
Использование кофеварки приводит кестественному отложению накипи, скорость которого зависит от частоты использования устройства и
жесткости воды.
Известковые отложения забивают трубки иснижают температуру на выходе, влияя на качество выходящего кофе исокращая срок службы
устройства.
Во избежание образования накипи, которая откладывается внутри бойлера, мы рекомендуем всегда использовать фильтр-умягчитель воды на
основе ионообменных смол Lelit (код MC747 - MC747PLUS не входит вкомплект), который, будучи вставленным врезервуар, очищает воду от
солей кальция имагния, которые образуют накипь ивлияют на вкус кофе.
Не забудьте что фильтр теряет свою эффективность после определенного количества фильтрованной воды.
Порядок использования изамены указан на упаковке самого фильтра.
Для того, чтобы предотвратить возможное повреждение компонентов машины, ДОБАВЛЯЙТЕ ТОЛЬКО НАТУРАЛЬНЫЕ СРЕДСТВА ДЛЯ
УДАЛЕНИЯ НАКИПИ врезервуар для воды

Pag. 35
Русский
ПОЛЕЗНЫЕ СОВЕТЫ:
-Фильтры на 1 порцию (9), 2 порции (10) не имеют необходимости быть вымытыми после каждого пользования. Важно
постоянно проверять, чтобы не были забиты дырочки на фильтрах.
-Чтобы достигнуть лучших результатов вполучении эспрессо, советуем предварительно подогревать чашки на
специальной платформе (2), которая работает только при включенной кофеварке.
-PID уже установлен производителем на правильной температуре, которая наилучшая для получения эспрессо.
Вовремя нагревания температура для производства кофе ипара может колебаться (+/-10/12°C). Также, обратите
внимание, что для (t1) приготовление кофе выставлено предупреждение: после 108°C дисплей PID показывает
температуру мигая периодически, предупреждая пользователя, что температура слишком высокая для эспрессо.
ТЕХ. ХАРАКТЕРИСТИКИ:
Напряжение: 230V - 50Hz; 120V - 60Hz
Мощность: 1200 Вт.
Время готовности кработе: около 3 минут
Давление насоса: 15 бар
Регулирование PID: от 80°C до 130°C для кофе; от 120°C до 140°C для производства пара
Объем контейнера для воды: 2.7 литра
Размеры (ВxШxГ): 31,5*25*37 cm
Вес: 10.2 кг.
Функционирование: зерновой, молотый итаблетированный кофе
ГАРАНТИЙНЫЕ ОБЯЗАТЕЛЬСТВА
Эта продукция защищена гарантийным законом, действующим встране, где она была продана; конкретная информация
огарантийных сроках может быть дана продавцом/импортером встране, где продукция была куплена.
Продавец/импортер полностью ответственны за эту продукцию.
Импортер ответственен за выполнение действующих законов встране, где распространяет продукт, включая правильную
утилизацию продукта по окончании его срока службы.
Вевропейских странах действуют национальные законы, которые осуществляют деятельность Директивы 44/99/CE

Pag. 36
Русский
РАЗРЕШЕНИЕ ВСТРЕЧАЮЩИХСЯ ПРОБЛЕМ:
Уважаемый покупатель!
Благодарим Вас за покупку нашей продукции, которая сконструирована по последним технологическим новшествам.
Тщательно следуя простым правилам по корректному пользованию, указанным внастоящей инструкции, Вы получите
максимальную отдачу от работы кофеварки иуверенность внадежности этой продукции на протяжении многих лет.
Ниже предлагается практическая таблица, вкоторой отображены встречающиеся неполадки иих быстрое устранение.
ПРОБЛЕМА
ПРИЧИНА
РАЗРЕШЕНИЕ
Не формируется
пенка кофе
1. Кофейная смесь не подходит кданному
типу кофеварки
2. Не подходит степень помола кофе
3. Недостаточное количество дозы кофе
4.Фильтродержатель плохо вставлен
1. Поменять кофейную смесь
2. Поменять степень помола кофе
3. Увеличить кофейную дозу исоразмерно ее
прессовать
4. Зафиксировать правильно
фильтродержатель
Выходит холодный
кофе
1. Кофеварка не достигла нужной
температуры
2. Не был подогрет фильтродержатель
3. Не были подогреты чашки
4. Термостат не работает
1. Следовать указаниям инструкции вразделе
«Подключение иналадка функционирования
кофеварки»и«Приготовление кофе эспрессо»
2. Фильтродержатель должен подогреваться
одновременно сводой, см. вразделе
«Подключение иналадка функционирования
кофеварки»
3. Подогреть чашки на предназначенной для
этого платформе (2)
4. Обратиться вЦЕНТР ТЕХОБСЛУЖИВАНИЯ
Кофе выходит очень
быстро
1. Кофейный помол очень крупный
2. Недостаточное количество кофе
3. Недостаточно спрессовано
4. Срок годности кофе/таблетки просрочен
или они не подходят
1. Регулировать кофейный помол на более
мелкий
2. Увеличить кофейную дозу
3. Увеличить прессование кофе
4. Заменить кофе/таблетку
Кофе выходит между
группой выдачи и
фильтродержателем
1. Фильтродержатель плохо вставлен
2. Передозировка кофе вфильтре
3. Края фильтродержателя не очищены
4. Испорченна прокладка вгруппе выдачи
1. Правильно вставить фильтродержатель
2. Уменьшить количество кофе
3. Очистить от остатков кофе края
фильтродержателя
4. Обратиться вЦЕНТР ТЕХОБСЛУЖИВАНИЯ
для замены прокладки
Кофе выходит по
каплям
1. Кофейный помол слишком мелкий
2. Излишнее количество кофе
3. Кофе слишком сильно спрессован
1. Регулировать кофейный помол на более
крупный
2. Уменьшить количество кофе
3. Уменьшить прессование кофе
Кофеварка не выдает
пар
1. Засорен проход вносике трубки выдачи
пара
2. Нехватка воды вконтейнере
1. Прочистить спомощью иглы носик трубки
выдачи пара
2. См. вразделе «Подключение иналадка
функционирования кофеварки»
Во время работы
цикла выдача кофе,
кофе не выходит»
1. Нехватка воды вконтейнере
2. Рычаг переключен на пар
3. Кофейный помол слишком мелкий
4. Излишнее количество кофе
5. Кофе слишком сильно спрессован
6. Засор вгруппе выдачи
1. Залить воду вконтейнер для воды
2. Переключить рычаг на кофе
3. Регулировать кофейный помол на более
крупный
4. Уменьшить количество дозы вфильтре
5. Уменьшить прессование кофе
6. Почистить или заменить деталь группы
Кофеварка не
работает и
сигнальная лампочка
не загорается
1. Нет электропитания
2. Вилка шнура электропитания плохо
вставлена
3. Поврежден шнур электропитания
1. Восстановить электропитание
2. Вставить правильно вилку вэлектророзетку
3. Обратиться вЦЕНТР ТЕХОБСЛУЖИВАНИЯ
для замены шнур электропитания
Лампочка включения
горит, алампочка
«готовый пар» не
гаснет втечение 10
минут
1. Термостаты не функционируют
2. Поврежден нагревательный элемент
1. Обратиться вЦЕНТР ТЕХОБСЛУЖИВАНИЯ
2. Обратиться вЦЕНТР ТЕХОБСЛУЖИВАНИЯ
Указанные данные ифотографии могут быть изменены без предварительного предупреждения для улучшения работы
кофеварки.

Pag. 51
ITALIANO
AVVERTENZE PER IL CORRETTO SMALTIMENTO DEL PRODOTTO AI SENSI DELLA DIRET-
TIVA EUROPEA 2002/96/EC
Alla fine della sua vita utile il prodotto non deve essere smaltito insieme ai rifiuti urbani. Può essere
consegnato presso gli appositi centri di raccolta differenziata predisposti dalle amministrazioni comu-
nali, oppure presso i rivenditori che forniscono questo servizio. Smaltire separatamente un elettrodo-
mestico consente di evitare possibile conseguenze negative per l’ambiente e per la salute derivanti da
un suo smaltimento inadeguato e permette di recuperare i materiali di cui è composto al fine di ottenere
un importante risparmio di energia e di risorse. Per rimarcare l’obbligo di smaltire separatamente gli
elettrodomestici, sul prodotto è riportato il marchio del contenitore di spazzature mobile barrato.
DICHIARAZIONE DI CONFORMITÀ CE
Gemme Italian Producers srl dichiara sotto la propria responsabilità che il prodotto: Macchina per
caffè espresso tipo: PL042TEMD alla quale è riferita questa dichiarazione, è conforme alle seguenti
norme:
EN 60335/1 - EN 60335/2/15 - EN 61000/3/2 - EN 55014
secondo le disposizioni delle direttive:
Direttiva Bassa Tensione 2014/35/UE - Direttiva EMC 2014/30/UE
NB: La presente dichiarazione perde la sua validità se la macchina viene modificata senza la nostra
espressa autorizzazione.
ENGLISH
IMPORTANT INFORMATION FOR CORRECT DISPOSAL OF THE PRODUCT IN ACCORDANCE
WITH EC DIRECTIVE 2002/96/EC
At the end of its working life, the product must not be disposed of as urban waste. It must be taken to
a special local authority differential waste collection centre or to a dealer providing this service. Dis-
posing of a household appliance separately avoids possible negative consequences for the environment
and health deriving from inappropriate disposal of enables the constituent materials to be recovered to
obtain significant savings in energy and resources. As a reminder of the need to dispose of household
appliances separately, the products is marked with a crossed-out wheeled dustbin.
EC DECLARATION OF CONFORMITY
Gemme Italian Producers srl declares under its own responsibility that the product:
Coffee machine type: PL042TEMD to which this declaration relates conforms to the following stand-
ards:
EN 60335/1 - EN 60335/2/15 - EN 61000/3/2 - EN 55014
pursuant to directives:
Low Voltage Directive 2014/35/UE –Directive EMC 2014/30/UE
NB: This declaration is null and void should the machine be modified without our specific authorisa-
tion.
DEUTSCH
WICHTIGER HINWEIS FÜR DIE KORREKTE ENTSORGUNG DES PRODUKTS IN ÜBEREINSTIM-
MUNG MIT DER EG-RICHTLINIE 2002/96/EG
Am Ende seiner Nutzzeit darf das Produkt NICHT zusammen mit dem Siedlungsabfall beseitigt werden.
Es kann zu den eigens von den städtischen Behören eingerichteten Sammelstellen oder zu den Fach-
händlern, die einen Rücknahmeservice anbieten, gebracht werden. Die getrennte Entsorgung eines
Haushaltsgerätes vermeidet mögliche negative Auswirkungen auf die Umwelt und die menschliche Ge-
sundheit, die durch eine nicht vorschriftsmäßige Entsorgung bedingt sind. Zudem ermöglicht wird die
Wiederverwertung der Materialien, aus denen sich das Gerät zusammensetzt, was wiederum eine be-
deutende Einsparung an Energie und Ressourcen mit sich bringt. Zur Erinnerung an die Verpflichtung,
die Elektrohaushalsgeräte zu beseitigen, ist das Produkt mit einer Mülltonne, die durchgestrichen ist,
gekennzeichnet.
EG-KONFORMITÄTSERKLÄRUNG
Gemme Italian Producers srl erklärt auf eigene Verantwortung, dass das Produkt:
Kaffeemaschine vom Typ: PL042TEMD auf das sich diese Erklärung bezieht, den folgenden Normen
entspricht:
EN 60335/1 - EN 60335/2/15 - EN 61000/3/2 - EN 55014
gemäß den Bestimmungen der Richtlinien:
Niederspannungsrichtlinie 2014/35/UE - EMV-Richtlinie 2014/30/UE
PS: Diese Erklärung verliert ihre Gültigkeit, wenn die Maschine
ohne unsere ausdrückliche Genehmigung verändert wird.
Castegnato, 10/10/2011
Amministratore Delegato

Pag. 52
РУССКИЙ
УКАЗАНИЯ ПО КОРРЕКТНОМУ ИЗБАВЛЕНИЮ ОТ ИЗДЕЛИЯ ВСООТВЕТСТВИИ СЕВРОПЕЙСКОЙ
ДЕРЕКТИВОЙ 2002/96/ЕС
По окончании срока службы, электроприбор не следует помещать вобщий контейнер смусорными
отходами. Его можно сдать вспециальные центры по сбору дифференциальных отходов,
предоставленных административными муниципалитетами, или вспециализированные фирмы, которые
занимаются таким обслуживанием. Раздельная переработка электроприборов позволяет избежать
возможные негативные последствия, возникающие из-за не соответствующей переработки отходов, для
окружающей среды, здоровья общества. Дает возможность достигнуть значительной экономии энергии и
ресурсов, благодаря повторному использованию материалов изготовления электроприбора. Чтобы
подчеркнуть обязательство сдачи электроприбора на раздельную переработку, на изделие нанесена
маркировка ввиде зачеркнутого передвижного мусорного контейнера.
ДЕКЛАРАЦИЯ СООТВЕТСТВИЯ ТРЕБОВАНИЯМ ЕС
Компания Gemme Italian Producers srl заявляет под свою ответственность, что изделие:
Кофеварка типа: PL042TEMD ккоторой относится данная декларация, соответствуют следующим
нормам:
EN 60335/1 - EN 60335/2/15 - EN 61000/3/2 - EN 55014 согласно положениям директив:
Директива по низкому напряжению 2014/35/UE - Директива ЭМС 2014/30/UE
Примечание: Настоящая декларация теряет силу, если вустройство были внесены изменения без нашего
письменного разрешения.
FRANÇAIS
AVERTISSEMENT POUR L’ÉLIMINATION CORRECTE DU PRODUIT AUX TRMES DE LA DIRECTIVE
EUROPÉENE 200/96/EC
Au terme de son utilisation, le produit ne doit pas être éliminé avec les déchets urbains. Le produit doit
être remis à l’un des centres de collecte sélective prévus par l’administration communale ou auprès des
revendeurs assurant ce service. Éliminer séparément un appareil électroménager permet d’éviter les re-
tombées négatives pou l’environnement et la santé dérivant d’une élimination incorrecte, et permet de
récupérer les matériaux qui le composent dans le but d’une économie importante en termes d’énergie et
de ressources. Pour rappeler l’obligation d’éliminer séparément les appareils électroménagers, le produit
porte le symbole d’un caisson à ordures barré.
DÉCLARATION DE CONFORMITÉ CE
Gemme Italian Producers srl déclare sous sa propre responsabilité que le produit :
Machine expresso type : PL042TEMD à laquelle se rapporte cette déclaration, est conforme aux normes
suivantes :
EN 60335/1 - EN 60335/2/15 - EN 61000/3/2 - EN 55014
selon les dispositions des directives:
Directive Basse Tension 2014/35/UE - Directive CEM 2014/30/UE
NB: la présente déclaration n’est plus valable si la machine est modifiée sans notre autorisation expresse.
ROMÂNĂ
INFORMAŢII IMPORTANTE PENTRU ÎNDEPĂRTAREA CORECTĂ A PRODUSULUI ÎN CONFORMI-
TATE CU PREVEDERILE DIRECTIVEI 2002/96/EC
La sfârşitul ciclului de viaţă produsul nu va fi îndepărtat cu gunoiul menajer. Acesta va fi dus la o autoritate
locală specializată pentru colectarea şi tratarea diferenţiată a deşeurilor sau la un dealer care oferă acest
serviciu. Îndepărtarea corectă a aparatelor electrice evită posibile consecinţe negative pentru mediu şi
sănătate care ar rezulta din îndepărtarea eronată a acestora şi permite recuperarea materialelor compo-
nente pentru a asigura economii semnificative de energie şi resurse. Pentru a vă aminti că acest aparat nu
trebuie aruncat cu gunoiul menajer, produsul este marcat cu o siglă a unui tomberon tăiat.
DECLARAŢIE DE CONFORMITATE CE
Gemme Italian Producers srl declară pe propria răspundere că produsul:
Maşină pentru cafea tip: PL042TEMD la care se referă această declaraţie, este conformă cu următoarele
standarde:
EN 60335/1 - EN 60335/2/15 - EN 61000/3/2 - EN 55014
în conformitate cu prevederile directivelor:
Directiva Tensiune joasă 2014/35/UE - Directiva EMC 2014/30/UE
NB: Această declaraţie îşi va pierde valabilitatea dacă maşina este modificată fără permisiunea noastră
expresă.
Castegnato, 10/10/2011
Amministratore Delegato

Pag. 53
Español
ADVERTENCIAS PARA LA CORRECTA ELIMINACIÓN DEL PRODUCTO EN VIRTUD DE LA DI-
RECTIVA EUROPEA 2002/96/EC.
Al final de su vida útil, el producto no se debe desechar junto a los residuos urbanos. Se puede dejar
en los centros especiales de recogida selectiva dispuestos por las administraciones municipales, o en
los distribuidores que ofrezcan este servicio. Desechar por separado un electrodoméstico permite
evitar posibles consecuencias negativas para el medio ambiente y la salud derivadas de una elimina-
ción inadecuada y permite recuperar los materiales de los cuales está compuesto con el fin de obte-
ner un importante ahorro de energía y recursos. Como recordatorio de la obligación de desechar por
separado los electrodomésticos, en el producto aparece indicado el símbolo del contenedor de basura
móvil tachado.
DECLARACIÓN DE CONFORMIDAD CE
Gemme Italian Producers srl declara bajo su propia responsabilidad que el producto: PL042TEMD a
los que se refiere esta declaración es conforme a las siguientes normas:
EN 60335/1 - EN 60335/2/15 - EN 61000/3/2 - EN 55014 según las disposiciones de las directivas:
Directiva de Baja Tensión 2014/35/UE - Directiva EMC 2014/30/UE
NOTA: La presente declaración pierde su validez si la máquina se modifica sin nuestra autorización
expresa.
Castegnato, 10/10/2011
Ammi-
nistratore Delegato

Pag. 56
MC652_REV03_11/2018
Gemme Italian Producers srl
Via del Lavoro 45 - I - 25045 Castegnato (BS) Italy
Tel: +39 030 2141199 - Fax: +39 030 2147637
www.lelit.com - lelit@lelit.com - P.Iva 03426920173
Other manuals for PL042TEMD
4
Table of contents
Languages:
Other Lelit Coffee Maker manuals

Lelit
Lelit PL60T User manual

Lelit
Lelit PL 046 User manual

Lelit
Lelit Grace PL81T User manual

Lelit
Lelit PL042E User manual

Lelit
Lelit Vip Line Kate User manual

Lelit
Lelit PL41LEM User manual

Lelit
Lelit PL41LEM User manual

Lelit
Lelit PL60 User manual

Lelit
Lelit PL162T-EU Service manual

Lelit
Lelit PL042TEMD User manual

Lelit
Lelit PL042EM User manual

Lelit
Lelit Giulietta PL1SVH User manual

Lelit
Lelit PL60T User manual

Lelit
Lelit PL41TEM/110 User manual

Lelit
Lelit Pro Line MARA X PL62X Service manual

Lelit
Lelit PL41E User manual

Lelit
Lelit PL60R1 User manual

Lelit
Lelit Kate PL82T User manual

Lelit
Lelit PL042TEMD User manual

Lelit
Lelit PL92T User manual