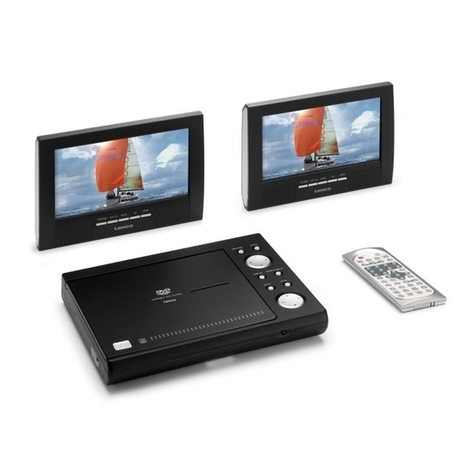
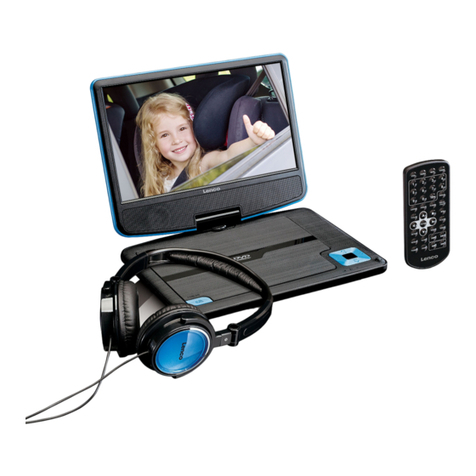
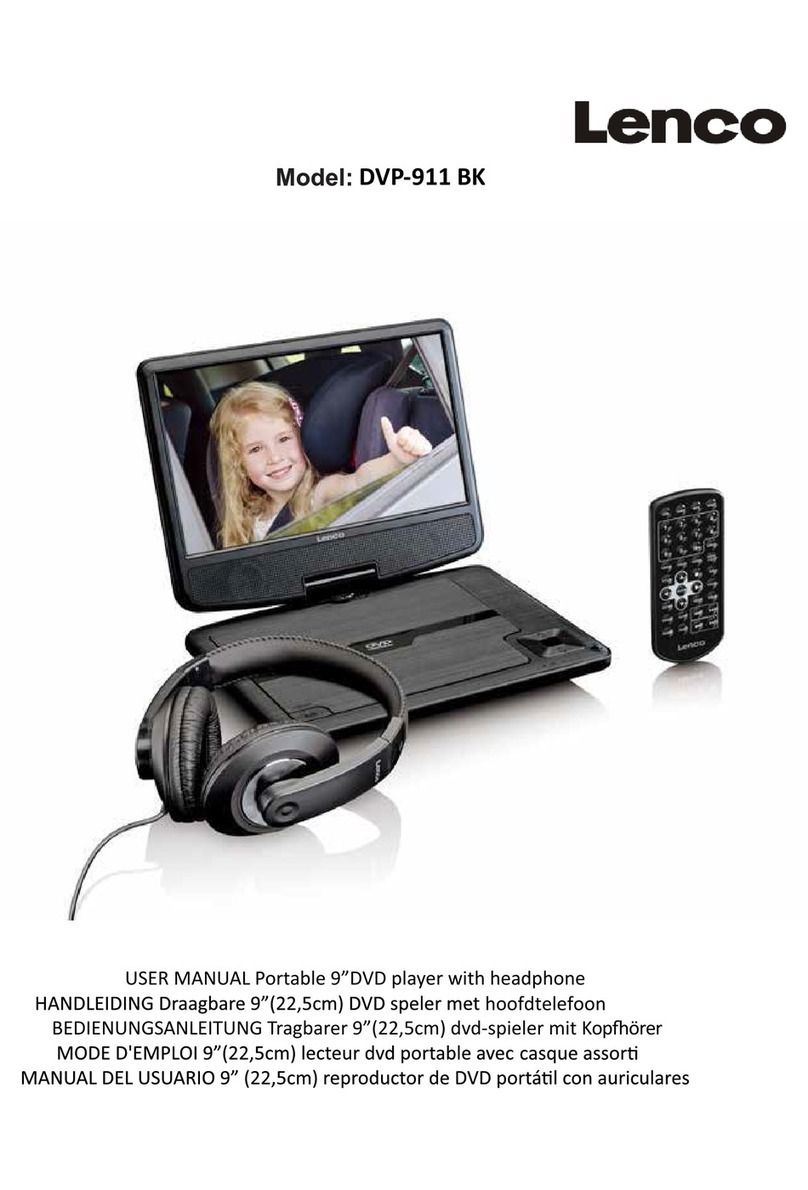
LENCO DVP-937 User manual

USER MANUAL PORTABLE DVD
HANDLEIDING SPELERDRAAGBARE DVD
BENUTZERHANDBUCH TRAGBARER DVD-PLAYER
DVD PORTABLEMANUEL DE L'UTILISATEUR
MANUAL DEL USUARIO REPRODUCTOR DE DVD PORTÁTIL
Model: DVP-937

English------------------------------------------------------------3
Nederlands-----------------------------------------------------------12
Deutsch-------------------------------------------------------------21
Français-------------------------------------------------------------30
Español----------------------------------------------------------------39
Version: 2.0
Index

Power supply adaptor(For EU only)
Manufacturer: Shenzhen Mass Power Electronics Limited
Model number: SEF0900100E1BA /PEF0900100VE
Only use the power supply listed in the user instructions
3
1. Safety Instructions
- Before using this product, read and follow all warnings and instructions.
- This device is not intended for use by people (including children) with
physical, sensory or mental disabilities, or a lack of experience and
knowledge, unless they’re under supervision or have received instructions
about the correct use of the device by the person who is responsible for their
safety;
- This product is intended for household use only and not for commercial or
industrial use.
- Do not expose to dripping or splashing.
- No naked flame sources, such as lighted candles, should be placed on or
near the product.
- Ventilation should not be impeded by covering ventilation openings with
items such as newspapers, table cloths, curtains and the like.
- Make sure the unit is adjusted to a stable position. Damage caused by using
this product in an unstable position or by failure to follow any other warning
or precaution contained within this user manual will not be covered by
warranty.
- Do not place objects filled with liquids, such as vases on or near the product.
- Do not use or store this product in a place where it is subject to direct
sunlight, heat, excessive dust or vibration.
- Do not keep or store this product in wet conditions for a long period.
- Do not clean this product with water or other liquids.
- Do not block or cover the slots and holes in the product.
- Do not push foreign objects into the slots or holes in the product.
- Do not attempt to open this product yourself. There are no user serviceable
parts inside.
- Do not allow children access to plastic bags.
Warning
-Never remove the casing of this device.
-Never place this device on other electrical equipment.
Notice
• If at any time in the future you should need to dispose of this product
please note that: All batteries and accumulators need to be removed from
this product (Removal of Waste Batteries and Accumulators).
• Always bring your product to a professional to remove the built-in battery.
- This device is not intended for use by people (including children) with physical,
sensory or mental disabilities, or a lack of experience and knowledge, unless
they’re under supervision or have received instructions about the correct use of
the device by the person who is responsible for their safety.
- This product is intended for household use only and not for commercial or
industrial use.
- Make sure the unit is adjusted to a stable position. Damage caused by using
this product in an unstable position or by failure to follow any other warning
or precaution contained within this user manual will not be covered by
warranty.
- Never remove the casing of this apparatus.
- Never place this apparatus on other electrical equipment.
- Do not use or store this product in a place where it is subject to direct
sunlight, heat, excessive dust or vibration.
- Do not clean this product with water or other liquids.
- Do not block or cover the slots and holes in the product.
- Do not push foreign objects into the slots or holes in the product.
- Do not allow children access to plastic bags.
- Please check that the voltage on the type plate of your appliance
corresponds with your house electricity supply (type plate is located on the
back of the unit).
- Protect the power cord from being walked on or pinched, particularly at
plugs, convenience receptacles, and the point where they exit from the
apparatus.
- Only use attachments/accessories specified by the manufacturer.
- Refer all servicing to qualified service personnel. Servicing is required
when the apparatus has been damaged in any way, such as the power supply
cord or the plug, when liquid has been spilled or objects have fallen into the
apparatus, when the apparatus has been exposed to rain or moisture, does
not operate normally, or has been dropped.
- Do not use a damaged power cord or plug or a loose outlet. Doing so may
result in fire or electric shock.
WARNING: Prolonged exposure to loud sounds from personal music players
may lead to temporary or permanent hearing loss.

2. Identification of Controls
Main Unit
4
Insert the battery
Remove battery during storage or when you are not using the DVD
player for a long time.
2.Insert battery.
NNOTES:
1.Open the battery door.
9.SETUP
10.OPEN
11.SD/MMC/MS
12.USB
13. AV OUT
14. Earphone Socket
15. COAXIAL
16.ON/OFF
17.DC IN 9-12V
1.REMOTE SENSOR
2.VOL- / VOL+
3. PLAY/PAUSE
4.■ STOP
5.SOURCE
6. MENU
7.ENTER
8.▲/▼/ / (up/down/right/left)
Select an item in the menu.OK key
confirms menu selection.
when playing,VCD,DVD,if available:
right: fast forward
left: fast reverse
up: previous track
down: next track
11 12 13 14 15 17
16

5
2. Identification of Controls
1 2 34
5678
9 0 10+
REPEAT
TI TLE
EN TER
ME NU
SUBTITLE
AUDIO
MUTE
SOURCE
MODE
PBC
VOL+VOL-
AB
DISPLAY
11
26 27
9
12
21
20
24
16
1
2
25
14
4
3
23
22
15
87
6
5
19
13
10
17
18
Remote control unit
1. PLAY/PAUSE ( )
Starts playback or pause playback.
2. STOP ( )
Stops playback.
3. Reverse Skip ( )
Go to previous chapter / track or to the
beginning.
4. Forward Skip( )
Go to the next chapter / track.
5.VOL-
6.REPEAT
Repeat chapter, track, title all.
7.A B
Repeat sequence.
8. PROGRAM
Place a track on the program list.
9.SOURCE
DVD, card,USB
10.TITLE
Return to DVD title menu.
11. MODE
Switch the IR headphone ON/OFF.
12.0-9 NUMBER BUTTON
Selects numbered items in a menu.
13.ENTER
Confirms menu selection.
14. VOL+
15.DISPLAY
Accesses On-Screen display.
16.AUDIO
Selects an audio language (DVD).
17.SUBTITLE
Selects a subtitle language.
18.ANGLE
Selects a DVD camera angle if available
19.SETUP
Accesses or removes setup menu.
20.10+ BUTTON
Add 10+ while your selection is more than10.
21.STEP
Step the motion in DVD mode.
22. BUTTON
Fast backward.
23. BUTTON
Fast forward.
24. PBC
PBC on/off switch.
25.MENU
Accesses menu on a DVD disc.
26.SEARCH
Go to time point , title or chapter you want in
DVD Mode
27. MUTE
Disable Audio output.
STEP

3. SETUP Menu Setting
General Setup Page
OSD Language
You can select your own preferred language seetings.
Angle Mark
Displays current angle setting information on the right hand corner
of the TFT screen if available on the disc.
Closed Captions
Closed captions are data that are hidden in the video signal of some
discs.Before you select this function,please ensure that the disc
contains closed captions information and your TV set also has this
function.
Screen Saver
This function is used to turn the screen saver On or Off.
Audio Setup Page
Audio Setup Page
-- --
DOWNMIX STR
DOLBY DIGITAL
LT/RT
SPDIF/OFF
SPDIF/RAW
SPDIF/PCM
DUAL MONO
DYNAMIC
STR STR
L-MONO
R-MONO
MIX-MONO
-
-
-
-
-
-
-
-
-
-
-
-
-
-
-
-
-
-
FULL
OFF
-
Press SETUP button to reach the setup menu. Use direction buttons
to select the preferred item. After finishing settings, press
SETUP again for a normal display.
The following menu items can be changed:
GENERAL: selects the GENERAL PAGE menu.
AUDIO: selects the AUDIO PAGE menu.
VIDEO: selects the VIDEO PAGE menu.
PREFERENCE : selects the PREFERENCE PAGE menu.
General Setup Page
TV DISPLAY: selects the aspect ratio of the playback picture.
4:3 PANSCAN: if you have a normal TV and want both sides of the
picture to be trimmed or formatted to fit your TV screen.
4:3 LETTERBOX: if you have a normal TV. In this case, a wide
picture with black bands on the upper and lower portions of the
TV screen will be displayed.
16:9:wide screen display.
- - - -AUDIO SETUP PAGE
GO TO AUDIO SETUP PAGE
DIGITAL OUTPUT RAW STEREO
IR HEADPHONE
This function is used to select the IR headphone ON or OFF.
AUTO STANDBY
This function is used to standby.
6
TFT DISPLAY: selects the aspect ratio of the panel.
- - GENERALSETUP PAGE - -
GOTO GENERAL SETUP PAGE
TV DISPLAY WIDE
TFT DISPLAY 16:9
ANGLE MARK ON
OSD LANGUAGE ENG
CLOSED CAPTIONS ON
SCREEN SAVER ON
4:3 PANSCAN
4:3 LETTERBOX
16:9
ON
OFF
ENGLISH
FRENCH
GERMAN
SPANISH
DUTCH
POLISH
HUNGARIAN
ON
OFF
ON
OFF
16:9
4:3
ON
OFF
IR HEADPHONE OFF
AUTO STANDBY 3H
OF F
3 HO URS
4 HO URS

Video Setup Page
Video Setup Page
- - VIDEO SETUP PAGE - -
GOTO VIDEO SETUP PAGE
BRIGHTNESS 00
CONTRAST 00
HUE 00
SATURATION 00
Brightness,Contrast,Hue,Saturation:setting the video
quality.
Preference Page
Preference Page
TV Type
Selecting the colour system that corresponds to your TV when AV
outputs.This DVD Player is compatible with both NTSC and PAL.
Downmix
This option allows you to set the stereo analog output of your
DVD Player.
Audio Setup Page
LT/RT :Select this option if your DVD Player is connected to a
Dolby Pro Logic decoder.
Stereo :Select this option when the output delivers sound from
the two front speakers only.
Dolby digital
The options included in Dolby Digital Setup are: and
'Dynamic '.
'Dual Mono '
Dual Mono
Stereo: the left mono sound will send output signals to the Left speaker
and the Right mono sound will send output signals to the Right speaker.
L-Mono: Left mono sound will send output signals to the Left speaker
and Right speaker.
R-Mono: the Right mono sound will send output signals to the Left speaker
and Right speaker.
Mix-Mono: the Left and Right mixed mono sound will send output
signals to the Left and Right speakers.
Dynamic
Dynamic range compression.
Digital Output
The function is used to select the SPDIF Output:SPDIF Off,SPDIF
/RAW,SPDIF/PCM.
SPDIF Off: Turns off the SPDIF output.
SPDIF/RAW: If you have connected your DIGITAL AUDIO OUT
to a multi-channel decoder/receiver.
SPDIF/PCM: Only if your receiver is not capable of decoding
multi-channel audio.
7
- - PREFERENCE SETUP PAGE - -
GOTO PREFERENCE PAGE
TV TYPE PAL
AUDIO ENG
SUBTITLE OFF
DISC MENU ENG
DEFAULT
PAL
AUTO
NTSC
ENGLISH
FRENCH
GERMAN
SPANISH
DUTCH
POLISH
HUNGARIAN
OTHERS
RESET
ENGLISH
FRENCH
GERMAN
SPANISH
DUTCH
POLISH
HUNGARIAN
OTHERS
ENGLISH
FRENCH
GERMAN
SPANISH
DUTCH
POLISH
HUNGARIAN
OFF
OTHERS
3. SETUP Menu Setting

PAL - Select this if the connected TV is PAL system.It will change the
video signal of a NTSC disc and output in PAL format.
NTSC-Select this if the connected TV is NTSC system.It will change
the video signal of a PAL disc and output in NTSC format.
Auto:Changs the video signal output automatically according to the
playing disk format.
Preference Page
Audio:Selects a language for audio (if available).
Subtitle:Selects a language for subtitle (if available).
Disc Menu:Selects a language for disc menu (if available).
Default:Back to the factory setting.
8
3. SETUP Menu Setting

4. Parameters and specifications 5. Battery Parameters
Battery Specifications:
Output:7.4V
Storage and work circumstances:
1. Storage circumstances Temperature Humidity
6 months -20°C +45 C~ °
-20 C +65 C° ~ °
65+20%
65+20%
2.Work circumstances Temperature Humidity
Standard charge
Standard discharge
0 C +45 C° ~ °
-20 C +65 C° ~ °
65+20%
65+20%
1 week
9
Item Standard requirement
Output
Electronical parameters
VIDEO OUT
AUDIO OUT :1.2 Vrms (1 KHz, 0 dB)
Power requirements
Operating humidity
: AC 100-240 V , 50/60 Hz
: 5 % to 90 %
System
Laser :Semiconductor laser, wavelength 650 nm
Signal system : NTSC / PAL
Frequency
response
Signal-to-noise ratio :More than 80 dB (ANALOG OUT connectors only)
Dynamic range :More than 80 dB (DVD/CD)
Accessories
Note: Design and specifications are subject to change prior notice.
N
:Video/Audio cable,Remote control,
Stereo headphone,Rechargeable battery,
: 20Hz to 20 kHz(1dB)
Power consumption : <10W
: 0.948kg
Dimensions (Approx.)
Weight (Approx.)
: 240(L)X186(W)X44(H)MM
Battery Charging
Connect the DVD player to the supplied power adaptor, the LED indicator will
be RED when the battery is charging and will turn into green when the battery
is full charged.

6.Mounting Bag
10
1. Align the angled support’s bolt to the screw
hole on the back of the DVD unit. Turn the bolt
clockwise and secure the support.
Mounting the DVD in a Car
Use the supplied mounting kit to install the DVD players on the back of the
vehicle’s headrests.
2. Lift the headrest off its leg supports. Align the
horizontal support with the headrest leg slots and
ensure the horizontal support rests securely on the
top of the car seat. Reattach the headrest.
3.Grip the DVD firmly with both hands and slot the
angled support firmly into the support bar. It will
click. Ensure the entire unit is secure.
4.Adjust the angle of the DVD unit, then secure by
tightening the bolt on the right.
Support
Headrest
Leg
support
Horizontal
support bar
•This unit should never be used by the vehicle’s driver or left unsecured in the vehicle while
driving.
•If this unit is being used in your vehicle, be sure that it is secured or held safely, and does not
obstruct any safety device, including air bags or seat belts.
•All passengers should wear seat belts when using this unit in a moving vehicle.
•If in doubt, please contact your vehicle manufacturer for further advice.
5. To remove the DVD from the horizontal support
bar, support the DVD unit with one hand. With the
other hand, firmly squeeze the release buttons
either side of the angled support and pull.

11. Ser
10. CE Marking
9. Disposal of the Old De
8
7. Guar
11
antee
Lenco offers service and warranty in accordance with the European law,
which means that in case of repairs (both during and after the warranty
period) you should contact your local dealer.
Important note: It is not possible to send products that need repairs to Lenco
directly.
Important note: If this unit is opened or accessed by a non-official service
center in any way, the warranty expires.
This device is not suitable for professional use. In case of professional use, all
warranty obligations of the manufacturer will be voided.
This symbol indicates that the relevant electrical product or battery
should not be disposed of as general household waste in Europe. To
ensure the correct waste treatment of the product and battery,
please dispose them in accordance to any applicable local laws of
requirement for disposal of electrical equipment or batteries. In so
doing, you will help to conserve natural resources and improve
standards of environmental protection in treatment and disposal of
electrical waste (Waste Electrical and Electronic Equipment
Directive).
. Disclaimer
Updates to Firmware and/or hardware components are made regularly. Therefore
some of the instruction, specifications and pictures in this documentation may
differ slightly from your particular situation. All items described in this guide for
illustration purposes only and may not apply to particular situation. No legal right
or entitlements may be obtained from the description made in this manual.
Products with the CE marking comply with the EMC Directive
(2004/108/EC) and the Low Voltage Directive (2006/95/EC) issued
by the Commission of the European Community.
Hereby, Lenco Benelux BV, Thermiekstraat 1a, 6361 HB Nuth, The Netherlands,
declares that this product is in compliance with the essential requirements and
other relevant provisions of Directive 1999/5/EC.
The declaration of conformity may be consulted via [email protected]
vice
For more information and helpdesk support, please visit www.lenco.com
Lenco Benelux BV, Thermiekstraat 1a, 6361 HB, The Netherlands.
vice

12
Nederlands
1. Veiligheidsinstructies
- Lees voor het gebruik van dit product alle waarschuwingen en instructies en volg
ze op.
- Dit apparaat is niet bestemd voor gebruik door mensen (inclusief kinderen) met
fysieke, zintuiglijke of geestelijke gebreken of gebrek aan kennis en ervaring, tenzij
zij onder toezicht staan of instructies hebben over het juiste gebruik van het
apparaat hebben gekregen van de persoon die verantwoordelijk is voor hun
veiligheid;
- Dit product is alleen voor huishoudelijk gebruik bedoeld en niet voor commercieel
of industrieel gebruik.
- Stel het niet bloot aan druppels of spatwater.
- Er mogen geen bronnen van open vuur, zoals brandende kaarsen, op of in de
buurt van het toestel worden geplaatst.
- De ventilatie mag niet worden belemmerd door het bedekken van de ventilatie-
openingen door bijvoorbeeld kranten, tafelkleden, gordijnen en dergelijke.
- Verzeker u ervan dat het apparaat in een stabiele positie staat opgesteld. Schade,
veroorzaakt door het gebruik van dit product in een onstabiele positie, of door het
niet naleven van waarschuwingen of voorzorgsmaatregelen genoemd in deze
handleiding, valt niet onder de garantie.
- Plaats geen voorwerpen gevuld met vloeistoffen, zoals vazen, op of bij het
product.
- Dit product niet gebruiken of opslaan op plaatsen waar het wordt blootgesteld
aan direct zonlicht, hitte, buitensporig veel stof of trillingen.
- Houd of bewaar dit product niet gedurende langere tijd onder vochtige
omstandigheden.
- Reinig dit product niet met water of andere vloeistoffen.
- Bedek of blokkeer de gleuven en de gaten in het product niet.
- Stop geen vreemde voorwerpen in de gleuven of gaten van het product.
- Probeer dit product niet zelf te openen. Er zitten geen door de gebruiker te
onderhouden onderdelen in.
- Geef kinderen geen gelegenheid in aanraking met plastic zakken te komen.
Waarschuwing
Verwijder nooit de behuizing van dit apparaat.
Plaats dit apparaat nooit op andere elektrische apparatuur.
Let op
• Als het in de toekomst nodig is om dit product af te voeren, let dan op het
volgende: Alle batterijen en accu's dienen uit het product te worden verwijderd
(verwijdering van afval batterijen en accu's).
• Breng het apparaat altijd naar een vakman om de geïntegreerde batterij te laten
verwijderen.
- Verwijder nooit de behuizing van dit apparaat.
- Plaats dit apparaat nooit op andere elektrische apparatuur.
- Geef kinderen geen gelegenheid in aanraking met plastic zakken te komen.
- Controleer of de spanning op het specificatieplaatje van uw apparaat
overeenkomt met het lichtnet in uw huis (specificatieplaatje is te vinden op de
achterzijde van het apparaat).
- Zorg ervoor dat niemand op de voedingskabel kan gaan staan of dat de kabel kan
worden ingedrukt, voornamelijk bij stekkers, stopcontacten en het punt waar
kabels uit het apparaat komen.
- Gebruik uitsluitend uitbreidingen/accessoires gespecificeerd door de fabrikant.
- Laat alle reparaties over aan gekwalificeerd onderhoudspersoneel. Onderhoud is
vereist als het toestel hoe dan ook is beschadigd, zoals bijvoorbeeld het netsnoer
of de stekker, wanneer er vloeistof of een voorwerp in het apparaat is
terechtgekomen, wanneer het apparaat is blootgesteld aan regen of vocht, als het
niet normaal werkt of is gevallen.
- Gebruik nooit een beschadigde voedingskabel of stekker of een los stopcontact.
Dit vormt namelijk een risico op brand of elektrische schokken.
WAARSCHUWING: Langdurige blootstelling aan luid geluid van
persoonlijke muziekspelers kan leiden tot tijdelijke of permanente
gehoorbeschadiging.
Voedingsadapter (alleen voor EU)
Fabrikant: Shenzhen Mass Power Electronics Limited
Modelnummer: SEF0900100E1BA/PEF0900100VE
Gebruik uitsluitend het voedingsapparaat dat in de gebruiksaanwijzing staat
vermeld

2. Identificatie van bedieningselementen
Hoofdeenheid
13
Plaats de batterij
OPMERKING:
Verwijder de batterij wanneer de DVD-speler wordt opgeslagen,
of wanneer hij gedurende langere tijd niet wordt gebruikt.
2. Batterij installeren.
N
1.Open het batterijvak.
9.SETUP
10.OPEN
11.SD/MMC/MS
12.USB
13.AV UIT
14. Aansluiting oortelefoon
15.COAXIAAL
16.AAN/UIT
17.Ingang 9-12 V
gelijkspanning
1.SENSOR AFSTANDSBEDIENING
2.VOL-/VOL+
3. AFSPELEN/PAUZE
4.■ STOP
5.BRON
6.MENU
7.ENTER
8.▲/▼/ /
(omhoog/omlaag/rechts/links)
Een onderwerp selecteren in het menu.
De OK-toets bevestigt menuselecties.
tijdens het afspelen van een VCD/ DVD,
indien beschikbaar:
rechts: vooruitspoelen
links: terugspoelen
omhoog: vorige track
omlaag: volgende track
11 12 13 14 15 17
16
Openin

14
2. Identificatie van bedieningselementen
Afstandsbediening
1.START/PAUZE ( )
Het afspelen starten of pauzeren.
2.STOP ( )
Het afspelen stoppen.
3.Vorige ( )
Naar het vorige hoofdstuk of het begin van de huidige track gaan.
4.Volgende ( )
Naar het volgende hoofdstuk/de volgende track gaan.
5.VOL-
6.REPEAT
Hoofdstuk, track, titel of alles herhalen.
7.AB
Segment herhalen.
8.PROGRAM
Een track programmeren in de programmeerlijst.
9.SOURCE
DVD, kaart, USB
10.TITLE
Om terug te keren naar het titelmenu van de DVD.
11. MODE
De IR hoofdtelefoon AAN/UIT schakelen.
12.CIJFERTOETSEN 0-9
Voor het selecteren van genummerde onderdelen in een menu.
13.ENTER
Bevestigt de menukeuze.
14.VOL+
15.DISPLAY
De schermweergave openen.
16.AUDIO
Een audiotaal selecteren (DVD).
17.SUBTITLE
Een ondertitelingstaal selecteren.
18.ANGLE
Een DVD camerahoek selecteren indien beschikbaar
19.SETUP
Voor toegang tot of verlaten van het instellingenmenu.
20.10+ TOETS
10+ toevoegen wanneer u selectie hoger is dan 10.
21.STEP
Stapsgewijs afspelen in DVD-modus.
22. TOETS
Terugspoelen.
23. TOETS
Vooruitspoelen.
24.PBC
PBC aan/uitschakelaar.
25.MENU
Het menu openen van een DVD.
26.SEARCH
Ga naar het gewenste tijdstip, titel of hoofdstuk in de
DVD-modus
27.MUTE
Uitschakelen audio-uitgang.
1 2 34
5678
9 0 10+
REPEAT
TI TLE
EN TER
ME NU
SUBTITLE
AUDIO
MUTE
SOURCE
MODE
PBC
VOL+VOL-
AB
DISPLAY
11
26 27
9
12
21
20
24
16
1
2
25
14
4
3
23
22
15
87
6
5
19
13
10
17
18
STEP

3. Instellen instellingenmenu
Algemene instellingenpagina
Pagina audio-instellingen
-- --
DOWNMIX STR
DOLBY DIGITAL
LT/RT
SPDIF/OFF
SPDIF/RAW
SPDIF/PCM
DUAL MONO
DYNAMIC
STR STR
L-MONO
R-MONO
MIX-MONO
-
-
-
-
-
-
-
-
-
-
-
-
-
-
-
-
-
-
FULL
OFF
-
- - - -AUDIO SETUP PAGE
GO TO AUDIO SETUP PAGE
DIGITAL OUTPUT RAW STEREO
15
- - GENERALSETUP PAGE - -
GOTO GENERAL SETUP PAGE
TV DISPLAY WIDE
TFT DISPLAY 16:9
ANGLE MARK ON
OSD LANGUAGE ENG
CLOSED CAPTIONS ON
SCREEN SAVER ON
4:3 PANSCAN
4:3 LETTERBOX
16:9
ON
OFF
ENGLISH
FRENCH
GERMAN
SPANISH
DUTCH
POLISH
HUNGARIAN
ON
OFF
ON
OFF
16:9
4:3
ON
OFF
IR HEADPHONE OFF
AUTO STANDBY 3H
OF F
3 HO URS
4 HO URS
Druk op de toets SETUP om het instellingenmenu te openen. Gebruik de
pijtjestoetsen om het gewenste onderdeel te selecteren. Druk nadat
de instellingen zijn gemaakt nogmaals op de toets SETUP om de normale
weergave te herstellen.
U kunt de volgende menuonderwerpen instellen:
GENERAL (ALGEMEEN): selecteert het GENERAL PAGE (ALGEMENE PAGINA)
menu.
AUDIO: selecteert het AUDIO PAGE (AUDIO PAGINA) menu.
VIDEO: selecteert het VIDEO PAGE (VIDEOPAGINA) menu.
PREFERENCE (VOORKEUR): selecteert het PREFERENCE PAGE
(VOORKEURPAGINA) menu.
Algemene instellingenpagina
TV DISPLAY: selecteert de aspectverhouding van het beeld.
4:3 PANSCAN: als u een normale TV bezit en wilt dat beide zijden van het beeld
afgeknipt en aangepast worden om op uw TV scherm te passen.
4:3 LETTERBOX (BRIEVENBUS): als u een normale TV bezit. In dit geval wordt
een breed beeld met zwarte balken onderin en bovenin het TV-scherm
weergegeven.
16:9: breedbeeldscherm.
TFT DISPLAY (TFT SCHERM): een aspectverhouding selecteren voor de
weergave.
Angle Mark (Hoekmarkering)
Informatie weergeven over de huidige hoekinstelling in de rechter hoek van
het TFT scherm, indien beschikbaar op de disk.
OSD Language (OSD Taal)
U kunt uw eigen gewenste taalinstellingen selecteren.
Closed Captions (Ondertitels)
Ondertitels zijn gegevens verborgen in het videosignaal van bepaalde disks.
Voordat u deze functie selecteert, dient u te controleren of de disk inderdaad
ondertitels bevat en of ook uw TV ingesteld is voor deze functie.
Screen Saver (Schermbeveiliging)
Deze functie wordt gebruikt om de schermbeveiliging Aan of Uit te schakelen.
IR HEADPHONE (IR HOOFDTELEFOON)
Gebruik deze functie om de IR hoofdtelefoon AAN of UIT te schakelen.
AUTO STANDBY (AUTO STAND-BY)
Gebruik deze functie om op stand-by te schakelen.

Pagina video-instellingen
- - VIDEO SETUP PAGE - -
GOTO VIDEO SETUP PAGE
BRIGHTNESS 00
CONTRAST 00
HUE 00
SATURATION 00
Brightness, Contrast, Hue, Saturation (Helderheid, Contrast, Tint, Verzadiging):
videokwaliteit instellen.
Voorkeurpagina
TV Type (Soort TV)
Voor het selecteren van het kleursysteem dat overeenkomt met uw TV bij
gebruik van de AV-uitgang. Deze DVD-speler is voor zowel NTSC als PAL geschikt.
16
- - PREFERENCE SETUP PAGE - -
GOTO PREFERENCE PAGE
TV TYPE PAL
AUDIO ENG
SUBTITLE OFF
DISC MENU ENG
DEFAULT
PAL
AUTO
NTSC
ENGLISH
FRENCH
GERMAN
SPANISH
DUTCH
POLISH
HUNGARIAN
OTHERS
RESET
ENGLISH
FRENCH
GERMAN
SPANISH
DUTCH
POLISH
HUNGARIAN
OTHERS
ENGLISH
FRENCH
GERMAN
SPANISH
DUTCH
POLISH
HUNGARIAN
OFF
OTHERS
Downmix
U kunt met deze optie de stereo analoge uitgang van uw DVD-speler instellen.
LT/RT: Selecteer deze optie als uw DVD-speler aangesloten is op een
Dolby Pro Logic decoder.
Stereo: Selecteer deze optie als de uitgang alleen geluid geeft op de
twee voorluidsprekers.
Digital Output (Digitale Uitgang)
De functie wordt gebruikt om de SPDIF-uitgang te selecteren: SPDIF Uit,
SPDIF/RAW, SPDIF/PCM.
SPDIF Off (SPDIF UIT): Schakelt de SPDIF uitgang uit.
SPDIF/RAW: Als u de DIGITALE AUDIO-UITGANG aangesloten hebt op
een multikanaal decoder/ontvanger.
SPDIF/PCM: Alleen als uw ontvanger geen multikanaal audio kan
decoderen.
Dolby digital
De Dolby Digital Instelling biedt de volgende opties: 'Dual Mono' ('Dubbel
Mono') en 'Dynamic' ('Dynamisch').
Dual Mono (Dubbel Mono)
Stereo: het linker mono geluid zal uitgangssignalen sturen naar de
Linker luidspreker en het rechter mono geluid zal uitgangssignalen naar de
Rechter luidspreker sturen.
L-Mono: Het linker monogeluid zal uitgangssignalen naar de Linker en
Rechter luidspreker sturen.
R-Mono: het rechter mono geluid zal uitgangssignalen sturen naar de
Linker en Rechter luidspreker.
Mix-Mono: het linker en rechter gemixte mono geluid zal
uitgangssignalen sturen naar de Linker en Rechter luidsprekers.
Dynamic (Dynamisch)
Dynamische bereikcompressie.

17
PAL - selecteer deze optie als de aangesloten TV is voorzien van het PAL-
systeem. Het wijzigt het videosignaal van een NTSC-disc en voert dit uit in
PAL-formaat.
NTSC - selecteer deze optie als de aangesloten TV is voorzien van het NTSC-
systeem. Het wijzigt het videosignaal van een PAL-disc en voert dit uit in
NTSC-formaat.
Auto: Verandert het uitgaande videosignaal automatisch op basis van het
afspelende diskformaat.
Audio: Audiotaal selecteren (indien beschikbaar).
Subtitle (Ondertiteling): Ondertitelingstaal selecteren (indien beschikbaar).
Disc Menu (Diskmenu): Taal voor het diskmenu selecteren (indien
beschikbaar).
Default (Standaard): Terugstelling naar standaard fabriekswaarden.

4. Parameters en specificaties 5. Batterijparameters
Batterijspecificaties:
Uitvoer: 7,4V
Opslag- en bedrijfscondities:
1.Opslagcondities Temperatuur Vochtigheid
6 maanden -20°C +45 C~ °
-20 C +65 C° ~ °
65+20%
65+20%
2.Gebruiksomstandigheden Temperatuur Vochtigheid
Standaard lading
Standaard ontlading
0 C +45 C° ~ °
-20 C +65 C° ~ °
65+20%
65+20%
1 week
18
Onderwerp Standaard vereiste
Uitgang
Technische parameters
VIDEO UIT
AUDIO UIT :1,2 VRms (1 KHz, 0 dB)
Stroomvereisten
Bedrijfsvochtigheid
: AC 100-240 V , 50/60 Hz
: 5% tot 90%
Systeem
Laser : SEMIGELEIDER LASER, GOLFLENGTE 650 NM
Signaalsysteem : NTSC / PAL
Frequentiebereik
Signaal/ruisverhouding :BETER DAN 80 DB (UITSLUITEND ANALOGE UITGANGEN)
Dynamisch bereik :MEER DAN 80 DB (DVD/CD)
Accessoires
Opmerking: Ontwerp en specificaties kunnen zonder voorafgaande
kennisgeving worden gewijzigd.
N
:VIDEO/AUDIOKABEL, AFSTANDSBEDIENING,
STEREO HOOFDTELEFOON, OPLAADBARE BATTERIJ.
: 20 HZ TOT 20 KHZ (1 DB)
Energieverbruik : <10W
: 0.948kg
Afmetingen (ca.)
Gewicht (ca.)
: 240 (L) x 186 (D) x 44 (H) mm
Batterij opladen
Sluit de DVD-speler aan op de meegeleverde netadapter,
de LED-indicator is ROOD tijdens het opladen van de batterij en wordt groen
wanneer de batterij volledig is opgeladen.

6.DE LA FUNDA DE TRANSPORTE
19
De DVD-speler in een auto installeren
Gebruik de meegeleverde montagekit om de DVD-spelers op de achterzijde van de
hoofdsteunen in de auto te installeren.
1.Pas de haakse steunbout op het
schroefgat op de achterzijde van de DVD-
eenheid. Draai de bout rechtsom en zet de
steun goed vast.
2.Hef de hoofdsteun op van zijn poten. Pas
de horizontale steun af op de openingen
van de hoofdsteunpoten en zorg ervoor dat
de horizontale steun stevig bovenop de
autostoel zit. Bevestig de hoofdsteun weer
op de poten.
3.Pak de DVD-speler met beide handen
stevig vast en bevestig de haakse steun
stevig op de steunstang. U zult een klik
horen. Controleer dat het gehele apparaat
stevig vast zit.
4.Pas de hoek aan van de DVD-speler en zet
vervolgens stevig vast door de rechter bout
vast te draaien.
5.U kunt de DVD-speler van de horizontale
steunstang verwijderen door de DVD-speler
met de ene hand te ondersteunen. Druk
vervolgens met de andere hand de
ontgrendelknoppen aan beide zijden van de
haakse steun stevig in en trek.
Steun
Hoofdsteun
Pootsteun
Horizontale steunstang
•Dit apparaat dient nooit te worden gebruikt door de bestuurder van het voertuig en dient nooit
tijdens het rijden ontoereikend bevestigd in het voertuig te worden achtergelaten.
•Als dit apparaat in uw voertuig wordt gebruikt, zorg er altijd voor dat deze veilig vast zit en
geen veiligheidsapparatuur belemmerd zoals airbags en veiligheidsgordels.
•Alle passagiers dienen veiligheidsgordels te gebruiken wanneer dit apparaat wordt gebruikt
in een bewegend voertuig.
•Neem in geval van twijfel contact op met uw voertuigfabrikant voor meer advies.

11. Ser
10. CE-mark
9. Af
8. Disclaimer
7. Gar
20
antie
Lenco biedt service en garantie aan overeenkomstig met de Europese wetgeving. Dit
houdt in dat u, in het geval van reparaties (zowel tijdens als na de garantieperiode),
uw lokale handelaar moet contacteren.
Belangrijke opmerking: Het is niet mogelijk producten direct naar Lenco te sturen voor
reparatie.
Belangrijke opmerking: De garantie verloopt als een onofficieel servicecenter het
apparaat op wat voor manier dan ook heeft geopend, of er toegang toe heeft
gekregen.
Het apparaat is niet geschikt voor professioneel gebruik. In het geval van professioneel
gebruik worden alle garantieverplichtingen van de fabrikant nietig verklaard.
Dit symbool geeft aan dat het betreffende elektrische product of de
batterij niet moet worden verwijderd als algemeen huishoudelijk afval in
Europa. Zorg voor een juiste afvalverwerking door het product en de
batterij in overeenstemming met alle van toepassing zijnde lokale wetten
voor het verwijderen van elektrische apparatuur of batterijen te
verwijderen. Als u dit doet, helpt u de natuurlijke hulpbronnen te
behouden en de standaard van milieubescherming te verbeteren bij de
behandeling en verwijdering van elektrisch afval (Afgedankte Elektrische
en Elektronische Apparatuur).
Er worden regelmatig updates in de firmware en/of hardwarecomponenten
gemaakt. Daardoor kunnen gedeelten van de instructie, de specificaties en
afbeeldingen in deze documentatie enigszins verschillen van uw eigen situatie. Alle
onderwerpen die staan beschreven in deze handleiding zijn bedoeld als illustratie
en zijn niet van toepassing op specifieke situaties. Aan de beschrijving in dit
document kunnen geen rechten worden ontleend.
ering
Producten met een CE keurmerk houden zich aan de EMC richtlijn
(2004/108/EC) en de Richtlijn voor Lage Voltage (2006/95/EC) uitgegeven
door de Europese Commissie.
Hierbij verklaart Lenco Benelux BV, Thermiekstraat 1a, 6361 HB Nuth,
Nederland, dat dit product voldoet aan de essentiële eisen en andere
relevante bepalingen van Richtlijn 1999/5/EU.
De verklaring van conformiteit is verkrijgbaar via t[email protected]
vice
Voor meer informatie en ondersteuning van de helpdesk, kunt u terecht op
www.lenco.com
Lenco Benelux BV, Thermiekstraat 1a, 6361 HB, Nederland.
voer van het oude apparaat
Other manuals for DVP-937
2
Table of contents
Languages:
Other LENCO Portable DVD Player manuals

LENCO
LENCO DVP-736 User manual

LENCO
LENCO BRP-1150 User manual

LENCO
LENCO MES-415 User manual

LENCO
LENCO DVP-937 User manual

LENCO
LENCO DTVR-700 User manual

LENCO
LENCO DVR-70 User manual

LENCO
LENCO DVP-1027 User manual

LENCO
LENCO MES-220 DVX - User manual

LENCO
LENCO DVD-2051 User manual

LENCO
LENCO DVP-1027 User manual

LENCO
LENCO MES-202 User manual

LENCO
LENCO DVP-738X2 User manual

LENCO
LENCO DVR-70 User manual

LENCO
LENCO MES-402 User manual

LENCO
LENCO TDV901 User manual

LENCO
LENCO DVP-936 User manual

LENCO
LENCO WALKY-BOX User manual

LENCO
LENCO DVP-79 User manual

LENCO
LENCO SNOOPY DVP-7 User manual

LENCO
LENCO MES-202 User manual