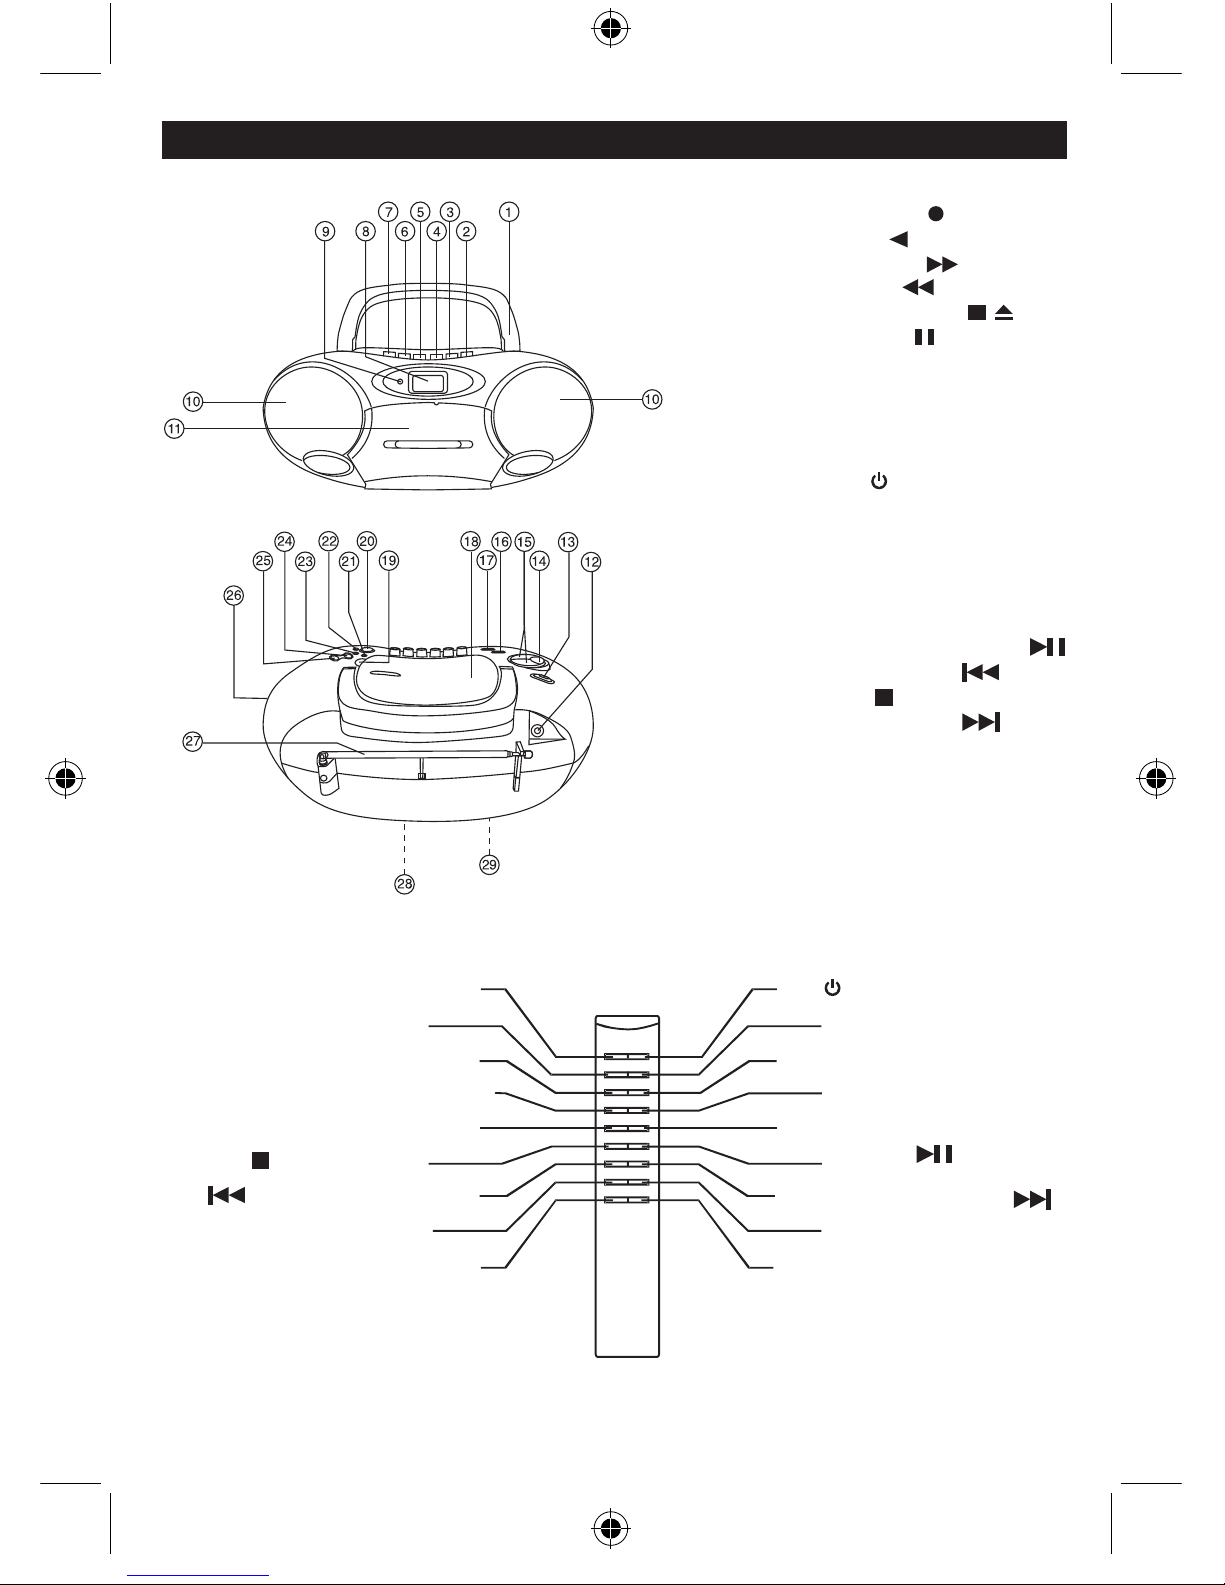
RADIO MEMORY FUNCTION
COMPACT DISC PLAYBACK
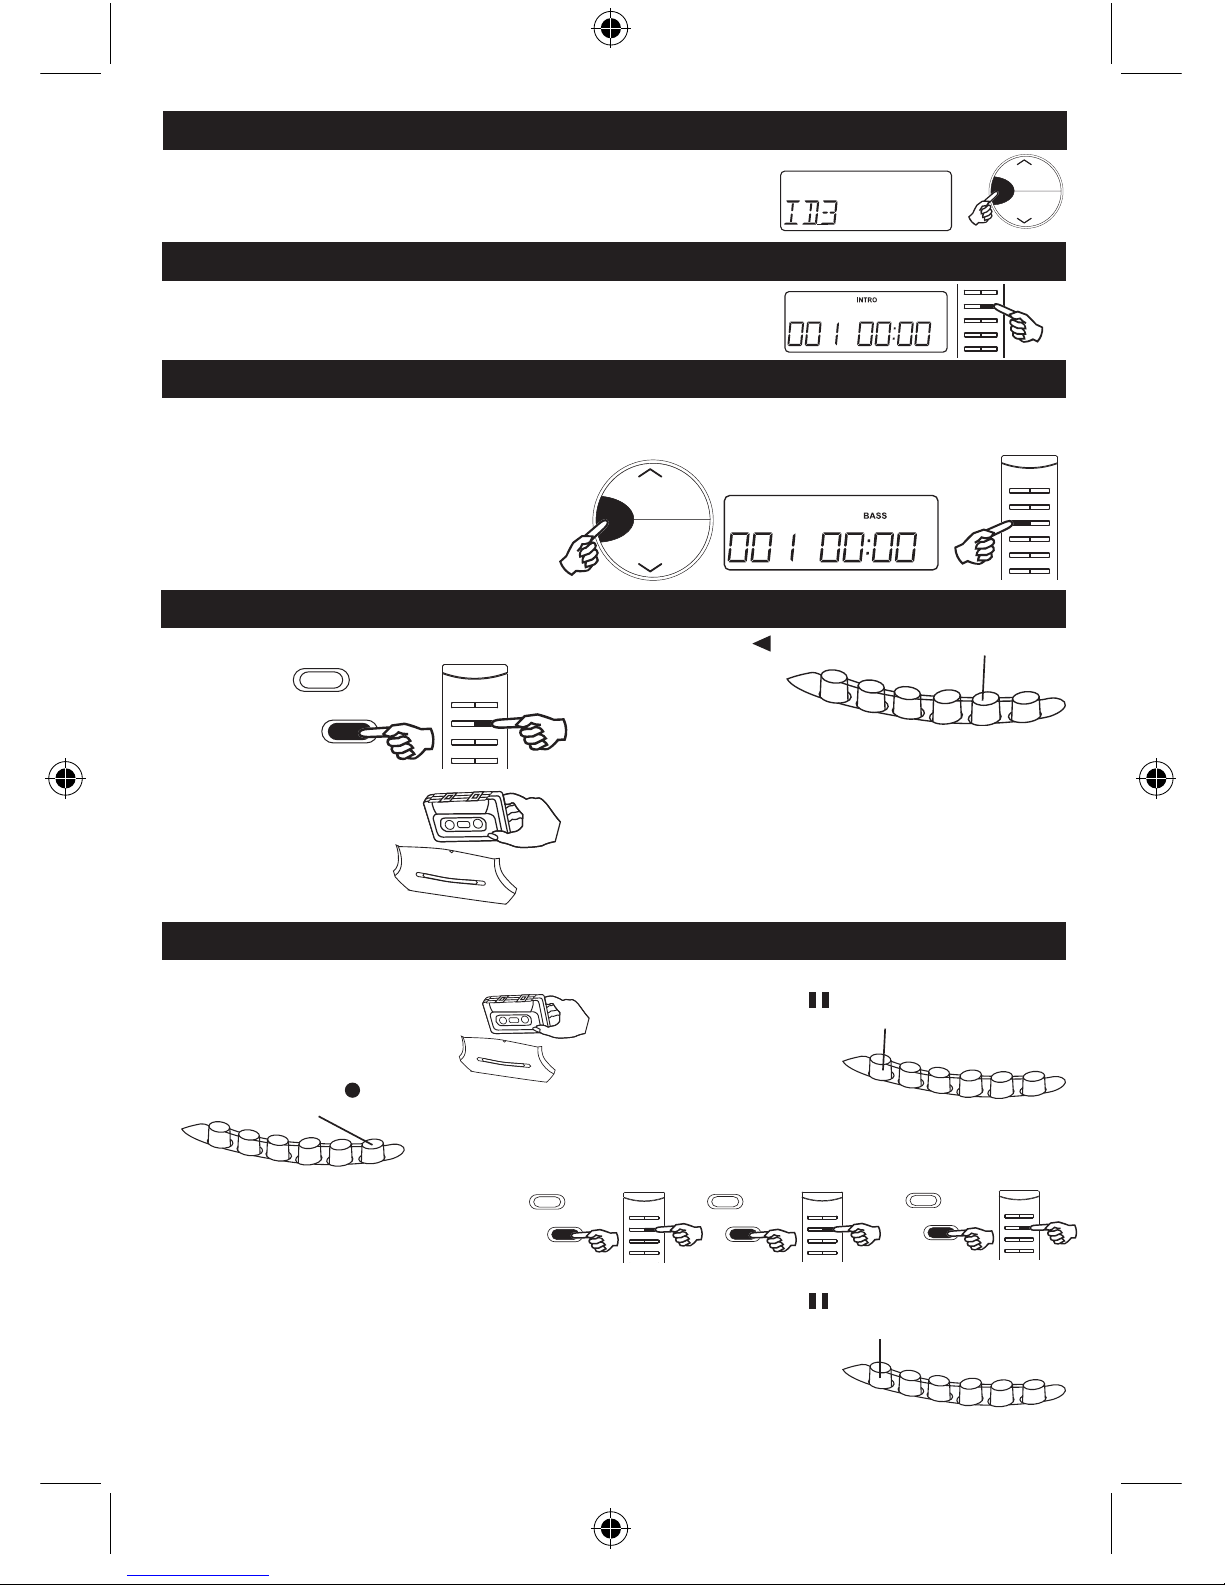
1. Press FUNCTION button
repeatedly until “CD” is
shown on display.
2. Lift the CD door up.
3. Insertadiscwiththelabelsidefacingup.
4. Close the CD door, the disc will rotate.
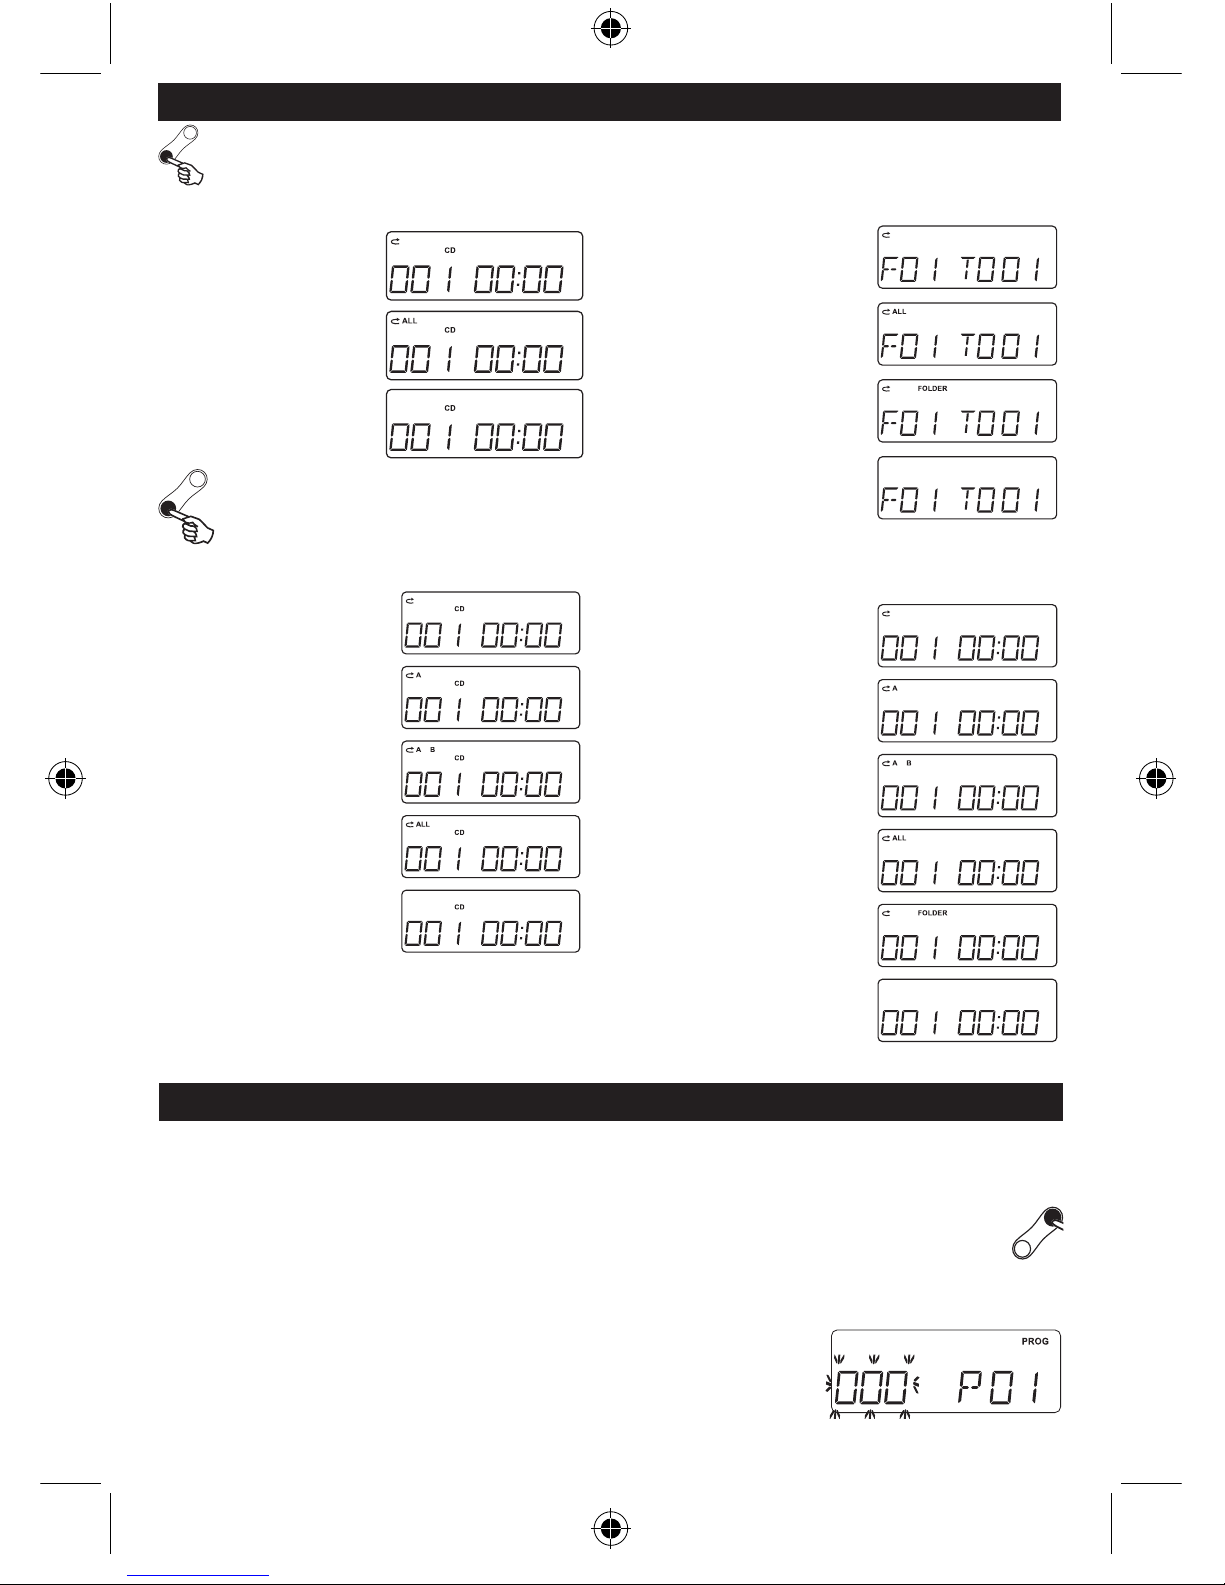
For CD : The total tracks of the disc will show on the
display.
For MP3/WMA/USB : The total tracks of the disc and total
number of the folder will show on
the display.
CD display
E 3
TO STOP PLAYBACK
Press the STOP button.
For CD : Total number of tracks and time will be shown.
For MP3 : Total number of tracks and folder will be shown.
For WMA : Total number of tracks and folder will be shown.
For USB : Total number of tracks and folder will be shown.
TO SKIP TO THE BEGINNING OF A TRACK
• Presseitheroneoftheskipbuttonsaccordingtothedesiredskipdirection.
• Play/back resumes from the selected track.
• Whenthebuttonispressedonceduringplay,theprevioustrackstartsagain.
• Whenthebuttonispressedonceduringplay,thenexttrackplays.
SEARCHING FOR A PASSAGE WITHIN A TRACK
• Keeptheorbuttonpressedduringplayback,andreleasethebuttonassoonasyou
recognisethedesiredpassage.ThennormalCDplaybackwillresumefromthispoint.
For CD : Track number "001" & "CD" will be shown, the
timeofthetrack"00:00"inash,duringnormal
compact disc playback.
For MP3 : Track number "F01" & "MP3" will be shown,
thetimeofthetrack"00:00"inash,during
MP3 playback.
For WMA : Track number "F01" & "WMA" will be shown,
thetimeofthetrack"00:00"inash,during
WMA playback.
For USB : Track number "F01" & "USB" will be shown,
thetimeofthetrack"00:00"inash,during
USB playback.
TO INTERRUPT PLAYBACK
Press the ENTER / PLAY/PAUSE button. Press the
button to resume playback.
5. Afterdiscreadnished,thediscwillplayautomatically.
In stop mode, press the ENTER / PLAY/PAUSE
button to play the track.
PLAYING TRACKS IN RANDOM ORDERS
1. If the RANDOM / P - / PROGRAM / MEMORY button is pressed, the tracks on the discs are not playedRANDOM / P - / PROGRAM / MEMORY button is pressed, the tracks on the discs are not playedis pressed, the tracks on the discs are not played
in consecutive order but in random order. The word RAND appears on the display to provide a visual
reminder that the RAND function has been activated.
2. Press the STOP button or RANDOM / P - / PROGRAM / MEMORY button to switch off the function RAND.RANDOM / P - / PROGRAM / MEMORY button to switch off the function RAND.to switch off the function RAND.
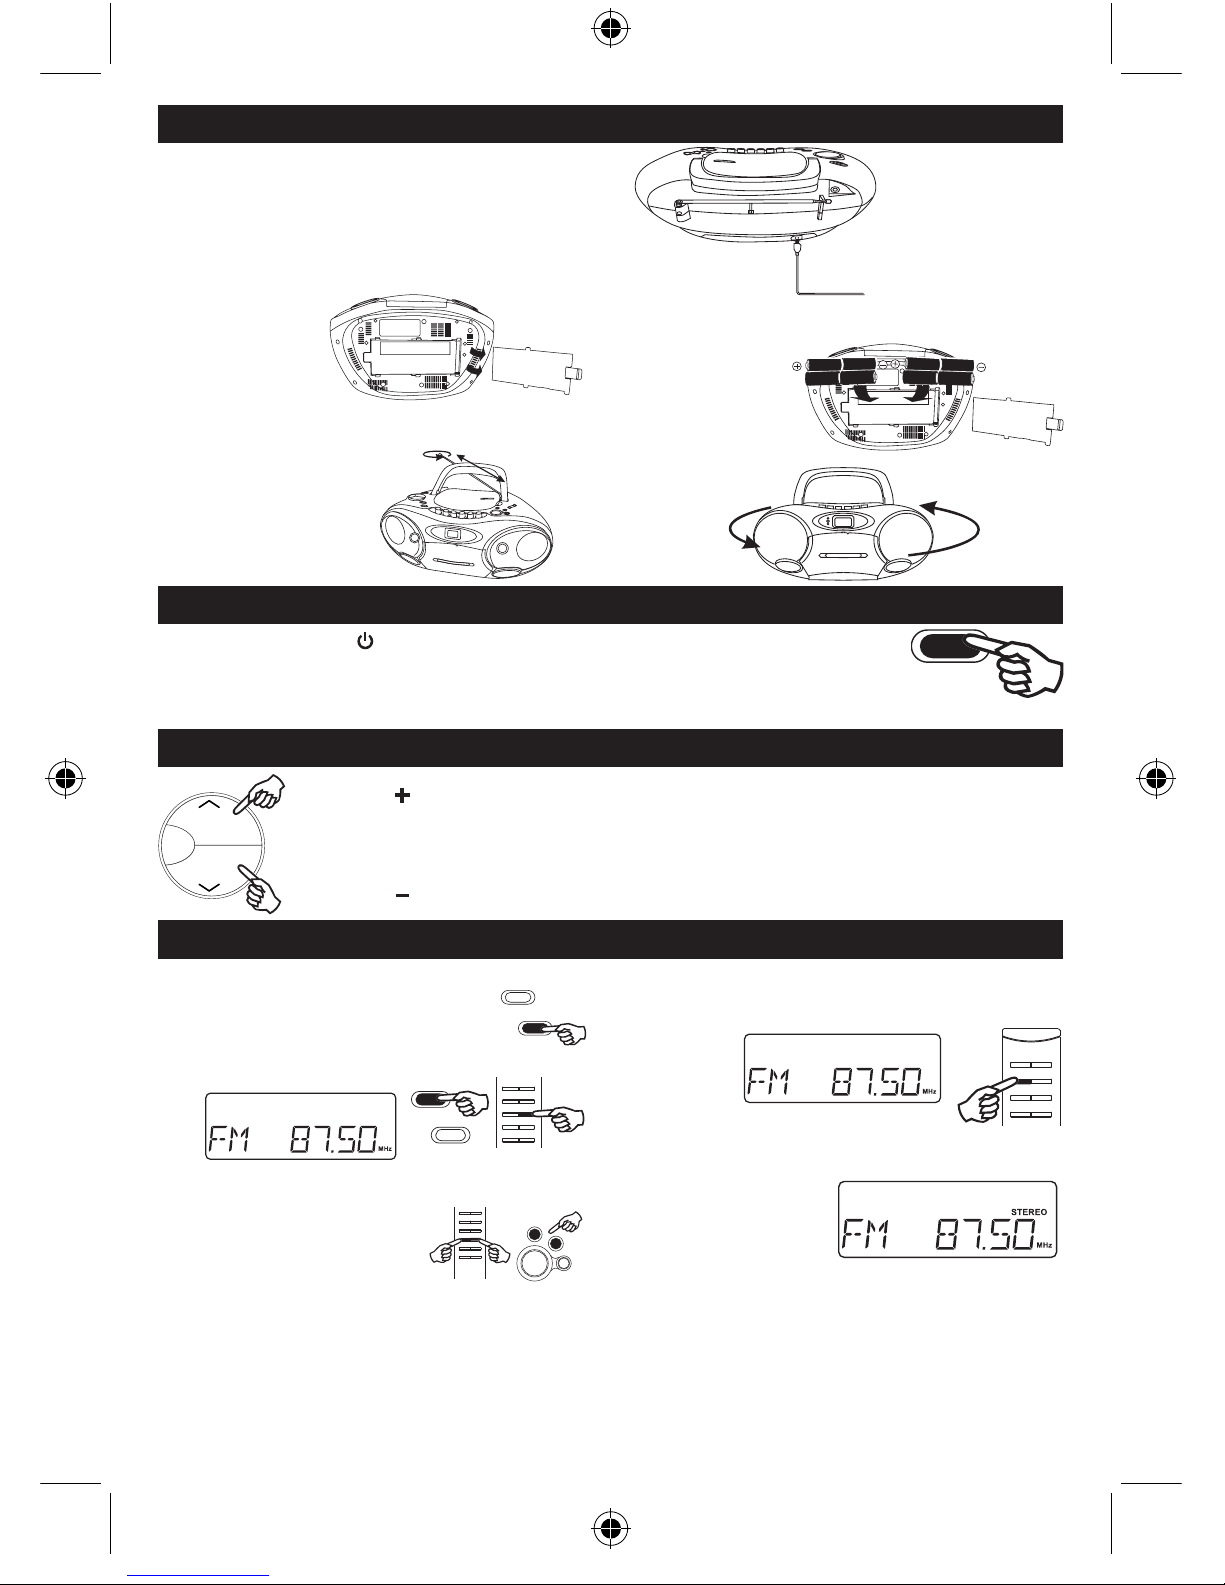
1. Tune to a desired radio station.
2. PressRANDOM/P-/PROGRAM/MEMORYbutton(2seconds)toentertuningsavingmode.
The “MEMORY” icon will be turned on.
3. Programnumber“01”onthelefthandsidewillbeashing.
4. Within 10 seconds, press PLAY MODE / P+ or RANDOM / P - / PROGRAM / MEMORY
buttontoselectthedesiredprogramnumber.
5. PressENTER/PLAY/PAUSEbuttontoconrmtheProgramnumber.
6. PressRANDOM/P-/PROGRAM/MEMORYbutton(2seconds)toconrmthememory.
7. Ifthereisnobuttonpressedwithin10seconds,itwillexittuningsavemodeandthe
“MEMORY” icon will be turned off.
For CD : Track number "001" & "CD" & "00:00" will be
shown,duringnormalcompactdiscplayback.
For MP3 : Track number "F01" & "MP3" & "00:00" will
beshown,duringMP3playback.
For WMA : Track number "F01" & "WMA" & "00:00" will
beshown,duringWMAplayback.
For USB : Track number "F01" & "USB" & "00:00" will
beshown,duringUSBplayback.
CD display MP3 display
WMA display USB display
CD display MP3 display
WMA display USB display