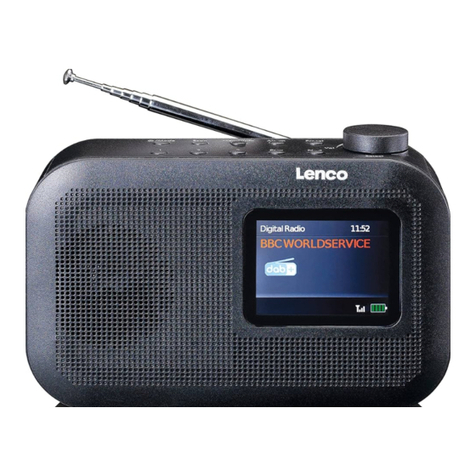
LENCO PDR-020 User manual

Version: 1.0
Model : PDR-020
USER MANUAL
DAB+/FM Radio
HANDLEIDING
DAB+/FM-radio
BENUTZERHANDBUCH
DAB+/UKW-Radio
MODE D'EMPLOI
Radio DAB+/FM
MANUAL DEL USUARIO
Radio DAB+/FM

Version: 1.0
Index:
English .....................................................................................................................................................3
Nederlands............................................................................................................................................11
Deutsch .................................................................................................................................................19
Français .................................................................................................................................................28
Español..................................................................................................................................................37

3
English
DAB+/FM Radio
General Safety
General precautions
Install the unit in accordance with the manufacturer’s instructions. Do not install it near any heat
sources such as radiators, heart registers, stoves or other objects (including amplifiers) that produce
heat.
Only use the unit with the accessories that are sold with the unit.
To ensure proper ventilation and operation, do not block any ventilation openings.
Unplug the unit from the charging power source during lightning storms.
Excessive sound pressure from earphones and headphones can cause hearing loss.For the sake of
your health, always keep the volume at a low to moderate level when using eraphones/headphones.
Keep candles or other open flams away from this product at all times.
Placing this radio near a TV, refrigerator, microwave oven, amplifier or DVD player and may
adversely affect the sound quality.In such a case, move the radio away from the device that causes
the interference.
Do not install or place this radio in a bookcase, built-in cabinet or in another confined space.Insure
the unit is well ventilated.
This product is not intended for the use by persons (including children) with reduced physical,
sensory or mental capabilities, or lack of experience and know ledge, unless they have been given
supervision or instruction concering the use of the appliance by a person responsible or their safety.
Supervise children to ensure they do not play with the appliance.
Keep the original packaging for future transport of the radio.For maximum protection, repack the
unit as it was originally packaged.
Ensure to unplug adaptor form the unit before cleaning.
Only use a soft, dry cloth for cleaning the unit and the display screen.
Do not use any type of solvent, such as thinner and benzene, as they may cause damage to the
surface of the radio.
Before first use
Unpack the appliance but keep all packaging meaterials until you have made sure your new DAB
Radio is undamaged and in good working order, Plastic wrapping can be suffocation hazard for
babies and young children, so ensure all packaging materials are out of their reach.
4
Product Overview
1. Info/Menu
Press and hold to access menu settings.
2. Scan
Auto-scan all DAB and FM stations.
3. Enter/Snooze
Press to activate 9 minutes mode when the alarm is sounding.

5
4. Preset
Store and access up to 10 DAB and 10 FM Station Presets.
5. Vol-
Decrease the volume.
6. Prev
Select previous frequency, station, preset station or menu option.
7. Vol+
Increase the volume.
8. Next
Select next frequency, station, preset station or menu option.
9. Power/Mode
While the radio is on, press to switch between DAB and FM modes.
10. Power on/off switch
While the radio is on, slide to switch it off. While the radio is off, slide to
switch it on.
11. DC 5V,1A Power connector
12. Charging Light Indicator
13. 3.5mm Headphone Socket
14. LCD display
15. Telescopic Antenna
Instructions
Basic operations
Switch on your DAB Radio for the first time
Slide the OFF/ON switch to the ON position on the back of your DAB radio to power up the DAB
radio.
Extend the telescopic antenna for the best reception possible.
Then press the Power/Mode button to turn the radio on.
When DAB mode is activated for the first time, a full scan will automatically commence, or will play
the last station before the unit was turned off.
Once the radio has been switched ON, press the Power/Mode button to switch between DAB and
FM modes.
During scanning the screen will display a slide bar that indicates the progress of the scan, and the
amount of radio stations that have been found so far. Once the scan has finished, the radio will
select the first alphanumeric station.
Slide the ON/OFF switch to the OFF positin to turn the DAB radio off.
Note: Long press power button and unit will go to standby mode.
Selecting the modes
When the DAB radio is turned on, press the power/Mode button repeatedly to switch between DAB
and FM modes.
Adjusting volume
Press the VOL+ or VOL- button to increase/decrease the volume.
DAB operation
To listen to the tuned stations press either the PREV or NEXT buttons. Each time you press the
PREV/NEXT burrons, you wll skip to the previous or next stored station.
The radio will display the station name.

6
Memory
When you power up the radio again after a switch off.it will automatically tune into the same station
(DAB of FM) that was last selected.
Storing stations
You can store up to 10DAB stations to the memory presets for quick and easy recall of your favourite
stations.
To store a preset, you must first be listening to the station that you would like to save. Press and
hold the PRESET button. The display will show “Preset Store<#: (Empty)>”. If a station is already
stored. The display will show “<#: Station name>”.
Press the PREV/NEXT buttons to select the preset station number 1-10.
To save to the selected preset station number, press the ENTER button. The display will then show
“Preset# stored”.
Recalling a stored station
Once you have saved a station to one of rthe preset buttons, you can:
Press the PRESET button and press the PREV/NEXT button to select your desired preset station’s
number.
Press the ENTER button to recall a preset station number.
Station information on DAB mode
Press the INFO/MENU button repeatedly to show the different program information.
Signal Strength: Displays a signal bar with the strength of the current station.
Bit Error Rate (BER): Provides daails of the signal error rate.
Channel and Frequency: Displays the station’s transmission channel number and frequency.
PTY (Program Type): Shows the type and description of the program provided by the DAB station.
Time and Date: Displays the time and date information provided by the broadcaster.
DAB indicatiom: Indicates DAB mode.
Dynamic Label Segment (DLS): Displays scrolling text information supplied by the broadcaster.
FM opearation
In order to switch the radio from DAB to FM mode, press the Power/Mode button once.
Auto scan
To search for an FM station, press the SCAN button. This will start scanning up the frequency band.
To scan down the frequency band. Press and hold the SCAN button.
Once a station has been found.the scanning will stop automatically. If no station is found, then the
tuning will stop one it has cycled through the entire FM band (87.5-108 MHz).

7
Manual Scan
To search FM stations manually, simply press the PRES/NEXT buttons repeatedly until your desired
frequency is reached.
Storing stations
You can store up to 10 FM stations to the memory presets for quick and easy recall of your favourite
stations.
To store a preset, you must first be listening to the station that you would like to save. Press and hold
the PRESET button. The display will show “Preset store <#: (Empty)>”. If a station is already stored, the
display will show “<#: Station frequency>”.
Press the PREV/NEXT button to select the preset station number 1-10.
To save to the selected preset station number, press the ENTER button. The display will then show
“Preset # stored”.
Recalling a stored station
Once you saved a station to one of the preset buttons, you can:
Press the PRESET button and press the PREV/NEXT buttons to select your desired preset station’s
number.
Press the ENTER button to recall a preset station number.
Station information on FM mode
Press the INFO button repeatedly to show the different program information.
Program Type: Displays a description of the type of program provided by the broadcaster.
Signal Strength: Displays a signal bar with the strength of the current station.
Time and Date: Displays the time and the date.
Frequency: Displays the station’s transmission frequency.
Audio Type: Displays the audio type of the station you are listening to. It will either be Stereo or Mono.
Radio Text: Displays scrolling test information supplied by the broadcaster.
System Settings
With the unit turned on press and hold the INFO/MENU button. This will open the “System Menu
Settings”.
Press the PREV/NEXT buttons to select your desired Sub-option between:
Setting the Time/Date
Press the ENTER button, the hour digitals will flash.
Press the PREV/NEXT buttons to set the hour correctly.
Press the ENTER button to confirm.
Repeat the last two steps to set the minutes, the Year, Month, Date.

8
Alarm Setting
Press the Enter/Snooze to use Alarn 1 or press NEXT to access Alarm2.
Press the Next button so the word “ON” is flashing and press Enter to confirm.
The hour digits for the alarm will flash, press the Prev or Next to change the hour and press the Enter
button to confirm.
Press the Prev or Next button to change the minute and press the Enter button to confirm.
Press the Prev or Next button to change the volume and press the Enter button to confirm.
Press the Prev or Next button to change between Alarm-DAB-FM and press the Enter to confirm.
To set the Alarm 2, follow the Alarm 1 instructions.
Note: You can press the Info/Menu button to get back last one step when in the process of setting the
alarm.
Turn off the alarm
To turn off the alarm, press the Next button so the word “OFF” is flashing and press Enter button. The
alarm is now OFF.
Turn off the alarm when sounding
Press the Power/Mode button to turn off the alarm when sounding.
Note: The alarm will keep ringing for one hour if you do not turn it off when it is sounding.
Sleep Setting
Press the Prev or Next button to select either OFF-120-90-60-45-30-15-5 minutes.
Press the Enter button to confirm your selection.
Factory Reset
Press the Enter button and the display will show “Factory Reset?”. Press the Next or Prev to select
“Yes”.
Press the Enter button again and will reset the radio.
FM Scan Set
Press the Enter button to select Only or All. If select Only, the radio only scan the strong signal station
and play. If select All, the radio will also scan the weak signal station and play.
System Version
You can check the software version number.
Resetting the radio
Resetting the radio will delete all the tuned DAB stations and all the preset memory stations in FM and
DAB modes.To reset the radio:
Press and hold the INFO/MENU button.
Press the Next button repeatedly until “Factory Reset” is displayed on the screen.

9
Press the Enter button and the display will show “Factory Reset?”. Press the Next button until the word
“YES” is flashing.
Press the Enter button again, this will reset the radio.
Snooze Function
When the alarm sounds, press the Enter/Snooze button to delay the alarm for another 9 mins. The
radio will go to Standby mode.
You can press Power/Mode button to stop the Snooze function and go to the operation mode before
the alarms rings.
FAQs
Problem
Solution
No sound
The station is not tuned in. Fine tune the station.
The volume is set to a low position. Increase the volume.
Headphones may be connected. Disconnect the headphones.
Buttons are not working
Turn off the unit and turn on after a few seconds.
FM: Static sound
DAB: Burbling/intermittent
cut - out
Signal reception is too low. Adjust the aerial or move the unit to a
stronger signal location.
Rescan stations.
Sound is destorted
The volume is too high. Adjust the volume control.
Desired station not found
Weak signal. Use the manual tune function.
Display shows “No Service”
There is no DAB coverage in your area, or poor receiption. Adjust the
position of the aerial, or move the unit to a stronger signal location.
Display is blank
This may occur if the broadcaster changes the label of a service or
removes a label while tuned. The radio will try to retune or perform a
scan.
Specifications
Power supply
Built-in battery
Frequency rangs
FM 87.5-108MHz
DAB 174-240 MHz
Output connector
3.5mm earphone socket
Aerial
Telescopic antenna
Power supply adaptor (For EU only)
Manufacture
Shenzhen Adition Audio Science &Technology Co.Ltd
Input
AC 100-240V~50/60Hz,0.15A Max
Output
DC 5V/1A
Mode Number
AD050501000EUU
Use only original AC adaptor
Use only the power supply listed on the user
instructions
Play Time
Your radio has a play time of around 3-5 hours. This is dependant on signal strength and volume
selection of the radio

10
5. Guarantee
Lenco offers service and warranty in accordance with the European law, which means that in case of
repairs (both during and after the warranty period) you should contact your local dealer.
Important note: It is not possible to send products that need repairs to Lenco directly.
Important note: If this unit is opened or accessed by a non-official service center in any way, the
warranty expires.
This device is not suitable for professional use. In case of professional use, all warranty obligations of
the manufacturer will be voided.
6. Disclaimer
Updates to Firmware and/or hardware components are made regularly. Therefore some of the
instruction, specifications and pictures in this documentation may differ slightly from your particular
situation. All items described in this guide for illustration purposes only and may not apply to
particular situation. No legal right or entitlements may be obtained from the description made in
this manual.
7. Disposal of the Old Device
This symbol indicates that the relevant electrical product or battery should not be
disposed of as general household waste in Europe. To ensure the correct waste
treatment of the product and battery, please dispose them in accordance to any
applicable local laws of requirement for disposal of electrical equipment or
batteries. In so doing, you will help to conserve natural resources and improve
standards of environmental protection in treatment and disposal of electrical
waste (Waste Electrical and Electronic Equipment Directive).
8. CE Marking
Products with the CE marking comply with the EMC Directive (2014/30/EU) and
the Low Voltage Directive (2014/35/EU) issued by the Commission of the European
Community.
Hereby, Lenco Benelux BV, Thermiekstraat 1a, 6361 HB Nuth, The Netherlands, declares that this
product is in compliance with the essential requirements and other relevant provisions of Directive
1999/5/EC.
9. Service
For more information and helpdesk support, please visit www.lenco.com
Lenco Benelux BV, Thermiekstraat 1a, 6361 HB, The Netherlands.

11
Nederlands
DAB+/FM-radio
Algemene veiligheid
Algemene voorzorgsmaatregelen
Installeer het apparaat volgens de instructies van de fabrikant. Installeer het niet in de buurt van
warmtebronnen zoals radiatoren, verwarmingen, kachels of andere voorwerpen (inclusief versterkers)
die warmte produceren.
Gebruik het apparaat alleen met de accessoires die worden verkocht samen met het apparaat.
Blokkeer of bedek geen van de ventilatieopeningen, om een goede ventilatie en werking te garanderen.
Haal de stekker uit het stopcontact tijdens onweer.
Overmatige blootstelling aan luid geluid van oortelefoons en hoofdtelefoons kan leiden tot
gehoorverlies. Houd uit gezondheidsoverwegingen het volume altijd op een laag tot matig niveau
wanneer u gebruik maakt van oortelefoons/hoofdtelefoons.
Houd kaarsen of andere bronnen met een open vlam te allen tijde uit de buurt van dit product.
Gebruik van deze radio in de buurt van een televisie, koelkast, magnetron, versterker of DVD-speler
kan een negatieve invloed hebben op de geluidskwaliteit. Plaats in een dergelijk geval de radio uit de
buurt van het apparaat dat de storing veroorzaakt.
Installeer of plaats deze radio niet in een boekenkast, ingebouwde kast of in een andere afgesloten
ruimte. Zorg ervoor dat het apparaat goed geventileerd blijft.
Dit apparaat is niet bedoeld voor gebruik door personen (inclusief kinderen) met een lichamelijke,
zintuiglijke of verstandelijke beperking of met een gebrek aan kennis en ervaring, tenzij zij onder
toezicht staan of instructies over het juiste gebruik van het apparaat hebben gekregen van de
persoon die verantwoordelijk is voor hun veiligheid.
Kinderen moeten onder toezicht staan om ervoor te zorgen dat zij niet met het apparaat spelen.
Bewaar de originele verpakking voor toekomstig transport. Verpak de radio zoals hij oorspronkelijk
werd verpakt voor maximale bescherming.
Zorg ervoor dat u de adapter uit het apparaat verwijdert vooraleer het te reinigen.
Gebruik alleen een zachte, droge doek om het apparaat en het beeldscherm te reinigen.
Gebruik geen oplosmiddelen, zoals verfverdunner en benzeen, omdat deze het oppervlak van de
radio kunnen beschadigen.
Vóór het eerste gebruik
Pak het apparaat uit, maar bewaar alle verpakkingen totdat u er zeker van bent dat uw nieuwe DAB-
radio niet beschadigd en in goede staat is. Plastic verpakkingsmateriaal levert verstikkingsgevaar op
voor baby's en jonge kinderen, zorg er daarom voor dat alle verpakkingsmaterialen buiten hun
bereik blijven.

12
Productoverzicht
1. Info/Menu
Ingedrukt houden om toegang te krijgen tot de menu-instellingen.
2. Scan
Automatische scan van alle DAB en FM-zenders.
3. Enter/Snooze
Druk om 9 minuten te sluimeren wanneer het alarm afgaat.

13
4. Preset
Opslag en toegang tot 10 DAB en 10 FM-voorkeuzezenders.
5. Vol-
Verlaag het volume.
6. Prev
Selecteer vorige frequentie, zender, voorkeuzezender of menuoptie.
7. Vol+
Verhoog het volume.
8. Next
Selecteer volgende frequentie, zender, voorkeuzezender of menuoptie.
9. Power/Mode
Druk, terwijl de radio is ingeschakeld, om te schakelen tussen DAB en
FM-modi.
10. Aan/uit-schakelaar
Verschuif, terwijl de radio is ingeschakeld, om deze uit te schakelen.
Verschuif, wanneer de radio is uitgeschakeld, om deze in te schakelen.
11. DC 5 V, 1 A voedingsaansluiting
12. Laadindicator
13. 3,5 mm hoofdtelefoonaansluiting
14. LCD-scherm
15. Uitschuifbare antenne
Instructies
Basishandelingen
Wanneer u uw DAB-radio voor de eerste keer inschakelt
Schuif de schakelaar OFF/ON op de achterkant van uw DAB-radio naar de positie ON om de DAB-
radio in te schakelen.
Verleng de uitschuifbare antenne voor de best mogelijke ontvangst.
Druk vervolgens op de knop Power/Mode om de radio aan te zetten.
Wanneer de DAB-modus voor de eerste keer wordt ingeschakeld, zal automatisch een volledige scan
worden uitgevoerd, of zal de laatste zender beginnen te spelen die opstond voordat het apparaat
werd uitgeschakeld.
Druk wanneer de radio is ingeschakeld op de knop Power/Mode om te schakelen tussen DAB en
FM-modi.
Tijdens het scannen zal een schuifbalk op het scherm verschijnen die de voortgang van het scannen
aangeeft, en het aantal radiozenders dat tot dan toe werd gevonden. Zodra de scan is voltooid,
selecteert de radio het eerste alfanumerieke station.
Schuif de schakelaar ON/OFF naar de positie OFF om de DAB-radio uit te schakelen.
Opmerking: Wanneer u de powerknop ingedrukt houdt, zal het apparaat in stand-bymodus gaan.
Modus selecteren
Druk wanneer de DAB-radio is ingeschakeld herhaaldelijk op de knop power/Mode om te schakelen
tussen DAB en FM-modi.
Volume aanpassen
Druk op de knoppen VOL+ of VOL- om het volume te verhogen/verlagen.
DAB-bediening
Druk om te luisteren naar de zenders op de knoppen PREV of NEXT. Elke keer dat u op de knoppen
PREV/NEXT drukt, gaat u naar de vorige of volgende opgeslagen zender.
De radio zal de naam van de zender weergeven.

14
Geheugen
Wanneer u de radio opnieuw inschakelt nadat hij was uitgeschakeld, zal hij automatisch afstemmen
op dezelfde zender (DAB of FM) die het laatst was geselecteerd.
Zenders opslaan
U kunt maximaal 10 DAB-zenders opslaan in het geheugen voor voorkeuzezenders voor snelle en
eenvoudige toegang tot uw favoriete zenders.
Om een voorkeuzezender op te slaan, moet u eerst luisteren naar de zender die u wilt opslaan. Houd
de knop PRESET ingedrukt. Op het scherm verschijnt “Preset Store<#: (Empty)>” (Voorkeuzezenders<#:
(leeg)>). Als een zender reeds is opgeslagen. Op het scherm verschijnt “<#: Station name>” (<#: Naam
zender>).
Druk op de knop PREV/NEXT om de voorkeuzezendernummers 1-10 te selecteren.
Druk op de knop ENTER om de geselecteerde voorkeuzezender op te slaan. Op het scherm verschijnt
dan “Preset# stored” (Voorkeuzezender# opgeslagen).
Een opgeslagen zender oproepen
Zodra u een zender hebt opgeslagen op een van de voorkeuzetoetsen, kunt u:
op de knop PRESET drukken en met de knoppen PREV/NEXT uw gewenste voorkeuzezender selecteren;
op de knop ENTER drukken om een voorkeuzezender op te roepen.
Zenderinformatie in de DAB-modus
Druk herhaaldelijk op de knop INFO/MENU om de verschillende programma-informaties te tonen.
Signal Strength (Signaalsterkte): Geeft een signaalbalk weer met de sterkte van de huidige zender.
Bit Error Rate (BER) (Bitfoutenkans): Geeft gegevens weer over de signaalfoutenkans.
Channel and frequency (Kanaal en frequentie): Geeft het nummer en de frequentie van het
transmissiekanaal weer.
PTY (Program Type) (Soort programma (PTY)): Geeft het type en de beschrijving weer van het
programma op de DAB-zender.
Time and Date (Tijd en datum): Geeft de tijd en datum weer die door de zender wordt gegeven.
DAB indication (DAB-indicatie): Geeft de DAB-modus weer.
Dynamic label segment (DLS) (Dynamische berichtenindeling): Toont schuivende tekstinformatie die
door de zender wordt verstrekt.
Bediening FM
Druk eenmaal op de knop Power/Mode om van DAB-modus naar FM-modus over te schakelen.
Automatische scan
Druk op de knop SCAN om een FM-zender te zoeken. Dit zal de frequentieband naar boven beginnen
te scannen.
Om de frequentieband naar beneden af te scannen: houd de knop SCAN ingedrukt.
Zodra een zender wordt gevonden, zal het scannen automatisch stoppen. Als er geen zender wordt
gevonden, stopt de afstemming zodra de hele FM-band (87,5-108 MHz) werd afgelopen.

15
Handmatige scan
Druk herhaaldelijk op de knop PRES/NEXT totdat de gewenste frequentie is bereikt.
Zenders opslaan
U kunt maximaal 10 FM-zenders opslaan in het geheugen voor voorkeuzezenders voor snelle en
eenvoudige toegang tot uw favoriete zenders.
Om een voorkeuzezender op te slaan, moet u eerst luisteren naar de zender die u wilt opslaan. Houd de
knop PRESET ingedrukt. Op het scherm verschijnt “Preset store <#: (Empty)>” (Voorkeuzezenders<#:
(leeg)>). Als een zender reeds is opgeslagen, verschijnt er op het scherm “<#: Station frequency>”
(<#: Zenderfrequentie>).
Druk op de knop PREV/NEXT om de voorkeuzezendernummers 1-10 te selecteren.
Druk op de knop ENTER om de geselecteerde voorkeuzezender op te slaan. Op het scherm verschijnt
dan “Preset # stored” (Voorkeuzezender # opgeslagen).
Een opgeslagen zender oproepen
Zodra u een zender hebt opgeslagen op een van de voorkeuzetoetsen, kunt u:
op de knop PRESET drukken en met de knoppen PREV/NEXT uw gewenste voorkeuzezender selecteren.
op de knop ENTER drukken om een voorkeuzezender op te roepen.
Zenderinformatie in de FM-modus
Druk herhaaldelijk op de knop INFO om de verschillende programma-informaties te tonen.
Soort programma: Geeft een beschrijving weer van het type programma geleverd door de zender.
Signal Strength (Signaalsterkte): Geeft een signaalbalk weer met de sterkte van de huidige zender.
Time and Date (Tijd en datum): Geeft de tijd en de datum weer.
Frequentie: Geeft de zendfrequentie van de zender weer.
Soort audio: Geeft het type audio weer van het station waar u naar luistert. Dat zal ofwel Stereo of
Mono zijn.
Radiotekst: Toont schuivende tekstinformatie die door de zender wordt verstrekt.
Systeeminstellingen
Houd, wanneer het apparaat is ingeschakeld, de knop INFO/MENU ingedrukt. Dit opent de “System
Menu Settings” (Systeeminstellingen).
Druk op de knop PREV/NEXT om uw gewenste suboptie te selecteren:
Instellen van tijd/datum
Druk op de knop ENTER, dan begint het uur te knipperen.
Druk op de knop PREV/NEXT om het uur aan te passen.
Druk op de knop ENTER om te bevestigen.
Herhaal de laatste twee stappen om de minuten, het jaar, de maand, en de datum in te stellen.

16
Alarminstelling
Druk op de knop Enter/Snooze om Alarm 1 te gebruiken of druk op de knop NEXT om naar Alarm 2 te
gaan.
Druk op de knop Next en het woord “ON” (AAN) begint te knipperen, druk dan op Enter om te
bevestigen.
De uurcijfers voor het alarm beginnen te knipperen, druk op de knoppen Prev of Next om het uur te
wijzigen en druk dan op de knop Enter om te bevestigen.
Druk op de knoppen Prev of Next om de minuten te wijzigen en druk dan op de knop Enter om te
bevestigen.
Druk op de knoppen Prev of Next om het volume te wijzigen en druk dan op de knop Enter om te
bevestigen.
Druk op de knoppen Prev of Next om te schakelen tussen Alarm-DAB-FM en druk dan op de knop
Enter om te bevestigen.
Volg om Alarm 2 in te stellen de instructies voor Alarm 1.
Opmerking: U kunt op de knop Info/Menu drukken om terug te keren naar de laatste stap tijdens
het instellen van het alarm.
Het alarm uitschakelen
Druk om het alarm uit te schakelen op de knop Next, zodat het woord “OFF” (UIT) begint te
knipperen en druk op de knop Enter om te bevestigen. Het alarm is nu UIT.
Het alarm uitschakelen wanneer het afgaat
Druk op de knop Power/Mode om het alarm uit te schakelen wanneer het afgaat.
Opmerking: Het alarm zal gedurende een uur blijven klinken als u het niet uitschakelt wanneer het
afgaat.
Slaapstandinstelling
Druk op de knoppen Prev of Next om te kiezen uit OFF-120-90-60-45-30-15-5 minuten.
Druk op de knop Enter om uw selectie te bevestigen.
Fabrieksinstellingen terugstellen
Druk op de knop Enter en op het scherm verschijnt “Factory Reset?” (Fabrieksinstellingen terugstellen?).
Druk op de knoppen Next of Prev om “Yes” (Ja) te selecteren.
Druk nogmaals op de knop Enter en de radio wordt teruggesteld op de fabrieksinstellingen.
FM-scaninstelling
Druk op de knop Enter om Only (Uitsluitend) of All (Alle) te selecteren. Als u Only (Uitsluitend)
selecteert, zal de radio alleen de sterke signaalzenders scannen en afspelen. Als u All (Alle) selecteert,
zal de radio ook de zwakkere signaalzenders scannen en afspelen.
Systeemversie
U kunt het nummer van de softwareversie bekijken.
De radio opnieuw instellen
Als u de radio opnieuw instelt, worden alle afgestemde DAB-zenders en alle voorkeuzezenders in FM
en DAB-modes verwijderd. Om de radio opnieuw in te stellen:

17
Houd de knop INFO/MENU ingedrukt.
Druk herhaaldelijk op de knop Next totdat “Factory Reset” (Fabrieksinstellingen terugstellen) op het
scherm verschijnt.
Druk op de knop Enter en op het scherm verschijnt “Factory Reset?” (Fabrieksinstellingen terugstellen?).
Druk op de knop Next totdat het woord “YES” (Ja) knippert.
Druk nogmaals op de knop Enter en de radio wordt teruggesteld op de fabrieksinstellingen.
Sluimerfunctie
Druk op de knop Enter/Snooze wanneer het alarm afgaat om het alarm voor 9 minuten uit te stellen.
De radio gaat naar de stand-bymodus.
U kunt op de knop Power/Mode drukken om de sluimerfunctie te stoppen en naar de bewerkingsmodus
te gaan voordat het alarm afgaat.
Veelgestelde vragen
Probleem
Oplossing
Geen geluid
Zender is niet afgestemd. Stem de zender beter af.
Het volume is ingesteld op een lage stand. Verhoog het volume.
Er is een hoofdtelefoon aangesloten. Verwijder de hoofdtelefoon.
Knoppen werken niet
Schakel het apparaat uit en zet het na een paar seconden opnieuw aan.
FM: Geluid met ruis
DAB: Geluid kraakt/
komt met tussenpozen
De signaalontvangst is te laag. Pas de positie van de antenne aan of
verplaats het apparaat naar een locatie met een sterker signaal.
Scan de zenders opnieuw.
Geluid klinkt vervormd.
Het volume is te hoog. Pas het volume aan.
Gewenste zender niet
gevonden
Zwak signaal. Gebruik de functie handmatig afstemmen.
Het scherm toont “No
Service” (Geen service)
Er is geen DAB-dekking in uw omgeving, of slechte ontvangst. Pas de
positie van de antenne aan of verplaats het apparaat naar een locatie
met een sterker signaal.
Beeldscherm is leeg
Dit kan zich voordoen als de zender de benaming van een dienst wijzigt
of verwijdert terwijl u erop afgestemd bent. De radio zal proberen om
opnieuw in te stellen of een scan uit te voeren.
Specificaties
Stroomvoorziening
Ingebouwde batterij
Frequentiebereik
FM 87.5-108 MHz
DAB 174-240 MHz
Uitvoerconnector
3,5 mm oortelefoonaansluiting
Antenne
Uitschuifbare antenne
Voedingsadapter (alleen voor EU)
Fabrikant
Shenzhen Adition Audio Science &Technology Co.Ltd
Ingang
AC 100-240 V~50/60 Hz, 0,15 A Max
Uitgang
DC 5 V/1 A
Modelnummer
AD050501000EUU
Gebruik alleen de originele
wisselstroomadapter
Gebruik uitsluitend de voeding die op de
gebruiksaanwijzing is aangegeven
Speelduur
Uw radio heeft een speelduur van ongeveer 3-5 uur. Dit is afhankelijk van de signaalsterkte en de
volumeselectie van de radio

18
5. Garantie
Lenco biedt service en garantie aan overeenkomstig met de Europese wetgeving. Dit houdt in dat u, in
het geval van reparaties (zowel tijdens als na de garantieperiode), uw lokale handelaar moet contacteren.
Belangrijke opmerking: Het is niet mogelijk om producten die gerepareerd moeten worden direct
naar Lenco te sturen.
Belangrijke opmerking: De garantie verloopt als een onofficieel servicecenter het apparaat op wat
voor manier dan ook heeft geopend, of er toegang toe heeft gekregen.
Het apparaat is niet geschikt voor professioneel gebruik. In het geval van professioneel gebruik
worden alle garantieverplichtingen van de fabrikant nietig verklaard.
6. Disclaimer
Er worden regelmatig updates in de firmware en/of hardwarecomponenten gemaakt. Daardoor
kunnen gedeelten van de instructie, de specificaties en afbeeldingen in deze documentatie enigszins
verschillen van uw eigen situatie. Alle onderwerpen die staan beschreven in deze handleiding zijn
bedoeld als illustratie en zijn niet van toepassing op specifieke situaties. Aan de beschrijving in dit
document kunnen geen rechten worden ontleend.
7. Afvoer van het oude apparaat
Dit symbool geeft aan dat het betreffende elektrische product of de batterij niet
moet worden verwijderd als algemeen huishoudelijk afval in Europa. Zorg voor een
juiste afvalverwerking door het product en de batterij in overeenstemming met
alle van toepassing zijnde lokale wetten voor het verwijderen van elektrische
apparatuur of batterijen te verwijderen. Als u dit doet, helpt u de natuurlijke
hulpbronnen te behouden en de standaard van milieubescherming te verbeteren
bij de behandeling en verwijdering van elektrisch afval (Afgedankte Elektrische en
Elektronische Apparatuur).
8. CE-markering
Producten met een CE-keurmerk houden zich aan de EMC-richtlijn (2014/30/EU)
en de Richtlijn voor Lage Voltage (2014/35/EU) uitgegeven door de Europese
Commissie.
Hierbij verklaart Lenco Benelux BV, Thermiekstraat 1a, 6361 HB Nuth, Nederland, dat dit product
voldoet aan de essentiële eisen en andere relevante bepalingen van Richtlijn 1999/5/EU.
9. Service
Bezoek voor meer informatie en helpdeskondersteuning www.lenco.com
Lenco Benelux BV, Thermiekstraat 1a, 6361 HB, Nederland.

19
Deutsch
DAB+/UKW-Radio
Allgemeine Sicherheitshinweise
Allgemeine Vorsichtsmaßnahmen
Bei der Aufstellung des Gerätes sind die Anweisungen des Herstellers zu befolgen. Das Gerät nicht in der
Nähe von Wärmequellen, wie Heizkörpern, Heizregistern, Ö fen und anderen Objekten (einschließlich
Verstärkern), die Wärme abgeben, aufstellen.
Das Gerät nur mit dem Zubehör verwenden, das mit dem Gerät verkauft wird.
Die Lüftungsschlitze nicht blockieren, um eine ausreichende Belüftung und einen ordnungsgemäßen
Betrieb zu gewährleisten.
Während Gewittern das Gerät von der Stromversorgung trennen.
Ü bermäßiger Schalldruck von Kopfhörern kann zu Gehörschäden führen. Halten Sie Ihrer Gesundheit
zuliebe die Lautstärke bei Verwendung von Kopfhörern niedrig bis mäßig.
Kerzen oder andere offene Flammen immer vom Gerät fernhalten.
Das Aufstellen dieses Radios in der Nähe eines Fernsehers, einer Mikrowelle, eines Verstärkers order
eines DVD-Spielers kann die Klangqualität beeinträchtigen. Stellen Sie das Radio in solchen Fällen
entfernt von Geräten auf, die diese Störungen verursachen.
Dieses Radio sollte nicht in Bücherregalen, Einbauschränken oder anderen geschlossenen Bereichen
aufgestellt werden. Eine ausreichende Belüftung des Gerätes muss sichergestellt werden.
Das Gerät ist nicht für die Verwendung durch Personen (einschließlich Kinder) mit eingeschränkten
physischen, sensorischen oder psychischen Fähigkeiten bzw. ohne jegliche Erfahrung oder Wissen
vorgesehen, es sie denn sie sind unter Aufsicht oder wurden in die Verwendung des Gerätes durch
eine Person, die für ihre Sicherheit verantwortlich ist, eingewiesen.
Kinder sollten beaufsichtigt werden und nicht mit dem Gerät spielen.
Bewahren Sie die Originalverpackung für den zukünftigen Transport des Radios auf. Um einen
maximalen Schutz zu erzielen, das Gerät wieder so einpacken, wie es ursprünglich verpackt wurde.
Sicherstellen, dass der Adapter vor der Reinigung des Gerätes entfernt wurde.
Zur Reinigung des Gerätes und des Display nur ein weiches, trockenes Tuch verwenden.
Keine Lösungsmittel wie Verdünner oder Benzol verwenden, da diese die Oberfläche des Radios
beschädigen können.
Vor der Erstinbetriebnahme
Das Gerät auspacken und sämtliches Verpackungsmaterial aufbewahren, bis sichergestellt ist, dass das
DAB Radio unbeschädigt ist und einwandfrei funktioniert. Kunststoffverpackung kann eine
Erstickungsgefahr für Babys und Kleinkinder darstellen, dasher sollte sämtliches Verpackungsmaterials
außerhalb ihrer Reichweite aufbewahrt werden.

20
Produktübersicht
1. Info/Menu
Gedrückt halten, um auf die Menüeinstellungen zuzugreifen.
2. Scan
Automatischer Suchlauf aller DAB- und FM-Sender.
3. Enter/Snooze
Drücken, um den 9-Minuten-Modus zu aktivieren, wenn der Alarm ertönt.
Table of contents
Languages:
Other LENCO Radio manuals

LENCO
LENCO KCR-200WH User manual

LENCO
LENCO NR-001 User manual

LENCO
LENCO 8711902066156 User manual

LENCO
LENCO LUCILLE User manual

LENCO
LENCO BT-9000 User manual

LENCO
LENCO DIR-260BK User manual

LENCO
LENCO SCD-12 User manual

LENCO
LENCO PDR-026 User manual

LENCO
LENCO DAR-081 User manual

LENCO
LENCO PDR-050 User manual

LENCO
LENCO SCD-301 User manual

LENCO
LENCO RT-1 CD User manual

LENCO
LENCO KCR-200 User manual

LENCO
LENCO KCR-100WH User manual

LENCO
LENCO DAR-015 User manual

LENCO
LENCO DIR-70 BK User manual

LENCO
LENCO KCR-190WH User manual

LENCO
LENCO NR-006 User manual

LENCO
LENCO CR-2003 User manual

LENCO
LENCO SCD-24 User manual