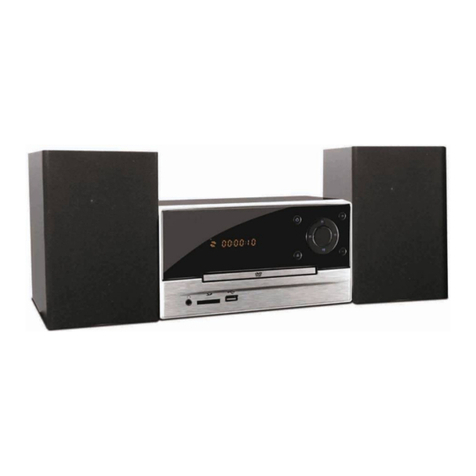
LENCO MC-140 User manual

INSTRUCTION MANUAL
MICRO MUSIC CENTRE WITH CD PLAYER,
PLL RADIO AND USB/SD/MMC INTERFACE
MC
-
140

1
IMPORTANT NOTES
INTRODUCTION
Thank you for buying this product.
Please read through these operating instructions, so you will know how to operate your equipment
properly.
Store the manual in a save place for future reference after you finished reading the instructions.
Put it away in a safe place for future reference.
CAUTION
Use of controls or adjustment or performance of procedures other than those specified in this manual
may result in hazardous radiation exposure.
DANGER
Invisible laser radiation when open and interlock failed or defeated. Avoid direct exposure to beam.
This Compact disc player is classified as a Class 1 LASER
PRODU
CT.
THE CLASS 1 LASER PRODUCT label is located on the rear
exterior.
NOTE: The manufacturer is not responsible for any radio or TV interference caused by unauthorized
modifications could void the user s authority to operate the equipment.
Avoid installing
the unit in locations described below:
1.
Places exposed to direct sunlight or close to heat radiating appliances such as electric heaters, on
top of other stereo equipment that radiate too much heat.
2.
Places locking ventilation or dusty places.
3.
Places subjec
t to constant vibration.
4.
Humid or moist places.
Operate turning controls and switches as instructed in the manual.
Before turning on the power for the first time, make sure that the power cord is properly installed.
Store your tapes or CD in a cool area to
avoid damage from heat.
CAUTION:
TO REDUCE THE RISK OF
AN
ELECTRIC SHOCK, NOT REMOVE THE COVER
(OR BACK). NO USER SERVICEABLE PARTS INSIDE, REFER SERVICING TO QUALIFIED
SERVICE PERSONNEL.
WARNING:
Remove batteries if empty or if they will not be used ag
ain for a long period.
The incorrect use of batteries can cause electrolyte leakage and will corrode the compartment or
cause the batteries to burst. Therefore:
Do not mix battery types, e.g. alkaline with zinc carbonate.
When inserting new batteries, rep
lace all batteries at the same time.
The ventilation should not be impeded by covering the ventilation openings with items, such as
newspapers, table
-
cloths, curtains, etc;
No naked flame sources, such as lighted candles, should be placed on the apparatus;
Do not expose the apparatus to dripping or splashing and do not place objects with liquids, such as
vases, on the
apparatus;
Do not
place the product in closed bookcases or racks
without
proper ventilation.
Where
the mains plug or an appliance coupler is used as the disconnect device, the disconnect device
shall remain readily operable.
CLASS 1 Laser product.

2
LOCATION OF CONTROLS

3
NAMES OF CONTROLS
1.
CD COMPARTMENT
2.
CD DOOR OPEN/CLOSE
3.
LCD DISPLAY
4.
CD PLAY/PAUSE
BUTTON
5.
REMOTE SENSOR
6.
USB INDICATOR
7.
POWER ON/OFF BUTTON
8.
STANDBY INDICATOR
9.
MEMORY UP / ALBUM
+
BUTTON
10.
C-
ADJ./MEMORY BUTTON
11.
FIND/ST/ESP BUTTON
12.
PHONE JACK
13.
SPEAKERS (L&R)
14.
EQUALIZER
BUTTON
15.
CD REPEAT BUTTON
16.
CD RANDOM BUTTON
17.
CD STOP BUTTON
18.
USB
PORT
19.
SD/MMC CARD SLO
T
20.
VOLUME UP/DOWN
CONTROL
21.
CD SKIP BACK/FORWARD & RADIO
TUNING UP/DOWN CONTROL
22.
BAND SELECTOR
23.
FUNCTION
BUTTON
24.
FM ANTENNA WIRE
25.
AUX INPUT JACK
26.
SPEAKER CONNECTORS
27.
AC POWER PLUG
REMOTE CONTROL
1.
FUNCTION BUTTON
2.
MEMORY DOWN/ALBUM
-
BUTTON
3.
VOLUME DOWN BUTTON
4.
MUTE
BUTTON
5.
CD SKIP BACK/TUNING DOWN
BUTTON
6.
BATTERY COMPARTMENT
7.
CD STOP BUTTON
8.
CD SKIP FORWARD/TUNING UP
BUTTON
9.
CD PLAY/PAUSE BUTTON
10.
VOLUME UP BUTTON
11.
MEMORY UP/ALBUM + BUTTON
12.
C-
ADJ./MEMORY BUTTON
13.
POWER/STANDBY BUTTON
POWER SOURCE
This unit is designed to be
operated on AC.
Plug the power cord into standard household AC wall outlet.
SPEAKER CONNECTION
Connect each speaker to the corresponding speaker terminals on the back
panel of the main unit. Make sure that the left speaker is connected to the
left pair of speaker terminals and the right speaker to the right pair of
speaker terminals. Also make sure that the speaker wires are correctly
connected: that the red wires are connected to the red terminals and the black
wires to the black terminals.
BASIC FUNCT
ION
Switching on the unit
Note: Before switching on the unit, please make sure that all connections have been
made.
Press the POWER ON/OFF button, the LCD display will be illuminated and shows "HELLO". Press the
FUNCTION button to select a playing mode.

4
Clock adjusting
1.
In standby mode the LCD display will show
--
:
--
flashing. Press and hold the C-ADJ/
MEMORY
button
for about 3 seconds. The display will show the 24 hours or the 12 hours version. Press CD
SKIP FORWARD/TUNING UP button to choose for the 12 or 24 hour version.
Press
the
C-ADJ/
MEMORY button to confirm.
2.
Enter the correct hour with the CD SKIP FORWARD/TUNING UP button, press the MEMORY
button to confirm. Enter the correct minutes with the CD SKIP FORWARD/TUNING
UP
button,
press the
C-ADJ/
MEMORY b
utton to
confirm.
To adjust volume
Press and/or hold
the VOLUME
UP/DOWN
CONTROL to increase or decrease
the
volume.
Press the MUTE button on the remote control to turn off the sound. Press this button again to turn the
volume back on
.
Built
-
in Different E
qualizer System
This unit has a built-in equalizer system, Press preset EQ button on the main unit while playing to select
different music style (sound tone): PASS, CLASSIC, ROCK, POP and JAZZ.
HEADPHONE JACK
For private listening, insert a 3.5mm headphone (not included) into the HEADPHONE JACK. The
speaker output is automatically cut off.
CAUTION: LISTENING AT A HIGH VOLUME OVER A LONG PERIOD OF TIME
COULD
DAMAGE USERS
EARS.
RADIO OPERATION
TUNING IN RADIO STATIONS
1.
Press
the FUNCTION switch to
select
the
RADIO
mode, the display will show
TUNER
.
2.
Press
the BAND switch to select the desired wave band: AM
(MW)/
FM ST.
3.
Tune to
des
ired station by
press
ing the CD SKIP BACK/FORWARD & RADIO TUNING
UP/DOWN CONTROL
, the display will show the band frequency
.
Exampl
e:
FM 97.10
MHz
4.
Adjust
the VOLUME CONTROL to the
to desired volume level.
5.
Extend
the
ANTENNA WIRE to its full length if you are listening to FM broadcasting. Gently
move
the wire back and forth to get the best reception when you are listening to AM program, or place the
unit in an open location.
6.
When you are receiving FM stereo program, the display will show
((
ST
)
)
. You can also set it to
MONO mode by pressing the FIND/ST/ESP button once, the display will show
MONO
, press the
FIND/ST/ESP button again,
the display shows
STEREO
and get back to STEREO mode.
7.
To turn off the radio, press the FUNCTION switch to enter CD, TAPE or CARD-USB operation, or
switch off the unit by pressing POWER ON/OFF button (the display will say
GOOD BYE
to you).
RADIO
A
UTO SCA
N (SEARCH)
Press and hold the CD SKIP BACK/FORWARD & RADIO TUNING UP/DOWN CONTROL for 1 or 2
seconds and release. The unit will auto scan until having found a strong signal program. Press and hold
again to search other stations.
RADIO STATION MEMORY OPERAT
ION
You can pre-store 40 (AM and FM) radio stations in the memory for your preference. With this
memory
-option you can listen to your desired station directly and quickly, so you don't need to tune and
search for
the stations
again.

5
1.
Set the unit to TUNER m
ode.
2.
Press BAND button to select band (AM or FM),
and tune
into a station.
3.
Press the MEMORY button. "MEMORY" shows on the display. Then press MEMORY UP
button
or
Memory DOWN button to select the first storing location.
4.
Press
the
MEMORY button again to stor
e.
5.
Search another station, repeat
steps 3 & 4 until all desired stations are stored
. Up to 40 stations can be
programmed (10 for AM and 30 for FM).
6.
Press
MEMORY
-
UP or MEMORY
-
DOWN button
to listen to the stored
station
directly.
USING THE CD/MP3
Discs for
Playback
This system can playback all digital audio CD
/MP3
, finalized digital audio CD
-
Recordable (CD
-
R) discs
,
finalized digital audio CD-Rewritable (CD-RW) discs and CD-DA format digital audio CD
/CDR/
CD
-
RW discs.
LOADING A DISC
1.
Press
the FUNCTION swit
ch to
select
CD playing
mode
.
2.
Open the CD door
,
OPEN
will be shown on the display
.
3.
Place an audio CD
/MP3
disc
into the tray with the label side facing up.
4.
Close the CD door. The display will show CD READ , then the total number of tracks, album (if a
M
P3 disc contains several albums) and STOP will appear on the display after several seconds.
5.
To remove the CD, press OPEN to open
the
CD compartment lid, the display will show
OPEN
.
Take the CD by its edges and carefully lift it out the device.
Note:
Make
sure the disc is stopped before open the CD
compartment.
To ensure a good system performance; you need to wait until the disc tray completely reads the disc
before proceeding.
If no disc loaded into the compartment, or the disc is unreadable, the display
will show
NO DISC
.
PLAYING A DISC
1.
Press PLAY/PAUSE button to start the playback. The playback starts at track 1. To interrupt the
playback
, press the PLAY/PAUSE button again. The elapsed time will flash on and off in the
display
.
Example:
00:57
flashes
on and off.
To resume playback, press PLAY/PAUSE button again.
2.
To stop the playback, press the STOP button. The total number of tracks and playing time (
only
Audio CDs
)
will appear in the display
(MP3 shows number or folders and tracks).
SELECTING A DESIR
ED TRACK/PASSAGE
To select a desired track
CD:
Press
CD SKIP BACK/FORWARD & RADIO TUNING UP/DOWN button repeatedly in stop
mode or during playing until the desired track appears on the display.
MP3: Press the
MEMORY UP / ALBUM
+
button repeatedly
in stop
mode
or during playing to
select
desired album. Then press CD SKIP BACK/FORWARD & RADIO TUNING UP/DOWN button to
select desired track.
Press PLAY/PAUSE button to start play.
To search for a particular passage during playback
(track scanning at high speed)
Press and hold CD SKIP BACK/FORWARD & RADIO TUNING UP/DOWN button to scan the current
playing track at high speed until desired point (passage), then release the button for normal playback
mode
.
Playback will start again from this point.

6
PROGRAM TRACKS
Pro
gram tracks of disc are possible when playback is stopped. Up to
64
tracks can be stored in the
memory in any order.
1.
In stop mode, press
MEMORY
button
to enter program setting, the display
will show
00 P
--
01
.
2
Press
the
CD SKIP BACK/FORWARD & RADIO TUNING UP/DOWN button to select the first
desired track to be programmed.
(example: 06)
3
Press
the
MEMORY
button to enter. The display
changes to
show
00 P
--
02
.
4
Repeat steps 2 & 3 to store other desired tracks until all tracks
are
programmed.
5Press the PLAY/PAUSE button to start
the
playback from the first programmed track. The display
will show
CD 06
with
Memory
indicator on LCD display
.
6
Press STOP button to stop program playback.
Note: For MP3 disc program setting please follow the instruction described at PROGRAM TRACKS
ON USB (MP3)
To Erase the Memory
(Program)
You can clear the program by two ways:
1.
Press STOP button when the disc stopped, or
2.
Open the CD compartment lid, program will be erased.
REPEAT
You can play one track or all tracks on the disc
repeatedly.
To Repeat a Single Track
1.
Press REPEAT button once in playing mode, " REPEAT " appears in upper left corner of the display.
The current track will be played over and over again
until you press the STOP button.
2.
To cancel the repeat playback, press and keep pressing the REPEAT button until
REPEAT
goes off
on
the
display.
To repeat all the Tracks
1.
Press REPEAT button twice in playing mode, "REPEAT ALL" shows in the display, all tracks on
the disc will be played over and over again
until you press
the STOP button
.
2.
To cancel the repeat playback
,
press and keep pressing button REPEAT until REPEAT ALL
goes
off on
the
display.
To repeat album (MP3)
1.
Press
the
REPEAT button three times in
the
playing mode,
REPEAT ALBUM
shows in the display.
All track
s in the selected album will be played repeatedly until you press the STOP button.
2.
To cancel the repeat play, press the REPEAT button once
,
REPEAT ALBUM
goes off from display.
RANDOM PLAY
Press the RANDOM button in stop mode, the unit will start playback automatically in random order,
order. "RANDOM" will be shown
on the display.
ESP (Electronic Shock Protection) System
This unit has a built-in (40 seconds for CD/120 seconds for MP3 disc) shock protection system to
prevent sound skipping and distorting when the unit is shocked and rocked to vibrate. Press
FIND/ST/ESP
button to activate this function. Press again to cancel.
Note: In MP3 playback, the
FIND/ST/ESP
button has combined another function Title, Artists and
Album displaying.
When pressing the FIND/ST/ESP button once, tracks can be searched in alphabetical (A-Z) and
numerical (0-9) order. Use the CD SKIP BACK/FORWARD & RADIO TUNING UP/DOWN button to
skip through A-Z and 0-9. All tracks files under a certain letter or number will be shown. To see al
l
tracks filed under the selected letter or number, hold on the CD SKIP BACK/FORWARD & RADIO

7
TUNING UP/DOWN button pressed for two seconds. Use the SKIP CD BACK/FORWARD & RADIO
TUNING UP/DOWN
button to skip
within the selection. When pressing the
FIND/ST/E
SP
button twice,
album names can be searched. To playback your selection, press the CD
PLAY/
PAUSE button.
LISTEN
ING
TO USB/SD/MMC CARD
USB PLAYBACK
1.
Press the FUNCTION button until the display shows
CARD
-
USB
to enter USB playing mode.
2.
Connect the USB to the USB INPUT. The LCD will display
the
total number of tracks stored inside
the USB and the USB indicator will light up. Example,
019 STOP
3.
Press the PLAY/PAUSE button to start playing. Press the PLAY/PAUSE button once again to
temporarily stop. The elapsed
time will flash.
4.
Press the STOP button to stop playing. The display will show
the
total number of tracks and STOP.
5.
Proceed repeat play
(1
-repeat, all-repeat and album)/program play/random play/skip back and
forward operation the same d
e
scribed as above "US
ING THE CD/MP3"
Note: If insert SD/MMC card and USB at the same time, the unit will play SD/MMC card only. If select
to play USB, please remove the SD/MMC card.
SD/MMC CARD
INSTALLATION AND REMOVE
Press the card towards the SD/MMC CARD slot, when the installation is well done, a
click
sound will
be heard. To remove the SD/MMC card, press the card gently and the card will flick out. Now you can
remove the card out of the card slot.
SD/MMC CARD
PLAYBACK
1.
Press the FUNCTION button to select CARD
-
USB playing m
ode.
2.
Connect the SD/MMC card to the SD/MMC CARD INPUT slot. The LCD will display
the
total
number of tracks stored inside the card and STOP. Example,
019 STOP
3.
Press the PLAY/PAUSE button to start playing. Press the PLAY/PAUSE button once again to
temporari
ly stop. The elapsed time will flash.
4.
Press the STOP button to stop playing. The display will show
the
total number of tracks and STOP.
5.
Proceed repeat play
(1
-repeat, all-repeat and album)/program play/random play/skip back and
forward operation the same d
e
scribed as above "USING THE CD/MP3"
Note: If insert SD/MMC card and USB at the same time, the unit will play SD/MMC card only. If select
to play USB, please remove the SD/MMC card.
PROGRAM TRACKS
ON USB (MP3)
Program tracks on USB are possible when playback is stopped in USB mode. Up to
64
tracks can be
stored in the memory in any order.
1.
In stop mode, press
the MEMORY
button
to enter program setting, the display
will show
000 P
--
01
with album number
00
flashing
.
2.
Press
the
CD SKIP BACK/FORWARD & RADIO TUNING UP/DOWN button to select desired
album
(for example 02)
.
3.
Press
the MEMORY
button
, the track number within this album is flashing
000
(
MP3
).
4.
Press
CD SKIP BACK/FORWARD & RADIO TUNING UP/DOWN button to select the first desired
track to be programmed.
Press
MEMORY
button to confirm (for example 006). The display
changes
to
show
00 P
--
02
.
5.
Repeat steps 2
to 4
to store other desired
album/
tracks until all tracks
are
programmed.
6.
Press the PLAY/PAUSE button to start playback from the first programmed track. The display will
show
the selected album/track number with
Memory
indicator showing on LCD display
8
7.
Press
the
STOP button to stop program playback.
Note: Switch the unit to CARD-USB or CD/MP3 playing mode, follow the above steps to proceed
PROGRA
M TRACKS ON SD/MMC CARD or ON MP3 disc.
TO FIND A DESIRED TRACK (not for CD)
To listen to the desired track, press the
FIND/ST/ESP
button once to search FILE, press again to search
ALBUM, p
ress
the
MEMORY
button
, the track number within this album is flas
hing, p
ress
the CD SKIP
BACK/FORWARD
& RADIO TUNING UP/DOWN button to select the desired track, then press
PLAY/PAUSE button to start playback.
REMOTE HANDSET
LOADING THE BATTERIES INTO THE REMOTE HANDSET
Open the battery compartment cover.
Insert two
AA
A
batteries (not included) as indicated inside the battery compartment.
Close the cover.
REMOTE CONTROL OPERATION
You can control the system with the provided remote controller. Slide the battery cover to remove it.
Inset two (AAA/
UM
-4) batteries correctly so that the + and
polarities match the polarity diagrams
inside the battery compartment.
About half a year of normal operation can be expected when using the general batteries.
When the batteries are exhausted, the remote control can no longer operate the system. Replace both
batteries with new ones.
When the commander is not to be used for a long time, remove the batteries to avoid damage caused
by battery leakage and corrosion.
Avoid keeping the
remote control
in extremely hot or humid locations.
Betw
een
the remote control
and
the
remote sensor there should be no obstacle and have to be within
30
°
range.
The remote controller
s operating distance is about 6~7meters away from the remote sensor.
COMPACT DISC MAINTENANCE
1.
Always use a compact disc
bearing the mark as shown.
2.
Notes on handling discs
Removing the disc from its storage case and loading it.
Do not touch the reflective recorded surface.
Do not stick or write
anything on the surface.
Do not bend the disc.
3.
Storage
Store the disc in its ca
se.
Do not expose discs to direct sunlight or high temperatures, high humidity or dusty places.

9
4.
Cleaning a disc
Should the disc become soiled, wipe off dust, dirt and fingerprints with a soft cloth.
The disc should be cleaned from the
center
to the edge.
Never use benzene, thinners, record cleaner fluid or anti
-
static spray.
Be sure to close the CD door, so the lens is not contaminated by dust.
Do not touch the lens.
SPECIFICATIONS
GENERAL
Power Requirement
AC 230V
Remote Handset
DC 3V UM
-
4size x 2
Power consumption
AC
20
Watts
Weight
Approx.
2.4
kg
Unit
Dimensions
Approx.
175
mm
(L) x 2
04
mm
(W)
x 135
mm
(H)
Dimensions of Each speaker
Approx.
110
mm
(L) x 178
mm
(W)
x 135
mm
(H)
Operation temperature
+5°C +35° C
RECEIVER SECTION
Receiving Bands
AM/FM
Tuning Range
AM 5
30
-
1600
KHz
FM 87.5 -
108
MHz
COMPACT DISC SECTION
Optical Pickup
3-
Beam Laser
Frequency Response
100Hz
-
16KHz
AUDIO SECTION
Power output
Maximum 2
Watts x 2
Headphone Impedance
32 Ohms
ACCESSORIES
Instruction Booklet
1
Remote Handset
1
Specifications are subject to change for continuous improvement, we reserve the rights to modification
without prior notice.
ESD Remark (I1):
In case of malfunction due to electrostatic discharge just reset the product (reconnect
of power source may be required) to resume normal operation.
If at any ti
me in the future you should need to dispose this product please note that
Waste
electrical
products should not be disposed of with household waste. Please
recycle where facilities exist. Check with your Local Authority or retailer for
recycling advice. (Wa
ste Electrical and Electronic Equipment Directive).
Other manuals for MC-140
1
Table of contents
Other LENCO Stereo System manuals

LENCO
LENCO MC-129 MP3 RDS User manual

LENCO
LENCO MC-150 User manual

LENCO
LENCO MDV-2 User manual

LENCO
LENCO MC-146 User manual

LENCO
LENCO MDV-15 User manual

LENCO
LENCO PA-95 User manual

LENCO
LENCO MCI-400 - V1.0 User manual

LENCO
LENCO MC-250 User manual

LENCO
LENCO DAR-070 User manual

LENCO
LENCO SCD-681 User manual