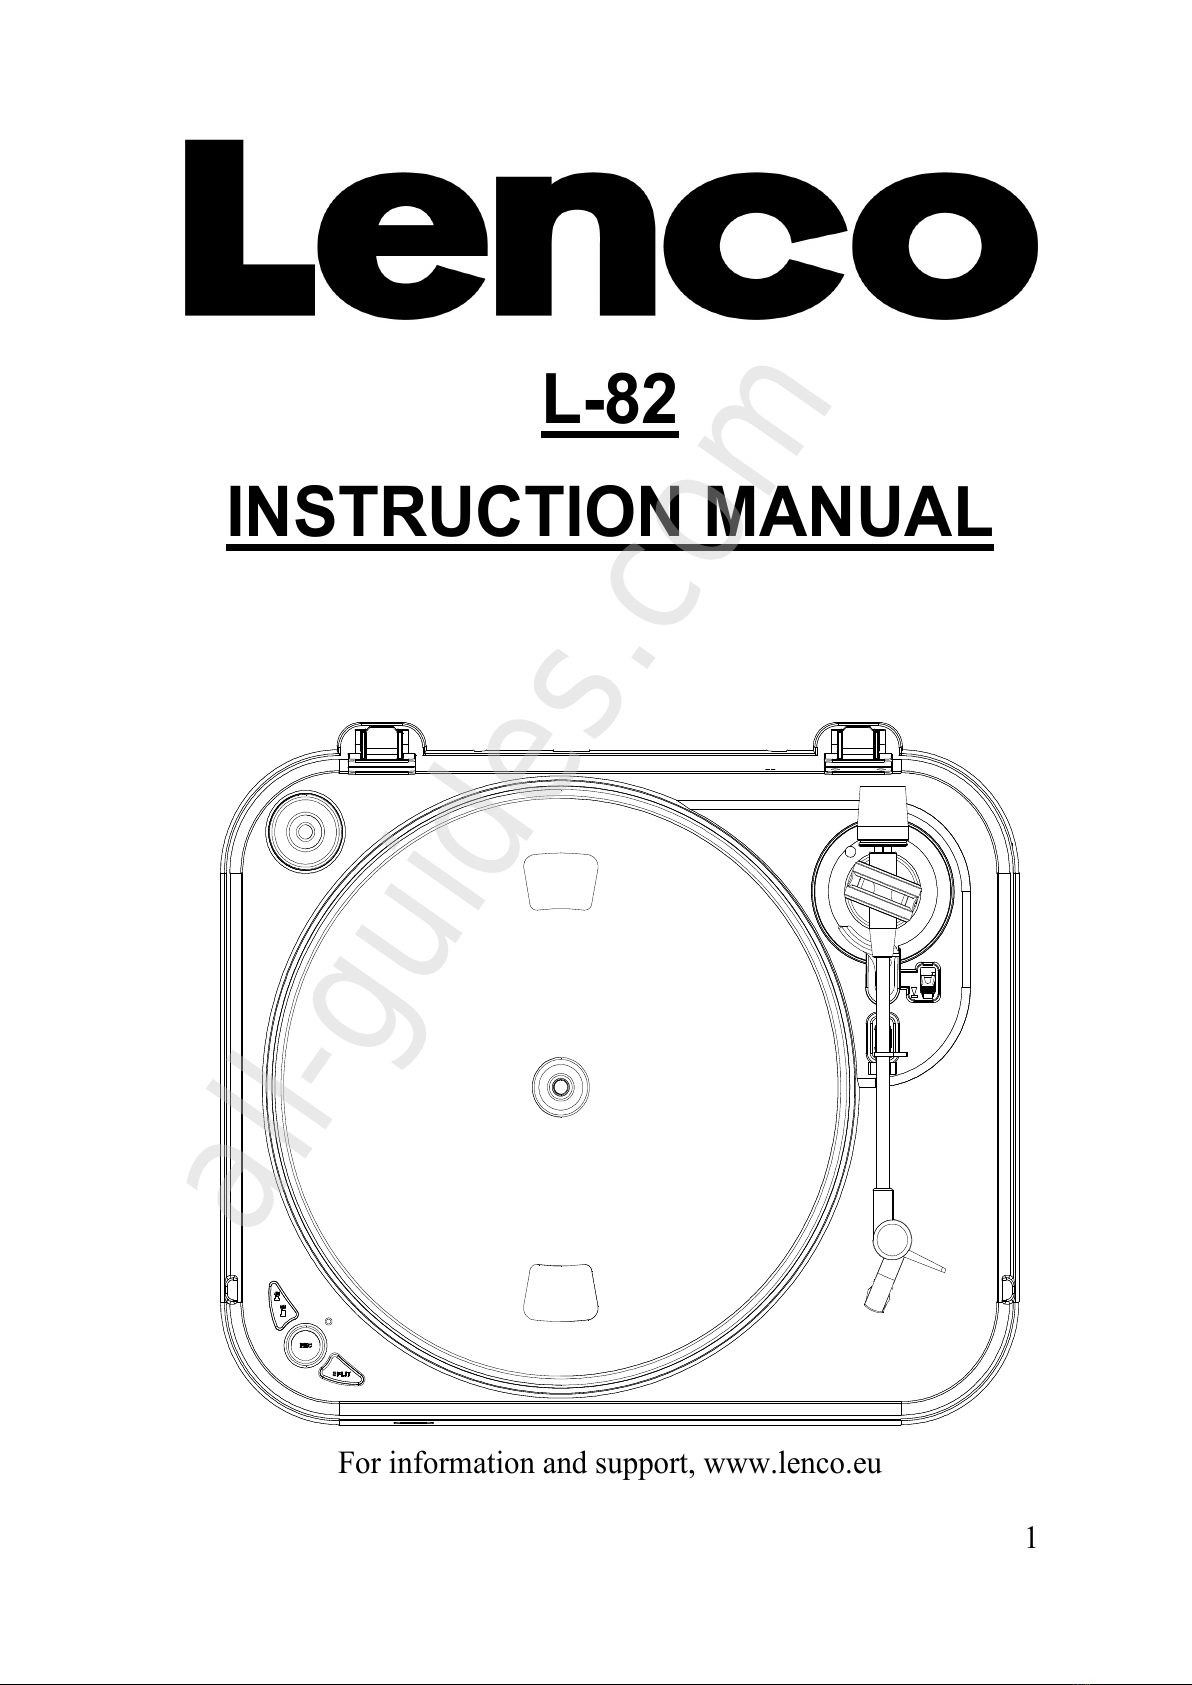
1. A aptor:
Use this adaptor when playing 45 RPM records.
2. Platter:
Place a record here to play.
3. 33/45 RPM Switch:
Switch 33 or 45 rpm for playing a record at a correct speed.
4. REC:
Press it to enter into record mode.
5. SPLIT
For stopping the current recording, forming a record file manually and then
going on recording the next track.
6. Pick-up Set
7. Pick-up Arm Lift Stick:
To raise up and down the Pick-up Arm and cue at a proper place of a inyl.
8. Pick-up Arm Lock:
Use this to lock the Pick-up Arm in place when not in use.
9. Dust Cover:
Use this to protect the turntable from exposure to dust. The co er may be
opened or remo ed during use, but should remain closed when the turntable is
not in use.
10. RCA Line Out Cable
Connect the RCA line out to a mixer or an amplifier in your sound system.
11. Power Cor
Connect this cord to an AC outlet of the proper oltage.
12. Power Switch:
For turning the power on or off through this switch. Please press this button to
re-start your de ice when operation was interrupted.
13. USB Port Input:
Plug in a USB Pen Dri e for recording the music from a record.
*The design is only for USB Flash Dri e. To pre ent the power supply is not
sufficient and o erheated of the circuit(IC), always get the external power
supply if using a hard dri e.
14. LED
USB Record Operation and ED Signal Indication
1. USB storage device is not plugged. -> ED light is off
2. USB storage device is plugged in -> ED flashes
3. When the system is ready to record. -> ED light is on
4. Press REC button to start recording. -> ED blinks slowly.
5. Press SP IT button to create new file in the recording.
6. Press REC button again to stop recording. -> ED is flashing for
a short time, then ED light is stably on again.
Note: Do not remove the USB storage device if the ED is flashing.