7
NOTE: DIAGRAMS & ILLUSTRATIONS ARE NOT TO SCALE.
Front Glass Enclosure Panel, Removal
and Installation
These are direct-vent appliances. They are
designed to operate only when the front glass
enclosure panel is installed. Generally the front
glass enclosure panel should not be removed
except to gain access to the components within
the firebox.
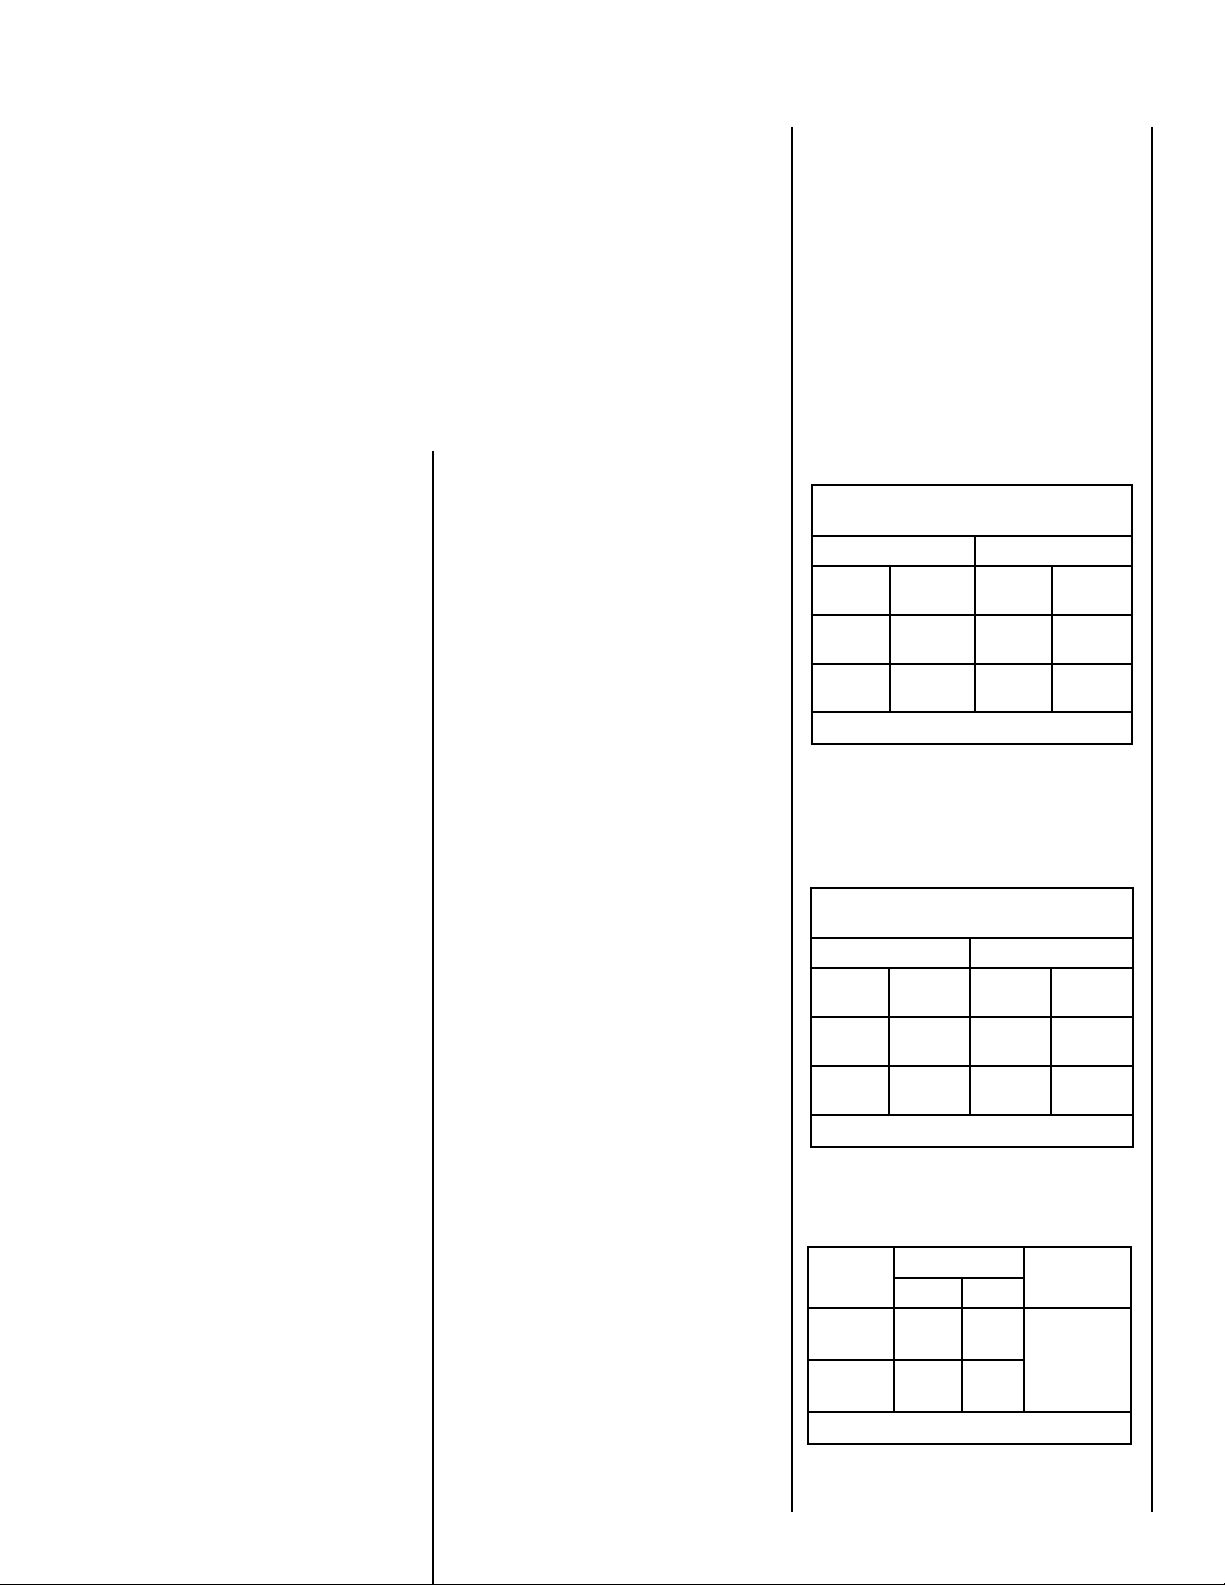
Refer to Figure 4 and remove the front glass
door assembly as follows:
To remove the firescreens, lift up the center of
the rod to disengage it from the center bracket,
bend down at center, hold left side with hand
until it disengages from left side, being careful
not to scratch paint. Slowly remove the rod
from the right side.
Remove the door modesty shield from the top
flangeglassdoorbypullingitupfirmlywithboth
hands until it is disengaged. Using a phillips
screwdriver, unfasten two (2) screws located
at the top of the glass frame.
ENSURE THAT THE FRONT GLASS DOOR
ASSEMBLY IS IN PLACE AND SEALED AFTER
ADJUSTMENT.
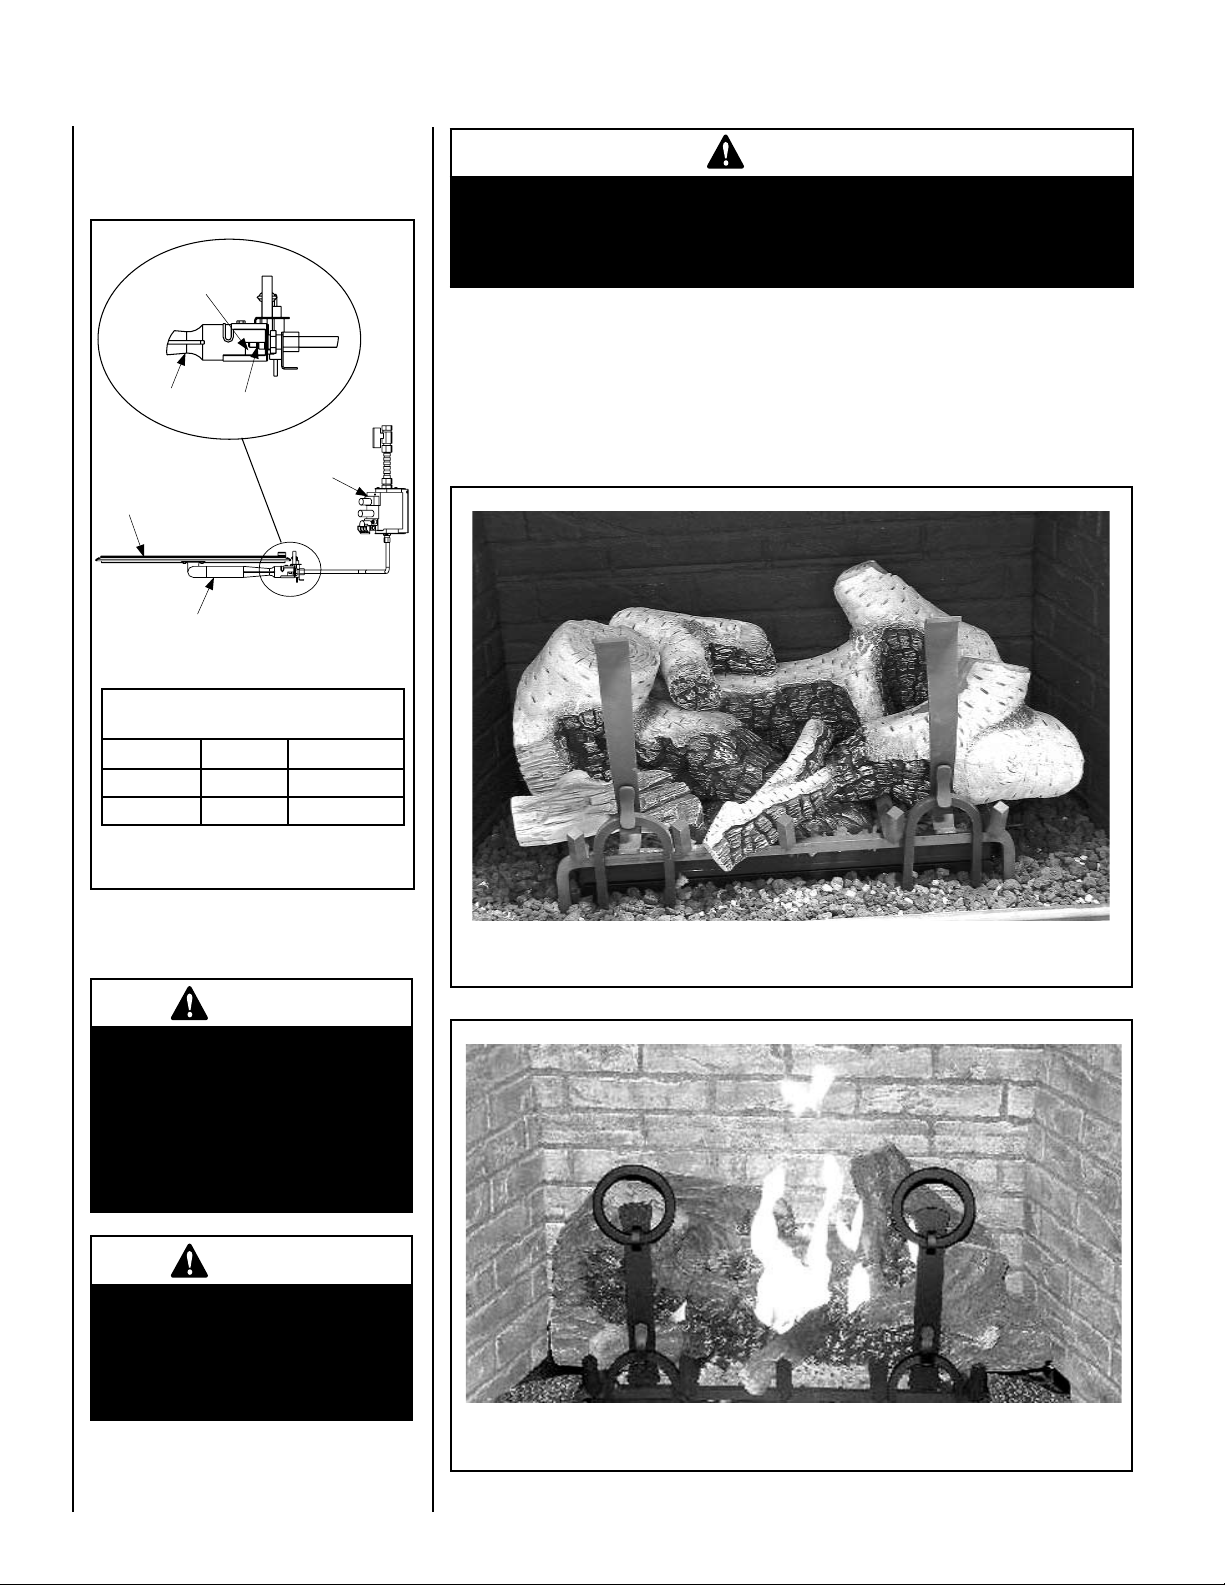
Adjustment
To adjust the flame, move the adjustment air
shutter (located on the lower venturi) back or
forward to increase or reduce the air shutter
opening, respectively. Position the air shutter
to the factory setting as shown in Figure 5 on
Page 8.Allow the burner to operate for at least
15minutes.Observetheflamecontinuously.Ifit
appearsweak or sooty as previously described,
adjustthe air shutter until the flame appearance
is as desired.
Propane models may exhibit a flame pattern
that may candle or appear stringy. If this is
problematic or persists as the appliance is
continually operated, adjust the air shutter
closedasdescribedinthepreviousparagraphs.
Operatethe appliance for a period of time asthe
effect diminishes, ensuring that the appliance
does not develop sooty flames.
Figure 4
Glass Door Latch (2)
Glass Door Assembly
Firebox Floor
Top Flange Glass Door
Frame Assembly
Screws
Tilt the glass frame at the top away from the
unit. Lift it carefully off the bottom door track
and set the door aside, protecting it from
inadvertent damage.
To install the front glass door assembly,
proceed as follows:
1. Retrieve the glass door assembly. Visually
inspect the gasket on the backside of the
panel. The gasket surface must be clean,
free of irregularities and seated firmly.
2. Positionthedoorframeinfrontofthefirebox
opening and engage the bottom flange over
the rail at the bottom of the firebox open-
ing.
3. Swing the door up and back. Ensure the
gasket seats evenly as the door draws shut.
Engage the nut insert and fasten with two
screws to secure the door.
4. Installthe doormodesty shieldontop flange
glassdoorasfollows: grabthedoormodesty
shield with both hands, with the open hem
going down and engage it with the upper lip
of the glass door frame by pushing it all the
way down. Make sure the installed shield is
firmly in place.
5. With the firescreen hanging on the screen
rod, drop in the right side of the rod to the
right modesty panel. Then drop in the left
side of the rod through the slot of the left
modesty panel. Make sure that the rod is
supported by the bracket in the center of the
fireplace.
Burner Adjustments
The following paragraphs address burner
adjustment concerns and procedures.
Whenlitforthefirsttime,thisappliancewillemit
a slight odor for an hour or two. This is due to
the “burn-in” of internal paints and lubricants
used in the manufacturing process.
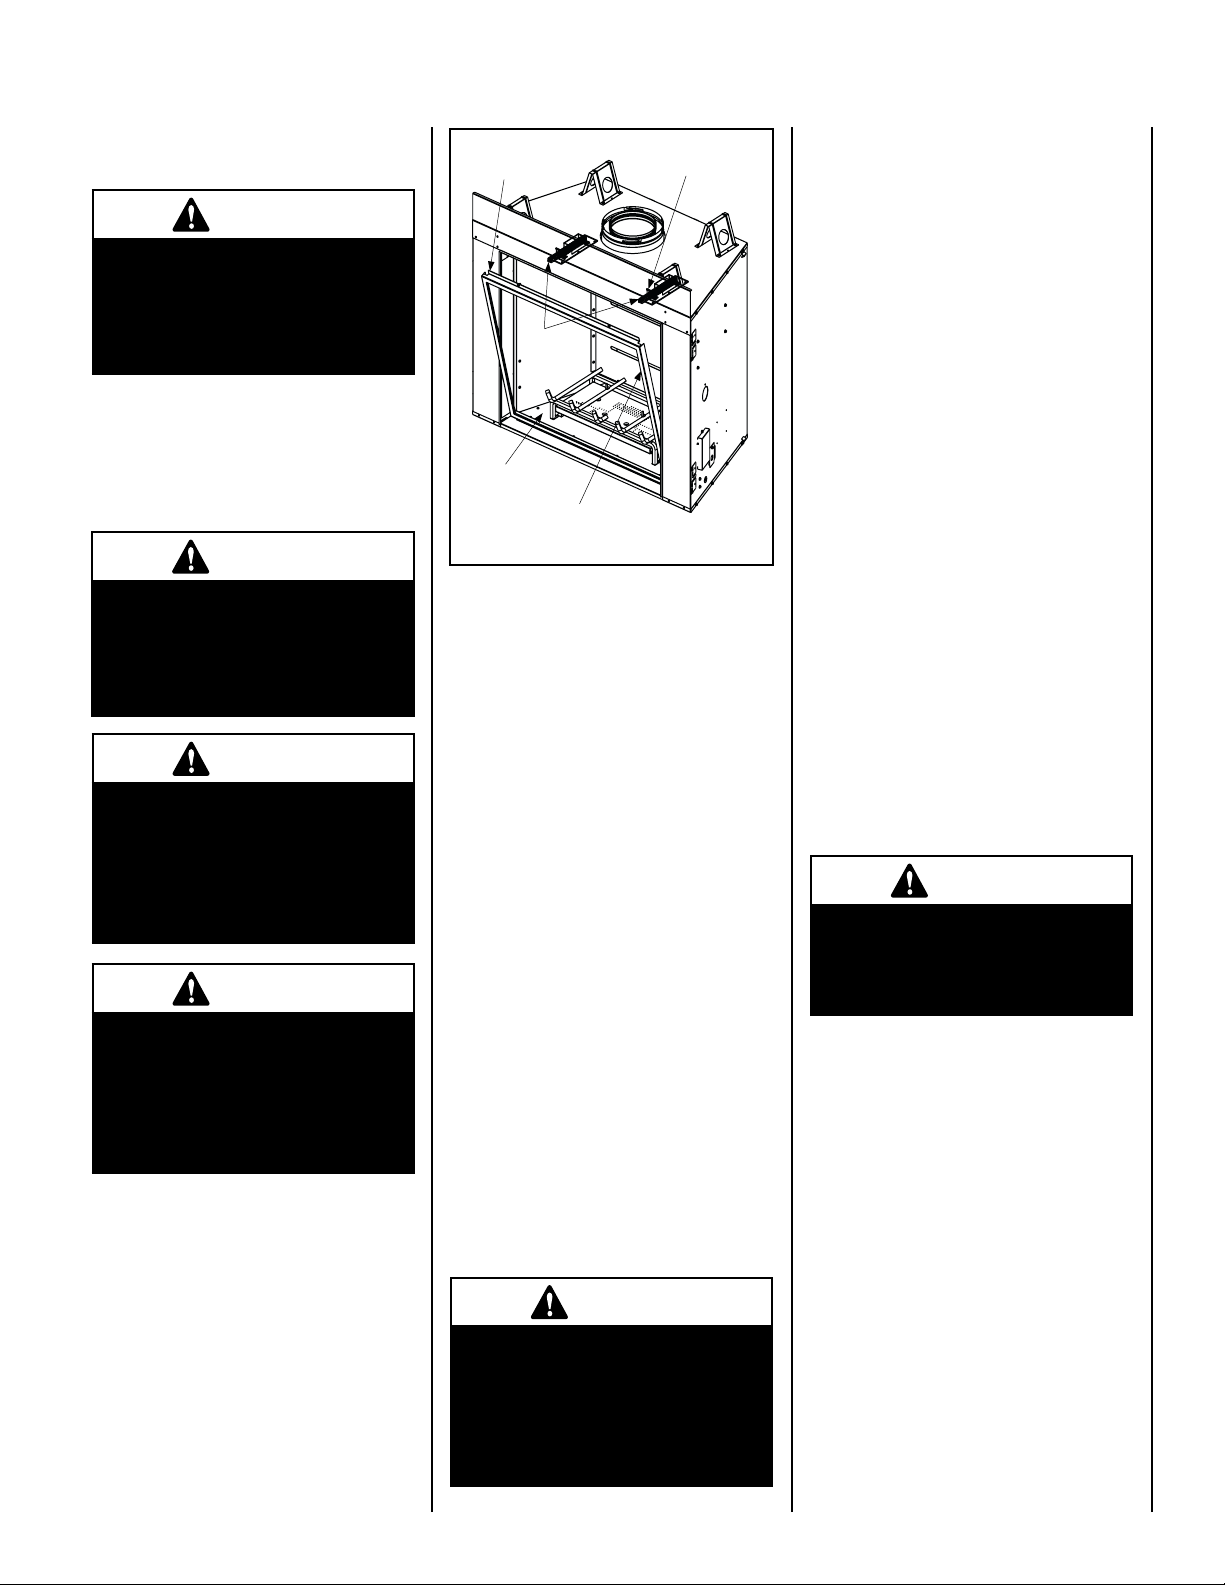
Flame Appearance and Sooting
(see Figures 6 and 7 on Page 8)
Appliances operated with air shutter openings
that are too large will exhibit flames that are blue
andtransparent.Theseweak,blueandtranspar-
ent flames are termed anemic. If the air shutter
opening is too small sooting may develop.
Sooting is indicated by black puffs developing
at the tips of very long orange flames. Sooting
results in black deposits forming on the logs,
appliance inside surfaces and on exterior sur-
faces adjacent to the vent termination.
Sootingis caused byincomplete combustion in
the flames and a lack of combustion air enter-
ing the air shutter opening. To achieve a warm
yellow to orange flame with an orange body
that does not soot, the shutter opening must
be adjusted between these two extremes. No
smokeorsootshouldbepresent.Repositionthe
logs if the flames impinge on any of them.
If the logs are properly positioned and sooting
conditions exist, the air shutter opening on the
main burner tube should be adjusted. Normally,
themoreoffsetsintheventsystem,thegreaterthe
need for the air shutter to be opened further.
WARNING
Donotoperateappliancewiththe
glass front removed, cracked or
broken.Replacementoftheglass
should be done by a licensed or
qualified service technician.
WARNING
Handle this glass with extreme
care! Glass is susceptible to
damage – Do not scratch or
handleroughlywhilereinstalling
the glass door frame.
WARNING
Air shutter adjustment should
only be performed by a qualified
professional service techni-
cian.
WARNING
Whenreinstallingtheglassdoor,
the door latch screws must be
securely tightened to prevent
the glass door from falling out,
which could potentially cause
damage and possible injury.
WARNING
Do not attempt to substitute the
materials used on this door, or
replace cracked or broken glass
with any materials other than
those provided by the appliance
manufacturer.
WARNING
The glass door of this appli-
ance must only be replaced as
a complete unit as provided by
themanufacturer. Donotattempt
to replace broken, cracked or
chipped glass separately.