1Unpacking
2Connecting the keyboard and mouse
3Connecting the Ethernet cable
Computer Keyboard* Mouse* Power cord Publications
* Selected models only.
NOTE: Some models may contain items not listed here.
5Connecting the monitor and power cable
4Choosing the right voltage
Selected models are equipped with a voltage selection switch. You can find it
at the rear of your computer. Models without a voltage selection switch control
voltage automatically.
If the electricity supply range is 100-127 V AC, set the switch to 115 V.
If the electricity supply range is 200-240 V AC, set the switch to 230 V.
Connecting to the Internet
6Turning on the computer
YouneedacontractwithanInternetServiceProvider(ISP)andsomehardware
in order to connect to the Internet. ISPs and the services they offer vary by
country. Contact your ISP for services available in your country. Your computer
supportswireless(selectedmodelsonly)orwirednetworksthatconnectyour
computer to other devices.
Wired network connection
Forwirednetworks,connectoneendofanEthernetcable(purchased
separately)totheEthernetconnectoronyourcomputer,andthenconnectthe
other end to the network router or broadband modem. Consult your ISP for
detailed setup instructions.
NOTE: Broadband modem and router installation procedures vary
depending on the manufacturer. Follow the manufacturer’s instructions.
Wireless network connection
Forwirelessnetworks,youcanusethebuilt-inWi-Fiantennatoaccessyour
wireless home network.
To connect your computer to the wireless network:
Click or tap the network icon on the taskbar, then select the name of your
router. Click or tap Connect, then follow the steps on the screen.
TestthewirelessnetworkbyopeningyourWebbrowserandaccessingany
Website.
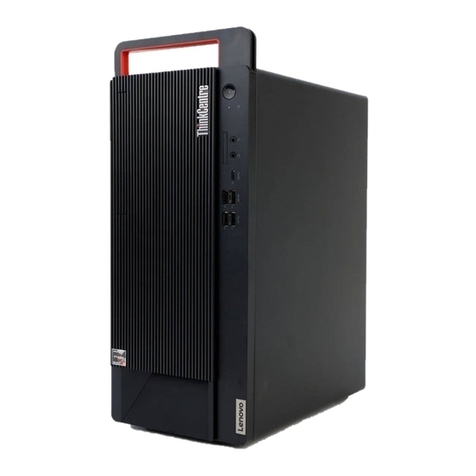
Front view of the computer
ATTENTION: Be sure not to block any air vents on the computer.
Blocked air vents may cause thermal problems.
NOTE: This computer only can be placed in a vertical position.
ATTENTION: Do not insert 3-inch discs into the optical drive.
Power button
Harddiskdriveindicator
Opticaldriveejectbutton1
Opticaldrive1
Microphone connector
Headphoneconnector
Memory card reader 1
USB3.0connectors(2)
USB2.0connectors(2)
Power button
Harddiskdriveindicator
Opticaldriveejectbutton1
Opticaldrive1
Microphone connector
Headphoneconnector
Memory card reader 1
USB3.0connectors(2)
USB3.0connectors(2)
Audio connectors
HDMI-outconnector
VGA-out connector
Serial connector
USB2.0connectors(2)
Ethernetconnector
Expansioncardslots
Power connector
Audio connectors
VGA-out connector
HDMI-outconnector
USB3.0connectors(2)
USB2.0connectors(2)
Ethernetconnector
Expansioncardslots
Power connector
Rear view of the computer
NOTE: If your model has two VGA monitor connectors, be sure to use the
connector on the graphics adapter.
ATTENTION: Do not open the Wi-Fi antenna cover.
Windows help system
TheWindowshelpsystemprovidesyouwithdetailedinformationaboutusing
theWindowsoperatingsystem.
ToaccesstheWindowshelpsystem,dothefollowing:
OpentheStartmenuandthenclickortapGet Started to get more details.
You can also enter Get Started or what you’re looking for in the search box
on the taskbar. You’ll get suggestions and answers to your questions about
WindowsandthebestsearchresultsavailablefromyourPCandtheInternet.
ToperformsystemrecoveryafteraseriouserrorinWindows10,clickortap
the Start button and select Settings →Update & security →Recovery.
Then, follow the instructions on the screen for system recovery.
ATTENTION: The Windows operating system is provided by Microsoft
Corporation. Please use it in accordance with the END USER LICENSE
AGREEMENT (EULA) between you and Microsoft. For any question related
to the operating system, please contact Microsoft directly.
1Selected models only.
or Accessing other manuals
The Important Product Information Guide has been preloaded onto your
computer. To access this guide, do the following:
For models come with Lenovo Companion:
1. OpentheStartmenuandthenclickortapLenovo Companion.
2. Click or tap Support →User Guide.
For models without Lenovo Companion:
OpentheStartmenuandthenclickortapManual to access this guide.
For models without preinstalled operating systems:
GototheLenovoSupportWebsitetoaccessyourmanuals.See“Downloading
manuals” for additional information.
Downloading manuals
The latest electronic publications for your computer are available from the
LenovoSupportWebsite.Todownloadthepublications,
go to: www.lenovo.com/UserManuals.
Service and Support information
The following information describes the technical support that is available for
your product, during the warranty period or throughout the life of your product.
RefertotheLenovoLimitedWarrantyforafullexplanationofLenovowarranty
terms.See“LenovoLimitedWarrantynotice”laterinthisdocumentfordetails
on accessing the full warranty. If you purchased Lenovo services, refer to the
following terms and conditions for detailed information:
– ForLenovoWarrantyServiceUpgradesorExtensions,
go to: http://support.lenovo.com/lwsu
– ForLenovoAccidentalDamageProtectionServices,
go to: http://support.lenovo.com/ladps
– Onlinetechnicalsupportisavailableduringthelifetimeofaproductat:
http://www.lenovo.com/support
The following information refers to ideacentre 720 series machine type:
90H1[720-18ASU/EnergyStar]/90H0[720-18IKL/EnergyStar]
The descriptions in this guide might be different from what you see on your computer,
depending on the computer model and configuration.
Product design and specifications may be changed without notice.
Lenovo, the Lenovo logo and ideacentre are trademarks of Lenovo in the United States,
other countries, or both.
WindowsisatrademarkoftheMicrosoftgroupofcompanies.
Othercompany,product,orservicenamesmaybetrademarksorservicemarksofothers.
©CopyrightLenovo2017.LIMITEDANDRESTRICTEDRIGHTSNOTICE:Ifdataor
software is delivered pursuant to a General Services Administration “GSA” contract, use,
reproduction,ordisclosureissubjecttorestrictionssetforthinContract
No.GS-35F-05925.
