Lenovo ThinkReality A6 User manual

A6
QUICK START GUIDE
www.lenovo.com

What’s in the box
Headset
Compute Pack
Arm Band
Controller with Clip
Belt Clip
Adapter USB Type-C Cable to
Adapter
USB Type-C Cable to
Headset
Neck Lanyard
Quick Start Guide,
Safety & Warranty Guide,
Wiping Cloth
Two Nose Bridges for
Dierent Sizes Clean Stick
Cable Clip
01

Initial setup
02
Use the BLACK USB Type-C cable to connect the compute pack to the adapter for charging.
Use the RED USB Type-C cable to connect the compute pack to the headset.
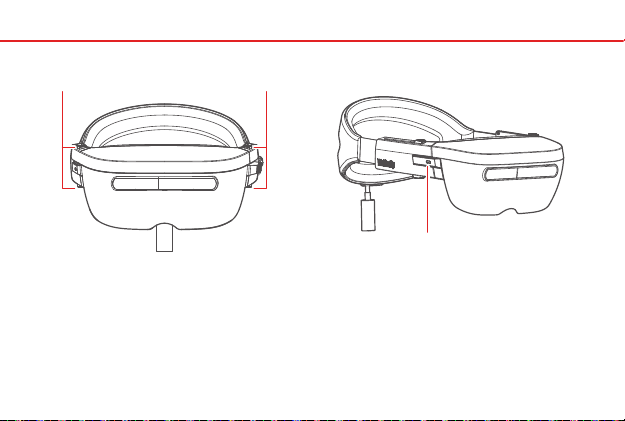
Identifying buttons and controls
Sizing Tabs Headset Button
Sizing Tabs Sizing Tabs
Headset Button
To adjust the tighteness of fit, squeeze
then slide the sizing tabs on either sides
of the headset backward and forward
along the adjustment slots.
Click to put the headset to sleep or wake
it up. Press to re-center the app in the
field of view. Press and hold to turn on
voice commands.
03

Identifying buttons and controls
04
Power Button with LED
Battery LED Strip
3.5mm Audio Connector
Volume Buttons
Selection Button
Clip Release Buttons
1.
2.
3.
4.
5.
6.
1 2 3
45
66
Power On/O
Press when the device is o/on. The LED flashes green
when powered on. It turns white when the device is fully
booted, and flashes green as the device shuts down.
Through device control dialog to power o.
Sleep/Wake
Click to put the device to sleep or wake it up.
Open Device Control Dialog
Press when the device is on.
Hard Boot
Press and hold the power button to hard boot the device.
Factory Reset
Press and hold the power and selection buttons to enter
recovery mode, then choose factory reset.
Indicates battery strength. When the battery reaches
20% or lower, the LED blinks.

Identifying buttons and controls
3
1
4
5
2
Navigation Buttons
Selection Button
Line Button
Circle Button (Reserved for Customer Use)
LED Indicator
1.
2.
3.
4.
5.
Power On/O Controller
Press and hold when the controller is on/o.
Cursor Re-center
Press when 2D display is on to re-center the cursor.
Pairing
Press and hold the line and circle buttons at the same
time.
Red when charging;
White when on;
Flashes when pairing.
05

06
Please read the following information before using the device
for the first time.
Please ensure you have the network password available to
connect to your secure wireless network. You will need to
navigate to the Settings menu to set up your wireless network.
WLAN Connection
You may experience discomfort in the form of motion sickness,
dizziness, headaches, and eye fatigue when using any augmented
reality device. To adjust to this new environment, be sure to keep your
initial sessions short and take regular breaks.
Safety and Comfort
Prepare to Start

07
Setting up the device
Step 1: Attaching the compute pack
Use any of the three attachment accessories provided to secure the compute pack.
Arm Band
Neck Lanyard
Belt Clip

Setting up the device
Step 2: Adjusting the strap
To adjust the strap length before putting the headset on your head,
simultaneously squeeze and slide the sizing tabs
along the adjustment slots while pulling the strap out.
08

Setting up the device
Step 3: Fitting the headset
After placing the headset on, squeeze and slide the sizing tabs backward and
forward along the adjustment slots until the headset fits comfortably.
09
Front View Top View
Table of contents
Other Lenovo Smart Glasses manuals


