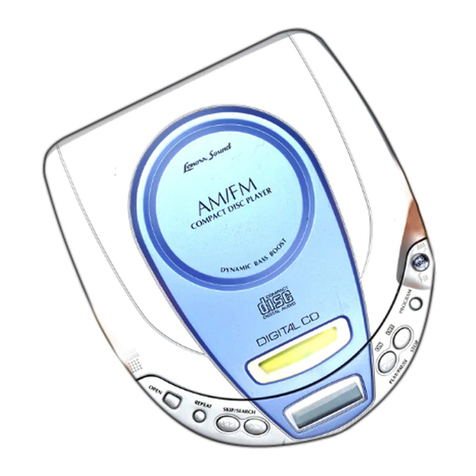
Lenoxx CD-88 User manual

CONNECTIONSCONNECTIONS
CONNECTIONS
LISTENING WITH HEADPHONESLISTENING WITH HEADPHONES
LISTENING WITH HEADPHONES
Connect the plug of the stereo headphones into the Phones Jack (on the
right side of set).
CAUTION:CAUTION:
CAUTION:CAUTION:
CAUTION:
Hearing experts advise against exposure to continuous extended play at
loud volume levels while using headphones, possible hearing loss may
result. If you experience a ringing in the ears, reduce volume or discontinue
use. We want you to listen for a lifetime.
HANDLING COMPHANDLING COMP
HANDLING COMPACTACT
ACTACT
ACT DISCSDISCS
DISCSDISCS
DISCS
This set is designed to play only compact discs bearing this identification
logo (logo must say DIGITAL AUDIO).
Other discs may not conform to the CD standard and may not play properly.
Dirty, scratched or warped discs may cause skipping or noise.
Handle the disc only by the edges. To keep clean, do not touch its surface.
Discs should be stored in their cases after use to avoid scratches.
Do not expose discs to direct sunlight, high humidity, high temperatures,
or dust, etc. Prolonged exposure to extreme temperatures can warp
the disc (such as leaving the discs in your car during summertime).
Do not stick or write anything on either side of disc. Sharp writing
instruments, or the inks used in some felt-tip pens, may damage its surface.
CLEANING DISCSCLEANING DISCS
CLEANING DISCS
Fingerprints should be carefully wiped from the surface of disc with a
soft cloth. Unlike conventional records, compact discs have no grooves
to collect dust and microscopic dirt, so gently wiping them with a soft
cloth should remove most particles. Wipe in a straight motion from the
center to the edge.
Never use thinner, benzine, record cleaner or antistatic spray on a
compact disc. Such chemicals can damage its plastic surface.
TO REMOVE THE DISCTO REMOVE THE DISC
TO REMOVE THE DISC
Open the CD Door by sliding the Door Open Button, hold the disc by the
edge while slightly pressing on the center spindle as illustrated, then lift
it from the edge to release and remove.
5
DO NOT PLUG THE HEADPHONES INTO THE AUX OUT JACK!DO NOT PLUG THE HEADPHONES INTO THE AUX OUT JACK!
DO NOT PLUG THE HEADPHONES INTO THE AUX OUT JACK!
NOTENOTE
NOTENOTE
NOTE
Always press Stop Button and wait for the disc to stop rotating before
pressing the CD Door Open Button to remove the disc.
TO PHONES JACK
CD-88S042799 V.2 E

PLAPLA
PLAPLA
PLAYING AYING A
YING AYING A
YING A DISCDISC
DISCDISC
DISC
1.Plug the cord from the headphones into the PhonesPhones
PhonesPhones
Phones
JackJack
JackJack
Jack on the right side of set..
..
.
IMPORIMPOR
IMPORIMPOR
IMPORTT
TT
TANTANT
ANTANT
ANT::
::
: Do not plug the headphones into the
Aux Out Jack. If you do, the sound
will be very low and the Volume
Control will not work.
2.Slide the Door Open Button to open the CD Door.
3.Hold the disc with the LABEL SIDE UPLABEL SIDE UP
LABEL SIDE UPLABEL SIDE UP
LABEL SIDE UP and
press it onto the spindle until it clicks into
place.
5.Adjust the Volume Control as desired.
6.Slide the Bass Boost Switch ONON
ONON
ON for more
bass, OFFOFF
OFFOFF
OFF for less bass (BASS means low
frequency sounds like a bass drum).
7.If you are using your set in a car or bumpy
location, press the ESP Button(see page 8)
(this is not needed if your set will sit on a table
or night stand).
8.To stop playing temporarily, press the Play/Pause
Button.
The elapsed playing time FLASHESFLASHES
FLASHESFLASHES
FLASHES in the
Display.
6
Press the Play/Pause Button again to
resume normal play.
9.To stop play, press the Stop Button. Total
tracks and time will appear in the Display and
after about 30 seconds the power turns off
automatically. To shut the power off quickly,
press the Stop Button twice slowly.
NOTE:NOTE:
NOTE:NOTE:
NOTE:
The power turns off automatically when
all tracks on a disc have been played.
The power turns off immediately when
the CD Door is opened.
The power turns off when the Stop
Button is pressed slowly twice.
NOTE:NOTE:
NOTE:NOTE:
NOTE:Display will show , the dash inside
the basket flashes, reminding that you
are in ESP mode. The basket will
gradually fill.
4.Close the CD Door (it will latch shut), press the
Play Button (Power On), the disc will begin to
spin, the display will show and then the
total tracks and total playing time, then it will
begin playing track number 1 (song #1).
POWER ONPOWER ON
POWER ONPOWER ON
POWER ON
Close the CD Door and press the Play Button.
POWER OFFPOWER OFF
POWER OFFPOWER OFF
POWER OFF
Press the Stop Button twice (please remember
to press the Stop Button before opening the
CD Door).
OPEN
NOTE:NOTE:
NOTE:NOTE:
NOTE: If the time display flashes, your set is
in the Pause mode, press Play again
to play the disc.
BATT
NOTE:NOTE:
NOTE:NOTE:
NOTE:
1. If the Display shows , the CD is
upside down or missing.
2. When the symbol BATT flashesflashes
flashesflashes
flashes, your
batteries are weak and need replacement.
PLAY/PAUSE
TOTAL NUMBER
OF TRACKS
TOTAL PLAYING
TIME ON THE DISC
BATT
ESP
PLAY/PAUSE
STOP
X 2X 2
X 2X 2
X 2
CD-88S042799 V.2 E
TRACK NUMBER
CURRENTLY
PLAYING
ELAPSED PLAYING
TIME OF THE
CURRENT TRACK
BATT
FORFOR
FORFOR
FORWW
WW
WARD AND REWIND TRACK SEARCH (or changing songs)ARD AND REWIND TRACK SEARCH (or changing songs)
ARD AND REWIND TRACK SEARCH (or changing songs)ARD AND REWIND TRACK SEARCH (or changing songs)
ARD AND REWIND TRACK SEARCH (or changing songs)
Press the Skip/Search Button ( or ) during play to go to the desired track (song).
Skip/Search FORWARD
Skip/Search BACKWARD
Press the Forward Skip/Search ( ) Button to skip to the next track on the disc.
Press the Backward Skip/Search ( ) Button to rewind to the beginning of the track
currently playing. Press this button twice or more to skip to previous tracks.
Press and holdand hold
and holdand hold
and hold the Skip/Search Button ( or ) during play to scan
the disc at higher speed. When the desired music section of the disc is
found, release the button, normal play will resume.
If you press and hold the Forward Skip/Search Button ( ) while the last track is playing, and the
end of the track is reached, the player stops.
BASS BOOST SWITCHBASS BOOST SWITCH
BASS BOOST SWITCH
This switch enhances the low frequency (bass) sounds at low listening levels. Switch this ON or OFF
to suit your taste. During bass boost on setting, sometimes, you may hear some distortion, adjust the
Volume Control to a lower level for the best sound quality.
AUTO POWER OFF FUNCTIONAUTO POWER OFF FUNCTION
AUTO POWER OFF FUNCTION
The power turns off automatically when all tracks on a disc have been played or the Stop Button is
pressed. The display will show track & time for 30 seconds and then shut itself off.
The power turns off immediately when the CD Door is opened (please remember to press the Stop
Button before opening the CD Door).
IF BUTTONS DO NOT WORKIF BUTTONS DO NOT WORK
IF BUTTONS DO NOT WORK
If operating buttons do not work when pressed:
1.Remove the batteries or AC Adaptor and wait a few seconds. The circuits will reset themselves.
2.Replace the batteries or AC Adaptor.
3.If the buttons still do not work, your batteries are weak, replace them or use the AC Adaptor or
Cigarette Lighter Adaptor.
REMEMBERREMEMBER
REMEMBERREMEMBER
REMEMBER
If the symbol BATT flashesflashes
flashesflashes
flashes in the display, your batteries are weak, replace them or use the AC
Adaptor or Car Adaptor. If the BATT symbol is shown without flashing, the batteries (or AC
adaptor) are OK.
If the Display is blank - no numbers show when Play/Pause Button is pushed, the batteries are
dead. Replace them, or use AC Adaptor, or Cigarette Lighter Adaptor (Also check if you inserted the
batteries according to the + and - as shown on the back of the set).
7CD-88S042799 V.2 E

This set is designed with 40 second ESPESP
ESPESP
ESP (Electronic Shock Protection), PLUSPLUS
PLUSPLUS
PLUS
TMTM
TMTM
TM
- which allows
virtually unlimited gentle skip protection, and 40 second normal shock protection.
Press the ESP BUTTON to turn the ESP PLUSESP PLUS
ESP PLUSESP PLUS
ESP PLUS
TMTM
TMTM
TM
system on. Press it
again to turn the ESP PLUSESP PLUS
ESP PLUSESP PLUS
ESP PLUSTMTM
TMTM
TM system off.
When the ESP Button is pressed during play, the (memory
basket) indicator will appear in the Display, the dash inside the basket
flashes reminding you that the 40 second ESP PLUSPLUS
PLUSPLUS
PLUS
TMTM
TMTM
TM
function is ON.
The digital data equivalent to approximately 40 seconds of music is
stored in read-ahead memory buffer before it is decoded and played.
The mark changes to the mark, indicating that the memory
buffer (basket) is full.
When the set is subject to a shock or a bump during play, the data
stored in memory continues to be decoded and played. This gives the
pickup time to stabilize and continue reading new music. As the data is
read from memory. The indicator changes from to Once the
pickup returns to its original position, new data is stored in memory and
the Display changes back to the mark.
If the set is subjected to repeated shocks and all the data stored in
memory is used up, the mark is displayed and the sound will skip
or stop for a brief period until the memory basket has time to fill up again.
To turn off the 40 second ESP PLUSPLUS
PLUSPLUS
PLUS
TMTM
TMTM
TM
function, press the ESP
Button again.
Keep the digital ESP function OFF when using the set in a stable, no
vibration area, where it will not receive shocks, The batteries will last
longer when the ESP function is turned off.
NOTE:NOTE:
NOTE:NOTE:
NOTE:
- The music may stop if the player receives continuous shocking.
- You may hear noise or skipping if the CD is dirty or scratched.
- If during ESP play, you press Pause, or Search buttons, the memory
basket will empty itself temporarily.
8
The ESP PLUSPLUS
PLUSPLUS
PLUS
TMTM
TMTM
TM
function prevents the sound from skipping by using a buffer memory that stores
music data. The new ESP PLUSESP PLUS
ESP PLUSESP PLUS
ESP PLUS
TMTM
TMTM
TM
system can store more music than normal anti-skip systems.
X 1
DISPLAY WITH EMPTY MEMORY
DISPLAY WITH FULL MEMORY
SOME MEMORY USED WHEN
SET IS SHOCKED
ALL MEMORY IS
USED UP
When the digital ESP PLUSPLUS
PLUSPLUS
PLUS
TMTM
TMTM
TM
function is switched ON or OFF during
play, the sound will be interrupted for a few seconds. This is normal.
ESP
CD-88S042799 V.2 E
This new design allows gentle swaying of the set without music skipping as in walking. This set will not
work during jogging.
40 SECOND ESP PLUS40 SECOND ESP PLUS
40 SECOND ESP PLUS
TMTM
TMTM
TM
SYSTEMSYSTEM
SYSTEMSYSTEM
SYSTEM
BATT
BATT
BATT
BATT

REPEAREPEA
REPEAREPEA
REPEATT
TT
TPLAPLA
PLAPLA
PLAYY
YY
Y- SINGLE TRACK REPEA- SINGLE TRACK REPEA
- SINGLE TRACK REPEA- SINGLE TRACK REPEA
- SINGLE TRACK REPEATT
TT
T
Plays one song over and over till you press Stop.
During play press the Repeat/Enter Button once the symbol
REPEAREPEA
REPEAREPEA
REPEATT
TT
T
flashesflashes
flashesflashes
flashes.
The song currently playing will repeat over and over, until you press
Stop.
To stop repeat play, press the Repeat/Enter Button twice till the word
REPEAREPEA
REPEAREPEA
REPEATT
TT
T
disappears.
REPEAREPEA
REPEAREPEA
REPEATT
TT
TPLAPLA
PLAPLA
PLAYY
YY
Y--
--
-
ALLALL
ALLALL
ALL TRACKS REPEATRACKS REPEA
TRACKS REPEATRACKS REPEA
TRACKS REPEATT
TT
T
Repeats all songs in order, till you press Stop.
During play, press the Repeat/Enter Button twice, the symbol
REPEAREPEA
REPEAREPEA
REPEATT
TT
T
will
show steady (not flashing) in the display.
All songs will keep playing in sequence 1, 2, 3, etc, when finished, will
repeatedly start all over again untill you press the Stop Button.
INTRO PLAINTRO PLA
INTRO PLAINTRO PLA
INTRO PLAYY
YY
Y
This plays the first 10 seconds of each song on the CD in sequential
order.
1. During play, press the Program Button once, the word
INTROINTRO
INTROINTRO
INTRO
will
flash in the Display.
2. Press one of the Skip/Search Buttons, the word
INTROINTRO
INTROINTRO
INTRO
will stop
flashing and the first 10 seconds of eacheach
eacheach
each song from the currently
playing song (or the next song) on the CD will play in sequential
order.
3. When you find a song you like, press Play, the word
INTROINTRO
INTROINTRO
INTRO
will go off
and that song (and the following songs) will play NORMALLNORMALL
NORMALLNORMALL
NORMALLYY
YY
Y.
9
RANDOM PLARANDOM PLA
RANDOM PLAYY
YY
Y
1. During play, press Program Button three times the word
RANDOMRANDOM
RANDOMRANDOM
RANDOM
will flash during play.
2. Press the Forward Skip/Search Button , this will play all of the
songs in random order selected by the CD player.
RANDOMRANDOM
RANDOMRANDOM
RANDOM
will be
steady on.
3. Press the Forward Skip/Search Button , to skip to the next
random song.
4. To stop
RANDOMRANDOM
RANDOMRANDOM
RANDOM
play and resume to normal play, press the
Program Button once.
X 1
X 2
X 1 X 1
X 3
To resume normal play, press the Repeat/Enter Button once and the
word
REPEAREPEA
REPEAREPEA
REPEATT
TT
T
disappears.
REPEAT
ENTER
REPEAT
ENTER
PROGRAM
PROGRAM
X 1
CD-88S042799 V.2 E
BATT
BATT
REPEAREPEA
REPEAREPEA
REPEATT
TT
T, INTRO AND RANDOM PLA, INTRO AND RANDOM PLA
, INTRO AND RANDOM PLA, INTRO AND RANDOM PLA
, INTRO AND RANDOM PLAYY
YY
Y
BATT
BATT
Other Lenoxx CD Player manuals

Lenoxx
Lenoxx CD-85 User manual

Lenoxx
Lenoxx Durabrand CD-62 User manual

Lenoxx
Lenoxx CD-511 User manual

Lenoxx
Lenoxx CD-85 Operator's manual

Lenoxx
Lenoxx CD-87 User manual

Lenoxx
Lenoxx CD-163 User manual

Lenoxx
Lenoxx CD-89 Operator's manual

Lenoxx
Lenoxx CD-79 User manual

Lenoxx
Lenoxx PR4057 User manual

Lenoxx
Lenoxx CD-91 User manual

Lenoxx
Lenoxx CD-57 Operator's manual

Lenoxx
Lenoxx CD-78 User manual

Lenoxx
Lenoxx CD-625 Operator's manual

Lenoxx
Lenoxx CD-52 User manual

Lenoxx
Lenoxx CD-155 User manual

Lenoxx
Lenoxx CDR-190 User manual

Lenoxx
Lenoxx CD-52 Operator's manual

Lenoxx
Lenoxx CD-965 Operator's manual

Lenoxx
Lenoxx CD-52 User manual

Lenoxx
Lenoxx CD-155 User manual