manuals.online logo
Brands
  1. Home
  2. •
  3. Brands
  4. •
  5. Lexmark
  6. •
  7. Printer
  8. •
  9. Lexmark T420 User manual

Lexmark T420 User manual

Other manuals for T420

4

This manual suits for next models

1

Other Lexmark Printer manuals

Lexmark 3455 User manual

Lexmark

Lexmark 3455 User manual

Lexmark E 330 User manual

Lexmark

Lexmark E 330 User manual

Lexmark J 110 User manual

Lexmark

Lexmark J 110 User manual

Lexmark S400 Series User manual

Lexmark

Lexmark S400 Series User manual

Lexmark Z730 Color Jetprinter User manual

Lexmark

Lexmark Z730 Color Jetprinter User manual

Lexmark C782n User manual

Lexmark

Lexmark C782n User manual

Lexmark C2335 User manual

Lexmark

Lexmark C2335 User manual

Lexmark printer User manual

Lexmark

Lexmark printer User manual

Lexmark M1145 User manual

Lexmark

Lexmark M1145 User manual

Lexmark S510 Series User manual

Lexmark

Lexmark S510 Series User manual

Lexmark 12B0104 - W 820 B/W Laser Printer Operating instructions

Lexmark

Lexmark 12B0104 - W 820 B/W Laser Printer Operating instructions

Lexmark E 230 Product information sheet

Lexmark

Lexmark E 230 Product information sheet

Lexmark 20T3600 - T 620 B/W Laser Printer User manual

Lexmark

Lexmark 20T3600 - T 620 B/W Laser Printer User manual

Lexmark MS610de Technical manual

Lexmark

Lexmark MS610de Technical manual

Lexmark 10G1664 - T 634dtnf B/W Laser Printer User manual

Lexmark

Lexmark 10G1664 - T 634dtnf B/W Laser Printer User manual

Lexmark 4039-1XX User manual

Lexmark

Lexmark 4039-1XX User manual

Lexmark MS710 Series User manual

Lexmark

Lexmark MS710 Series User manual

Lexmark T420d User manual

Lexmark

Lexmark T420d User manual

Lexmark 6500E Installation and maintenance instructions

Lexmark

Lexmark 6500E Installation and maintenance instructions

Lexmark MS911 User manual

Lexmark

Lexmark MS911 User manual

Lexmark C543dn User manual

Lexmark

Lexmark C543dn User manual

Lexmark 5000 Series User manual

Lexmark

Lexmark 5000 Series User manual

Lexmark Pro5500 Series User manual

Lexmark

Lexmark Pro5500 Series User manual

Lexmark 4900 Series User manual

Lexmark

Lexmark 4900 Series User manual

Popular Printer manuals by other brands

Evolis Elypso user guide

Evolis

Evolis Elypso user guide

Panduit COUGAR LS9Q Operator's manual

Panduit

Panduit COUGAR LS9Q Operator's manual

Olivetti PG L2140 Operation guide

Olivetti

Olivetti PG L2140 Operation guide

Samsung SL-M2820DW user manual

Samsung

Samsung SL-M2820DW user manual

Kyocera FS-9530DN specification

Kyocera

Kyocera FS-9530DN specification

Canon LASER SHOT LBP-1210 Specifications

Canon

Canon LASER SHOT LBP-1210 Specifications

Canon PIXMA PRO-1 Series Getting started

Canon

Canon PIXMA PRO-1 Series Getting started

Canon LBP113w Getting started

Canon

Canon LBP113w Getting started

Epson M1120 user guide

Epson

Epson M1120 user guide

TransAct POSJET 1500 Spare parts

TransAct

TransAct POSJET 1500 Spare parts

Telpar MTP-1500 user manual

Telpar

Telpar MTP-1500 user manual

Star DP8340 SERIES user manual

Star

Star DP8340 SERIES user manual

MGI JETVARNISH 3DS user manual

MGI

MGI JETVARNISH 3DS user manual

Kyocera TASKalfa PA4500ci Operation guide

Kyocera

Kyocera TASKalfa PA4500ci Operation guide

Emaar EP-360 user manual

Emaar

Emaar EP-360 user manual

Fujitsu DL7400 user manual

Fujitsu

Fujitsu DL7400 user manual

Centronics 101A Technical manual

Centronics

Centronics 101A Technical manual

Logic Controls LR1100 user manual

Logic Controls

Logic Controls LR1100 user manual

manuals.online logo
manuals.online logoBrands
  • About & Mission
  • Contact us
  • Privacy Policy
  • Terms and Conditions

Copyright 2025 Manuals.Online. All Rights Reserved.

Quick Reference
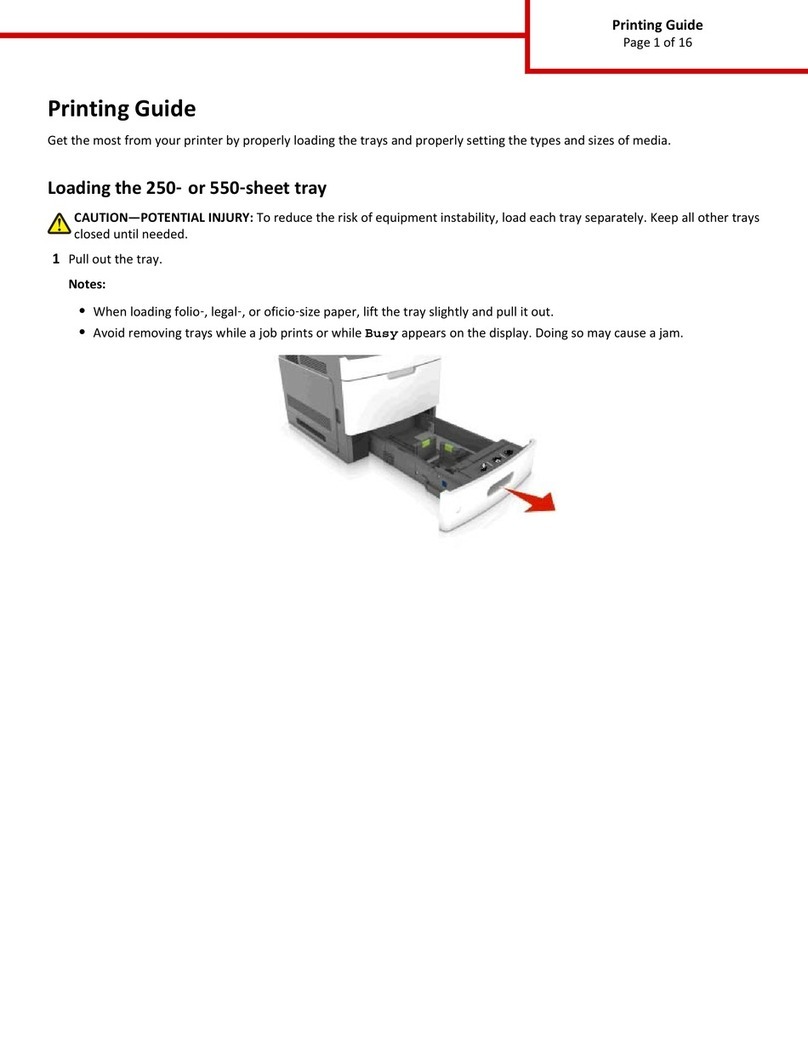
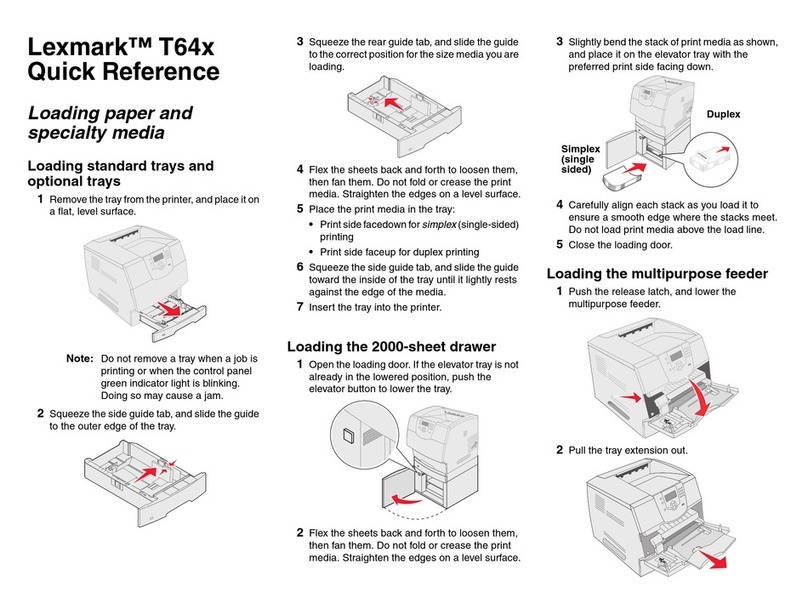
Loading a tray
1 Remove the tray completely.
For the optional 500-sheet tray, open the cover.
2 Press the metal plate down.
3 Squeeze the width guide tab and the width guide together, and
then slide the guide all the way to the right.
4 Squeeze the length guide tab and the length guide together, and
then slide the guide to its fully extended position.
5 Flex the sheets back and forth to loosen them, and then fan them.
Do not fold or crease the print media. Straighten the edges of the
stack on a level surface.
6 Place the print media against the left side of the tray and insert it
under the metal stop, print side down, and facing the front of the
tray. Do not bend or wrinkle the sheets.
Note: Do not exceed the maximum stack height. Overfilling the
tray may cause a jam.
7 Squeeze the width guide tab and the width guide together, and
then slide the guide to the edge of the print media.
8 Squeeze the length guide tab and the length guide together, and
then slide the guide to the edge of the print media.
For the optional 500-sheet tray, close the cover.
9 Reinstall the tray.
Loading the multipurpose feeder
The multipurpose feeder accepts plain paper, envelopes,
transparencies, card stock, and labels.
1 Open the multipurpose feeder door, and then pull out the
extension.
2 Unfold the extension.
3 Slide the width guide all the way to the right.
4 Place paper print side up, or envelopes flap side down, in the
feeder. Push the print media forward without forcing it.
Note: Orient the print media correctly for the size, type, and print
method you are using. Refer to the Publications CD for
detailed information about orienting print media. Do not
overfill the feeder.
5 Slide the width guide until it lightly touches the side of the stack.
6 In your word processor, spreadsheet, browser, or other
application, select File Print.
7 Click Properties (or Options, Printer, or Setup depending on the
application) to view the printer driver settings.
8 Select MP Feeder from the Form Source list box.
9 Select your print media type (envelopes, transparencies, and so
on) from the Media Type list box.
10 Click OK, and then send your print job as usual.
Canceling a print job
If the job you want to cancel is printing and the Ready/Data light is
blinking, press Cancel. All the lights come on indicating the print job is
canceled.
Printing a menu settings page
To print a menu settings page, press Continue while only the
Ready/Data light is on.
Operator panel conditions
The operator panel can be used for more detailed functions than
outlined here. Refer to the Publications CD for more information.
Metal stop
Maximum stack height indicator
Light sequence Printer status
Ready/Data on The printer is ready to receive and process
data.
Ready/Data blinks The printer is busy receiving or processing
data.
•Ready/Data on
•Press Continue on
The printer is waiting for additional data.
Error on The printer top cover is open or the print
cartridge is not installed.
•Error on
•Press Continue on
A secondary error has occurred.
•PressContinue twice quickly to display
the secondary error light sequence.
• Refer to the Publications CD to resolve
the problem.
•Load/Remove Paper
on
•Press Continue on
The printer is out of print media, or the print
media is not loaded properly.
•Load/Remove Paper
blinks
•Press Continue on
• The printer is prompting you to load a
single sheet of media in the multipurpose
feeder.
•PressContinue to print the page.
•Paper Jam on
•Press Continue on
The printer detects a jam.
•PressContinue twice quickly to display a
jam light sequence.
• See “Clearing jams” on this card or on the
Publications CD.
•Ready/Data on
•Toner Low on
The printer is alerting you the toner is low.
Removing the cartridge and shaking it may
let you print more pages before replacing it.
Light sequence Printer status
© Copyright 2002 Lexmark International, Inc. All rights reserved.
Printed in U.S.A.
E.C. 6H0007 P/N 16H0520
Clearing jams
To clear the Paper Jam error light and resume printing, you must
remove all jams and press Continue.
The following table may help you locate the jam based on the jam light
sequence. However, you still have to check each possible jam area to
find all the jams.
Jam light sequences
Jams under the print cartridge or in the fuser
1 Open the upper front door using the finger grips.
2 Remove the print cartridge.
CAUTION! The rear portion of the inside of the printer may
be hot.
Warning! Do not touch the photoconductor drum on the
bottom of the print cartridge.
3 Remove any jams.
4 Reinstall the print cartridge.
5 Close the upper front door.
Jams behind the rear output bin door
1 Open the rear output bin door.
2 Remove any jams.
You may have to remove the print cartridge to clear a jam in this
area.
3 Close the rear output bin door.
Jams in a tray
1 Gently open the tray until you can see the jam.
2 Remove any jams.
If you see any print media above the metal stop, completely
remove the tray. Press down on the print media to lock the metal
plate below it into place. Reposition the print media under the
metal stop.
3 Reinstall the tray.
Jams under the printer
Print media can jam under the printer and above tray 1 when the
duplex function is in use. To clear this type of jam:
1 Completely remove tray 1.
2 Press down the green lever on the left under the printer.
3 Remove any jams.
4 Grasp the tab on the rear door and pull the door open.
5 Press down the green lever on the right under the printer.
6 Remove any jams.
7 Close the rear door, and then reinstall the tray.
Jams in the standard output bin or
multipurpose feeder
Remove any jams from these areas.
If you need more information
•Refer to the Setup Guide or the Publications CD for information
about using and maintaining your printer.
•Contact your administrator or Help desk if you have questions
about network printing.
Light sequence Meaning
•Ready/Data on
•Paper Jam on
•Press Continue on
Input jam—see:
• “Jams under the print cartridge or in the
fuser”
• “Jams in a tray”
•Toner Low on
•Paper Jam on
•Press Continue on
Exit jam—see:
• “Jams under the print cartridge or in the
fuser”
• “Jams behind the rear output bin door”
•Toner Low blinks
•Paper Jam on
•Press Continue on
Duplex jam—see:
“Jams under the printer”
•Ready/Data blinks
•Paper Jam on
•Press Continue on
Multipurpose feeder jam:
• Remove any jams in the multipurpose
feeder.
• Make sure any print media in the
multipurpose feeder is loaded correctly.
Finger grips