manuals.online logo
Brands
  1. Home
  2. •
  3. Brands
  4. •
  5. LF
  6. •
  7. Bathroom Fixture
  8. •
  9. LF Allen + Roth SHLSNC01SN User manual

LF Allen + Roth SHLSNC01SN User manual

44-IN TO 72-IN CURVED
SHOWER ROD
CORTINERO PARA DUCHA CURVO DE
111,76 CM A 182,88 CM
Gracias por comprar este producto allen + roth. Hemos creado estas instrucciones fáciles de seguir para garantizar que pase su tiempo disfrutando el
producto en lugar de armándolo. No obstante, si necesita más información que la entregada aquí, visite Lowes.com, busque el número de artículo y consulte
la pestaña Guides & Documents (Guías y documentos) en la página del producto.
Si el artículo ya no está a la venta o si tiene alguna pregunta o problema, llame a nuestro Departamento de Servicio al Cliente al 866-439-9800, de lunes a
domingo de 8 a.m. a 8 p.m., hora estándar del Este. También puede ponerse en contacto con nosotros en [email protected].
Thank you for purchasing this allen + roth product. We’ve created these easy-to-follow instructions to ensure you spend your time enjoying the product instead
of putting it together. But, if you need more information than what is provided here, please visit Lowes.com, search the item number and refer to the Guides &
Documents tab on the product’s page.
If the item is no longer for sale, or if you have any questions or problems, please call our customer service department at 866-439-9800, 8 a.m. - 8 p.m., EST,
Monday – Sunday.You could also contact us at [email protected].
WARNING/ADVERTENCIA
Make sure you are installing in a clean, dry and safe environment.DO NOT STAND ON TUB LEDGE.
Asegúrese de que está realizando la instalación en un entorno limpio, seco y seguro. NO LO INSTALE EN EL BORDE DE LA BAÑERA.
Please read and understand this entire manual before attempting to assemble, operate or install the product.
Lea y comprenda completamente este manual antes de intentar ensamblar, usar o instalar el producto.
SAFETY INFORMATION/INFORMACIÓN DE SEGURIDAD
CARE AND MAINTENANCE/CUIDADO Y MANTENIMIENTO
TROUBLESHOOTING/SOLUCIÓN DE PROBLEMAS
• Wipe clean with damp cloth./Limpie con un paño húmedo.
WARRANTY/GARANTÍA
1-Year limited warranty that protects against defects in materials and workmanship.
Garantía limitada de 1 año que protege contra defectos en los materiales y la mano de obra.
MODEL/MODELO #SHLSNC01SN/SHLSNC01CH
/SHLSNC01BR/SHLSNC01MB
/SHLSNC01SG
1 OF 6
ALLEN + ROTH and logo design are
trademarks or registered trademarks
of LF, LLC. All rights reserved.
ALLEN + ROTH y el diseño del logotipo
son marcas comerciales o marcas registradas
de LF, LLC. Todos los derechos reservados.
AS22447
PROBLEM
PROBLEMA
POSSIBLE CAUSE
CAUSA POSIBLE
CORRECTIVE ACTION
ACCIÓN CORRECTIVA
Shower rod falling from wall.
El cortinero para ducha se cae
de la pared.
1.The screws are not tightened./Los tornillos no
están apretados.
2.The lock is not fully tightened./El bloqueo no
está completamente apretado.
1.Tighten the screws with a screwdriver./Apriete los
tornillos con un destornillador.
2.Pay attention tothe direction of rotation, tighten
inwards, loosen outwards./Preste atención a la dirección
de rotación, apriete hacia adentro, afloje hacia afuera.
ITEM/ARTÍCULO#5138227/5138230/5138232/5138233/5277706
PACKAGE CONTENTS/CONTENIDO DEL PAQUETE
HARDWARE CONTENTS/ADITAMENTOS
PREPARATION/PREPARACIÓN
Before beginning assembly of product, make sure all parts are present. Compare parts with package contents list and hardware contents list.
If any part is missing or damaged, do not attempt to assemble the product.
Antes de comenzar a ensamblar el producto, asegúrese de tener todas las piezas. Compare las piezas con la lista del contenido del paquete
y la lista de aditamentos. No intente ensamblar el producto si falta alguna pieza o si estas están dañadas.
Estimated Assembly Time: 5 minutes
Tiempo estimado de ensamblaje: 5 minutos
TOOLS REQUIRED/HERRAMIENTAS NECESARIAS:
FEELING CONFIDENT? START YOUR NEXT PROJECT/
¿SE SIENTE CONFIADO? EMPIECE SU PRÓXIMO PROYECTO
• Visit lowes.com for more information./Para obtener más información, visite lowes.com.
Printed in China
Impreso en China
×1
A
×4
AA ×4
BB ×1
CC ×1
DD
2 OF 6
T.For Tension Installation proceed to T1
T.Para la instalación de tensión, proceda a T1
P.For Permanent Installation proceed to P1
P.Para la instalación permanente, proceda a P1
QUICK REFERENCE GUIDE/GUÍA DE REFERENCIA RÁPIDA
TROUBLESHOOTING /SOLUCIÓN DE PROBLEMAS
3 OF 6
If the finial and tube are not locked tightly,
please use the large allen key to tighten it.
Si el remate y el tubo no están bien bloqueados,
utilice la llave Allen grande para apretarlos.
CC
T P
ATTENTION/ATENCIÓN
Before you begin,please note this curved rod has two installation methods.
Antes de comenzar, tenga en cuenta que este cortinero curvo tiene dos métodos de instalación.
Please choose one according to your needs. /Elija una de acuerdo a sus necesidades.
1.Tension installation/Instalación de tensión.
2.Permanent installation/Instalación permanente.
T4.Move the outer threaded rod next to the inner threaded rod,
rotate the outer threaded rod to cover the inner threaded rod,
and move the plastic sleeve close to the threaded rod.
T4.Mueva el cortinero roscado exterior junto al cortinero roscado
interior, gire el cortinero roscado exterior para cubrir el cortinero roscado
interior y mueva el manguito de plástico cerca del cortinero roscado.
T5.Hold the rod to your desired location,
continue to rotate the outer threaded rod inwards
until you feel increased resistance.
T5. Sostenga el cortinero en la ubicación deseada,
continúe girando el cortinero roscado exterior hacia
adentro hasta que sienta una mayor resistencia.
T1.Measure the distance of your desired location and make a record.
T1.Mida la distancia de su ubicación deseada y regístrela.
T2.Put the rod on a flat surface,
rotate the outer threaded rod outwards
until the entire inner threaded rod is exposed.
T2.Coloque el cortinero sobre una superficie plana,
gire el cortinero roscado exterior hacia afuera hasta
que quede expuesto todo el cortinero roscado interior.
T3.Extend the rod to the size same as you recorded.
Move the both threaded rod to the junction
of the outer and inner tubes, and use the small allen key
to lock the inner thread rod fastened.
T3.Extienda el cortinero roscado al tamaño que registró.
Mueva ambos cortineros roscados a la unión de
los tubos exterior e interior, y utilice la llave Allen
pequeña para bloquear el cortinero roscado interior.
T5
QUICK REFERENCE GUIDE/GUÍA DE REFERENCIA RÁPIDA
T4
T3
T2
T1
TENSION INSTALLATION /INSTALACIÓN DE TENSIÓN
DD
4 OF 6
QUICK REFERENCE GUIDE/GUÍA DE REFERENCIA RÁPIDA
P4
P3
P1 P2
PERMANENT INSTALLATION /INSTALACIÓN PERMANENTE
P1.Disassemble rod and remove the lock.
P1. Desmonte el cortinero y retire el bloqueo.
P3.Push the decorative cover of both ends towards
the middle of the rod.
P3. Empuje la cubierta decorativa de ambos extremos hacia el
centro del cortinero.
P4.Place the rod in your desired location and extend
until both ends touch the wall.
P4. Coloque el cortinero en la ubicación deseada y
extiéndalo hasta que ambos extremos toquen la pared.
P2.Reassembled rod and retain plastic sleeve on rod.
P2. Vuelva a ensamblar el cortinero y retenga el
manguito de plástico en el cortinero.
5 OF 6
P5.Use a pencil to mark the hole locations
through the mounting plate.
P5. Utilice un lápiz para marcar las ubicaciones de los
orificios a través de la placa de montaje.
P6.Drill the holes.
P6. Taladre los orificios.
P5 P6
Repeat this step on the other side.
Repita este paso en el otro lado.
Repeat this step on the other side.
Repita este paso en el otro lado.
QUICK REFERENCE GUIDE/GUÍA DE REFERENCIA RÁPIDA
PERMANENT INSTALLATION /INSTALACIÓN PERMANENTE
A
6 OF 6
P10.Push the decorative cover back into place at both ends.
P10. Vuelva a colocar la cubierta decorativa en su lugar en
ambos extremos.
P8.Insert screws through the mounting plate into anchors.
P8. Inserte los tornillos en las anclas de expansión a través
de la placa de montaje.
P9.Tighten the screws.
P9. Apriete los tornillos.
P8
P9 P10
AA
AA
P7.Insert anchors into the marked positions
until flush with the wall.
P7. Inserte las anclas de expansión en las posiciones
marcadas hasta que queden al ras con la pared.
P7 BB
Repeat this step on the other side.
Repita este paso en el otro lado.
Repeat this step on the other side.
Repita este paso en el otro lado.
Repeat this step on the other side.
Repita este paso en el otro lado.

This manual suits for next models

9

Other LF Bathroom Fixture manuals

LF allen + roth ML-20524 User manual

LF

LF allen + roth ML-20524 User manual

LF style selections LW153C14-W User manual

LF

LF style selections LW153C14-W User manual

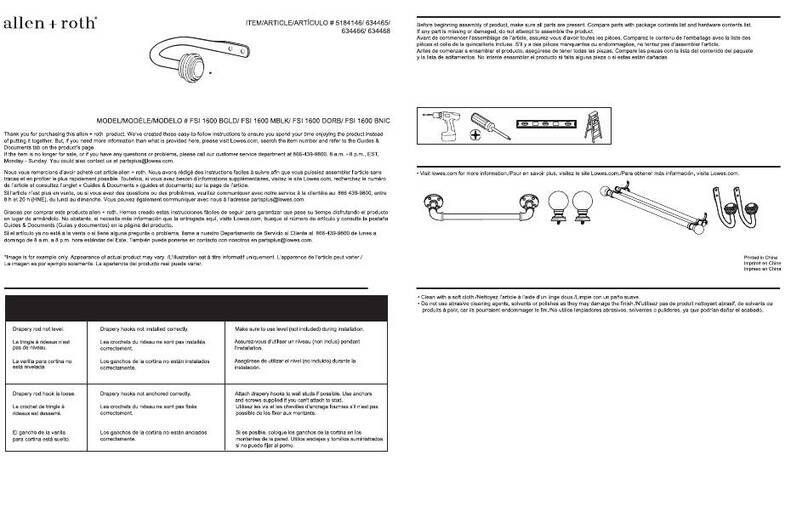
LF allen + roth FSI 1600 BGLD Original operating instructions

LF

LF allen + roth FSI 1600 BGLD Original operating instructions

LF Aquasource ML-20509 User manual

LF

LF Aquasource ML-20509 User manual

LF Style Selections 2058NNMV User manual

LF

LF Style Selections 2058NNMV User manual

LF allen+roth Roveland 2026VA-36-200 User manual

LF

LF allen+roth Roveland 2026VA-36-200 User manual

LF Style Selections 261347 User manual

LF

LF Style Selections 261347 User manual

LF Style SELECTION 1678VA-49-292-934 User manual

LF

LF Style SELECTION 1678VA-49-292-934 User manual

LF Style Selections 2619KKMV User manual

LF

LF Style Selections 2619KKMV User manual

LF STYLE SELECTIONS 1790VA-24-201 User manual

LF

LF STYLE SELECTIONS 1790VA-24-201 User manual

LF STYLE SELECTIONS VANITY WITH TOP AND MIRROR ... Instruction manual

LF

LF STYLE SELECTIONS VANITY WITH TOP AND MIRROR ... Instruction manual

LF ORIGIN 21 FW0AC015CP User manual

LF

LF ORIGIN 21 FW0AC015CP User manual

Popular Bathroom Fixture manuals by other brands

Uberhaus 80465001 Installation instruction

Uberhaus

Uberhaus 80465001 Installation instruction

Tiger 5013 manual

Tiger

Tiger 5013 manual

Felton REFLEX RHSKCSRA installation guide

Felton

Felton REFLEX RHSKCSRA installation guide

Triton XEROPHYTE installation guide

Triton

Triton XEROPHYTE installation guide

agape PEAR C Assembly instructions

agape

agape PEAR C Assembly instructions

Geberit Piave Operation manual

Geberit

Geberit Piave Operation manual

OVE ELLIS 60 manual

OVE

OVE ELLIS 60 manual

Fleurco STAK DUO LVSTB24-AP-RD Series installation manual

Fleurco

Fleurco STAK DUO LVSTB24-AP-RD Series installation manual

Fleurco ABV3248 installation manual

Fleurco

Fleurco ABV3248 installation manual

Grohe Euphoria manual

Grohe

Grohe Euphoria manual

Jacuzzi THE ESSENTIALS 100x70 manual

Jacuzzi

Jacuzzi THE ESSENTIALS 100x70 manual

CLEOPATRA Easyfill Installation and user manual

CLEOPATRA

CLEOPATRA Easyfill Installation and user manual

Roca SENTRONIC-S A5A8102C00 manual

Roca

Roca SENTRONIC-S A5A8102C00 manual

Home Decorators Collection HAMPTON 45 installation manual

Home Decorators Collection

Home Decorators Collection HAMPTON 45 installation manual

Brizo Kintsu Series Installation sheet

Brizo

Brizo Kintsu Series Installation sheet

Arblu OTTO STANDARD NICCHIA 1AB Assembly instructions

Arblu

Arblu OTTO STANDARD NICCHIA 1AB Assembly instructions

MERLYN 6 Series Assembly instructions

MERLYN

MERLYN 6 Series Assembly instructions

Schulte D9670 manual

Schulte

Schulte D9670 manual

manuals.online logo
manuals.online logoBrands
  • About & Mission
  • Contact us
  • Privacy Policy
  • Terms and Conditions

Copyright 2025 Manuals.Online. All Rights Reserved.