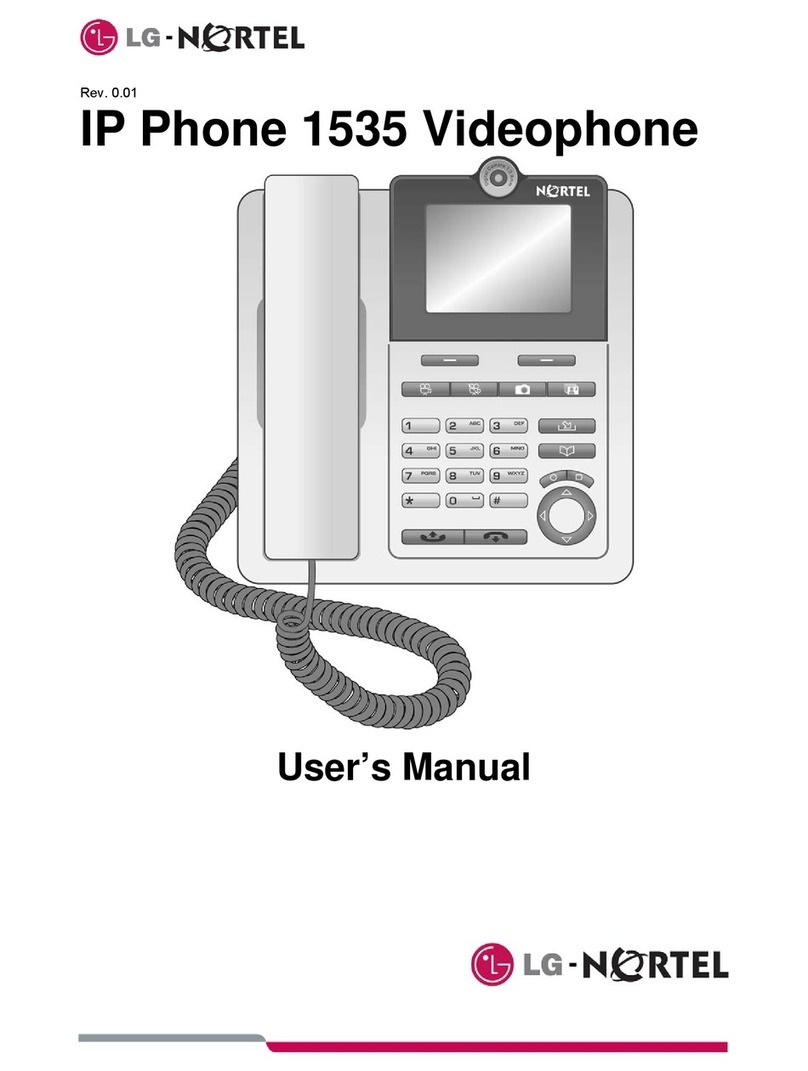
LG-Nortel LVP 2890 User manual

Rev. 0.01
LVP 2890 Videophone
User’s Manual

i
Table of Contents
1Videophone Description ............................................................................ 1
1.1 Basic Description ................................................................................................................. 1
1.2 Description of the Keys........................................................................................................ 2
1.3 Screen Symbols................................................................................................................... 2
1.4 Care of the Videophone....................................................................................................... 2
1.5 Safety Information................................................................................................................ 3
1.6 Entering Characters with the Keyboard ............................................................................... 3
1.7 Shipping Box Content .......................................................................................................... 3
1.8 Factory Settings................................................................................................................... 3
1.9 Technical Specifications ...................................................................................................... 4
2Installing .................................................................................................... 5
2.1 Installation Guidelines.......................................................................................................... 5
2.2 Installing the Videophone .................................................................................................... 5
2.2.1 Connecting the Handset.................................................................................................... 5
2.2.2 Connection to Power......................................................................................................... 5
2.2.3 PSTN Connection ............................................................................................................. 5
2.2.4 Broadband Connection ..................................................................................................... 5
3Settings ..................................................................................................... 7
3.1 Profile Selection................................................................................................................... 7
3.2 Audio Settings...................................................................................................................... 8
3.2.1 Configuring Audio Volume ................................................................................................ 8
3.2.2 Ringing Options ................................................................................................................ 8
3.3 Video Options ...................................................................................................................... 9
3.3.1 Window Size .....................................................................................................................9
3.3.2 Camera On/Off.................................................................................................................. 9
3.3.3 Video fluency .................................................................................................................... 9
3.4 Personalize with Phone Settings ....................................................................................... 10
3.4.1 Display Options............................................................................................................... 10
3.4.2 Call barring ..................................................................................................................... 10
3.4.3 Language Selection ........................................................................................................ 11
3.4.4 Writing Mode................................................................................................................... 11
3.5 Adjusting VoIP ................................................................................................................... 11
3.5.1 User Information ............................................................................................................. 11
3.5.2 Proxy............................................................................................................................... 12
3.5.3 Registration..................................................................................................................... 12
3.5.4 Expires............................................................................................................................ 12
3.5.5 Miscellaneous ................................................................................................................. 12
3.5.6 Ports ............................................................................................................................... 13
3.5.7 Codec priority..................................................................................................................13
3.6 System Settings.................................................................................................................13
3.6.1 Reset .............................................................................................................................. 13
3.6.2 Admin mode.................................................................................................................... 14
3.6.3 Date and time.................................................................................................................. 14
3.6.4 Network parameters........................................................................................................ 14
3.6.5 WiFi parameters.............................................................................................................. 15
3.6.6 Modifying the system PIN ............................................................................................... 15
3.6.7 System Version Control .................................................................................................. 15
4Voice Calls .............................................................................................. 16
4.1 Placing a call...................................................................................................................... 16
4.1.1 Pre-dial (Cell phone style)............................................................................................... 16
4.1.2 Recall Dialing ..................................................................................................................16
4.1.3 Phonebook Dialing.......................................................................................................... 16
4.1.4 Call Logs Dialing ............................................................................................................. 16

ii
4.2 Incoming Calls ................................................................................................................... 16
4.2.1 Receiving a Call .............................................................................................................. 16
4.2.2 Missed Call Notification/Return ....................................................................................... 17
4.3 Active Call Options ............................................................................................................ 17
4.3.1 Phonebook access.......................................................................................................... 17
4.3.2 Mute the microphone ...................................................................................................... 17
4.3.3 Audio volume .................................................................................................................. 17
4.3.4 Call hold.......................................................................................................................... 17
4.3.5 Blind transfer................................................................................................................... 18
4.3.6 Consultation transfer....................................................................................................... 18
4.3.7 Conference ..................................................................................................................... 18
4.3.8 Show hw/sw Version....................................................................................................... 18
4.3.9 Telephone number.......................................................................................................... 18
5Video Calls .............................................................................................. 19
5.1 Making a Video Call........................................................................................................... 19
5.1.1 Direct Video Call ............................................................................................................. 19
5.1.2 Indirect call...................................................................................................................... 19
5.2 Receiving a Video Call....................................................................................................... 19
5.3 Video Call Controls ............................................................................................................ 19
5.3.1 Video Privacy (Mute)....................................................................................................... 19
5.3.2 Video Window Size ......................................................................................................... 19
5.4 Active Video Call Options .................................................................................................. 20
5.4.1 Show/hide Details ........................................................................................................... 20
5.4.2 Video fluency .................................................................................................................. 20
5.4.3 Phonebook...................................................................................................................... 20
5.4.4 Mute the Microphone ...................................................................................................... 20
5.4.5 Audio Volume.................................................................................................................. 20
5.4.6 Show hw/sw version........................................................................................................ 20
5.4.7 Telephone number.......................................................................................................... 20
6E-Mail Messages Menu........................................................................... 21
6.1 Configuring E-Mail ............................................................................................................. 21
6.2 E-mail Menu Options ......................................................................................................... 21
6.2.1 Writing an email .............................................................................................................. 21
6.2.2 Sending & Saving an E-Mail ........................................................................................... 21
6.3 Accessing saved E-Mails................................................................................................... 22
6.4 Reading New E-Mails ........................................................................................................ 22
6.5 E-Mail Management Options ............................................................................................. 22
7Services Menu ........................................................................................ 23
7.1 Voice Mail .......................................................................................................................... 23
7.1.1 Configuring Voice Mail .................................................................................................... 23
7.1.2 Accessing Voice Mail ...................................................................................................... 23
7.2 Web browser...................................................................................................................... 23
7.3 Video Monitoring................................................................................................................24
8Call History.............................................................................................. 25
8.1 Viewing Call Logs .............................................................................................................. 25
8.2 Call Log Options ................................................................................................................25
8.2.1 Details............................................................................................................................. 25
8.2.2 Saving in the Phonebook ................................................................................................ 25
8.2.3 Delete a Call Record....................................................................................................... 26
8.2.4 Call.................................................................................................................................. 26
8.3 Deleting Call History Logs ................................................................................................. 26
9Images and Sounds ................................................................................ 27
9.1 Image Galleries.................................................................................................................. 27
9.1.1 Taking Photos ................................................................................................................. 27
9.1.2 Administrating images..................................................................................................... 27

iii
9.2 Sound Galleries .................................................................................................................28
9.2.1 Recording Audio ............................................................................................................. 28
9.2.2 Administrating sounds..................................................................................................... 28
9.3 Video Gallery ..................................................................................................................... 29
9.3.1 Recording Videos............................................................................................................ 29
9.3.2 Administrating videos ...................................................................................................... 29
10 Calendar.................................................................................................. 30
10.1 Creating a new alarm......................................................................................................... 30
10.2 Options available ...............................................................................................................30
10.3 Deleting an Alarm .............................................................................................................. 30
11 Phonebook .............................................................................................. 31
11.1 Adding an entry.................................................................................................................. 31
11.2 Consulting the Phonebook................................................................................................. 31
11.2.1 Access Phonebook Records....................................................................................... 31
11.2.2 Quick Access to the Phonebook ................................................................................. 31
11.3 Modifying an entry ............................................................................................................. 32
11.4 Deleting an entry................................................................................................................ 32
11.5 VIP list................................................................................................................................ 32
12 SIM Card ................................................................................................. 33
12.1 Copying entries from the SIM card .................................................................................... 33
12.2 Copying entries to the SIM card ........................................................................................ 33
13 SD/MMC.................................................................................................. 34
13.1 Copying files from the Memory card .................................................................................. 34
13.2 Copying files from the videophone to an SD/MMC memory card...................................... 34
14 Maintenance and Problem Solving.......................................................... 35
14.1 What Videophone version do I have?................................................................................ 35
14.2 Updating the Phone’s software.......................................................................................... 35

1
1 Videophone Description
1.1 Basic Description
The LVP-2890 is a hybrid PSTN and IP based phone that permits audio and video calls and access to
special services available from your communications provider. The LVP-2890 incorporates the following
elements as shown in Fig. 1:
•Alphanumeric dial pad.
•Soft keys, located below the screen, interact with the menu to simplify operation.
•Color TFT LCD, 3.5 inch, QVGA (320 x 240 pixels)
•Digital camera, 1/4.5 inch, 640x480 pixels.
•Handset
•Speaker & Microphone.
•Fast Ethernet port and internal WiFi module for Internet connection.
•USIM (Unified Subscriber Identification Memory) slot for data exchange with Phonebook.
•SD/MMC (Secure Digital Multi-Media Card) slot for data exchange with multimedia devices.
Fig. 1. Front view of the Videophone
T
Te
el
le
ep
ph
ho
on
ne
e
d
di
ia
al
l-
-p
pa
ad
d
T
Te
el
le
ep
ph
ho
on
ne
e
h
ha
an
nd
ds
se
et
t
C
Ca
am
me
er
ra
a
S
SD
D/
/M
MM
MC
C
C
Ca
ar
rd
d
T
Tr
ra
ay
y
S
SI
IM
MC
Ca
ar
rd
d
T
Tr
ra
ay
y
C
Co
ol
lo
or
r
G
Gr
ra
ap
ph
hi
ic
cs
s
S
Sc
cr
re
ee
en
n

2
1.2 Description of the Keys
Key Function
Speakerphone off-hook button.
With Handset on-hook, activates Speakerphone.
With Handset off-hook, switches to Speakerphone operation.
Call release button. While using the Speakerphone, this button will end the
call. Also, while browsing menus, this button will return to the previous menu.
Navigation buttons. Controls movement through the various menus.
In the idle screen:
cEnables direct access to outgoing calls history
dEnables direct access to the phone book
Video Call Button. Lets you place a video call or request Video call.
Also used to accept a Video call request.
Video Mute button. Lets you stop (mute) and restart video transmission
during a video call.
Camera button. Gives access to camera, and audio and video recorder.
On a video call, controls video window size.
FAVOURITES button. Gives direct access to browser Favourites.
MESSAGES button, gives access to voice mail service.
Table 1 Videophone buttons
1.3 Screen Symbols
The telephone has a color screen displaying different icons giving you information on the Videophone’s
various events and status. The meaning of these will be detailed throughout this manual.
1.4 Care of the Videophone
The Videophone should only be cleaned with a moist or anti-static cloth. Do not use detergents or solvents.
Avoid using dry cloths as they can generate static electricity, which can be potentially dangerous for the
electrically sensitive parts of the Videophone.
When used in near proximity to electromagnetic sources such as Microwave ovens, audio interference may
result; relocate the device to minimize interference.

3
1.5 Safety Information
The Videophone complies with CEI EN60950 “ITE safety” regulations (IT equipment).
For safety reasons, do not use the telephone in bathrooms or very humid environments, as it is not
waterproof.
1.6 Entering Characters with the Keyboard
To enter any type of text (a name, an email address in the phonebook, etc.), follow the same procedure as for
any mobile telephone.
When writing text, you have the following options:
•Modify writing mode: if you want to modify the character set (mode), press the # key to run through the
various options. A symbol on the screen will tell you which writing mode you have selected at any
given time. For further information, see section 3.4.4 Writing mode.
•Insert symbols: if you want to insert a symbol, press the * key to view the available symbols. Move
through them, choose the desired symbol and select with OK.
•Delete text: a “Delete” option will always be available. Pressing it once deletes a single character. If
you press and hold the “Delete” for a few seconds, the entire text string is deleted.
•Insert a space: press the * key or, in all writing modes other than 123, press 0.
1.7 Shipping Box Content
The shipping box contains:
•1 LVP-2890 telephone base
•1 handset
•1 LAN cable
•1 power adaptor: 100V~240V, 50Hz~60Hz
•1 user manual
1.8 Factory Settings
The Videophone is delivered with the following settings:
•Ring tone volume: level 4
•Handset / hands free volume: level 4
•Date: 01/01/2006 (MM/DD/YYYY)
•Time: 00:00 (HH:MM)
•Ringing mode: standard
•VIP filter: disabled
•Video quality: level 4
•Video fluidity: 3
•Screen size: remote/local small
•Screen color: default
•Screen background: default
•Screensaver: enabled
•PIN: 0000

4
1.9 Technical Specifications
Videophone base size: 206 x 190 x 100 mm.
Handset size: 184 x 42 x 32 mm.
Approximate weight: 750 + 195 g (base + handset)
Main processor: Intel PXA270 @ 416 MHz
PSTN port RJ-11
LAN port: RJ-45
WLAN interface: IEEE802.11b/g
SD/MMC slot
SIM slot
Ring melodies: 50 polyphonic
Background images: 5
Operating temperature: 0° C- 40° C
Operating humidity: 5 ~ 95 %, non-condensing
Noise level: 15 dB @ 1 m
Dialing Mode: DTMF (Dual Tone Multi-frequency)
Power: AC/DC Adapter
AC Input- 100~240 VAC 60Hz
DC Output 5 VDC 1.5 Amps

5
2 Installing
2.1 Installation Guidelines
•The Videophone can be used in a temperature range of +0° to 40° C and a 5 to 95% relative humidity.
•Place the telephone on a smooth non-slip surface.
•Do not place the Videophone in particularly dusty environments, as the build up of dust deposits can
affect the working of the mechanical parts subject to movement.
•Make sure the Videophone is not directly exposed to sunlight or direct, irradiated heat sources as this
can damage electrical components over time.
2.2 Installing the Videophone
Basic installation of the LVP-2890 is simply a matter of connecting the ports of the phone to the correct
socket with standard connector ended cables. Connections are made for the Handset, Power and, as
needed, PSTN and LAN.
2.2.1 Connecting the Handset
•Insert one end of the coil cord in the handset connector on the handset cradle side of the
Videophone (see fig. 2).
•Insert the other end of the coil cord in the handset connector (see fig.2).
2.2.2 Connection to Power
•Insert the power adaptor DC plug in the DC power jack in the rear of the Videophone (see fig. 2).
•Connect the adaptor’s AC plug into an appropriate AC voltage socket.
Note use only the adaptor delivered as other adaptors may cause operating anomalies, hazardous
conditions and/or material damage.
2.2.3 PSTN Connection
•Insert one end of the Telephone line cord in the PSTN connector located at the rear of the
Videophone base (see fig. 2).
•Insert the other end of the Telephone line cord in the local PSTN connection.
2.2.4 Broadband Connection
2.2.4.1 LAN Connection
•Insert the RJ45 terminated LAN cable in the LAN (Local Area Network) port located at the
back of the Videophone base (see fig. 2).
•Connect the other end of the LAN cable in the local LAN connection.
2.2.4.2 WiFi Connection
The Videophone can be connected to the Broadband LAN via a wireless WiFi connection. To do this you
must have a wireless router or access point. Normally, the Videophone will automatically locate and
register with the WiFi source. In some cases it may be necessary to configure the Videophone WiFi
parameters, see section 3.6.5

6
Figure 2 LVP-2890 Installation
Power
Connection
LAN
Conncetion
PSTN Line
Conncetion Handset Conncetion

7
3 Settings
By default, the LVP-2890 is set to function in the narrowband mode connected to a PSTN line and there is no
need for further configuration. These and other settings may be changed in the “SETTINGS” menu. The
“SETTINGS” Menu is accessed from the idle screen by selecting settings from the main menu. When you
select the main menu, you see the selections as below. The main menu selections available are:
•Messages: access to the Email options.
•Call history: access to missed, Dialed (outgoing) and received call
logs.
•Services: access to the browser, voice mail, and video monitoring
services.
•Images and sounds: access to the multimedia functions including
image, audio and video gallery.
•Settings: access to the LVP-2890 configuration parameters including
profiles, audio, video, phone, VoIP and system parameters.
•Organizer: access to LVP-2890 Phonebook and Calendar.
Under “SETTINGS” the following list is displayed on the right hand side of the screen:
•Profile: to select the telephone’s operating profile (LAN and WiFi). See section 3.1 Profile selection.
•Audio settings: configure ringing and audio parameters, see section 3.2.
•Video settings: configure the video size and fluidity, see section 3.3.
•Phone settings: modify telephone-related parameters (language, screen options, etc), see section
3.4.
•VoIP settings: modify VoIP parameters. See section 3.5 Setting VoIP.
•System settings: modify system-related parameters (date, time, network parameters, etc.). See
section 3.6 System settings.
3.1 Profile Selection
In place of the narrowband mode, the LVP-2980 may operate in either of two broadband modes or “Profiles”.
•LAN broadband profile: the Videophone is connected to the broadband network via an Ethernet
connection at an Ethernet Switch or router.
•WiFi broadband profile: the Videophone is connected to the broadband network via a wireless WiFi
connection. To do this, a wireless router or access point must serve as a bridge connection to the
broadband network.
When you select a profile, both Voice and Video calls are made via the interface corresponding to the
selected profile and the remaining profile is disabled. Once you have activated the profile, an icon indicating
the type of profile selected will appear in the top bar of the main page.
() LAN icon
() WiFi icon
If a problem exists in the connection, the ( or ) icon will appear, indicating no connectivity.
To select the broadband profile select: “main menu” →“settings” →
“profile”:
1. Select “LAN or WiFi and press OK
2. Select “Enable” to activate this interface.
3. When asked to confirm the change, press “YES”.

8
Enabling the a broadband profile may require configuring the parameters for “Network Parameters” or “WiFi
Parameters”, see sections 3.6.4 or 3.6.5 respectively. If this configuration is required, the (icon) icon will
appear, indicating this situation.
3.2 Audio Settings
3.2.1 Configuring Audio Volume
With this function you can set audio volume during normal audio calls and video calls for handset and
hands free conversations. To set audio volume:
1. From the idle screen, select “main menu” →“settings” →
“audio settings” →“handset volume” or “speaker volume”
and press OK to confirm.
2. The default volume may be set to one of five levels using the
vertical arrow keys.
3. Confirm with OK.
Note the volume level may be increased or decreased from the normal level any time during a
conversation, within the five levels available.
3.2.2 Ringing Options
3.2.2.1 Configuring Ring melody
The LVP-2890 Audio gallery includes 50 (fifty) melodies that can be used for ring. Each melody is 8
seconds long and an additional 60 (sixty) melodies may be downloaded from a SD/MMC card or recorded
from the LVP-2890. To use the built-in melodies follow the procedure below. To store a melody in the
Phone see section 9.
1. From the idle screen, select “main menu” →“settings” →
“audio settings” →“ringing” →“melody” and press OK to
confirm.
2. Search for the desired melody, select and confirm with OK.
3. Press “Set” to apply the melody as the ring tone.
3.2.2.2 Setting default Ringing volume
The initial ring default volume for the Videophone can be set at one of 5 different levels. To regulate the
default ring volume:
1. From the idle screen, select “main menu” →“settings” →
“audio settings” →“ringing volume” and press OK to confirm.
2. Adjust the volume using the vertical arrows. There are 5 levels
available.
3. Press OK to confirm the selection.
3.2.2.3 Configuring Ringing mode
The Videophone’s ring can be set to 4 different modes. To select a ring mode:
1. From the idle screen, select “main menu” →“settings” →
“audio settings” →“ringing” →“ringing mode” and press OK
to confirm.
2. Select one of the following options:
•Standard: sets normal ringing.
•Disable: mutes ringing at all times, do-not-disturb.
•For one ring: ring for the first ring only, one-time.
3. Press OK to confirm the desired ring mode.

9
3.2.2.4 Ring Filter for VIP calls
This parameter enables operation of the VIP filtering. When enabled, only calls from callers identified as
a VIP in the Phonebook will provide audible ringing. Note that CLI (Calling Line Identification) service
must be available. VIPs are defined as shown in section 11. To enable the
filter for VIP calls:
1. From the idle screen, select “main menu” →“settings” →
“audio settings” →“ringing” →“VIP filter” and press OK.
2. Press “YES” to confirm or “NO” to cancel and return to the
previous menu.
3.3 Video Options
3.3.1 Window Size
During a Video call the screen is divided into two windows, local and remote. The size of the window
remote and local windows is adjustable. To set Window size dimension:
1. With the Videophone idle, select “main menu” →“settings” →
“video settings” →“video dimension” and press OK.
2. Select the desired size using the vertical arrows. The options
available are:
•Remote/local small: both images are displayed in a small
frame. (Default)
•Remote big/local small: remote party’s image is displayed in
full screen, while your own image is seen in a small frame.
•Remote full screen: remote party’s image is displayed in full screen.
3. Press OK to confirm.
3.3.2 Camera On/Off
The camera can be turned off so that the video and photo functions of the LVP-2890 are disabled. This
parameter can only be accessed if the user has logged in to Admin, see section 3.6.2. To enable/disable
the camera:
1. With the Videophone idle select “main menu” →“settings” →
“video settings” →“camera” and press OK.
2. Select enable or disable and press OK to confirm.
If the Camera is turned off, Photos, Video recorder and Video Monitoring
features are not available, and during a video call, the local image will not be
sent to the remote user.
3.3.3 Video fluency
With this function you can set the image fluency level (choosing from five
different values) during a video call. Modifying this parameter allows you to
increase or decrease the fluency of the image transmitted during a Video
call. This parameter is also determined by the definition with which the
image is sent. In fact, the greater the reproduction speed (fluency), the
lower the image quality.
To set the video fluency:
1. With the telephone idle press “main menu” →“settings” →“video settings” →“video
fluency” and press OK.
2. Select the desired level using the vertical arrows. There are 5 levels available.
3. Press OK to confirm.

10
3.4 Personalize with Phone Settings
3.4.1 Display Options
3.4.1.1 Display Color
To personalize the display several background color choices are available. To modify the screen color:
1. With the telephone idle, select “main menu” →“settings” →
“phone settings” →“display” →“menu color” and press OK.
2. Select the desired color using the vertical arrows. The options
available are:
•Default
•Nature
•Flower
•Purple
3. Press OK to confirm.
3.4.1.2 Background
With this function you can select the screen’s background image.
To modify the background image:
1. With the telephone idle select “main menu” →“settings” →
“phone settings” →“display” →“background” and press OK.
2. Select the desired image from one of the following galleries:
•Photos
•LVP-2890 images
•Stored images
3. Press OK to confirm your selection.
3.4.1.3 Screen Saver
After a period of inactivity, Screensaver switches the LVP-2890 display screen off. The user can enable
or disable the Screensaver function and define the Screensaver delay period.
To enable the Screensaver function:
1. With the telephone idle select “main menu” →“settings” →
“phone settings” →“display” →“screen saver” and press OK.
2. Press “YES” to confirm or “NO” to cancel and return to the
previous screen.
3. When changing to an enabled state, the screensaver delay
interval is requested. Use the dial pad to enter the delay time
interval (minutes: seconds)
4. Confirm with OK.
3.4.2 Call barring
The LVP-2890 can bar or block outgoing calls where the first few digits match a pre-defined “prefix code”
Up to five prefix codes of up to 5 digits each can be entered for Call Barring. To configure call blocking:
1. With the telephone idle select “main menu” →“settings” →
“phone settings” →“call barring” and press OK.
2. The user’s PIN (default = 0000) is requested. Enter the valid PIN
and Confirm with OK.
3. Select “Prefix”.
4. Select one of the 5 prefix code indices.
5. Enter the prefix code to be barred, up to 5 digits, and press OK to
confirm.

11
6. If you wish to restrict voice calls only, select “voice call” →“enable”, to restrict video calls only,
select “video calls” →“enable”.
3.4.3 Language Selection
The LVP-2890 displays can be in several languages to meet the user needs. The languages available are
English (default), French, and Spanish. To modify the language:
1. With the telephone idle select “main menu” →“settings” →
“phone settings” →“menu language” and press OK.
2. Select the desired language from English, French, or Spanish
using the vertical arrows.
3. Press OK to confirm.
3.4.4 Writing Mode
The user can set the start-up Writing mode used during dial pad character entries. The user assigns the
start-up mode to employ small or capital letters. The user may also select the T9 look-ahead dictionary,
which compares entries to a dictionary to pre-determine a desired entry thus, easing user entry.
To set the writing mode:
1. With the telephone idle select “main menu” →“settings” →
“phone settings” →“writing mode” and press OK.
2. Select one of the 4 options available:
•Dictionary T9 in small letters
•Dictionary T9 in capital letters
•Small letters
•Capital letters
3. Press OK to confirm.
When using the dial pad for entries, such as in the Phonebook, the user may change the Writing mode as
needed.
3.5 Adjusting VoIP
Normally, the VoIP settings of the LVP-2890 are properly set through default and automated registration with
your service provider.
Should it be necessary to modify them, you can do this from “main menu” →“settings” →“VoIP settings”.
3.5.1 User Information
To modify information relating to the user, from “main menu” →“settings” →“VoIP settings”:
1. Select “User Information” and press OK.
2. Select the desired parameter and press OK.
•Telephone number
•Display name
•Authentication name
3. Enter parameters data and confirm with OK:

12
3.5.2 Proxy
To modify the SIP proxy parameters, from “main menu” →“settings” →“VoIP settings”:
1. Select “Proxy” and press OK.
2. Select the parameter you wish to modify and make the desired
changes. Modifiable parameters are:
•Proxy port: default is 5060
•NAT/Timer: set to keep broadband connectivity through a
firewall. The options are 30 secs., 45 secs., 1 min., 1.5 min., 2
min., 2.5 min., 3 min., and 5 min.
3.5.3 Registration
If a broadband profile, section 3.1, Network Parameter, section 3.6.4 or WiFI parameter, section 3.6.5 is
changed, the phone must be re-registered with the service provider for
proper operation,
To manual register the LVP-2890, from “main menu” →“settings” →
“VoIP settings”:
1. Select “Registration” and press OK.
2. Select “Register” and press OK.
3.5.4 Expires
For SIP service, the end-point must periodically register with the SIP server to continue proper operation.
The LVP-2890 can be configured with a preferred registration interval or Registration expiration period.
The LVP-2890 will request the SIP server use this period as the expiration time.
To configure the Registration expiration time, from “main menu” →
“settings” →“VoIP settings”
1. Select “registration” →“expires”.
2. Enter a number in seconds between 60 and 7200 and press OK
to confirm.
3.5.5 Miscellaneous
To modify various options such as Domain name, CTBW and voice mail, from “main menu” →“settings”
→“VoIP settings”:
1. Select “Misc” and press OK.
2. Select the parameter to modify:
•Domain name: to modify the domain name server.
•CTBW: to modify total average bandwidth for a conference
range 60 and 250 kbps.

13
3.5.6 Ports
The TCP and UDP ports for real-time media (audio and video) and the SIP signalling ports can be
configured according to network environment. This parameter can only be accessed if the user has
logged in to Admin, see section 3.6.2. To modify the port assignment, from “main menu” →“settings” →
“VoIP settings” →“ports”:
1. Select the port type (“audio”, ”video” or ”local”).
2. Enter the desired port number, see below for range, and press
OK to confirm.
•Audio: default is 23000, and must be in range between 1024
and 65535
•Video: default is 24000, and must be in range between 1024
and 65535
•Local: default is 5060, and must be in range between 1024 and 65535. This port is used to
connect with proxy server.
3.5.7 Codec priority
Codec priority can be adjusted according to the network environment. This parameter can only be
accessed if the user has logged in to Admin, see section 3.6.2.
To configure the codec preference, from “main menu” →“settings” →“VoIP settings”:
1. Select “codec priority”
2. Select the codec type (“audio” or ”video”).
3. Select the priority level and assign a codec from the list of
codecs available.
•Audio: G.711 u-law, G.711 a-law, G.723, G.729, AMR, None
•Video: H.263, H.264
Once a codec is assigned, it must be released to be available for another
priority level.
3.6 System Settings
System settings include operational and network interfaces parameters. To access the System Settings
menu, press “main menu” →“settings” →“system settings”.
3.6.1 Reset
The LVP-2890 incorporates two databases, Phonebook and Settings. The databases may be reset
individually or at the same time. This parameter can only be accessed if the user has logged in to Admin,
see section 3.6.2.
To reset the LVP-2890 databases:
1. Select “main menu” →“settings” →“system settings” →“reset”.
2. Select from the following options and a message pops up to
confirm the choice:
•Phonebook: remove all entries in phonebook.
•Settings: remove all configurations except for saved data such
as saved photos, audios, videos, email and call history.
•System: reset to factory setting and remove all data stored in
videophone.
3. Press “YES” confirm or “NO” to cancel.
The reset procedure is performed and you must wait until the end of procedure prior to performing further
action

14
3.6.2 Admin mode
The LVP-2890 includes an Admin mode, which is used to control access to several settings. Settings for
Camera mode, VoIP ports, Codec priority and database Reset can be accessed only if the user logs in or
activates the Admin mode.
To log in:
1. Select “main menu” →“settings” →“system settings” →
“admin” →“login”
2. Enter the PIN number (default = 0000) and Confirm with OK.
To log out:
•Select “main menu” →“settings” →“system settings” →“admin”
→“logout”
To change the PIN (password):
1. Select “main menu” →“settings” →“system settings” →“admin” →“password”
2. Enter the old PIN (default = 0000) and press OK.
3. Enter the new PIN and press OK.
4. Confirm the new PIN and press OK.
3.6.3 Date and time
With this menu, you can modify the date and time. From the “system
settings” menu:
1. Select “date and time” and press OK.
2. Enter the date (MM/DD/YYYY) and press OK.
3. Enter the time (HH:MM) and press OK.
3.6.4 Network parameters
In this menu you can view or modify IP network parameters.
To access the Network parameters menu, from “main menu” →“settings” →“system settings”:
1. Select “LAN” or “WiFi” →“network settings” and press OK.
2. Select the desired option:
•Details: displays the current network configuration (MAC
address, DHCP, IP address, subnet mask, link port and DNS).
•DHCP: set DHCP or static IP Address.
•IP address: view/modify IP address.
•Subnet mask: view/modify the subnet mask.
•Gateway: view/modify the default Gateway address.
•DNS1/DNS2: view/modify the primary and secondary Domain Name Servers.
3. If you modify any of the above parameters, select “Apply”.

15
3.6.5 WiFi parameters
With this menu, you can modify WiFi interface parameters. From “main menu” →“settings” →“system
settings”:
1. Select “WiFi” and press OK.
2. Select the desired option:
•“Network settings”: provides information on the current
network configuration (MAC address, DHCP, IP address,
subnet mask, link port and DNS) and allows this data to be
modified.
•“Wireless settings”: enables you to choose from the following
options:
•Details: displays information regarding WiFi the current WiFi connection.
•WiFi scanning: scans to search for available WiFi networks.
•ESSID: view/modify your WiFi network’s ESSID, i.e. the code included in your WiFi
package identifying it as part of that network.
•Channel ID: view/modify the Videophone channel ID.
•Encryption: enable WEP type keying (64/128 bits).
•Authentication: the type of authentication is always WPA-PSK.
3. If you modify one of above parameters, select “Apply” to save the changes.
3.6.6 Modifying the system PIN
With this menu, you can modify the user PIN for features such as Video monitor, call restriction, etc. From
“main menu” →“settings” →“system settings”:
1. Select “pin” and press OK.
2. Enter the old PIN (default = 0000) and press OK.
3. Enter the new PIN and press OK.
4. Confirm the new PIN and press OK.
3.6.7 System Version Control
In this menu you can view the hardware and software version and check whether new updates are
available.
To access the Version Control Menu, from “main menu” →“settings” →“system settings”:
1. Select “technical features” and press OK.
2. Select the desired option:
•Show hw/sw version: displays hardware and software
version.
•Check updates: checks whether there are new updates
available for the equipment. This check can take several
minutes.
•Update software: updates the Videophone’s software. This
update can take several minutes.
3. Confirm with OK.

16
4 Voice Calls
The LVP-2890 incorporates basic and advanced voice call handling functions. Calls can be placed, received,
held and transferred.
4.1 Placing a call
You can place a call by simply Dialing a number while the handset is off-hook or a number can be Dialed or
selected while:
•on-hook pre-dial, cell phone style
•from recall dial last number
•from Phonebook number from the phonebook
•from Call History number from Call Logs
The LVP-2890 incorporates a full duplex Speakerphone, activated with the “Off-hook” key and Volume and
Mute control options are available, see section 4.3.
4.1.1 Pre-dial (Cell phone style)
Simply pre-dial the number before going off-hook, the number is displayed as each character is entered
from the dial pad. A character may be modified during pre-dial using the ”Delete” key. The “Options” key
allows access to several options such as “Save in Phonebook”. For these options, follow the on-screen
display instructions.
4.1.2 Recall Dialing
With this function you can automatically call the Last Number Dialed, simply select the Redial key to dial
the number in the normal or pre-dial mode.
4.1.3 Phonebook Dialing
In the Phonebook, see section 11, you may select from several options including to call a number from the
Phonebook. With this function you can make a call using a name in the Phonebook in the normal or
pre-dial mode.
To use phonebook to dial a number:
1. Select a Phonebook entry, see section 11.
2. Select the “Call” key or go off-hook (pick-up the handset or press the “Off-hook” button) to
activate the Speakerphone function.
4.1.4 Call Logs Dialing
In the Call Logs menu, “main menu” →“call history”, the user may select to call, store, or delete a
number, see section 8. With this function the numbers for each of the last 20 missed, Dialed, and
received calls is available for automatic Dialing.
1. Select the number to call and pick up the handset.
4.2 Incoming Calls
4.2.1 Receiving a Call
When an incoming call is received, the phone will alert you with the normal ring or, if the calling party is
identified as a VIP in the Phonebook and the VIP filter enabled, with the VIP ring signal assigned, see
section 11.
Table of contents
Other LG-Nortel Telephone manuals

LG-Nortel
LG-Nortel IP Phone 1535 User manual

LG-Nortel
LG-Nortel LDP-7008 User manual

LG-Nortel
LG-Nortel 6830 User manual

LG-Nortel
LG-Nortel iPECS LIP-8004D User manual

LG-Nortel
LG-Nortel LWS-BS Instruction manual

LG-Nortel
LG-Nortel iPECS WIT-400H User manual

LG-Nortel
LG-Nortel iPecs LIP-8012D User manual

LG-Nortel
LG-Nortel GDC-400H User manual

LG-Nortel
LG-Nortel LDP-7008D User manual

LG-Nortel
LG-Nortel LSP-450 User manual