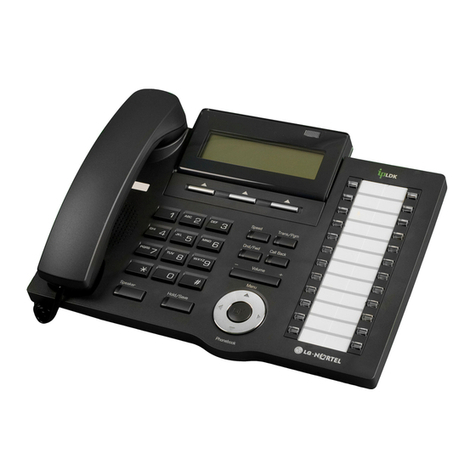
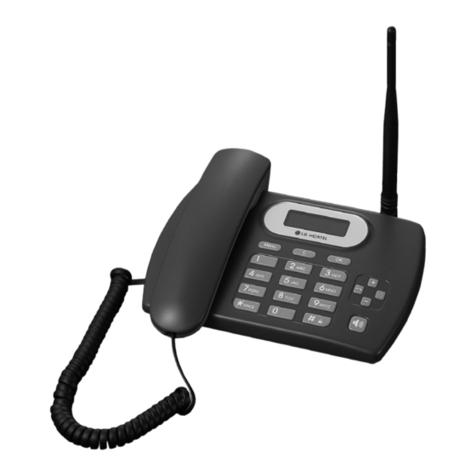
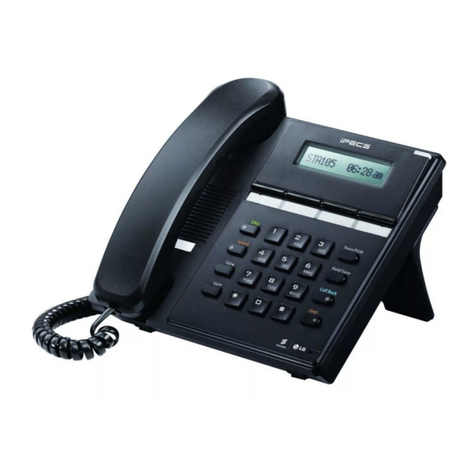
LG-Nortel LWS-BS Instruction manual

LWS-BS Quick User guide
1

LWS-BS Quick User guide
2
LWS-BS Appearance
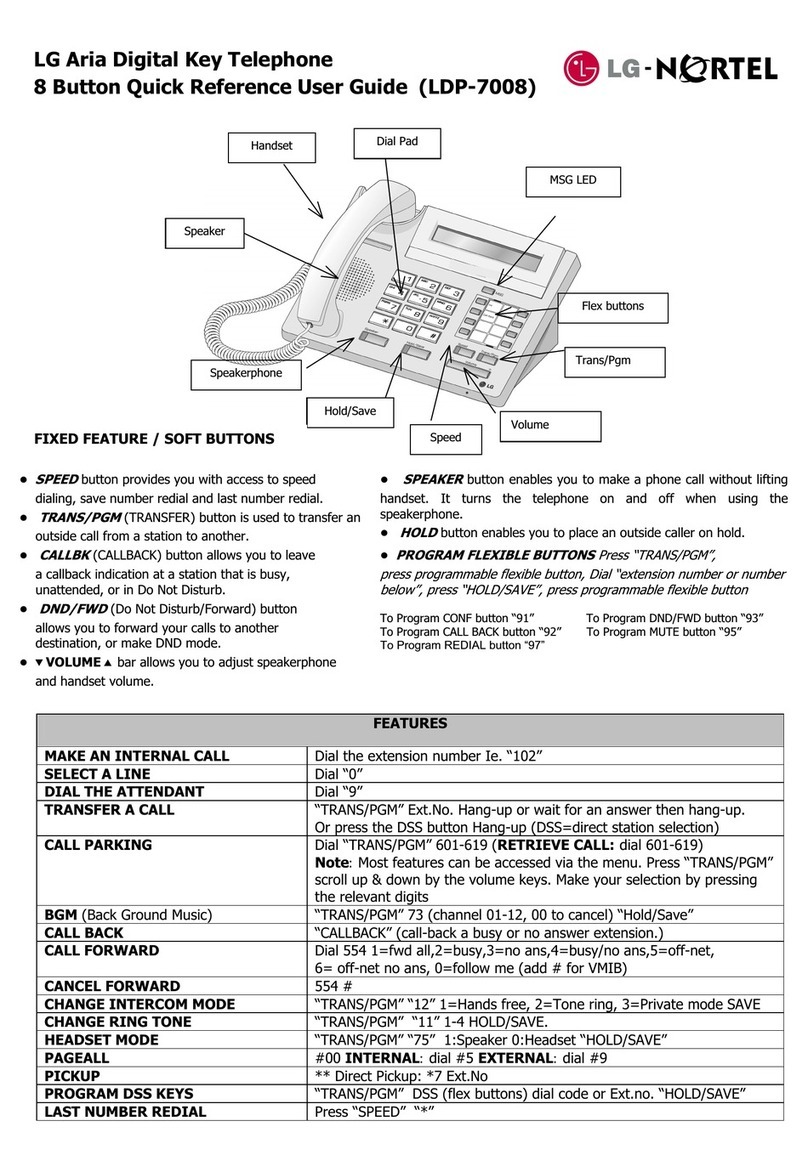
Brief Description of Features
DND Button – Activate/deactivate the Night/ eekend mode. Red LED illuminates hen the
‘Night/ eekend mode’ is on.
Headset Button – Set headset mode to on/off in idle state. Red LED illuminates when headset
mode is on. Pressing the Speaker button in Headset mode activates the headset optional) to
make or receive calls.
Vol
– Adjusts Handset, Speaker or Headset during a call/off hook state . Ringer volume is
turned up or down if phone is ringing. LCD contrast is turned up or down if phone is in idle state.
Trans Button – Transfer a line call or an intercom to another station during a call
Hold Button – Places an active call on hold, the held party will hear a hold music
Mute Button – In call state this disables the handset, speakerphone or headset microphone whilst
continuing to listen to the other party. Red LED illuminates when the ‘mute mode’ is on.
Speaker Button – Activates the speaker or headset. If headset mode is in on when the red LED
of headset button illuminates), headset is activated, otherwise speaker is activated.
Menu Button – Used to set or change the configuration, or to register to a LWS-BS.
MSG Button – Used to access voice messages.
3 Soft Buttons – Used to set features displayed on the LCD.
Line & Station Selection Buttons – Access Lines and Stations for making, receiving and
transferring line and intercom calls. These illuminate to provide visual line and station status
RING LED – Illuminates when ringing.
LCD – Displays status and information about the phone interface or setting.
Microphone – Used for hands-free speakerphone function.
Navigation Key – Used to set or change the configuration with Menu and soft buttons.

LWS-BS Quick User guide
3
LWS-BS Contents in the Package
Verify that all parts shown below were provided in the package.
Configuration
The following figure depicts a sample configuration using the LWS system.
Sample Configuration

LWS-BS Quick User guide
4
LWS-BS Connection
To connect the LWS-BS with phone lines and its peripherals:
1. Connect the line cords to the CO line ports on the bottom of the LWS-BS and its other ends to
the wall sockets.
2. Plug the AC/DC Adapter SA-B122). cord and FAX/SLT Line into the bottom of the LWS-BS
3. Connect the handset curly cord to the handset jack on the bottom of the LWS-BS.
4. Connect the optional Headset to the headphone jack on the bottom of the LWS-BS.
5. Screw the included rubber antenna clockwise onto the terminal at right side of the top of the
LWS-BS.
LWS-BS Connection

LWS-BS Quick User guide
5
Registration of LWS-WK and GDC-400HM/450H
The LWS-BS controls the functional service and registration related to the LWS-WK and GDC-
400HM/450H. Each LWS-WK and GDC-400HM/450H must be registered to the LWS-BS Base
Station) before use. Only one LWS-WK and GDC-400H/450H can be registered to the LWS-BS at
a time.
To enable a registration, belo procedure should be performed on the LWS-BS.
1. Press [Menu] button.
2. Press [Digit 1] CONFIGURATION submenu), or
Select [1. CONFIGURATION] use the Navigation up/down key and then press [OK]
soft button or Navigation ‘OK’ key .
3. Press [Digit 4] STATION REGISTRATION submenu), or
Select [4. STATION REGISTRATION] use the Navigation up/down key and then
press [OK] soft button or Navigation ‘OK’ key.
4. Press [Digit 1] REGISTER STATION submenu), or
Select [1. REGISTER STATION] use the Navigation up/down key and then press
[OK] soft button or Navigation ‘OK’ key.
5. Select the phone type using the Navigation left/right key GDC-4XX or LWS-WK)
6. Press Navigation [OK] button or [OK] soft key
7. Proceed to instructions following - “Registering GDC-400HM/450H to the LWS-BS”
or “Registering LWS-WK to the LWS-BS..
8. When the registration is completed, below message is shown on the LCD of the
LWS-BS
STATION: 70X
SUBSCRIBED: SUCCESS
Registering the GDC-400H/450H to the LWS-BS
To register to the LWS-BS, below procedure should be performed on the GDC-400H/450H.
1. Press [Menu] ( , ) button to display the menu.
2. Highlight [Phone Register] in the menu using the Navigation ) button.
3. Press [OK] , ) button; then the Phone Register menu will be displayed.
4. Select [LWS Subscription] using the up and down arrows of the Navigation )
button and press [OK] , ) button.
5. Display [Searching.1].
6. The system [RFPI : eg. 01234567890123] will be displayed when a system is found.
The RFPI of your system is available from your System Administrator, or perhaps
the attendant.
7. Press [OK] , ) button; in a few seconds, a confirmation tone will be heard
at the GDC-400H/450H.
LWS-BS Quick User guide
6
8. If the registration fails, repeat the procedure from Step 1 to 7 at the LWS-BS and
Step 1 to 7 from the GDC-400HM/450H.
Registering the LWS-WK to the LWS-BS
To register to the LWS-BS, below procedure is performed on the LWS-WK.
1. Press [Menu] button to display the menu.
2. Highlight [Phone Register] using the Navigation up/down key, and then press [OK]
soft button or Navigation ‘OK’ key.
3. Select [Subscription] using the Navigation up/down key, and then press [OK] soft
button or Navigation ‘OK’ key.
4. Display [Searching..1].
5. The system [RFPI : eg. 01234567890123] will be displayed when a system is found.
The RFPI of your system is available from your System Administrator, or perhaps
the attendant.
6. Press [OK] soft button or Navigation ‘OK’ key. In a few seconds, a confirmation tone
is received at the LWS-WK.
7. If the registration fails, repeat procedure from Step 1 to 7 at the LWS-BS and Step 1
to 6 from the LWS-WK.
LWS-BS User Operation
Call forward
1. Press [For ard] soft button.
2. Select forward type. “Unconditional”, “Busy”, “No Answer”, “Busy/No Ans”)
3. Select station number or VM - Voice Mail.
4. Press [Save] soft button.
Call Pick-up
1. Lift the handset or press [Speaker] button.
2. Press {Station} button for ringing station.
Call Transfer
While on a call, to perform a Screened Call Transfer:
1. Press [Trans].
2. Dial the station to receive the transfer.
3. When answered, announce call.
4. Hang-up to complete the transfer.
While on a call, to perform an Unscreened Call Transfer:

LWS-BS Quick User guide
7
1. Press [Trans].
2. Dial the station to receive the transfer.
3. If the ring-back tone from the station is played, hang-up to complete the transfer.
Call Waiting/Camp on
To activate a Camp-On while receiving the Intercom busy tone:
1. Press the ‘*’ button, called and calling stations receive Camp-On tone.
CO Line Access
To place an outgoing CO line call:
1. Lift the handset or press the [Speaker] button.
2. Press desired {Line} button, or dial the CO line access code.
To answer an incoming CO line call:
1. Lift the handset or press the [Speaker] button.
CO Line Ring Assignment
1. Press [Menu] button.
2. Dial 1 3 2.
3. Select a CO line.
4. Press the button of desired station and LED of button is turned on.
5. Press [Save] button.
Directory
1. Press the [Directory] soft button
2. Select “Station directory” or “System directory”.
3. Select desired name and press [Send] soft button
old
To place a call on System Hold:
1. Press the [Hold] button.
To access a call from System Hold:
1. Press the {Line} button.
Intercom Call (ICM Call)
1. Lift the handset or press the [Speaker] button to receive ICM dial tone.
2. Dial station number or press the {Station} button.
3. For ring-back tone, await answer.

LWS-BS Quick User guide
8
Intercom Call old
1. Press the [Hold] button;
Mute
1. Press the [Mute] button; the [Mute] button LED illuminates, the microphone Handset,
Speakerphone, Headset) is muted, and the connected party receives silence.
Night/Weekend mode
To activate night/weekend mode:
1. Press [DND] button.
2. Select the station where the incoming ring is to be directed.
3. Press [Save] soft button. Then [DND] button LED illuminates.
To deactivate night/weekend mode:
1. Press [DND] button in night/weekend mode.
2. Select [RING DEST <OFF>] submenu using navigation left/right key.
3. Press [Save] soft button or Navigation ‘OK’ key.
4. The [DND] button LED turns off.
Three-Party Voice Conference
1. Establish first call.
2. Press the [Conf] soft button; and the connected party is placed on exclusive hold
3. Place second call.
4. When connected, press [Conf] soft button to establish 3-party conference.
Wake-Up Alarm
1. Press the [Menu] button.
2. Dial 5 4.
3. Select [‘Single’ or ‘Continuous’] submenu using navigation left/right key.
4. Dial 2-digit hour and 2-digit minute to set alarm time.
5. Press [Save] button.

LWS-BS Quick User guide
9
LCD Display – Base Station
Figure 2.7.2.1-1 the LWS-BS LCD Display Screen
1. Call Forward – Icon indicates the base station is currently set for call forwarding.
2. Mute Icon indicates if the ute button is activated for blocking voice trans ission on your phone
during a conversion.
3. Alarm Icon indicates the alar has been set.
4. Message Icon indicates there is at least one new essage.
5. Station Number Displayed in idle state. If the LWS-BS station has the designated na e, the na e
is displayed.
6. Date & Time Displayed in idle state.
7. Calendar Displayed in idle state.
8. Soft Menu Dependent on the status and enu choices, the current available selections are
displayed.
Feature Code
Feature Code Remark
Call to Extension 700-708
Group Call Pickup *1
Direct Call Pickup *42
Individual CO Line Access 48 XX XX : 01 ~ 03
CO line number)
CO Line Access Code 1
VSF/VM access code 620
Access individual eld CO line
4# XX XX : 01 ~ 03
CO line number)
Access eld CO line 4*

LWS-WK Quick User guide
10
LWS-WK Appearance
Brief Description of Features
DND Button – Do Not Disturb - Blocks incoming calls ringing. This applies to outside calls,
intercom calls and transfers. Red LED illuminates when DND is on. Press to turn on/off.
Headset Button – Used to place/answer calls using the headset
Vol
– Adjusts Handset, Speaker or Headset during a call/off hook state . Ringer volume is
turned up or down if phone is ringing. LCD contrast is turned up or down if phone is in idle state.
Trans Button – Transfer a line call or an intercom to another station during a call
Hold Button – Places an active call on hold, the held party will hear a hold tone
Mute Button – In call state this disables the handset, speakerphone or headset microphone whilst
continuing to listen to the other party. Red LED illuminates when the ‘mute mode’ is on.
Speaker Button – Used to place/answer calls using the speaker/microphone
Menu Button – Used to set or change the configuration, or to register to a LWS-BS.
MSG Button – Used to access voice messages.
3 Soft Buttons – Used to set features displayed on the LCD.
Line & Station Selection Buttons – Access Lines and Stations for making, receiving and
transferring line and intercom calls. These illuminate to provide visual line and station status
RING LED – Illuminates when ringing.
LCD – Displays status and information about the phone interface or setting.
Microphone – Used for hands-free speakerphone function.
Navigation Key – Used to set or change the configuration with Menu and soft buttons.

LWS-WK Quick User guide
11
LWS-WK Contents in the Package
Verify that all parts shown below were provided in the package.
Configuration
The following image depicts a sample configuration using LWS-BS system and phones.
Sample Configuration
LWS-WK
(DECT terminal)
Po er Adapter
AC po er cord
Quick User Guide
LWS
-
WK

LWS-WK Quick User guide
12
LWS-WK Connections
To connect the LWS-WK to be used with the system:
1. Plug the AC/DC Adaptor cord into the bottom of the LWS-WK.
2. Fasten the AC Adaptor cord to the latch Hook as shown inset detail).
3. Connect the handset to the bottom of the LWS-WK.
4. Connect the headset to the headset jack on the bottom of the LWS-WK. Optional)
LWS-WK Connection

LWS-WK Quick User guide
13
LWS-WK Registration to LWS-BS
The LWS-BS controls the functional service and registration related to the LWS-WK. First of all, the
LWS-WK should be subscribed to LWS-BS. Each LWS-WK must be registered to the LWS-BS
before use. Only one LWS-WK can be registered to the LWS-BS at a time.
To enable a registration, the belo procedure must be performed on the LWS-BS.
9. Press [Menu] button.
10. Press [Digit 1] CONFIGURATION submenu), or
Select [1. CONFIGURATION] using the Navigation up/down key and then press
[OK] soft button or Navigation ‘OK’ key.
11. Press [Digit 4] STATION REGISTRATION submenu), or
Select [4. STATION REGISTRATION] using the Navigation up/down key and then
press [OK] soft button or Navigation ‘OK’ key.
12. Press [Digit 1] REGISTER STATION submenu), or
Select [1. REGISTER STATION] using the Navigation up/down key and then press
[OK] soft button or Navigation ‘OK’ key.
13. Select the phone type using the Navigation left/right key GDC-4XX or LWS-WK)
14. Press Navigation [OK] button or [OK] soft key
15. Proceed to instructions below - “Registering LWS-WK to the LWS-BS.
16. When the registration is completed, below message is shown on the LCD of the
LWS-BS
STATION: 70X
SUBSCRIBED: SUCCESS
Registering the LWS-WK to the LWS-BS
To register to the LWS-BS, below procedure is performed on the LWS-WK.
8. Press [Menu] button to display the menu.
9. Highlight [Phone Register] using the Navigation up/down key, and then press [OK]
soft button or Navigation ‘OK’ key.
10. Select [Subscription] using the Navigation up/down key, and then press [OK] soft
button or Navigation ‘OK’ key.
11. Display [Searching..1].
12. The system [RFPI : eg. 01234567890123] will be displayed when a system is found.
The RFPI of your system is available from your System Administrator, or perhaps
the attendant.
13. Press [OK] soft button or Navigation ‘OK’ key. In a few seconds a confirmation tone
is received at the LWS-WK.
14. If the registration fails, repeat procedure from Step 1 to 7 at the LWS-BS and Step 1
to 6 from the LWS-WK.

LWS-WK Quick User guide
14
LWS-WK User Operation
Call forward
1. Lift the handset or press [Speaker].
2. Dial digit “554”.
3. Dial forward type 1:Unconditional, 2:Busy, 3:No Answer, 4:Busy/No Answer)
4. Dial station number or {VSF/VM access} code
Call Pick-up
1. Lift the handset or press [Speaker].
2. Press {Station} button for ringing station.
Call Transfer
While on a call, to perform a Screened Call Transfer:
1. Press [Trans].
2. Dial the station to receive the transfer.
3. When answered, announce call.
4. Hang-up to complete the transfer.
While on a call, to perform an Unscreened Call Transfer:
1. Press [Trans].
2. Dial the station to receive the transfer.
3. If the ring-back tone from the station is played, hang-up to complete the transfer.
Call Waiting/Camp on
To activate a Camp-On while receiving the Intercom busy tone:
1. Press the ‘*’ button, called and calling stations receive Camp-On tone.
CO Line Access
To place an outgoing CO line call:
1. Lift the handset or press the [Speaker] button.
2. Press desired {Line} button, or dial the CO line access code.
To answer an incoming CO line call:
1. Lift the handset or press the [Speaker] button.
Phone Book
1. Press the [P.BOOK] soft button
2. Select [ADD] soft button.

LWS-WK Quick User guide
15
3. Enter the desired name and press [OK] soft button.
4. Enter the desired number and press [OK] soft button.
5. Select CO Line Access Code Yes or No and press [OK] soft button.
6. Enter phonebook position 01 - 60) and press [OK] soft button.
DND(Do Not Disturb)
To activate DND:
1. Press the [DND] button; the [DND] button LED illuminates.
To remove DND:
1. Press the [DND] button; the [DND] button LED turns off.
Group Call Pick-up
1. Lift the handset or press [Speaker]
button.
2. Dial the {Group Call Pick-up} code.
eadset Compatibility
To change operation from Speakerphone to Headset:
1. Press the [Headset] button.
2. The LED of [Headset] button turns on.
Pressing the Speaker button in Headset mode activates the headset optional) to make or receive
calls.
old
To place a call on System Hold:
1. Press the [Hold] button.
To access a call from System Hold:
1. Press the {Line} button.
Intercom Call (ICM Call)
1. Lift the handset or press the [Speaker] button to receive ICM dial tone.
2. Dial station number or press the {Station} button.
3. For ring-back tone, await answer.
Intercom Call old
1. Press the [Hold] button;
Mute

LWS-WK Quick User guide
16
1. Press the [Mute] button; the [Mute] button LED illuminates, the microphone Handset,
Speakerphone, Headset) is muted, and the other party cannot hear you.
Alarm
1. Press the [Menu] button.
2. Select Phone Settings sub menu.
3. Select Alarm Clock.
4. Select Yes.
5. Dial 2-digit hour and 2-digit minute for alerting.
6. Press [OK] button.
LCD Display
1. Antenna - Displayed when the LWS-WK is in the range of a LWS-BS where it can be
linked. Disappears when it moves out of range. The closer it moves to the base, the
stronger RSSI for reception is.
2. Message – Icon indicates there is at least one new message.
3. Date & Time –Displayed in idle state.
4. Keyset Number – Displayed in idle state.
5. Soft Menu – Dependent on the status and menu choices, the current available functions
are displayed.

LWS-WK Quick User guide
17
Feature Code
Feature Code Remark
Intercom Call 700-708
DND 553
Call Forward 554
C ange VM password 559
Group Call Pickup *1
Direct Call Pickup *42
Individual Line Access 48 XX XX : 01 ~ 03 Line number)
Outside Line Access Code 1
VSF/VM access code 620
Access individual eld line 4# XX XX : 01 ~ 03 Line number)
Access eld line 4*
Attendant code 0

GDC-400HM Quick User guide
18
GDC-400HM Appearance
Figure 2.5.3-1 GDC-400HM Component Description
Figure 2.5.3-2 GDC-450H Component Description

GDC-400HM Quick User guide
19
Button Function
[TALK]
To ake a call
Redial nu ber saved in handset.
[END/POWER]
END/POWER]
To end a call
Press for less than 1 second : Power Off
Press for less than 1 second :Leave a call back or a essage
Press for less than 1 second: Ignore an inco ing call.
[LEFT SOFT / RIGHT SOFT]
Access to the current functions by pressing the soft button directly below this sy bol.
[RECALL/CLEAR]
Talk Mode : Register recall
Recall a call and retry next call
When using pre-dial :
Press for longer than 1 second : All digits are cleared
Press for less than 1 second : 1 digit backspace
When using local functional operation : Function cancel
(It should be pressed for longer than 1 second)
[SPEED/PROGRAM]
Post-Dial :
Press for less than 1 second: System speed dial SPEED).
Press for longer than 1 second: Start/Finish a system program
PROGRAM).
[LEFT]
In an idle state : To view issed call
In MENU : LEFT

GDC-400HM Quick User guide
20
[RIGHT/INTERNAL/TRANSFER/HOLD]
Talking Mode :
Press for less than than 1 second: Transfer a call to another
station TRANS).
Press for longer than 1 second: Hold a call / release a holding
call HOLD).
In an idle state :
In MENU : right button
To make a intercom call or a line call
[CALL BACK]
Press less than 1 second : Leave a call back or a essage
[UP/DOWN]
Talk Mode : Up / Down the level of Rx volu e, Call by na e, CLIP
Standby Mode :
In Menu: Navigate and select a ong function ite s in a enu or sub enu.
No inputted state :
UP : Local Redial
DOWN : Phonebook list
To lock Keypad (Press for longer than 1 second)
‘#’ Display (Press less than 1 second)
While Dialing: To insert pause (Press for longer than 1 second)
Talk Mode : Ca p-On
Standby Mode :
‘*’ is displayed Press for shorter than 1 second)
Enable/disable manner mode Press for less than 1 second)
0~9
- Standard dial button
Table of contents
Other LG-Nortel Telephone manuals

LG-Nortel
LG-Nortel LDP-7008 User manual

LG-Nortel
LG-Nortel 7016 User manual

LG-Nortel
LG-Nortel IPECS User manual

LG-Nortel
LG-Nortel iPECS LIP-8004D User manual

LG-Nortel
LG-Nortel GDC-400H User manual

LG-Nortel
LG-Nortel LVP 2890 User manual

LG-Nortel
LG-Nortel LSP-450 User manual

LG-Nortel
LG-Nortel LDP-7008D User manual

LG-Nortel
LG-Nortel 6830 User manual

LG-Nortel
LG-Nortel iPecs LIP-8012D User manual

LG-Nortel
LG-Nortel ARIA SOHO IP Operating and installation instructions

LG-Nortel
LG-Nortel Aria LDK User manual

LG-Nortel
LG-Nortel SINGLE LINE TELEPHONE LKA-200 Owner's manual

LG-Nortel
LG-Nortel LKA 200 User manual

LG-Nortel
LG-Nortel iPECS WIT-400H User manual

LG-Nortel
LG-Nortel IP Phone 1535 User manual