LG 98UH5J User manual

2
ENGLISH
TABLE OF CONTENTS
BASIC .............................................3
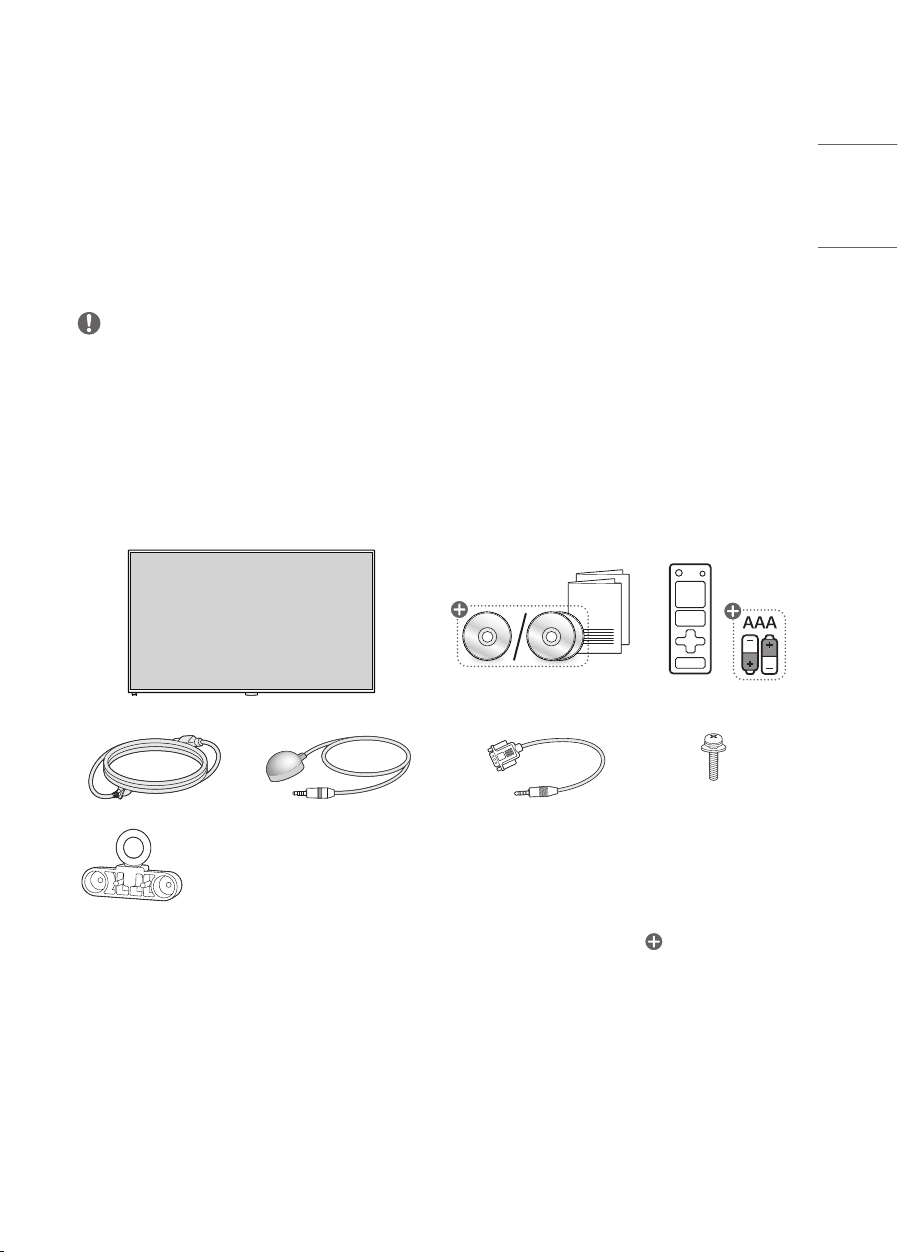
- Checking the Accessories ............................................3
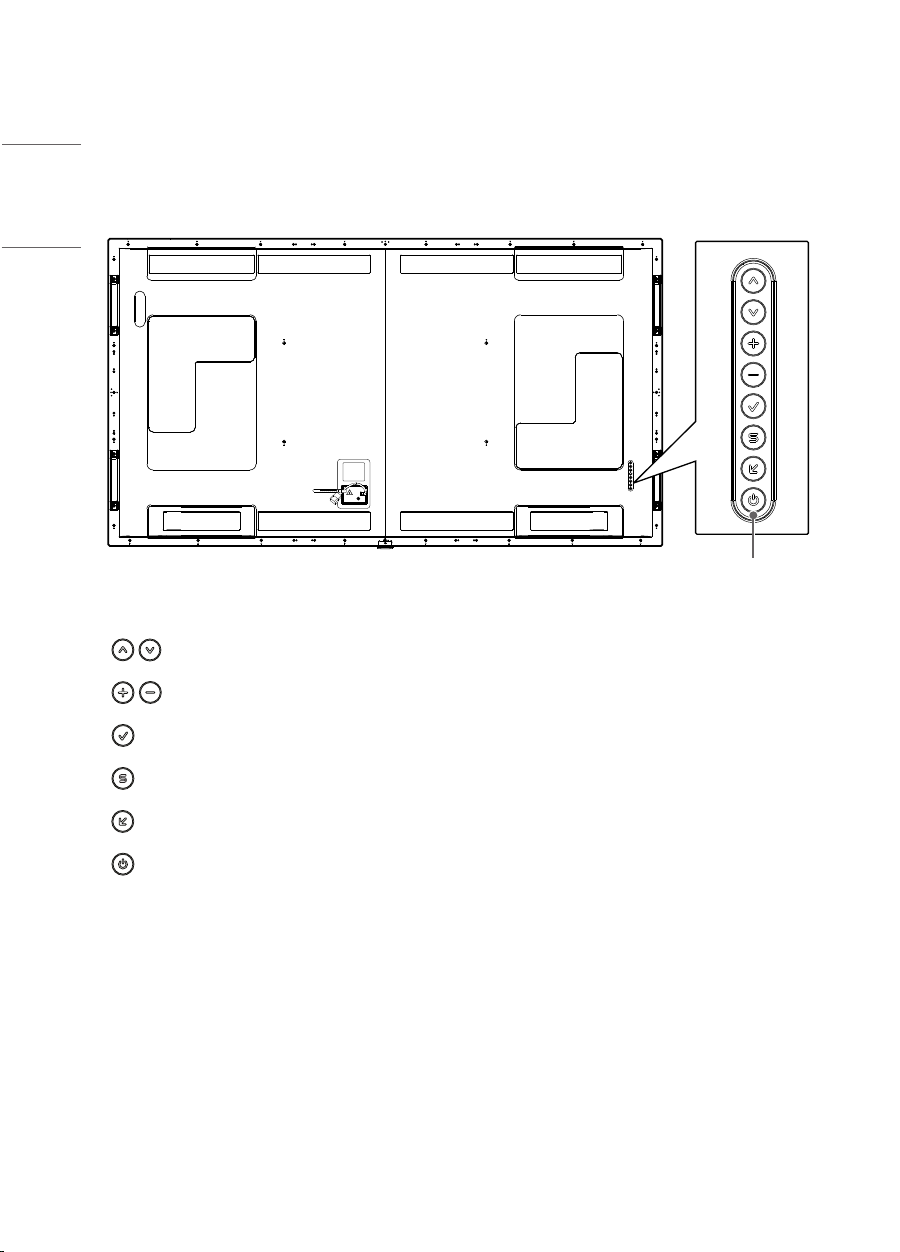
- Learning the Buttons......................................................4
GETTING READY ...........................5
- Connecting the IR Sensors..........................................5
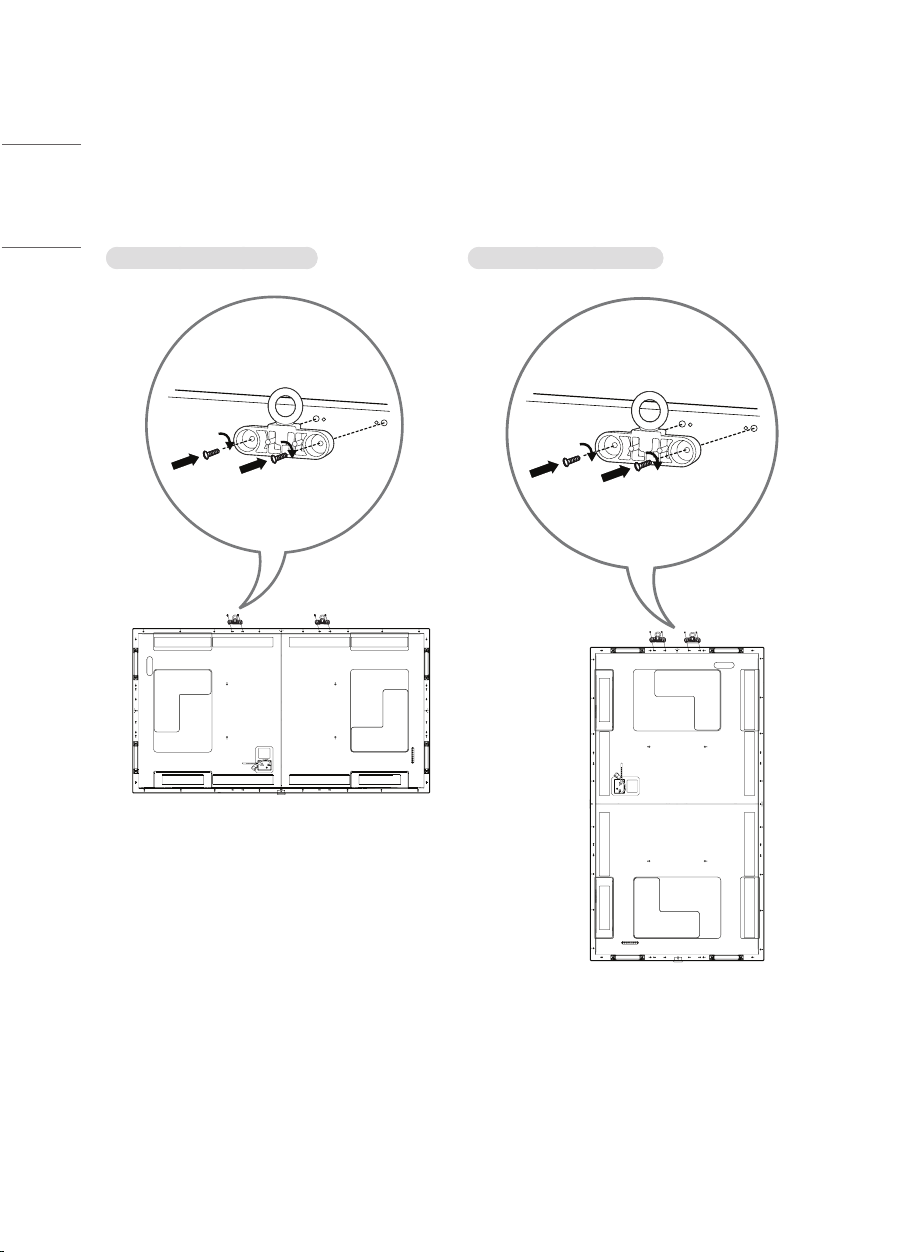
- Connecting the Eye-Bolt Bracket............................6
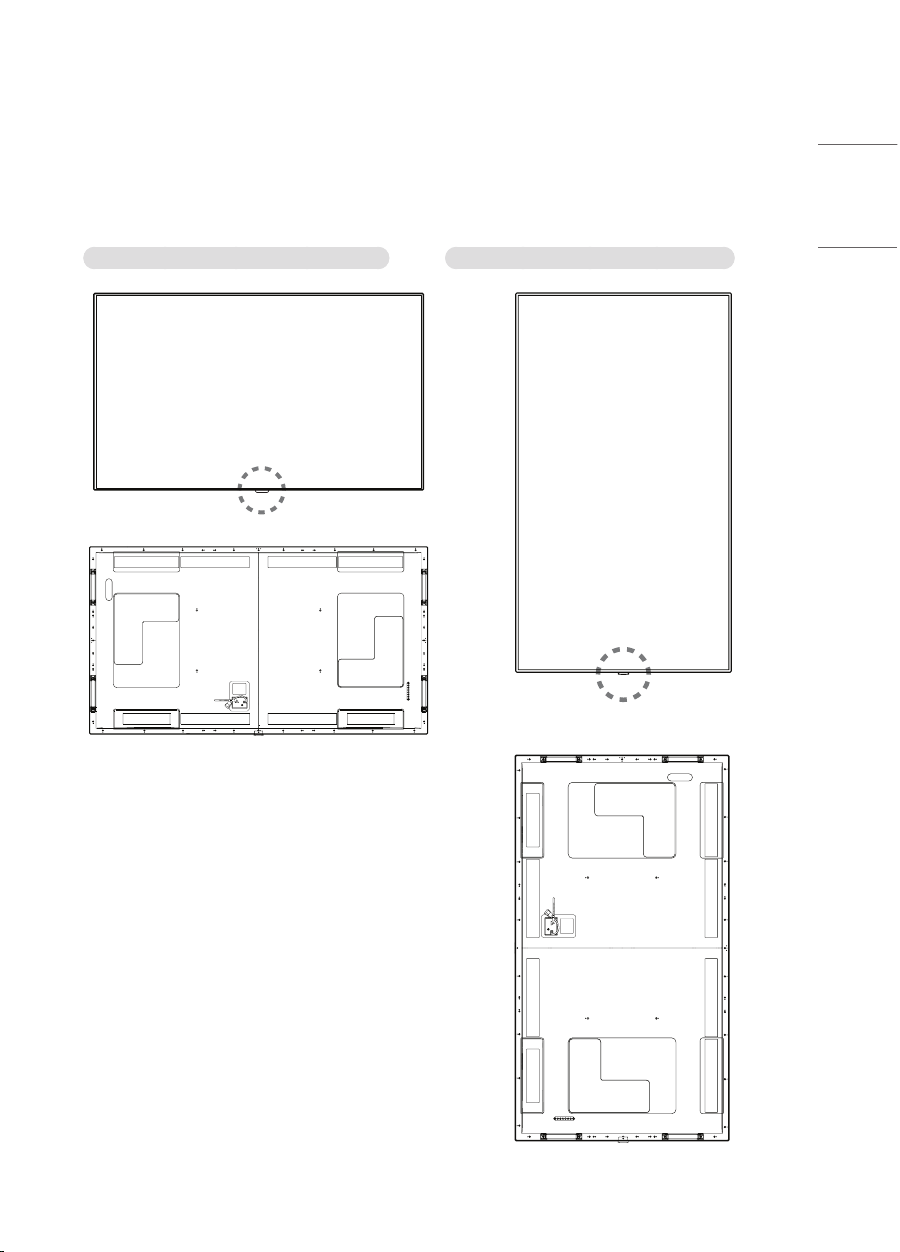
- Attaching the LG Logo Bracket ................................7
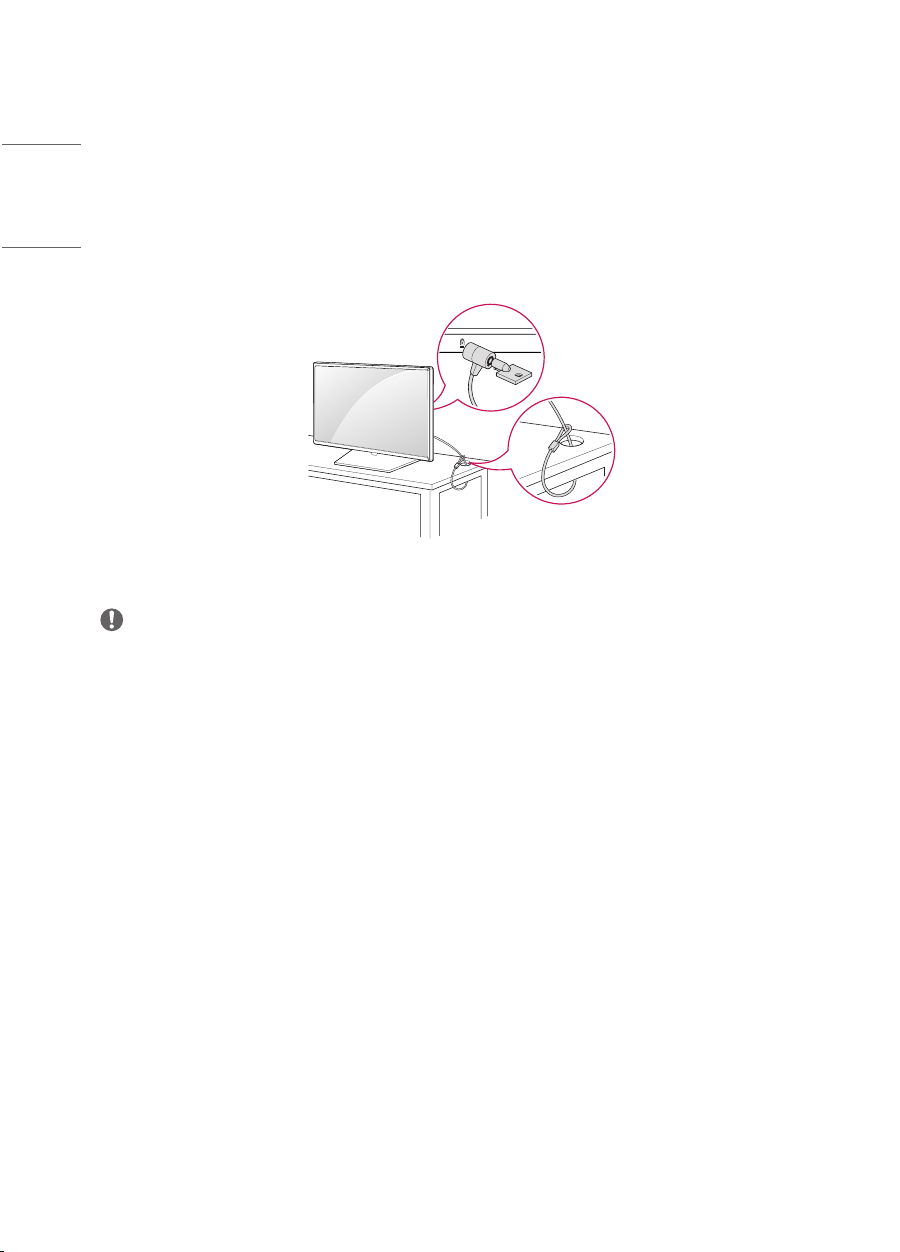
- Kensington Lock Device ................................................8
CHECKING BEFORE
INSTALLATION ..............................9
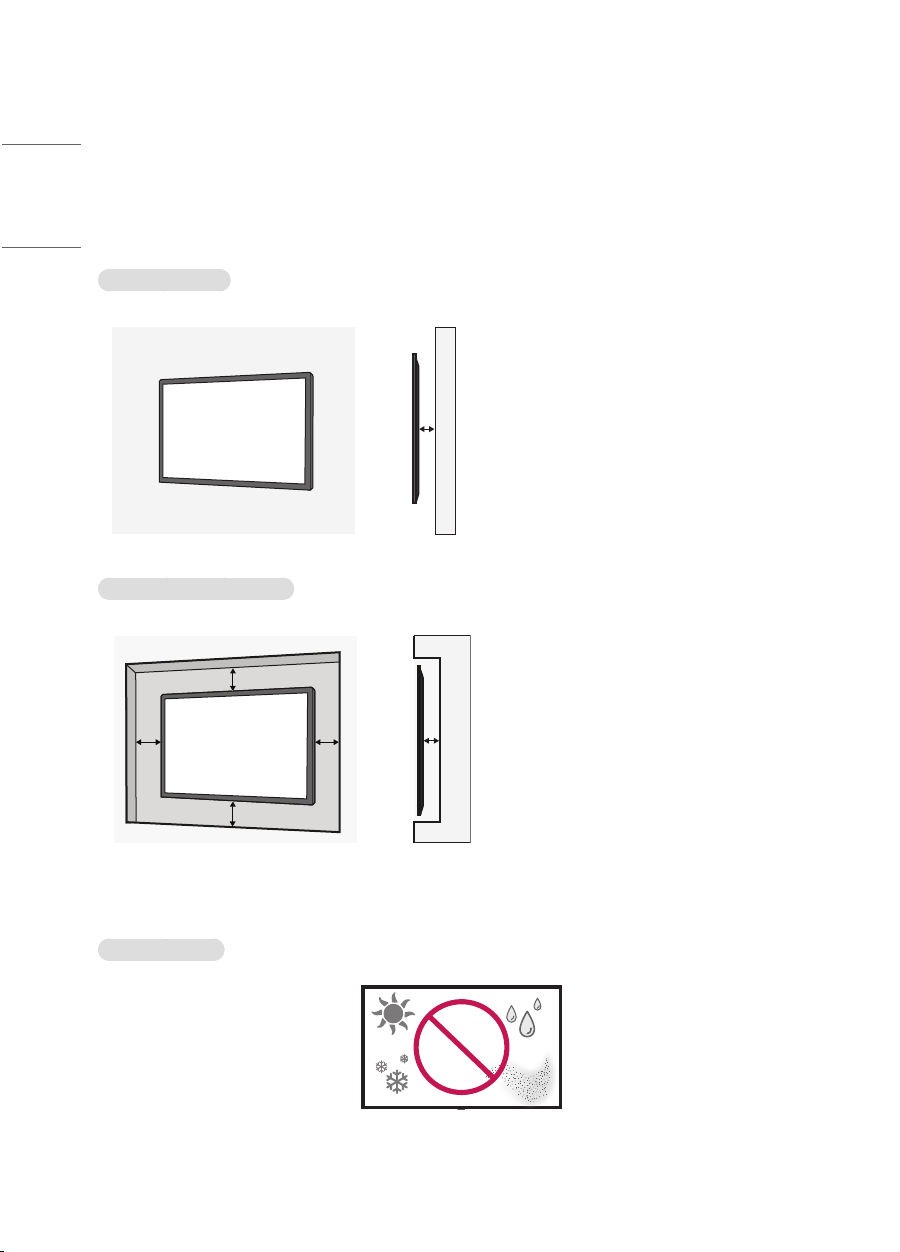
- Installation Orientation .................................................9
- Installation Location.....................................................10
- Wall Mount Holder .......................................................11
PRECAUTIONS FOR USE............ 12
- Dust.......................................................................................12
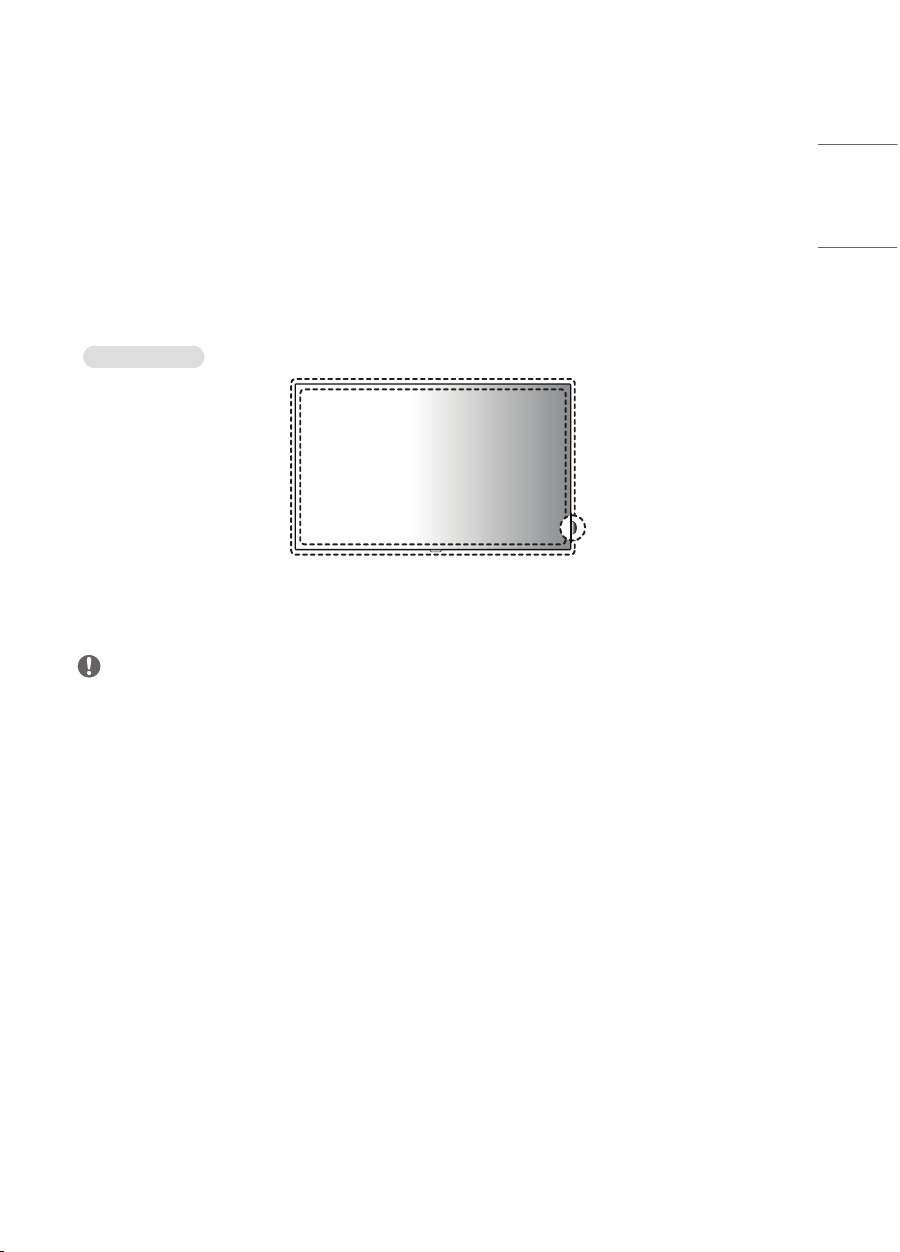
- Afterimage ........................................................................12
PRODUCT SPECIFICATIONS...... 14
LICENCE...................................... 17
TO SEE THE WEB MANUALS
(SOFTWARE USER GUIDE /
INSTALLATION MANUAL) ......... 18

3
ENGLISH
WARNING - This equipment is compliant with Class A of CISPR 32. In a residential environment this equipment may
cause radio interference.
BASIC
NOTE
•The accessories provided with your product may vary depending on the model or region.
•Product specifications or contents in this manual may be changed without prior notice due to upgrade of product
functions.
•SuperSign Software & Manual
- Visit https://partner.lge.com to download the latest SuperSign software and manual.
Checking the Accessories
(M4 x L22)
X 4
X 2
Depending on country

4
ENGLISH
Learning the Buttons
The illustrations may differ depending on the model.
Buttons
•: Adjusts up and down.
•: Moves left and right.
•: Displays the current signal and mode.
•: Accesses the main menus, or saves your input and exits the menus.
•: Change the input signal.
•: Turns the power on or off.

5
ENGLISH
GETTING READY
Connecting the IR Sensors
Connecting the cable to the product allows it to receive signals from the remote control.
The IR and light sensor is magnetic. Attach it to the front edge of the product for use.
- The illustrations may differ depending on the model.
Basic installation
(Front)
NOTE
•The signal strength of the IR and Light sensor will decrease if the sensor is not placed in front of the product.

6
ENGLISH
Connecting the Eye-Bolt Bracket
The eye-bolt bracket is designed to be used to lift the set up. Attach the bracket to the product using the two screws
provided.
Installing in Landscape Position Installing in Portrait Position

7
ENGLISH
Attaching the LG Logo Bracket
Use one screw, inserted from behind, to attach the LG Logo Bracket to the monitor. You can position the logo according
to the monitor’s direction.
When the monitor is in the horizontal position When the monitor is in the vertical position

8
ENGLISH
Kensington Lock Device
(This feature applies only to some models.)
The Kensington lock device connector is located on the back of the monitor. For more information on installation and
use, refer to the user manual provided with the locking device.
Connect the Kensington security system cable between the monitor and a table.
NOTE
•The Kensington lock device is an optional specification.
•This is a general illustration of installation and may look different from the product held by the customer.

9
ENGLISH
CHECKING BEFORE INSTALLATION
We are not responsible for product damage caused by failure to follow the guide.
Installation Orientation
Using Vertically
When installing vertically, rotate the monitor 90 degrees anti-clockwise while facing the front of the screen.
Tilt Angle
40 mm
15˚
Ceiling, Floor Orientation

10
ENGLISH
Installation Location
We are not responsible for product damage caused by failure to follow the guide.
Indoor
Installing on a Wall
A
C
B
BB
A
A : 100mm or more
•The warranty will not cover any damage
caused by using the product in direct sunlight
on the front panel.
Installing on a Recessed Wall
A
C
B
BB
A
A : 100mm or more
B : 100mm or more
C : 100mm or more
•The warranty will not cover any damage
caused by using the product in direct sunlight
on the front panel.
Outdoor
Outdoor Enclosed

11
ENGLISH
Wall Mount Holder
To install the monitor on a wall, attach a wall mount holder (optional) to the back of the monitor.
Take caution, and ensure that the wall mount holder (optional) is securely fixed to the monitor and to the wall.
The VESA dimensions of the wall mount by model are as follows.
A
B
Model VESA Dimensions
(A x B) (mm)
Standard
Dimensions
Length (Maximum)
(mm) Quantity
98UH5J 800 x 400 M8 15 4
CAUTION
•Disconnect the power cord first, and then move or install the monitor. Otherwise, it may result in electric shock.
•If the monitor is installed on a ceiling or inclined wall, it may fall and result in injury.
•Damage to the monitor by tightening the screws too tightly may void your warranty.
•Use screws and wall mount plates conforming to VESA standards. Breakage or personal injury due to use or misuse
of inappropriate components is not covered by the warranty of this product.
•To prevent injury, this apparatus must be securely attached to the wall in accordance with the installation instructions.
(This pertains only to Australia and New Zealand.)
NOTE
•Using screws longer than the indicated depth may damage the inside of the product. Be sure to use the proper length.
•For more information on installation, please refer to the user manual for the wall mount.

12
ENGLISH
PRECAUTIONS FOR USE
Dust
The warranty will not cover any damage caused by using the product in an excessively dusty environment.
Afterimage
•After-image appears when the product is turned off.
- Pixels may be damaged rapidly if a still image is displayed on the screen for a long period of time. Use the screen-
saver function.
- Switching from a screen with high differences in luminance (black and white or grey) to a darker screen may cause
an afterimage. This is normal due to the display characteristics of this product.
•When the LCD screen is in a still pattern for extended periods of use, a slight voltage difference may occur between
the electrodes that operate the liquid crystal (LC). The voltage difference between the electrodes increases over time
and tends to keep the liquid crystal aligned in one direction. At this time, the previous image remains, which is called
an afterimage.
•Afterimages do not occur when continuously changing images are used but take place when a certain screen is fixed
for a long time. The following are operational recommendations for reducing the occurrence of afterimages when
using a fixed screen. The maximum recommended time for switching the screen is 12 hours. Shorter cycles are better
for preventing afterimages.

13
ENGLISH
•Recommended Usage Condition
1 Change the background colour and text colour at equal intervals.
- Afterimages occur less when the colours to be changed are complementary to one another.
AA
ITO or MoTi Pixel Layer
2 Switch the screen at equal time intervals.
- Take caution, and ensure that text or images from before the screen change are not left in the same location after
the screen change.

14
ENGLISH
PRODUCT SPECIFICATIONS
Without prior notice, all product information and specifications contained in this manual are subject to change to
improve the performance of the product.
Input/Output Ports
Resolution
Recommended Resolution
HDMI1,2/ DisplayPort: 3840 x 2160 @ 60Hz
HDMI3: 3840 x 2160 @ 30Hz
DVI-D: 1920 x 1080 @ 60Hz
- This may not be supported on some OS or graphics card
types.
Max Resolution
Embedded battery Applied
Environmental
Conditions
Operating Temperature
Operating Humidity
0°C to40°C
10% to 80% (Condition for preventing condensation)
Storage Temperature
Storage Humidity
-20°C to60°C
5% to 85% (Condition for preventing condensation)
* Product box packaging storage conditions
Audio Input Sensitivity 0.7Vrms
NOTE
•Video Daisy Chain can be configured through HDMI OUT, and Input Resolution can support up to 3840 x 2160 at 30
Hz, and it cannot be above 30 Hz.
98UH5J
Power Voltage 100-240 V~ 50/60 Hz 6.5 A
Power Consumption
On Mode 420 W(Typ.)
Sleep Mode
Standby Mode ≤ 0.5W
Size (Width x Height x Depth) (mm)
/ Weight (kg) 2191.8mm x 1246.8mm x 86.1mm / 66kg

15
ENGLISH
HDMI/ DVI-D/ DisplayPort (PC) Support mode
Resolution Horizontal frequency (kHz) Vertical frequency (Hz) Remark
800 x 600 37.879 60.317
1024 x 768 48.363 60
1280 x 720 44.772 59.855
1280 x 1024 63.981 60.02
1680 x 1050 65.29 59.954
1920 x 1080 67.5 60
3840 x 2160 67.5 30 HDMI1/2/3, DisplayPort
3840 x 2160 135 60 HDMI1/2, DisplayPort
HDMI/ DisplayPort (DTV) Support mode
Resolution Horizontal frequency (kHz) Vertical frequency (Hz) Remark
480/60p 31.5 60
576/50p 31.25 50
720/50p 37.5 50
720/60p 45 60
1080/50i 28.1 50
1080/60i 33.75 60
1080/50p 56.25 50
1080/60p 67.432 59.94
1080/60p 67.5 60
2160/30p 67.5 30 HDMI1/2/3, DisplayPort
2160/50p 112.5 50 HDMI1/2, DisplayPort
2160/60p 135 60 HDMI1/2, DisplayPort
NOTE
•Horizontal frequency: The horizontal interval is the time taken to display one horizontal line. When 1 is divided by
the horizontal interval, the number of horizontal lines displayed every second can be tabulated as the horizontal
frequency. The unit is kHz.
•Vertical frequency: The product display functions by the screen image changing dozens of times every second like a
fluorescent lamp. The vertical frequency or refresh rate is the number of image displays per second. The unit is Hz.

16
ENGLISH
Wireless module (LGSBWAC92) Specifications
Wireless LAN (IEEE 802.11a/b/g/n/ac)
Frequency range (MHz) Output power (Max.) (dBm)
2400to2483.5
5150to5725
5725to5850
18
18
12
Bluetooth
Frequency range (MHz) Output power (Max.) (dBm)
2400to2483.5 8
•As band channels can vary per country, the user cannot change or adjust the operating frequency. This product is
configured for the regional frequency table.
•For consideration of the user, this device should be installed and operated with a minimum distance of 20 cm
between the device and the body.

17
ENGLISH
LICENCE
Supported licenses may differ by model. For more information of the licenses, visitwww.lg.com.
The terms HDMI, HDMI High-Definition Multimedia Interface, HDMI trade dress and the HDMI Logos are trademarks or
registered trademarks of HDMI Licensing Administrator, Inc.
Manufactured under license from Dolby Laboratories. Dolby, Dolby Vision, Dolby Vision IQ, Dolby Audio, Dolby Atmos,
and the double-D symbol are trademarks of Dolby Laboratories Licensing Corporation.
The Bluetooth®word mark and logos are registered trademarks owned by Bluetooth SIG, Inc. and any use of such marks
by LG Electronics Inc. is under license. Other trademarks and trade names are those of their respective owners.

18
ENGLISH
TO SEE THE WEB MANUALS (SOFTWARE USER
GUIDE / INSTALLATION MANUAL)
You can find more information about the LG Digital Signage (Monitor Signage) in the web manuals (Software User
Guide / Installation Manual).
For more information, visit the LG website at http://partner.lge.com.

19
ENGLISH

The model and serial number of the product are
located on the back and on one side of the product.
Record them below in case you ever need service.
MODEL
SERIAL NO.
Temporary noise is normal when powering ON or
OFF this device.
Other manuals for 98UH5J
1
Table of contents
Other LG Digital Signage manuals