LG PS34GNGB.AES2STD User manual
- Thank you for purchasing this product.
- This user manual contains instructions on how to use the product properly.
- Please read this manual carefully. Be sure to follow the instructions and notices.
- Disable the lock before use (refer to p. 20).
This user manual is subject to
change without prior notice.
Table of Contents Table of Contents
1. Before
Using the
Product
Safety Cautions
Product Features
Product Components
Names of Parts
Connecting the USB (MSC)
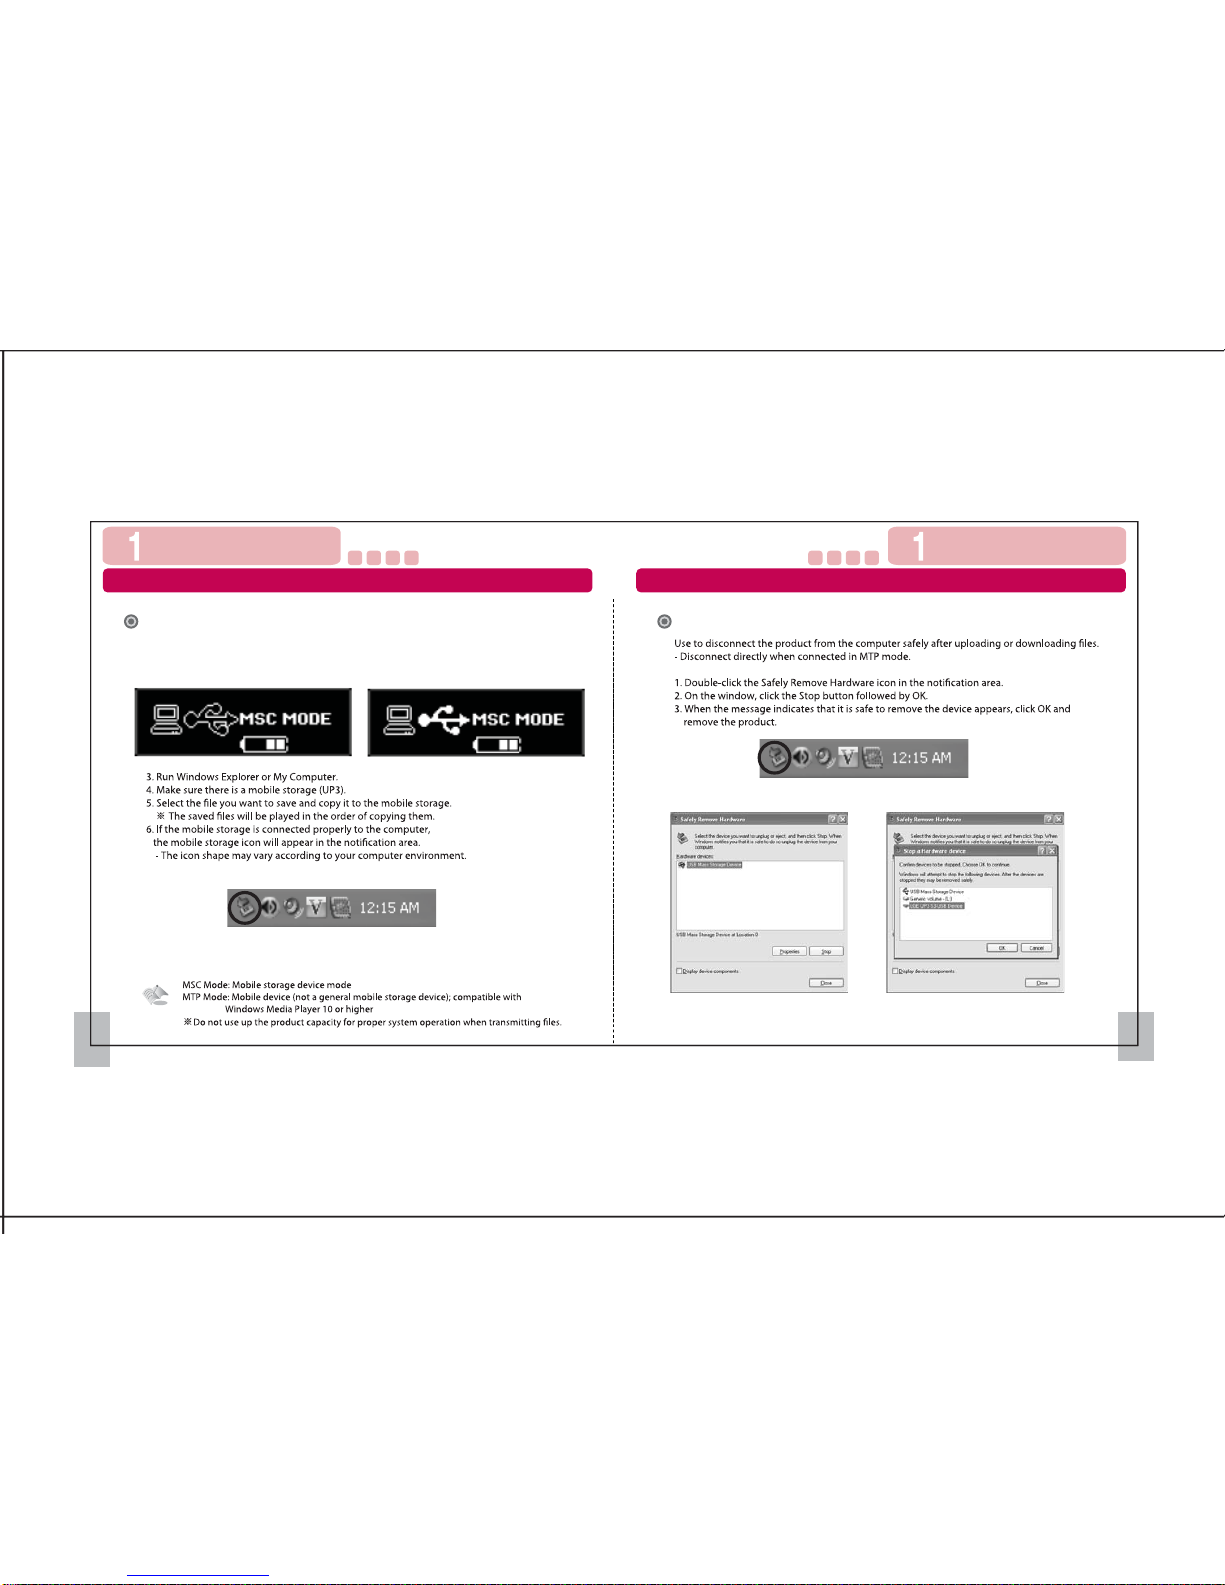
Removing the USB (MSC)
File Import (MTP)
Recharging/Battery Use
Installing Windows 98SE Driver
1
3
5
6
7
9
10
11
13
15
Display 16
2. Basic Use
Reset/Lock
Volume Control/Previous or Next Track
Menu Mode
Listening to Music
Listening to FM Radio
Recording FM Radio
Recording Voice
File Search
19
20
21
22
23
25
26
27
28
3. Setting Play Setting/Equalizer Setting
Power Setting
Record Setting
FM Setting/Play Speed Setting
Music Title Setting/Language Setting
Reset/About the Product
USB Mode Setting
4. Customer
Support
Firmware Upgrade
How to Upgrade the Firmware
Troubleshooting
Menu Structure
Product Specication
Warranty
31
32
34
35
36
37
38
41
42
43
45
46
47
48
User Rights
We shall not be responsible for any loss of or damage to saved or recorded data caused
by product defect, product repair, or any other reason.
1 2
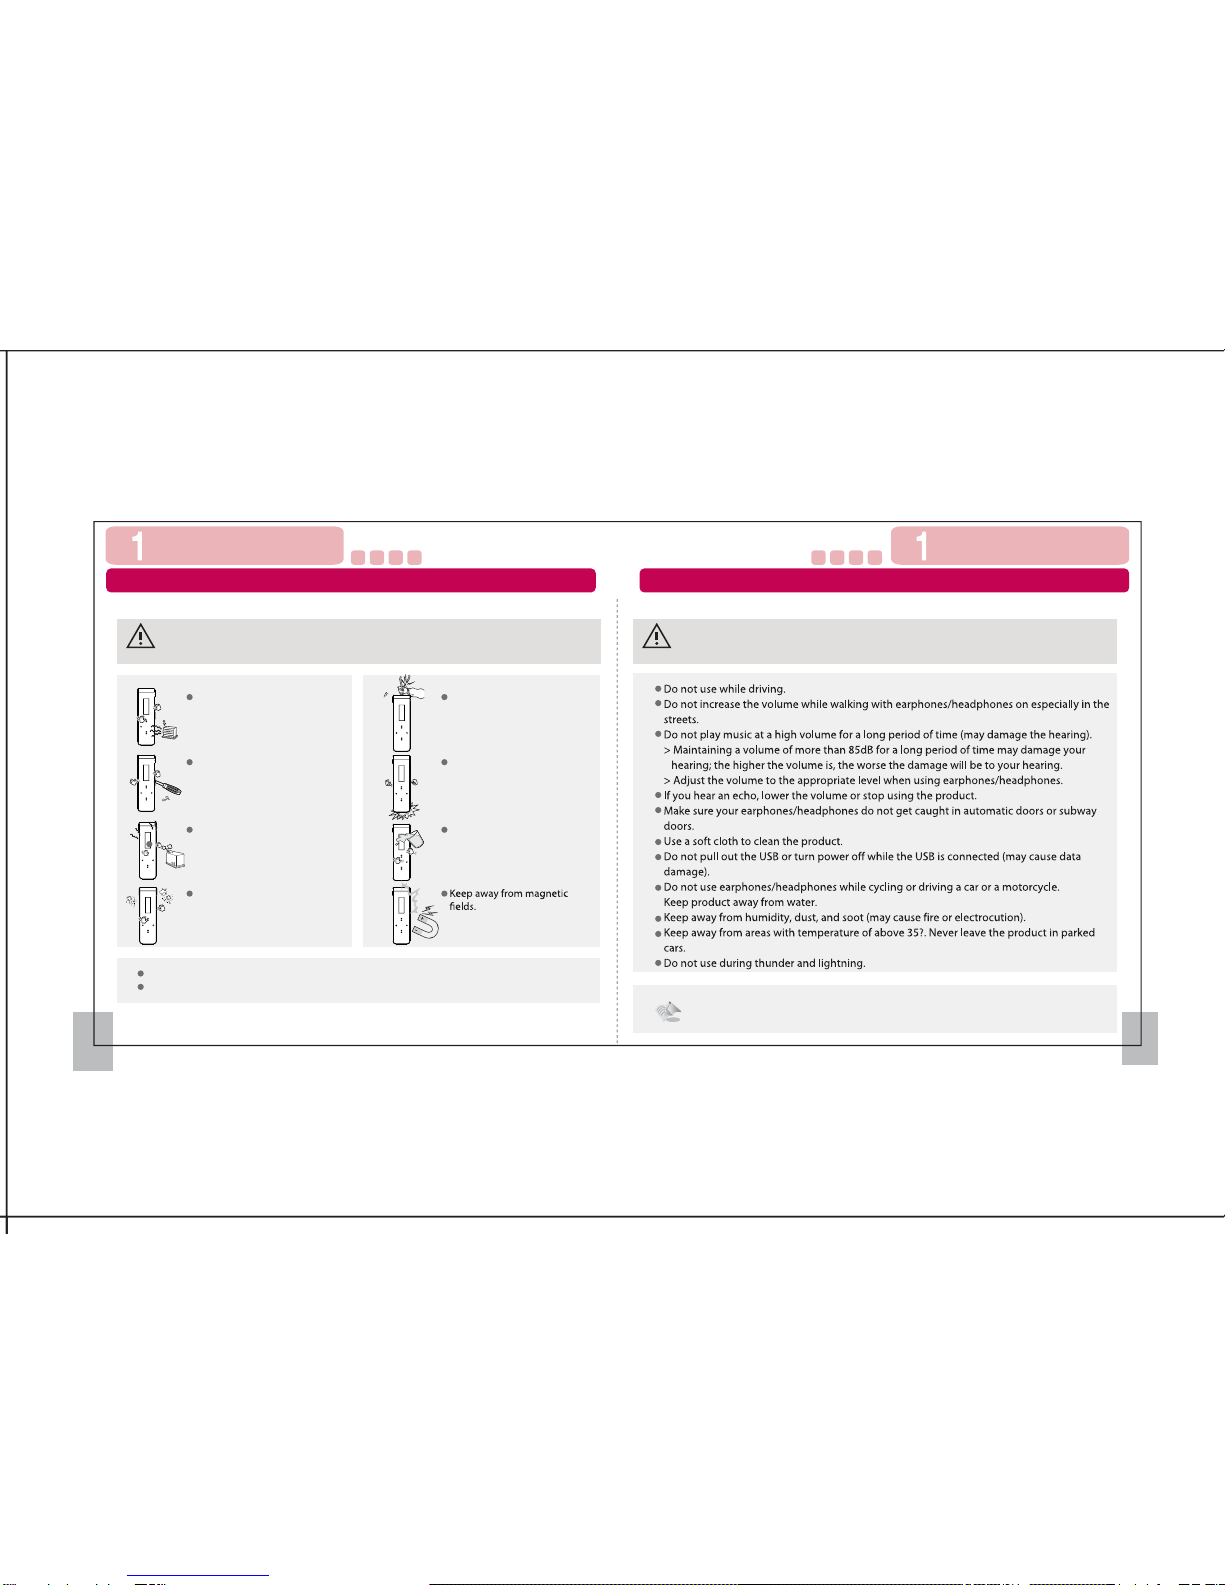
Cautions During Use
Before Using the Product Before Using the Product
Cautions During Use
Failure to follow the instructions below may result in injuries or
product damage.
Warning
Keep away from water.
Do not drop the product or
place heavy objects on it.
Do not disassemble, repair,
or rebuild.
When using the product on a
neck strap hung around the
neck, do not apply too much
pressure on the neck strap.
Keep away from heat.
Keep away from humidity,
dust, and soot.
Make sure no dust or other
foreign matter gets inside the
product.
Failure to follow the instructions below may result in injuries or
product damage.
Warning
The product may not work properly in areas with high static electricity.
Keep important data separately.

3 4
Product Features 제품구성품
Internal memory capacity
What is the Media Transfer Protocol (MTP) mode?
MTP mode is a mode with the latest Microsoft technology supporting multimedia devices. It is read as a
mobile device rather than as a general mobile storage device and is compatible with Windows Media
Player 10 or higher.
What is the Mass Storage Class (MSC) mode?
MSC mode is a mode that works as a general mobile storage device.
Digital Right Management (DRM) supported
Product Features
Firmware update supported
FM Radio supported
Supports FM radio and recording
Recording supported
Voice recording is supported to record voice anytime, anywhere.
USB 1.1/2.0 supported
USB2.0 speed is supported for fast upload and download; no need to wait for data to be
transmitted to/from the computer
Supports MP3 (8 ~ 320kbps), WMA (32~192kbps), ASF (Only Audio), and OGG
(Q1~Q10) formats
Mobile storage device
Slim design and touch buttons
The design is slim and simple, with touch buttons. Use the touch buttons to access various
menus and features.
Before Using the Product Before Using the Product

5 6
200MHz Pentium Processor or higher
- Windows 98SE/ME/2000/XP/Vista (32bit/64bit)
- Mac OS X (ver 10.0 or higher supported)
- Linux Kernel 2.6 or higher
USB port
SVGA graphic card
64MB main memory or more
Mouse
CD-ROM driver (2X speed)
HDD 100MB or more of space
※The components are subject to change without prior notice.
※Window 98SE users must install the driver in the CD.
Product Components
Software CD Quick Guide
Earphones Neck StrapDevice
.
Press lightly with your nger tips.
Before Using the Product Before Using the Product
Caution when using the touch buttons
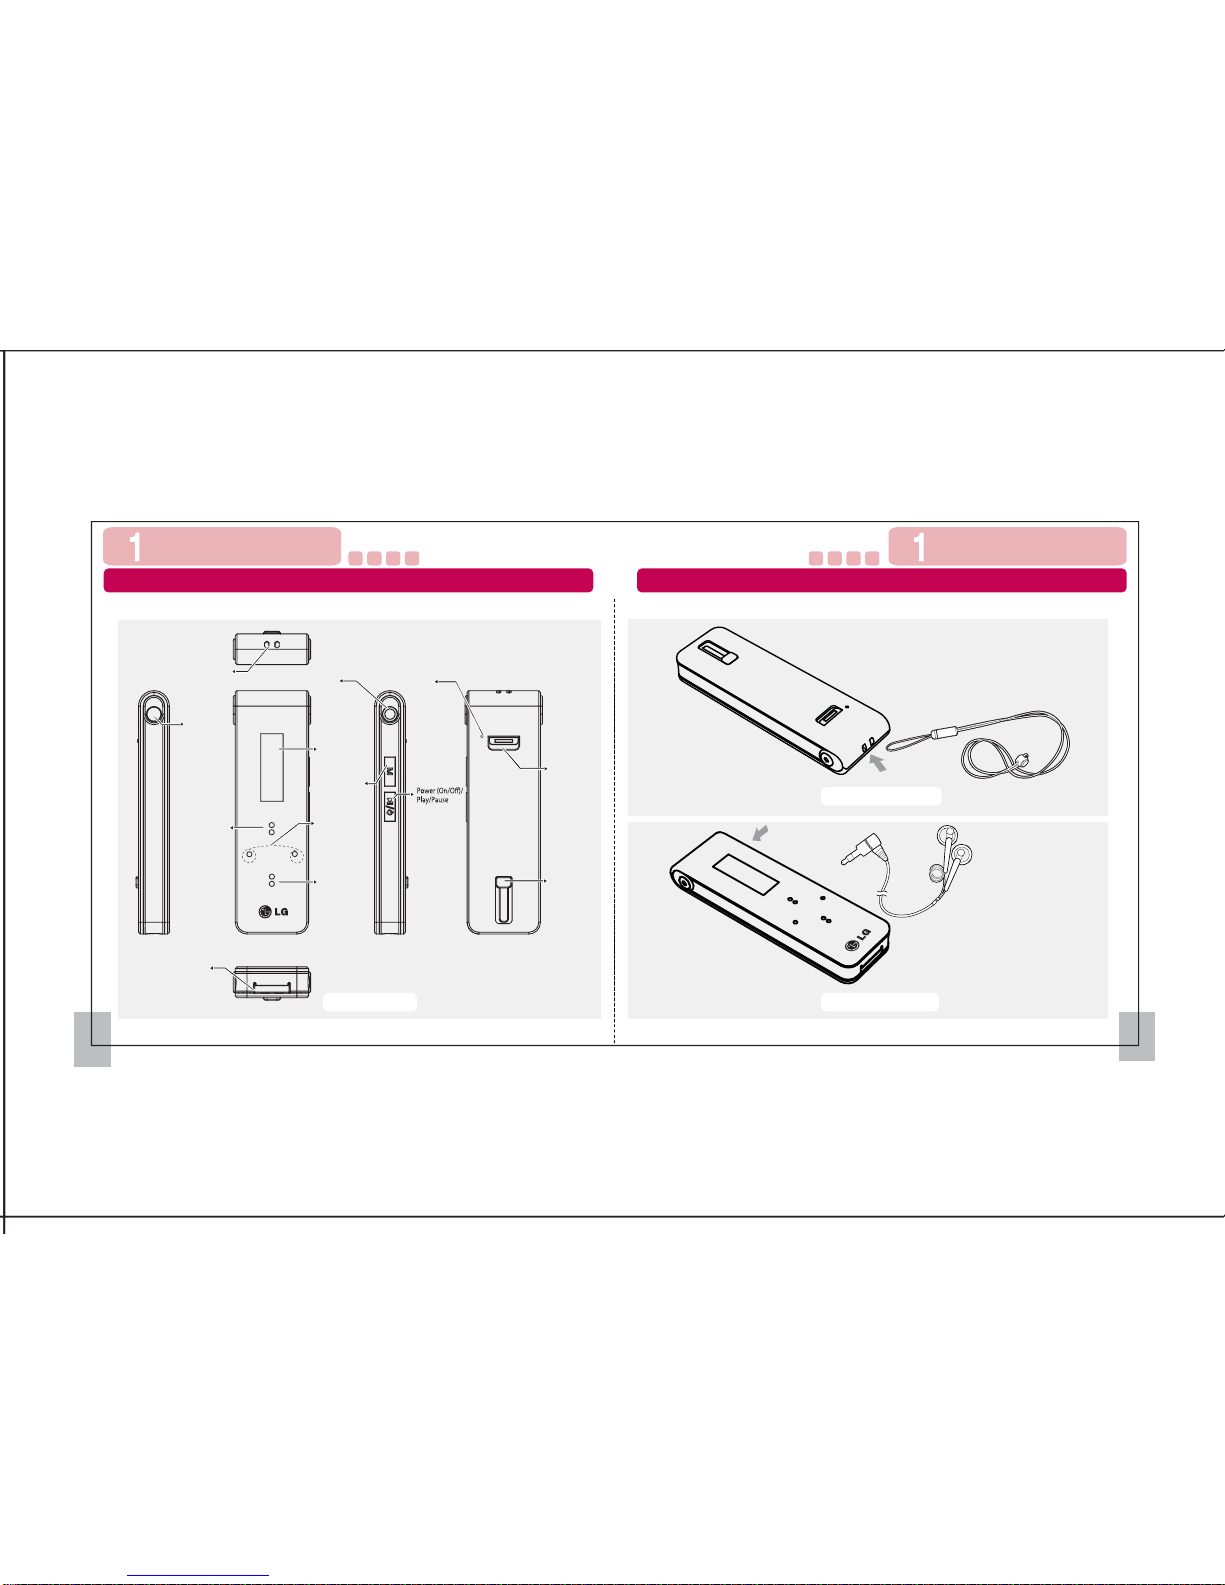
Earphone connection
Neck Strap connection
Earphones
Neck Strap
7 8
Names of Parts Names of Parts
Names of Parts
Record button
Repeat A-B
USB port
Menu/Previous
menu
Lock (Hold)
Neck strap
link
REW button
FF button
Volume control/
Up, Down
Earphone jack
USB slide
button
Display
window
MIC/
Reset hole
Before Using the Product Before Using the Product
9 10
When used as mobile storage device
1. Connect the UP3 product to the USB port of the computer.
2. The following window will then appear.
Removing the USB
Connecting the USB (MSC) Removing the USB (MSC)
Before Using the Product Before Using the Product
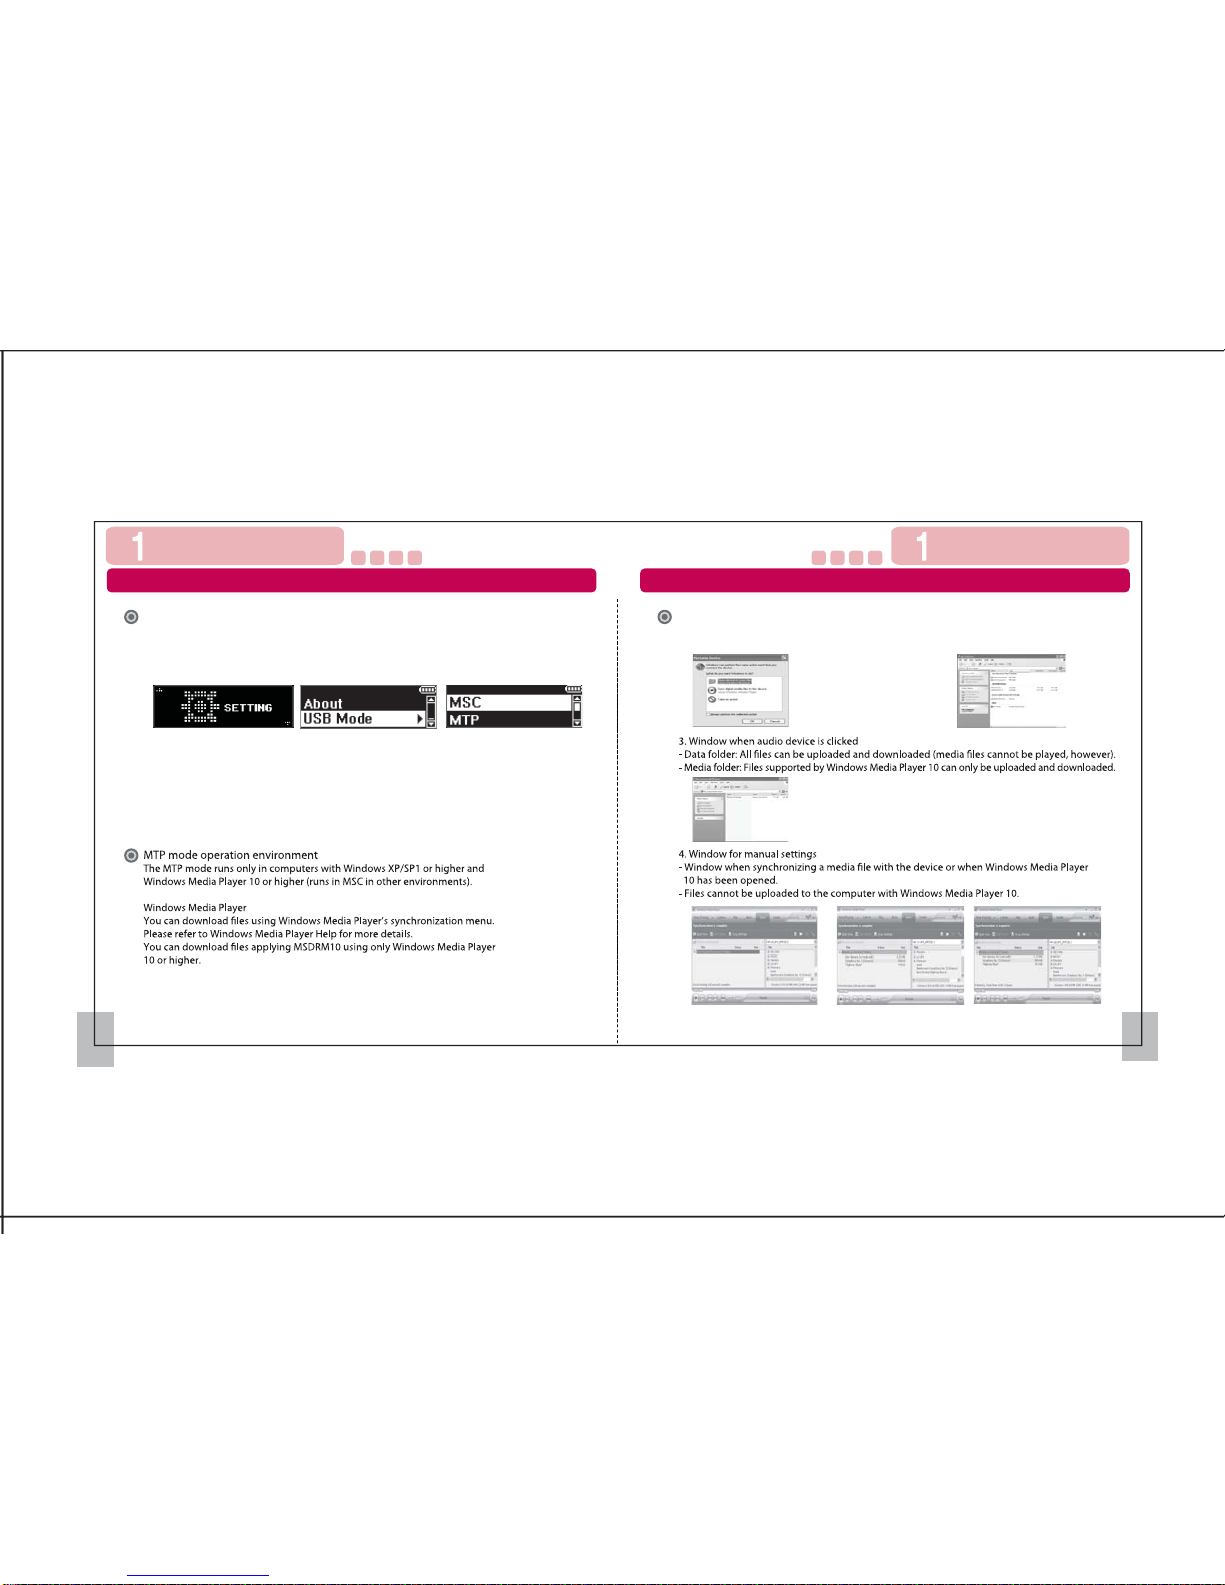
Supported in Windows XP/SP1 or higher and Windows Media Player 10 or higher
1. In Setting-> USB Mode, shift to MTP mode. (Refer to the Settings section.)
2. Plug the UP3 into the computer.
- If Windows Media Player 10 or higher is not installed, the UP3 will automatically
shift to MSC mode.
MTP mode environment
1. Window when UP3 is connected to
the computer
2. Window when My Computer is opened
Connecting to MTP Mode
File Import (MTP)
11 12
[Window after synchronization]
File Import (MTP)
Before Using the Product Before Using the Product
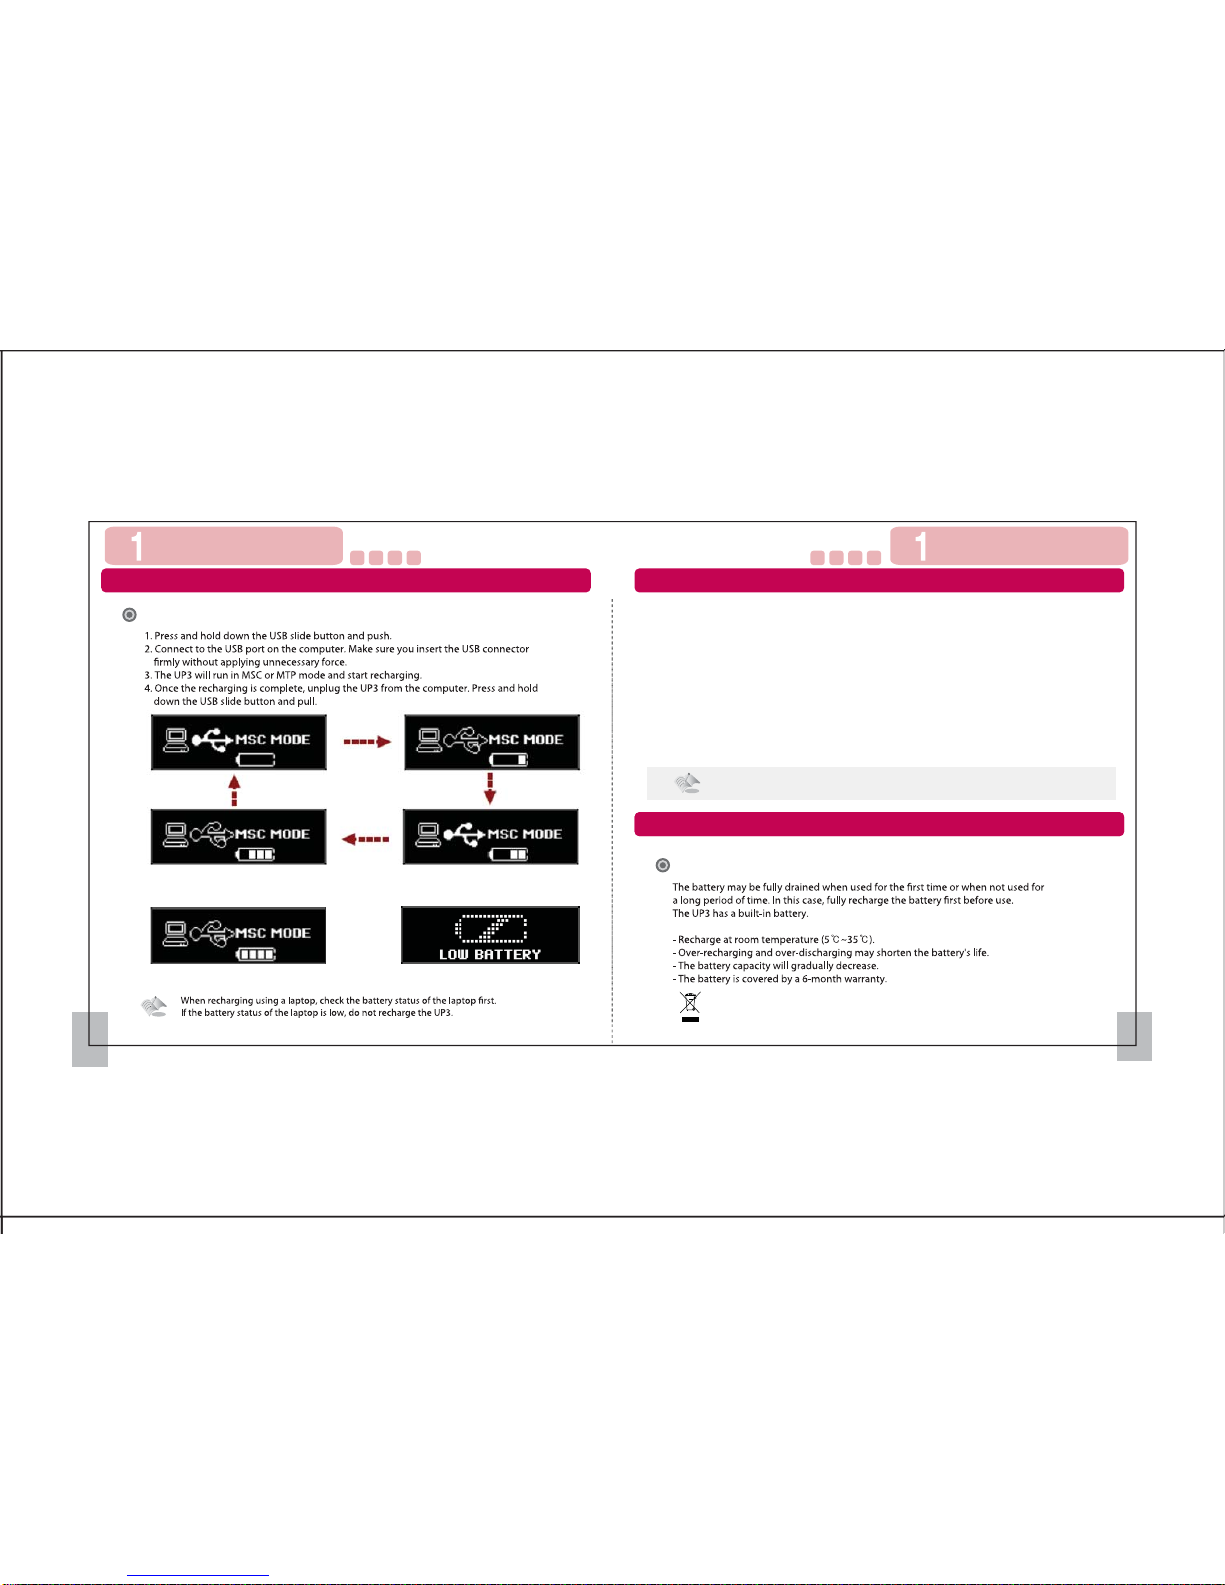
The capacity of the battery and time it takes to recharge the battery fully may vary
according to the usage conditions and environment.
- You can recharge the UP3 by plugging it to the computer.
Recharging the battery fully takes about an hour to an hour and a half.
- When recharging with the recharge station, the recharge icon will appear.
Once the recharging is complete, the battery icon will appear.
- The display may not turn on if the battery is fully drained.
Recharging
13 14
Recharging
Recharging
화면구성
Battery Use
Battery Use
[Recharging status]
[Low battery]
[Recharging completed]
Before Using the Product Before Using the Product
This symbol is applicable in Europe Union.
Please contact authorized LG Electronics service center to replace or remove.
Hand over used batteries to recycling collection point of waste batteries.

Play
1
2
3
4
5
6
8
9
Recording source
:Voice recording
:Radio recording
File name
Recording status
Remained recording time
Current recording time
Recording mode
Repeat icon
Music mode
6
7
3 4
5
2
1
9 8
1011
FM
1
2
3
4
5
Frequency range
Current frequency
Preset channel number
Preset mode/
Autoscan mode
FM mode
7
Play mode
7
8
9
10
11
1
2
3
4
5
6
Volume
EQ status
Lock status
Play status
Battery status
Filename/Artist name
15 16
Record
2 3
1
Installation
Installing Windows 98SE Driver
Before installing
45 3
2
5 4
6
1
Display
Before Using the Product Before Using the Product
Playing time
Track number
This manual suits for next models
5
Table of contents
Other LG MP3 Player manuals


