manuals.online logo
Brands
  1. Home
  2. •
  3. Brands
  4. •
  5. Liberty Pumps
  6. •
  7. Air Conditioner Accessories
  8. •
  9. Liberty Pumps Mini-Split LCU-MS Series User manual

Liberty Pumps Mini-Split LCU-MS Series User manual

Liberty Pumps Wholesale Products Limited Warranty
Liberty Pumps, Inc. warrants that Liberty Pumps wholesale products are free from all factory
defects in material and workmanship for a period of three (3) years from the date of purchase
(excluding batteries). The date of purchase shall be determined by a dated sales receipt noting
the model and serial number of the pump. The dated sales receipt must accompany the
returned pump if the date of return is more than three years from the date of manufacture
noted on the pump nameplate.
The manufacturer's sole obligation under this Warranty shall be limited to the repair or
replacement of any parts found by the manufacturer to be defective, provided the part or
assembly is returned freight prepaid to the manufacturer or its authorized service center, and
provided that none of the following warranty-voiding characteristics are evident:
The manufacturer shall not be liable under this Warranty if the product has not been properly
installed, operated, or maintained per manufacturer instructions; if it has been disassembled,
modified, abused, or tampered with; if the electrical cord has been cut, damaged, or spliced; if
the pump discharge has been reduced in size; if the pump has been used in water tempera-
tures above the advertised rating; if the pump has been used in water containing sand, lime,
cement, gravel, or other abrasives; if the product has been used to pump chemicals, grease, or
hydrocarbons; if a non-submersible motor has been subjected to moisture; or if the label
bearing the model and serial number has been removed.
Liberty Pumps, Inc. shall not be liable for any loss, damage, or expenses resulting from
installation or use of its products, or for indirect, incidental, and consequential damages,
including costs of removal, reinstallation or transportation.
There is no other express warranty. All implied warranties, including those of merchantability
and fitness for a particular purpose, are limited to three years from the date of purchase. This
Warranty contains the exclusive remedy of the purchaser, and, where permitted, liability for
consequential or incidental damages under any and all warranties are excluded.
“Acceptable For Indoor Use Only”
“Nonsubmersible Pump”
“CAUTION” – To reduce risk of electric shock, install with motor and all electrical
components above the top grade level of the sump. This pump is not submersible.
“WARNING”
“Risk Of Electric Shock – This pump has not been investigated for use in swimming pool
or marine areas.”
“To reduce risk of electric shock, see instruction manual for proper installation.”
“To reduce risk of electric shock, connect only to a properly grounded, grounding-type
receptacle.”
“THERMALLY PROTECTED”
Date of Production: stamped on reservoir.
“FOR INDOOR USE ONLY”
”ENCLOSURE TYPE 2”
LIMITED WARRANTY
7000 Apple Tree Avenue Bergen, NY 14416
Phone 800-543-2550 Fax 585-494-1839
www.LibertyPumps.com
Unit does not run.
Unit makes loud noises even
after the first dry-running
phase.
Unit runs but does not pump
the liquid out properly.
Check the highest point of the discharge hose
does not exceed the maximum delivery head of
the pump.
Check hose is not clogged or kinked.
Check the flow rate of the pump is sufficient for
the condensation volume of air conditioner.
Check if pump has contact with any hard surfaces.
If it does, anti-vibration materials should be
positioned between the pump and all hard
surfaces.
Verify there is no siphoning action.
Check the power supply.
Check the air conditioner to see if condensation is
actually being produced.
Check hose is not clogged or kinked.
Ensure power to the pump is disconnected before performing any service or maintenance.
1) Clean the reservoir every six months, preferably at the beginning and end of the air
conditioning season.
a) Open the reservoir cover using the opening latch.
b) Clean the reservoir and float using a solution of water containing 5% bleach.
c) Replace the float in the initial position (magnet facing UP).
d) Reinstall the reservoir cover.
2) Perform a TEST OPERATION [see above].
After installation, test pump operation by slowly pouring water into the air conditioner
drain pan. Repeat this approx. 8–10 times.
Check for any water leaks, kinked or pinched lines, or siphoning action.
Clicking noises heard at initial start-up are normal and are usually only heard for the first
few operations.
Allow a one minute rest after each cycle to prevent triggering the thermal protector.
CONFORMS TO ANSI/UL STD. 778
CERTIFIED TO CAN/CSA STD. C22.2 NO.108
4007096
SERVICE & MAINTENANCE
TEST OPERATION
TROUBLESHOOTING
PRODUCT INFORMATION
– 5–
LCU-MS Mini-Split Series
USER GUIDE
Read this user guide carefully before attempting to install, operate, or
service the LCU-MS Mini-Split Series pump. Know the pump application,
limitations, and potential hazards. Protect yourself and others by observing
all safety information. Failure to comply with these instructions could result
in personal injury and/or property damage. Retain this user guide for future
reference. Installation, connections, and service shall be done only by
qualified personnel.
7000 Apple Tree Avenue
Bergen, NY 14416
Phone 800-543-2550
Fax 585-494-1839
www.LibertyPumps.com
For Air Conditioners up to 7 kW
LCU-MS2
(LCU-MS + DUCTS)
LCU-MS
CEILING
DRAIN PAN
MADE IN SOUTH KOREA
Pump Model #: _____________________________________________
Pump Serial #: ______________________________________________
Install Date: _________________________________________________
 Keep this manual handy for future reference
 Retain dated sales receipt for warranty
✔ ✖
2035000A
1. Carefully unpack the unit and check for damage. Make sure all parts are included. The
units are thoroughly tested before packing to ensure safe delivery and operation. If there
is any sign of damage due to shipment, return it to the place of purchase for repair or
replacement.
2. Select proper mounting locations for the reservoir and the pump.
3. Connect the inlet hose[13] to the drain hose of the air conditioner. Connect the other end
of the inlet hose[13] to the reservoir inlet port[4].
4. Connect the vent hose[16] to the vent hole[6] on the reservoir cover[3].
The vent and vent hose must not get clogged.
5. Mount the reservoir[2] at the established location using the double-sided tape[17].
Reservoir must be mounted horizontally.
6. Connect the reservoir outlet port[12] and the pump inlet port[11] with the connection
hose[15].
7. Attach the double-sided tape[17] to the bottom of the pump. Mount the pump[1] at the
established location. If needed, use a cable tie[17] to secure the pump[1].
Attach the double-sided tape between the pump and any hard surface to reduce vibration
noise.
8. Connect the overflow alarm cable (COM and NC) into the cooling signal wire of the air
conditioner indoor unit to stop operation of the air conditioning unit in the event the
pump fails.
All wiring shall be done by qualified personnel who have assessed the set-up of the
individual air conditioning unit.
9. Connect the discharge hose[15] to the pump outlet port[5] and extend the discharge hose
to an appropriate drain.
Make sure all connection hoses are not clogged, kinked, or twisted. Use anti-kink spring
on tubing as needed[14].
10. Make sure the power source voltage matches the pump’s voltage requirement. Connect
the power supply cable[8] to a constant source of power (not a fan or other device that
runs intermittently).
Do NOT connect or link the air conditioner’s power cable directly to the power supply
cable of the pump.
11. When preceding steps are complete, verify the unit and connections by performing a TEST
OPERATION [next page].
INSTALLATION
L
N
E
NL E
L N
NC
COM
NO
1
2
L
N
E
KEY
1. Pump Unit
2. Indoor Unit
(L) Live (Hot): Black
(N) Neutral (Common): White
(E) Earth (Ground): Green
(NC) Normally Closed: Blue
(COM) Common: Black
(NO) Normally Open: Brown
■Do not use to pump flammable or explosive fluids such as gasoline, fuel oil, kerosene, etc. Do not
use in flammable and/or explosive atmospheres.
■Do not use pumps with fluid over 40°C (104°F).
■Do not handle or unplug pump with wet hands, when standing on a wet/damp surface, or in
water.
■Pump shall be properly grounded, using its supplied grounding conductor. Do not bypass
grounding wires or remove ground prong from attachment plugs. Failure to properly ground the
pump system can cause all metal portions of the pump and its surroundings to become
energized.
■Connect pump to power supply as specified on pump nameplate.
■For cord replacement: power cord must be of the same length and type as originally installed on
the Liberty Pumps product. Use of incorrect cord may lead to exceeding the electrical rating of the
cord and could result in death, serious injury, or other significant failure.
■Allow means to disconnect wiring.
■In any installation where property damage and/or personal injury might result from an inoperative
or leaking pump, a backup system and/or alarm should be used.
■Do not twist or kink the inlet or discharge hoses.
■Accidental contact with electrically live parts, items, or water can cause serious injury or death.
■Always disconnect pump from power source before handling or making any adjustments.
■All electrical and safety practices shall be followed for the NEC, OSHA, or applicable local codes
and ordinances.
■Do not allow children to play with the pump.
■Do not submerge pump or allow pump to be exposed to water. Pump is intended for dry
locations only.
■All installation and service of pumps shall be done by qualified personnel.
■Do not run pump dry.
■Do not modify the pump/pump system in any way.
■This product contains chemicals known to the State of California to cause cancer and birth defects,
or other reproductive harm. www.p65warnings.ca.gov.
Gallon/Hour
Liter/Hour
Head
10.0
2.64
0 m / 0 ft
2.38
9.0
4 m / 13 ft
1.59
6.0
6 m / 20 ft
0.92
3.5
8 m / 26 ft
WARNINGS
FLOW RATES
ITEM SPECIFICATION ITEM SPECIFICATION
For Use With Air Conditioner
(max 7 kW) Available Fluid Fresh Water
1–40°C / 33.8–104°F
Operating Time
(Non-continuous)
Refer to Product Label 5 min ON / 1 min OFFPower Supply
Safety Switch
Contacts
Max 3A 110 VAC /
3A 240 VAC Pump On, No Fluid <1 min
Max Suction Head 2 m / 6.6 ft Pump Size
(HxWxL)
mm: 33 x 32 x 132
in: 1.3 x 1.26 x 5.2
Max Flow Rate
@ Zero Head
10 l/hr
2.64 gal/hr Reservoir Capacity 35 ml / 1.2 oz
Max Discharge Head 8 m / 26.2 ft Reservoir Size
(HxWxL)
mm: 41 x 43 x 74
in: 1.6 x 1.7 x 2.9
Electrical Output 30W Thermal Protection 100°C / 212°F
► Specifications subject to change without notice.
SPECIFICATIONS
Straight Duct Elbow Duct Duct Socket Duct End
COMPONENT IDENTIFICATION
③Reservoir Cover
with Level Sensor
Ducts for LCU-MS2
⑩ Communication
Cable
⑪Pump Inlet Port
⑫Reservoir Outlet Port
①Pump
⑮ Connection /
Discharge Hose
⑭ Anti-kink
Spring
⑬
Inlet Hose ⑯ Vent Hose ⑰ Cable Ties &
Double-sided
Tape
②Reservoir
④Reservoir Inlet
Port
⑤Pump
Outlet
Port
⑥Vent Hose
⑦Float with Magnet
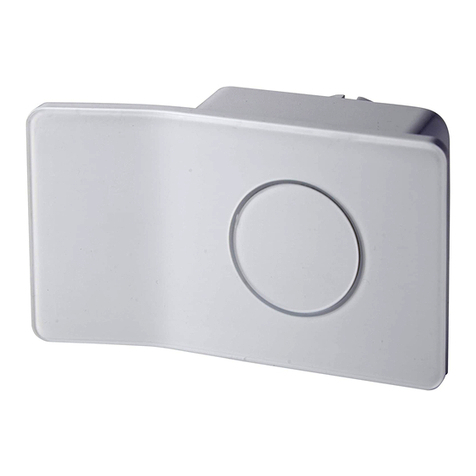
Liberty Pumps Mini-Split Series is an automatic condensate removal system
designed to remove water from a ductless mini-split air conditioner evaporative
coil when gravity-feed drainage is not possible or practical.
⑨Overflow Alarm Cable
⑧Power Supply Cable
WATER LEVEL SENSOR
Cover Open Tab
Level Tolerance (±2 mm)
10 mm / 0.39 in
(Pump OFF)
15 mm / 0.59 in
(Pump ON)
20 mm / 0.79 in
(Alarm ON)
Float
Vent Reservoir Cover
Magnet Always Facing UPBottom of Reservoir
– 2– – 3– – 4–

This manual suits for next models

2

Popular Air Conditioner Accessories manuals by other brands

ActronAir LR7-1W Operation manual

ActronAir

ActronAir LR7-1W Operation manual

ActronAir CP05 Operation manual

ActronAir

ActronAir CP05 Operation manual

Mitsubishi Electric CMY-Q100CBK installation manual

Mitsubishi Electric

Mitsubishi Electric CMY-Q100CBK installation manual

ActronAir CRQ2-14AS Installation and commissioning guide

ActronAir

ActronAir CRQ2-14AS Installation and commissioning guide

Kampmann PowerKon QE Assembly, installation and operating instructions

Kampmann

Kampmann PowerKon QE Assembly, installation and operating instructions

ActronAir LM7-2W Operation manual

ActronAir

ActronAir LM7-2W Operation manual

ActronAir PKV160T Installation and commissioning guide

ActronAir

ActronAir PKV160T Installation and commissioning guide

Mitsubishi Electric PAC-SNH21HS-E installation manual

Mitsubishi Electric

Mitsubishi Electric PAC-SNH21HS-E installation manual

TCL TCL-WiredCasCtrl user manual

TCL

TCL TCL-WiredCasCtrl user manual

Sinclair SDV5 Series Installation & owner's manual

Sinclair

Sinclair SDV5 Series Installation & owner's manual

Toshiba TCB-SIR41UYP-UL installation manual

Toshiba

Toshiba TCB-SIR41UYP-UL installation manual

manuals.online logo
manuals.online logoBrands
  • About & Mission
  • Contact us
  • Privacy Policy
  • Terms and Conditions

Copyright 2025 Manuals.Online. All Rights Reserved.