6
ADJUSTMENT METHOD
The user interface consists of an LCD display and a
4-button keypad on the front of the Economizer module.
The LCD is a 16 character by 2 line dot matrix display.
Power Up Cycle
All setpoints and advanced settings are restored after any
power loss (a power loss is assumed if voltage falls below
18 Vac). Normal operation is restored when power returns
above 18 Vac.
Initial Menu Display
On initial startup, Honeywell displays on the first line and
Economizer W7220 on the second line. After a brief
pause, the revision of the software appears on the first line
(second line is blank). It then displays W7220 on the first
line and STATUS on the second line.
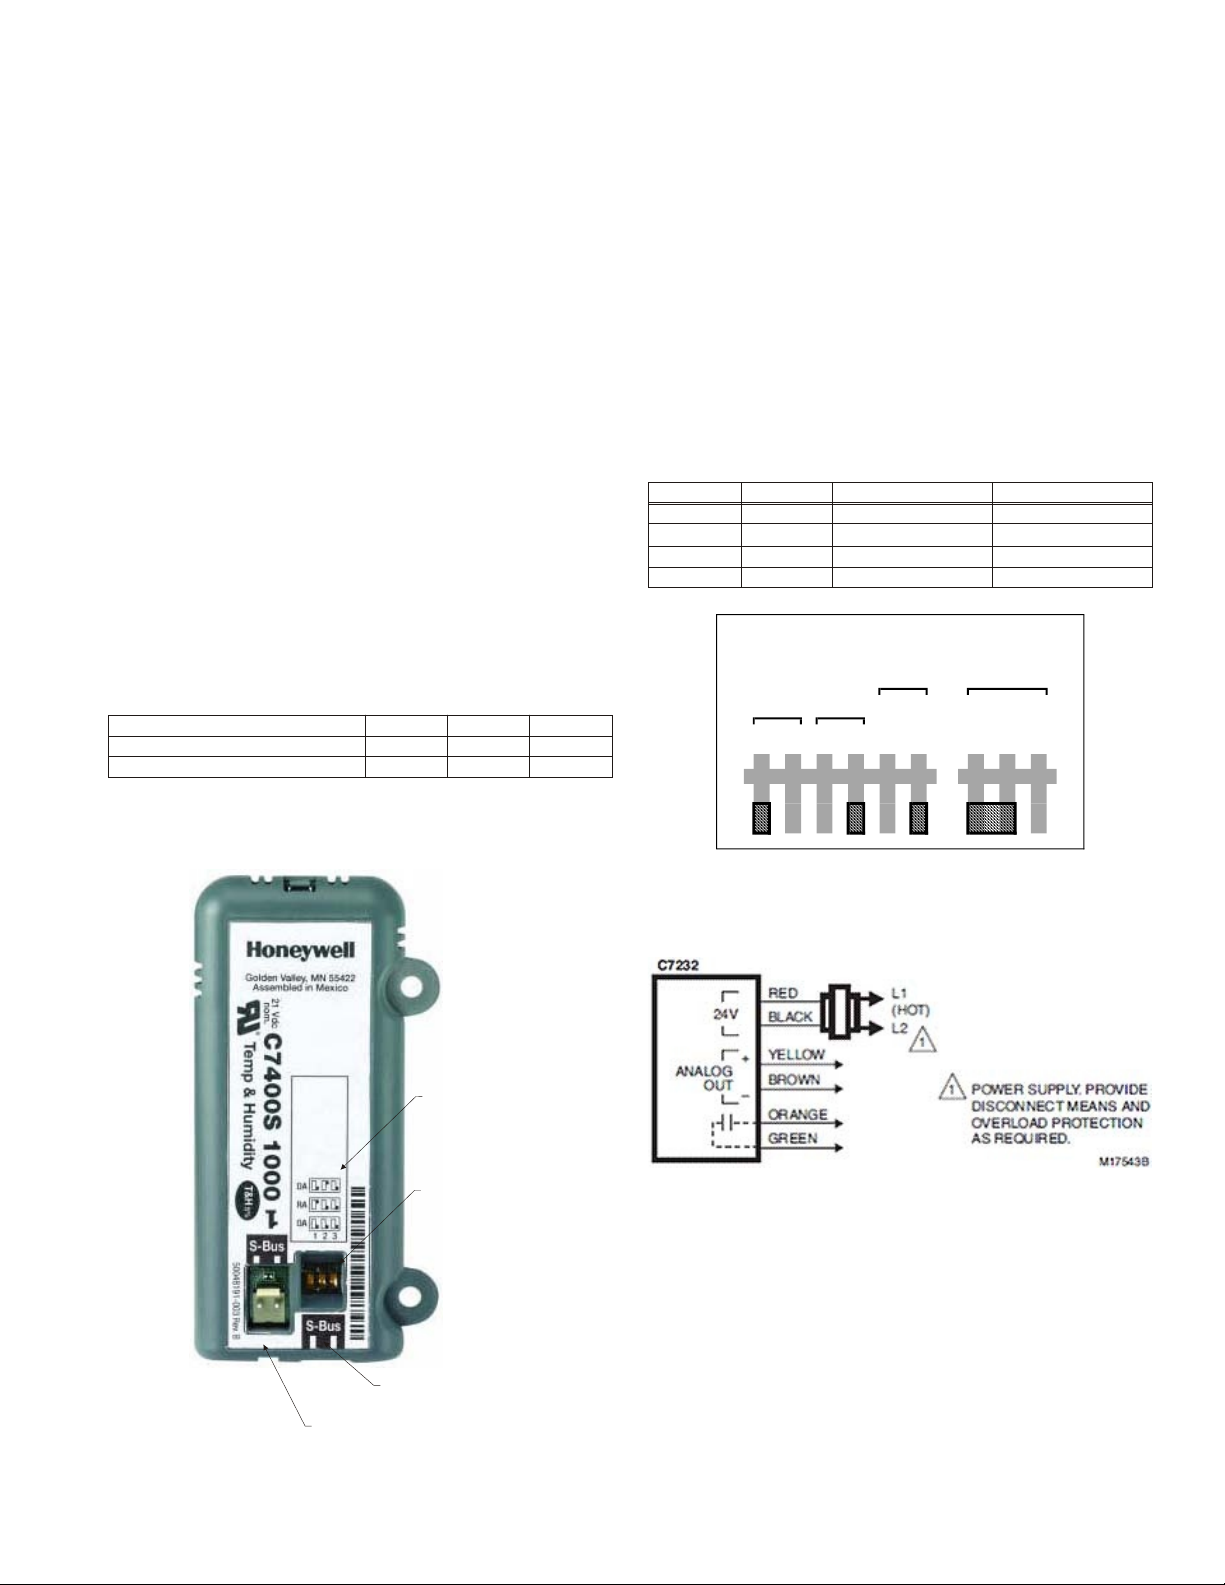
Keypad
The four navigation buttons illustrated in Figure 9 are used
to scroll through the menus and menu items, select menu
items, and to change parameter and configuration
settings.
Using the Keypad with Menus
To use the keypad when working with menus:
lPress the pbutton to move to the previous menu.
lPress the qbutton to move to the next menu.
lPress the 8button (Enter) to display the first item in
the currently displayed menu.
lPress the Óbutton (Menu up) to exit a menu’s item
and return to the list of menus.
Using the Keypad with Settings and Parameters
To use the keypad when working with Setpoints, System
and Advanced Settings, Checkout tests, and Alarms:
lNavigate to the desired menu.
lPress the 8button (Enter) to display the first item in
the currently displayed menu.
lUse the pand qbuttons to scroll to the desired
parameter.
lPress the 8button (Enter) to display the value of the
currently displayed item.
lPress the pbutton to increase (change) the
displayed parameter value.a
lPress the qbutton to decrease (change) the
displayed parameter value.a
lPress the 8button to accept the displayed value and
store it in non-volatile RAM.
lWhen the value is accepted, CHANGE STORED is
displayed on the LCD.
lPress the 8button (Enter) to return to the current
menu parameter.
lPress the Óbutton (MenuUp/Exit) to return to the
previous menu.
Time-out and Screensaver
When no buttons have been pressed for 10 minutes, the
LCD displays a screen saver, which cycles through the
Status items. Each Status items displays in turn and cycles
to the next item after 5 seconds.
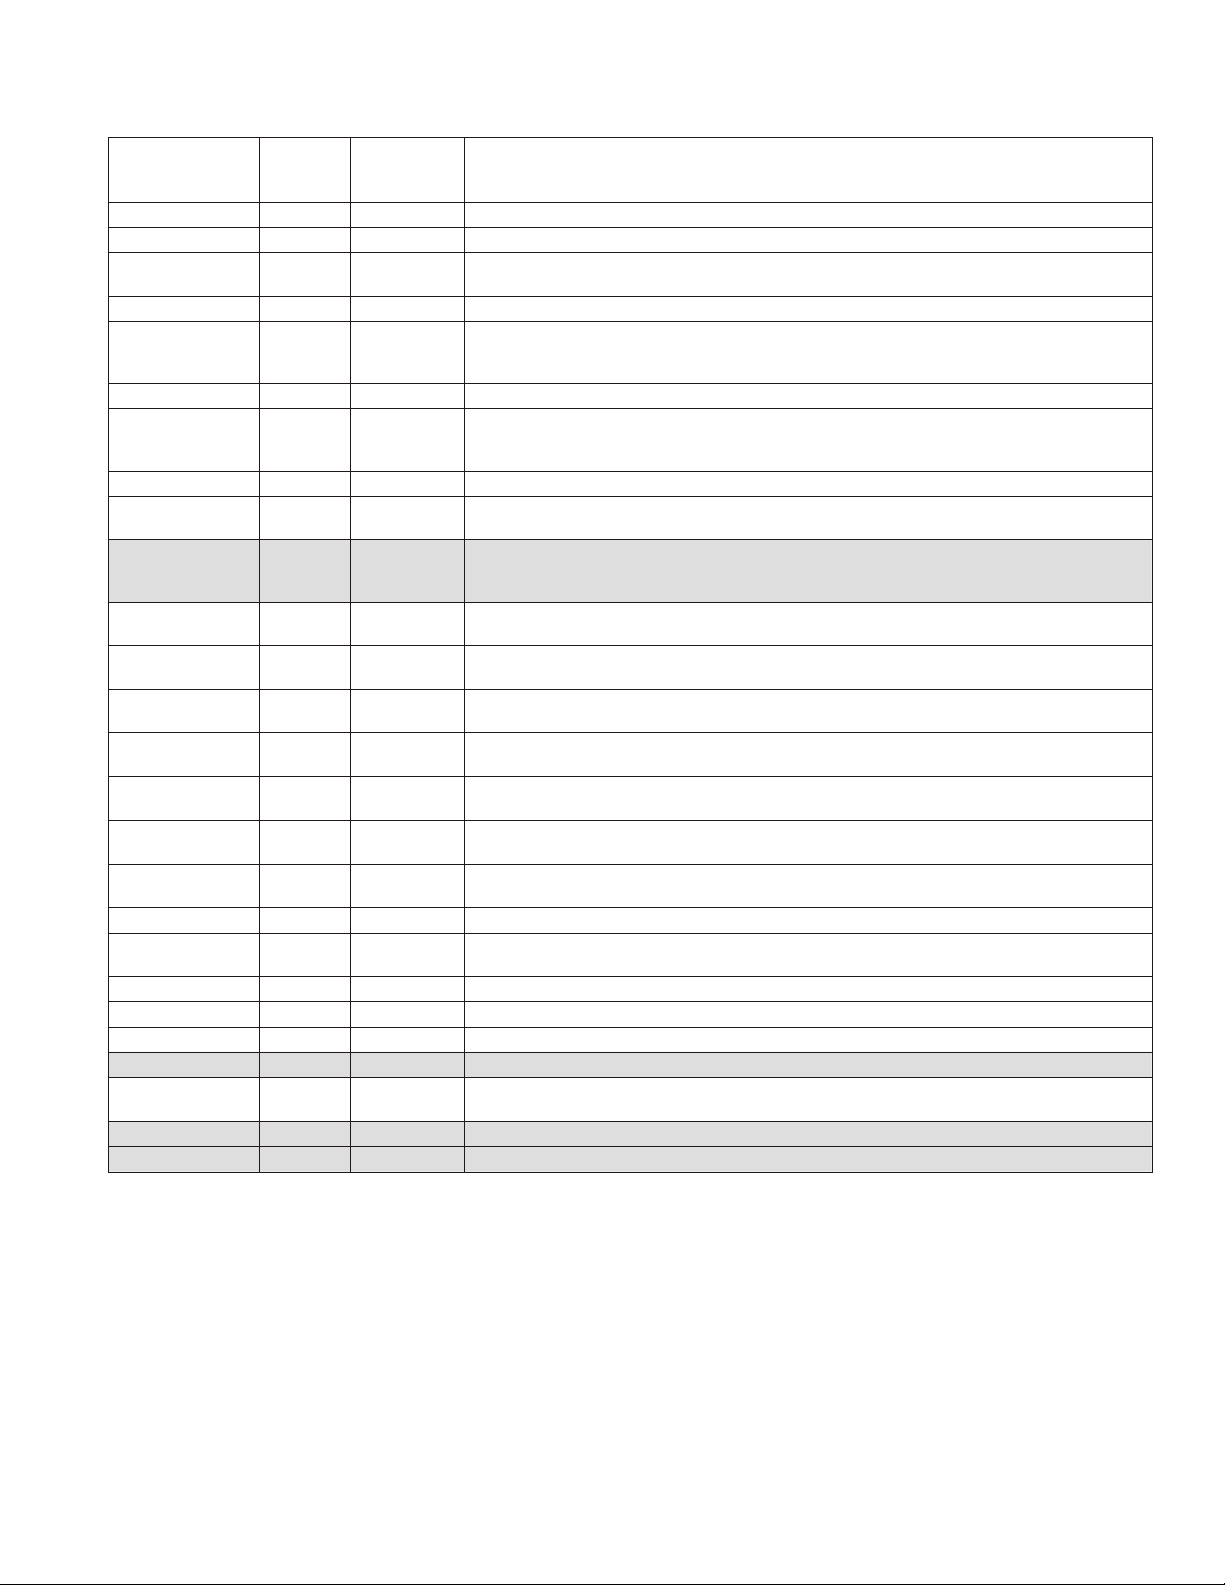
SETUP AND CONFIGURATION
Before being placed into service, the JADE™ Economizer
module must be setup and configured for the installed
system. Use the System Setup menu, the Advanced Setup
menu (if necessary), and the Setpoints menu to
accomplish this.
Menu Structure
The following tables illustrate the complete hierarchy of
menus and parameters for the JADE™ Economizer
system.
The Menus in display order are:
lSTATUS
lSETPOINTS
lSYSTEM SETUP
lADVANCED SETUP
lCHECKOUT
lALARMS
IMPORTANT
Your menu parameters may be different depending on
your configuration. For example if you do not have a DCV
(CO2) sensor, then none of the DCV parameters appear.
aWhen values are displayed, pressing and holding the por q button
causes the display to automatically increment.
FIGURE 9