manuals.online logo
Brands
  1. Home
  2. •
  3. Brands
  4. •
  5. Mitsubishi Electric
  6. •
  7. Air Conditioner Accessories
  8. •
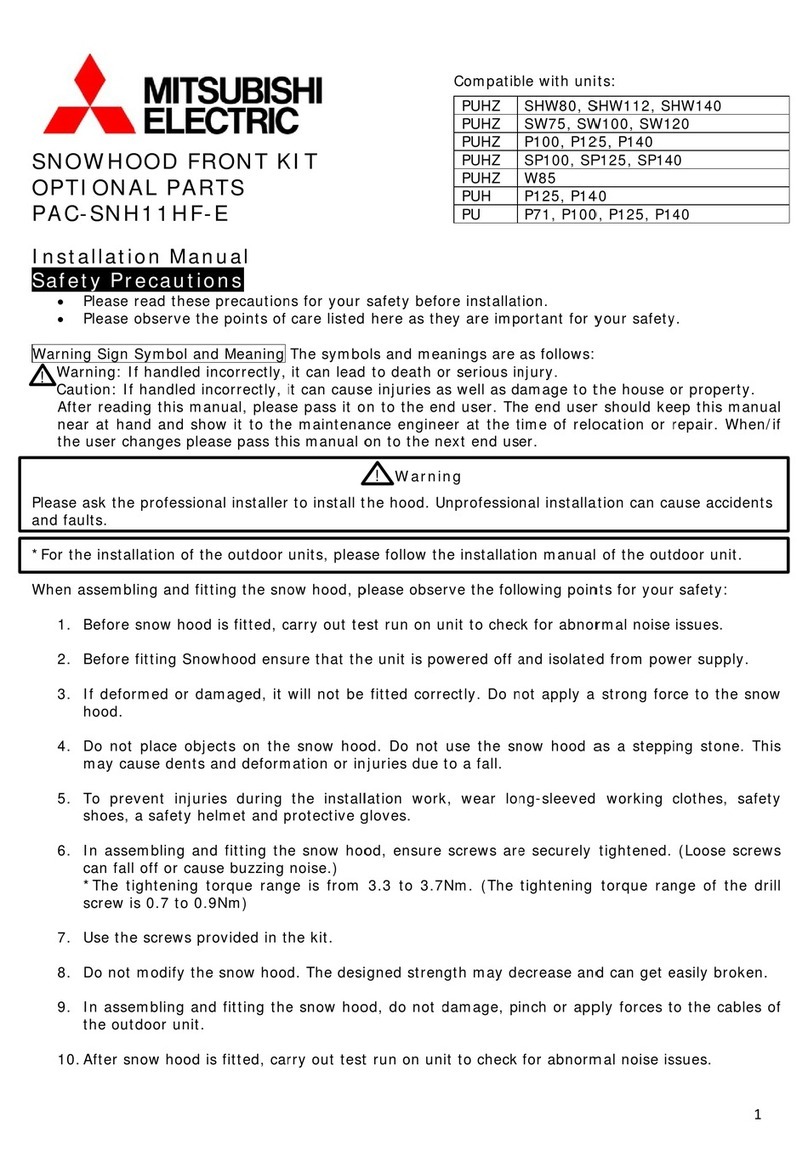
  9. Mitsubishi Electric PAC-SNH11HS-E User manual

Mitsubishi Electric PAC-SNH11HS-E User manual


S
N
O
P
P
A
In
S
a
Wa
r
Ple
a
and
*Fo

Wh
e
!
N
OWH
O
P
TION
A
A
C-SN
H
stallati
a
fety P
r
•Please
•Please
r
ning Sign
W
arning: I
Caution: I
f
After readi
near at ha
the user c
h
a
se ask th
e
faults.
r the insta
l
e
n assemb
l
1. Before
2. Before
3. If defo
r
hood.
4. Do not
may ca
5. To pre
v
shoes,
6. In ass
e
can fall
*The t
i
screw i
7. Use th
e
8. Do not
9. In ass
e
the ou
t
10.After s
n
O
OD S
I
A
L PA
R
H
11HS
-
on Ma
n
r
ecauti
o
read these
observe th
Symbol an
f
handled i
f
handled i
n
ng this ma
nd and sh
o
h
anges ple
a
e
professio
n
l
lation of t
h
l
ing and fit
t
snow hoo
d
fitting Sno
w
r
med or d
a
place obj
e
a
use dents
a
v
ent injuri
a safety h
e
e
mbling an
d
off or cau
s
i
ghtening
t
s 0.7 to 0.
9
e
screws p
r
modify th
e
e
mbling an
d
t
door unit.
n
ow hood i
s
I
DE KI
T
R
TS
-
E
n
ual
o
ns
precautio
n
e points of
d Meaning
ncorrectly,
n
correctly,
nual, plea
s
o
w it to th
e
a
se pass t
h
n
al installe
r
h
e outdoor
t
ing the sn
o
d
is fitted,
c
w
hood ens
a
maged, it
e
cts on th
e
a
nd defor
m
es during
e
lmet and
p
d
fitting th
s
e buzzing
t
orque ran
g
9
Nm)
r
ovided in t
e
snow hoo
d
d
fitting th
e
s
fitted, ca
r
T
n
s for your
care listed
The symb
o
it can lead
i
t can caus
e
s
e pass it
o
e
maintena
is manual
o
r
to install
t
units, plea
s
o
w hood,
p
c
arry out t
e
u
re that th
e
will not be
e
snow ho
o
m
ation or i
n
the instal
l
p
rotective
g
e snow ho
o
noise.)
g
e is from
he kit.
d
. The desi
e
snow ho
o
r
ry out tes
t
safety bef
o
here as t
h
o
ls and me
a
d
to death
o
e injuries
a
o
n to the e
n
a
nce engin
e
o
n to the
n
Warni
t
he hood.
U
s
e follow t
h
p
lease obs
e
e
st run on
u
e unit is p
o
fitted cor
r
o
d. Do not
n
juries due
l
ation wor
k
g
loves.
o
d, ensure
3.3 to 3.
7
i
gned stre
n
o
d, do not
t
run on u
n
!
o
re installa
t
h
ey are im
p
a
nings are
o
r serious i
n
a
s well as d
n
d user. T
h
e
er at the
t
n
ext end us
ng
U
nprofessio
h
e installat
i
rve the fol
l
u
nit to che
c
o
wered off
a
r
ectly. Do
n
use the s
n
to a fall.
k
, wear lo
screws ar
e
7
Nm. (The
n
gth may d
e
d
amage, p
it to check
PUHZ
PUHZ
PUHZ
PUHZ
PUH
PU
Compatib
t
ion.
p
ortant for
y
as follows:
n
jury.
amage to
t
h
e end use
r
t
ime of rel
o
er.
nal installa
i
on manual
owing poi
n
c
k for abno
r
a
nd isolate
d
n
ot apply a
n
ow hood
a
n
g-sleeved
e
securely
tightening
e
crease an
d
inch or ap
p
for abnor
m
SW
P1
0
SP
1
W8
P7
1
P7
1
le with uni
t
y
our safet
y
t
he house
o
r
should k
e
o
cation or
a
tion can c
a
l
of the out
n
ts for you
r
rmal noise
d from po
w
strong fo
r
a
s a stepp
working
tightened.
torque ra
n
d can get
e
p
ly forces
t
m
al noise i
s
W
75
0
0
1
00
5
1
, P100
1
, P100
t
s:
y
.
o
r propert
y
ep this ma
r
epair. Wh
e
a
use accide
door unit.
r
safety:
issues.
w
er supply.
r
ce to the
s
i
ng stone.
c
lothes, s
a
(Loose sc
r
n
ge of the
e
asily brok
e
t
o the cabl
e
s
sues.
1
y
.
nual
e
n/if
nts
s
now
This
a
fety
r
ews
drill
e
n.
e
s of
2

As
s
Ass
co
m
NO
T
Ba
c
1.
In
a

Part
Name
Item
N
Quan
t
Figu
*U
s
*U
s
*D
r
In
s

s
embly
e
mble the
m
ponents a
r
T
E: If fitti
n
k Kit.
Componen
a
ddition to
:
N
o:
L Pa
n
1
t
ity: 1
r
e:

s
e an elect
r
s
e 300mm
e
r
ill screw
s
s
tallation
S
•When
walls/b
locatio
n
•Ensure
•Ensure
replac
e

snow hoo
d
re availabl
e
n
g all three
ts
this install
a
n
el
R Pan
2
1

r
ic driver t
o
e
xtension
f
s
are to b
e
S
pace:
installing
uildings/w
a
n
.
the locati
o
there is
e
ment of p
a
d
by follo
w
e
.
kits (Fron
t
a
tion manu
el Cent
r

o
tighten th
f
or driver t
o
e
used on
e
snow
h
a
lkways –
o
n can bea
r
adequate
a
rts on the
w
ing the st
t
Kit, Side
K
al, please
c
r
e Top(CT)
Panel
3
1

e mountin
g
o
allow acc
e
e
time onl
y
h
ood con
s
refer to
u
r
the weigh
t
access
s
unit.

eps in the
K
it and Ba
c
c
heck the
f
Centre

g
/drill scre
w
e
ss to mo
u
y
. Discard
s
ider the
u
nit I.M. f
o
t of both t
h
s
pace to
a

assembly
c
k kit) the
S
f
ollowing c
o
Bottom(CB
)
P
anel
4
1

w
s.
u
nting poin
t
after eac
h
proximit
y
o
r more i
n
h
e unit and
a
llow for
manual p
r
S
ide Kit m
u
o
mponents
Mounti
n


t
s.
h
use.
y
of the
n
formation
the snow
h
the main
t
r
ovided aft
u
st be inst
a
are includ
e
n
g Screw-5
x
5
16


e
unit t
o
on choos
hood.
t
enance, i
er checkin
g
a
lled befor
e
e
d in the ki
x
12 Drill
S
6
4

o
surroun
i
ng install
a
nspection
g
all
e
the
t:
S
crew
6
4



ding
a
tion
and




Screw mo
u
create tem
Mo
u
nting screws
porary moun
t
unt L Panel u
s
into side pan
e
t
ing points fo
r
sing tempora
r
e
l half way to
r
L and R Pan
e
r
y mounting
p
3


e
ls.
p
oint.
4

In
s
Using
s
ert mountin
g
screws provi
d
g
screws half
w
Align
s
d
ed, mount L
w
ay into positi
s
lots on CT P
a
Panel.
ons highlight
e
a
nel with tem
p

Mount R Pan
e
e
d on L and
R
p
orary mount
e
l using the s
a
R
Panels to cr
e
ing points on
a
me method
a
e
ate temporar
y
L and R Pane
a
s used to m
o
r
y mounting p
ls.



o
unt L Panel.
oints for CT
P
5
T
ighten
b
temporar
y
mounting
screws.

P
anel.
b
oth
y


En
s
wit
h
pa
n
Use d
r
side p
a

s
uring mounti
n
h
mounting h
o
n
el for drill sc
r
r
ill screws to
d
a
nel. Discard
x2
n
g holes on
C
o
les on L and
r
ew position u
d
rill mounting
drill screw
s
T panel are a
R panels, ma
sing pencil/m
holes in the
s
after use.
ligned
rk top
arker.
Rem
drill
Refit the Top
drill mountin
g
Discard dril
l
6
x2
ove top pane
l
screw positio
n
Panel and us
e
g
holes in the
l
screws aft
e
R
e
l and mark si
d
n
using pencil
e drill screws
top panel.
e
r use.
R
emount CT P
a



d
e panel for
/marker.
to
a
nel.
5

6

4
Wi
t
scr
e
po
s
Mount
C
t
h CB Panel in
e
ws and tight
s
itions on L a
n
C
B Panel usin
position mo
u
en screws us
e
n
d R Panels
Ins
e
g
temporary
m
u
nt the remai
n
e
d for tempor
a

e
rt mounting
s
m
ounting pos
n
ing mountin
g
ary mounting
s
crews for CT
itions on L an
g
Panel.
d R Panels.











Full
te
m
scr
e
y tighten mo
u
m
porary moun
e
ws have bee
n
u
nting screws
ting after the
n
tightened.
used for
lower

7
8

Regular Checks/Maintenance
Please check the following items regularly for safety:
1. Check if there is no loose screw on the snow hood and in the joints between the snow hood and the
outdoor unit.
2. Check if there is no rust or corrosion on the snow hood and in the area where the outdoor unit is
fitted.
3. In order to prevent the snow hood from dropping, tighten screws when they are loose and make
repairs when rust or corrosion is present.
4. When oil or dust is present inside the snow hood, rust and corrosion can occur. (Mud and dust can
look like rust at times.) Clean the snow hood regularly.



GK79D001H02

Other Mitsubishi Electric Air Conditioner Accessories manuals

Mitsubishi Electric PFR-12-18 Instruction sheet

Mitsubishi Electric

Mitsubishi Electric PFR-12-18 Instruction sheet

Mitsubishi Electric PLP-6EAJ User manual

Mitsubishi Electric

Mitsubishi Electric PLP-6EAJ User manual

Mitsubishi Electric PAC-TZ02-E User manual

Mitsubishi Electric

Mitsubishi Electric PAC-TZ02-E User manual

Mitsubishi Electric PAC-645BH-E User manual

Mitsubishi Electric

Mitsubishi Electric PAC-645BH-E User manual

Mitsubishi Electric MSZ-RW25VG User manual

Mitsubishi Electric

Mitsubishi Electric MSZ-RW25VG User manual

Mitsubishi Electric PAC-SG85DR-E User manual

Mitsubishi Electric

Mitsubishi Electric PAC-SG85DR-E User manual

Mitsubishi Electric PAC-DRP10DP-E2 User manual

Mitsubishi Electric

Mitsubishi Electric PAC-DRP10DP-E2 User manual

Mitsubishi Electric PAC-SNH21HB-E User manual

Mitsubishi Electric

Mitsubishi Electric PAC-SNH21HB-E User manual

Mitsubishi Electric PAC-SNH11HB-E User manual

Mitsubishi Electric

Mitsubishi Electric PAC-SNH11HB-E User manual

Mitsubishi Electric SPTB1 User manual

Mitsubishi Electric

Mitsubishi Electric SPTB1 User manual

Mitsubishi Electric EHGT17D-YM9ED User manual

Mitsubishi Electric

Mitsubishi Electric EHGT17D-YM9ED User manual

Mitsubishi Electric PAC-645BH-E User manual

Mitsubishi Electric

Mitsubishi Electric PAC-645BH-E User manual

Mitsubishi Electric RCN-K-E User manual

Mitsubishi Electric

Mitsubishi Electric RCN-K-E User manual

Mitsubishi Electric RG79F146H03 User manual
Mitsubishi Electric

Mitsubishi Electric RG79F146H03 User manual

Mitsubishi Electric PAC-SG95LE-E User manual

Mitsubishi Electric

Mitsubishi Electric PAC-SG95LE-E User manual

Mitsubishi Electric PAC-SNH11HF-E User manual

Mitsubishi Electric

Mitsubishi Electric PAC-SNH11HF-E User manual

Mitsubishi Electric CMY-Q100CBK User manual
Mitsubishi Electric

Mitsubishi Electric CMY-Q100CBK User manual

Mitsubishi Electric PAC-SK38HR-R User manual
Mitsubishi Electric

Mitsubishi Electric PAC-SK38HR-R User manual

Mitsubishi Electric PAC-RB01BC User manual

Mitsubishi Electric

Mitsubishi Electric PAC-RB01BC User manual

Mitsubishi Electric AE-200A-50A User manual

Mitsubishi Electric

Mitsubishi Electric AE-200A-50A User manual

Mitsubishi Electric PRE-12 Instruction sheet

Mitsubishi Electric

Mitsubishi Electric PRE-12 Instruction sheet

Mitsubishi Electric FR-A800 User manual

Mitsubishi Electric

Mitsubishi Electric FR-A800 User manual

Mitsubishi Electric PAC-SNH21HS-E User manual
Mitsubishi Electric

Mitsubishi Electric PAC-SNH21HS-E User manual

Popular Air Conditioner Accessories manuals by other brands
Lennox 13U57 installation instructions

Lennox

Lennox 13U57 installation instructions

Lennox 31M77 installation instructions

Lennox

Lennox 31M77 installation instructions

Daikin DP 14 Service instructions

Daikin

Daikin DP 14 Service instructions

Samsung PC4NBSKA installation manual

Samsung

Samsung PC4NBSKA installation manual

Sharp AZ-F920F manual

Sharp

Sharp AZ-F920F manual

Carrier WF-60A1 Installation & owner's manual

Carrier

Carrier WF-60A1 Installation & owner's manual

LG 128 Expansion Kit installation manual

LG

LG 128 Expansion Kit installation manual

GE RAB46 installation instructions

GE

GE RAB46 installation instructions

manuals.online logo
manuals.online logoBrands
  • About & Mission
  • Contact us
  • Privacy Policy
  • Terms and Conditions

Copyright 2025 Manuals.Online. All Rights Reserved.