Linak DESKLINE User manual

LINAK-US.COM/DESKLINE
LINAK DESKLINE®
TROUBLESHOOTING GUIDE

2
LINAK DESKLINE Troubleshooting
Glossary of Common Terms
• Components
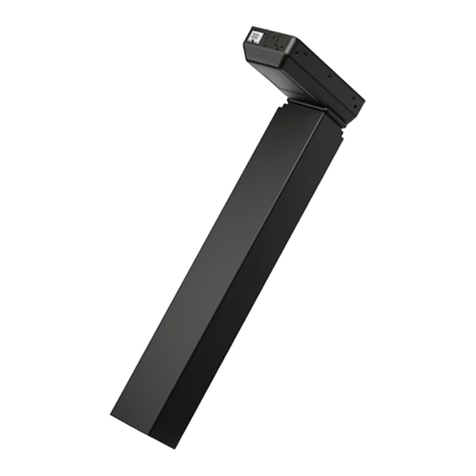
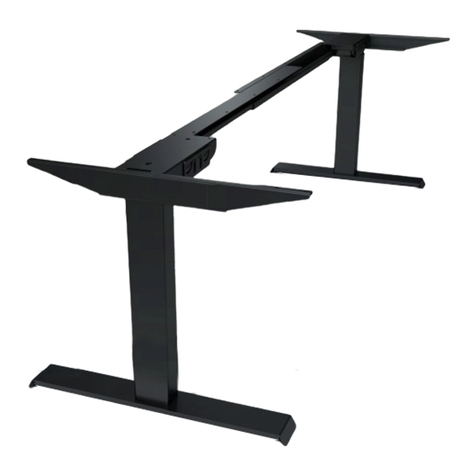
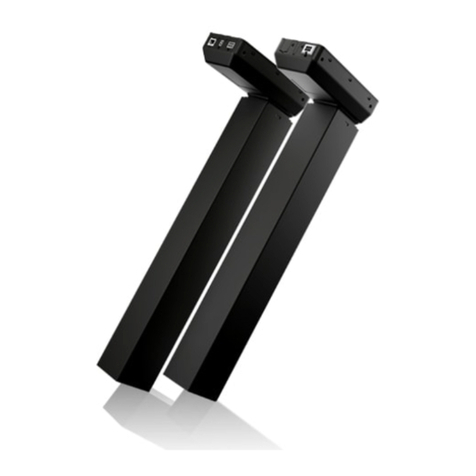
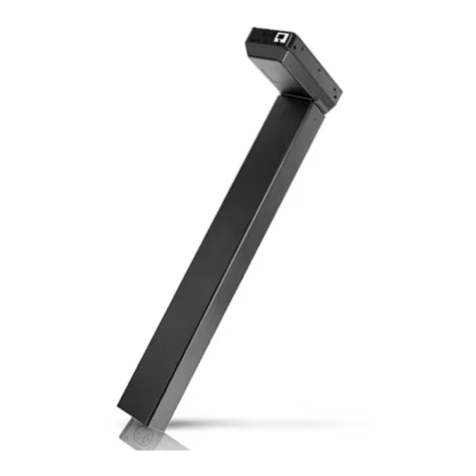
» Desk leg (DL) – The lifting columns, typically with powder coated steel profiles, responsible for lifting the working load of
the application.
» Control box (CBD6S) – Both the computer and power supply of the system.
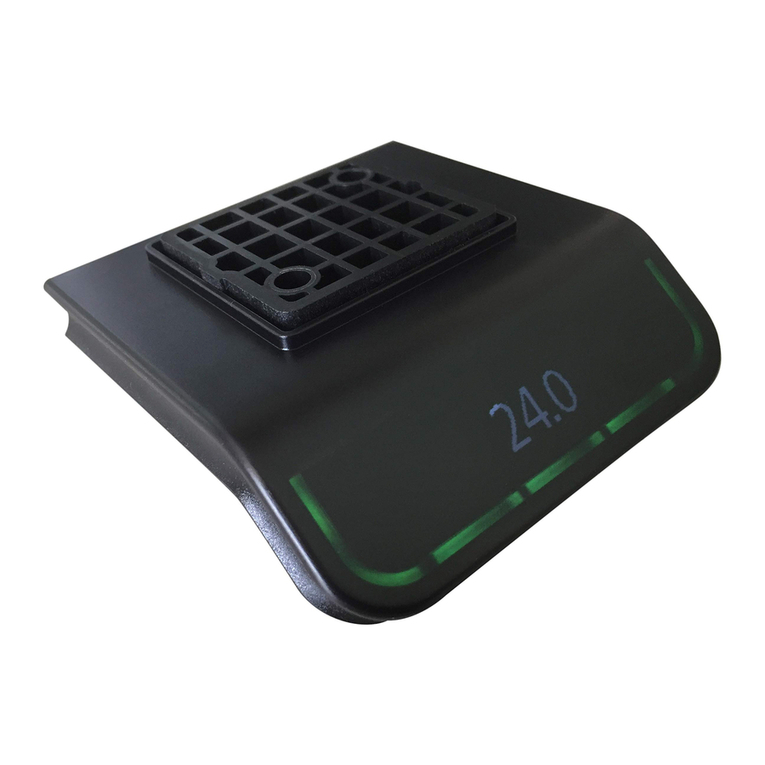
» Desk panel (DP) – The user interface. Depending on the model, it is used to activate the application, set memory
positions, display the height, display error codes, connect to mobile apps, and give reminders to the user.
» Motor cable – Transmits low voltage power (18-39 VDC) from the control box to the desk legs, and also transmits PIEZO
signals when available from the desk leg.
» Mains cable – Transmits high voltage power (120 VAC in US and Canada) to the control box.
• Other
» Initialize – Procedure to reset all desk legs to the fully retracted position so that the control box knows where they are.
» Reference – Any group of desk legs that run in parallel when an Up or Down command is sent to the control box. It is
possible to have a custom control box configuration that allows for more than one Reference. [Example: Two (2) desk
legs on Reference #1 (Channels #1 and #2) to lift a work surface, and one (1) LA31 on Reference #2 (Channel 3) to adjust
a monitor array.]
Standard Troubleshooting Procedures
P1 – Initialize the control box (“reset”)
Note: This is commonly the solution when a complaint is that a desk will move down but not up. When a control box requires
initialization, this is how the system is programmed to behave.
STEP 1. Hold Down button on desk panel to ensure the desk is retracted to its lower limit (whether it’s the fully retracted hard
stop, or a configured lower limit).
STEP 2. Briefly release Down
STEP 3. Press and hold Down for 5 seconds, wait until all desk movement has stopped, then release
a. If initialization is successful, you should see a slight up/down “handshake” movement of the desk legs
b. If you have a desk panel with display, you should also see E01 during this part of the procedure.
P2 – Check all cable connections
STEP 1. Mains cable, connected to both the control box and power outlet.
STEP 2. All motor cables, connected to both the control box and desk leg.
a. Assuming a standard control box configuration, these must be connected in channels 1 and 2, or channels 1, 2 and
3 for a 3-leg table. They can’t be connected in channels 1 and 3 or 2 and 3 unless there is a configuration on the
control box specifying this arrangement.
STEP 3. Desk panel cable, connected to the control box in either port A1 or A2 (doesn’t matter which)
Desk panel
Desk leg
Motor cable
Control box
Mains cable
Desk diagram:

3
Symptom Procedure
System will move down but not up 1. Initialize (P1)
System unresponsive (no power to
display with any button is pressed).
If any of these steps activates the
digital display, initialize the system
(P1).
1. Check mains cable connection
2. Test power outlet using another device (lamp, phone charger, etc.)
3. Plug in a new switch and test
4. Connect all existing cables to a new control box and test
System is powered, but will not
initialize
1. Try pressing and releasing the down button a few times before pressing and holding
for 5 seconds.
2. Also, be aware if the control box has a special configuration: If the desk is
programmed with a lower stroke limit, so as to avoid a collision with something like
a file cabinet, it is possible that it also has a custom, longer Forced Initialization
Time. This is the time required to hold Down before initialization begins. Sometimes
this is 10 seconds or longer.
3. If you have a standard control box without a special configuration (i.e. “Plug &
Play”), try to initialize each leg in Channel 1 by itself, with nothing else plugged into
the motor channels on the control box. Also, swap the motor cables so that a
different motor cable is used to initialize Channel 1 by itself. The problem could be a
faulty desk leg or a faulty motor cable.
Channel-specific error (Ex: E41 –
Channel 1 overload) – Everything
except PIEZO errors (E59-E63)
1. Swap the motor cable connections at the control box (Motor cable #1 from channel
1 to 2, motor cable #2 from channel 2 to 1). If It remains E41, there could be a
problem with the application (load or obstruction on one side) or a bad control box.
If the error changes to E42, go to step 2.
2. Swap the motor cable connections at the desk legs, so that the leg that was
originally connected to Channel 1 is back in Channel 1, but with the motor cable
that was originally connected to Channel 2. If it remains E42, it is most likely a bad
motor cable, now connected to Channel 2. If it goes back to E41, it is most likely a
bad desk leg, now connected to Channel 1.
P3 – Check for obstructions
STEP 1. Check under, above and on the sides of the desk for any obstructions that could prevent movement in either direction.
The next two procedures (P4 and P5) are for a two leg desk system. The same concepts can be used for a three leg system using
Channel 3 and so forth.
P4 – Check for faulty component(s) WITH error codes (digital display on Desk Panel, or on app via Bluetooth)
Notes: Check the error code list in the appendix of this troubleshooting guide for assistance. The code should read E##. Some
error codes are channel-specific which can help pinpoint the problem.

4
P5 – Check for faulty component WITHOUT error codes (no digital display on Desk Panel, no Bluetooth)
Symptom Procedure
System will move down but
not up 1. Initialize (P1)
System will not initialize.
OR
System won’t complete the full
range of motion.
– After each of these steps,
attempt to initialize (P1).
1. Check mains cable connection. Test power outlet using another device (lamp,
phone charger, etc.)
2. Plug in a new switch.
3. Connect all existing cables to a new control box.
4. Try pressing and releasing the down button a few times before pressing and
holding for 5 seconds.
Symptom Procedure
Desk is uneven 1. Initialize the desk. If both legs begin to run down, complete the initialization. If only
one leg moves, stop and move to Step 2.
2. Check motor cable connections. Check to ensure motor cables are not pulled during
movement. With a standard, Plug & Play control box, it’s possible that only one leg
is connected, and connected to Channel 1. In this case, it will initialize and run
Channel 1 only. If there is only one leg but it’s connected to Channel 2, it will not
initialize.
3. If a motor cable was disconnected, try initializing again.
4. If unsuccessful, connect the desk leg from Channel 2 into Channel 1, with nothing in
Channel 2, and initialize.
5. Try initializing the same leg that’s in Channel 1, but with a different motor cable. If it
still won’t initialize, replace the desk leg.

5
5. Also, be aware if the control box has a special configuration: If the desk is programmed
with a lower stroke limit, so as to avoid a collision with something like a file cabinet, it is
possible that it also has a custom, longer Forced Initialization Time. This is the time
required to hold Down before initialization begins. Sometimes this is 10 seconds or longer.
6. If you have a standard control box without a special configuration (i.e. “Plug & Play”),
try to initialize each leg in Channel 1 by itself, with nothing else plugged into the motor
channels on the control box. Also, swap the motor cables so that a different motor cable
is used to initialize Channel 1 by itself. The problem could be a faulty desk leg or a faulty
motor cable.
Desk is uneven 1. Desk is uneven (P4)
Appendix
What is the Control Box Thinking?
There are many clever procedures, checks and measurements performed in the control box. Here is a brief description of
what the control box is trying to accomplish while it is activating an application:
• Safe activation of the application
o Parallel, even movement of all desk legs in the application is critical.
» The control box does not directly know the position of each desk leg. Instead, the position of each leg
is constantly calculated via Hall pulses from each motor. The legs on a single reference are not
allowed to be more than +/- 5 Hall pulses out of sync. For a standard DL, this amounts to +/- 0.55 mm.
» Motor cable disconnections are also detected as errors.
o If PIEZO technology is present in the desk leg, the control box monitors for PIEZO “collision” signals from
each channel. When a PIEZO signal is sensed, movement is immediately stopped and, if there is room, the
system is ran in the opposite direction a small distance.
o Anytime the control sees an incomplete signal, or more than one signal (multiple keys pressed, multiple
desk panels activated at the same time), an error is determined and no movement is allowed at that
moment. This is to prevent an action of movement that is not intended by the user.
• Protection from equipment damage
o Internal temperature of the control box is monitored.
o Maximum current draw for each motor channel, as well as the system as a whole, is measured. When the
current exceeds an allowable limit, an error is presented.

6
ERROR
CODE NAME DESCRIPTION POTENTIAL CAUSE TROUBLESHOOTING
E01 Position Lost The desk has an unknown
position and needs to be
initialized
» Position error
» New Desk Leg added
• Initialize the system (P1)
E02 General Overload Up Overload in upward direction
has occurred
» Obstruction
» Bad leg or motor cable
• Check all cable connections, (P2)
initialize the system (P1)
• Troubleshoot components
by initializing 1 at a time
(only possible with Plug & Play
configuration) (P4)
E03 General Overload Down Overload in downward direction
has occurred
» Obstruction
» Bad leg or motor cable
• Check all cable connections, (P2)
initialize the system (P1)
• Troubleshoot components
by initializing 1 at a time
(only possible with Plug & Play
configuration) (P4)
E08 Watchdog Indicate that software failed to
kick watchdog
» Program fault • Unplug mains cable for 15 sec
• Initialize the system (P1)
• Replace Control Box
E09 LIN collision Collisions detected on the LIN
bus
» Key pressed on two or
more connected handset
simultaneously
» Multiple LINBUS devices
activated
• Check if another desk panel is
connected and being activated
• Unplug all but one desk panel
and test system
E10 Power fail Power fail happened, or power
regulator adjusted below 10%
» Mains cable pulled during
driving
» Internal fault
» Only 1 battery for a 3- or
4-channel system
» “E10 is a power fail,
voltage on power supply
drops below a certain limit,
power removed”
• Check mains cable is not caught,
and is allowed to freely travel
• Use strain-relief loop built into
control box
• Use a 2nd battery; charge
batteries
E11 Channel mismatch Change in number of actuators
since initialization
» Disconnection
» Desk Leg added
• Check Motor cable connections
and Integrity (P2)
• Change Motor cable or Desk Leg
• Initialize the system (P1)
E12 Position error One channel have position
different than others
» Too much back drive
occurred
• Move table to fully retracted
position
• Initialize system (P1)
E13 Short circuit Short circuit detected during
operation
» Squeezed Motor Cable
» Short in motor
• Check motor cable connections
(P2)
• Isolate and replace Motor Cable (P4)
• Isolate and replace Desk Leg (P4)
Error codes

7
ERROR
CODE NAME DESCRIPTION POTENTIAL CAUSE TROUBLESHOOTING
E15 Power limit System has reached its power
limitation
» Mains cable pulled during
driving
» Internal fault
» Many times will see this
alongside E10
» “E15 is when power
regulator has adjusted
speed down on actuators
without any significant
current draw, usually
caused by power supply
dropping.”
• Check mains cable is not caught,
and is allowed to freely travel
• Use strain-relief loop built into
control box
E16 Key Error Illegal keys pressed (handled
internally in DP1C).
» Hitting multiple buttons
simultaneously
• Check desk panel
E17 Safety missing LIN bus unit does not support
safety feature
» DP1C/DPF1C does not have
up-to-date software
• Try DP with more recent
software version (printed
on label)
E18 Missing Initialization plug A special service tool is required
to change number of channels
to the system
[BASELIFT Only]
» Service tool missing from
BASELIFT system when
initializing
• Add service tool
E23 Ch1 missing Channel 1 is detected missing » Disconnection
» Faulty motor cable
» Faulty motor in leg
• Check Motor cable connections
and Integrity (P2)
• Change Motor cable or Desk Leg
• Initialize the system (P1)
E24 Ch2 missing Channel 2 is detected missing » Disconnection
» Faulty motor cable
» Faulty motor in leg
• Check Motor cable connections
and Integrity (P2)
• Change Motor cable or Desk Leg
• Initialize the system (P1)
E25 Ch3 missing Channel 3 is detected missing » Disconnection
» Faulty motor cable
» Faulty motor in leg
• Check Motor cable connections
and Integrity (P2)
• Change Motor cable or Desk Leg
• Initialize the system (P1)
E26 Ch4 missing Channel 4 is detected missing » Disconnection
» Faulty motor cable
» Faulty motor in leg
• Check Motor cable connections
and Integrity (P2)
• Change Motor cable or Desk Leg
• Initialize the system (P1)

8
ERROR
CODE NAME DESCRIPTION POTENTIAL CAUSE TROUBLESHOOTING
E29 Ch1 type Channel 1 is not same type as
when initialized
» Change in Desk Leg type
» Loose wire inside motor
• Check Desk Leg type
• Change Desk Leg
• Initialize the system (P1)
E30 Ch2 type Channel 2 is not same type as
when initialized or not same
type as channel 1
» Change in Desk Leg type
» Loose wire inside motor
• Check Desk Leg type
• Change Desk Leg
• Initialize the system (P1)
E31 Ch3 type Channel 3 is not same type as
when initialized or not same
type as channel 1
» Change in Desk Leg type
» Loose wire inside motor
• Check Desk Leg type
• Change Desk Leg
• Initialize the system (P1)
E32 Ch4 type Channel 4 is not same type as
when initialized or not same
type as channel 1
» Change in Desk Leg type
» Loose wire inside motor
• Check Desk Leg type
• Change Desk Leg
• Initialize the system (P1)
E35 Ch1 pulse fail Channel 1 had to many pulse
errors
» Loose/faulty cable
» Hall sensor PCB
• Check motor cable connections
and integrity (P2)
• Change Desk Leg
• Initialize the system (P1)
E36 Ch2 pulse fail Channel 2 had to many pulse
errors
» Loose/faulty cable
» Hall sensor PCB
• Check motor cable connections
and integrity (P2)
• Change Desk Leg
• Initialize the system (P1)
E37 Ch3 pulse fail Channel 3 had to many pulse
errors
» Loose/faulty cable
» Hall sensor PCB
• Check motor cable connections
and integrity
• Change Desk Leg
• Initialize the system (P1)
E38 Ch4 pulse fail Channel 4 had too many pulse
errors
» Loose/faulty cable
» Hall sensor PCB
• Check motor cable connections
and integrity (P2)
• Change Desk Leg
• Initialize the system (P1)
E41 Ch1 overload up Overload up occurred on
channel 1
» Leg is overloaded
» Hit obstruction
» Reached end stop (before
initialization at upper end-
stop occurs)
• Remove obstruction (P3)
• Remove load
• Initialize if necessary (P1)
E42 Ch2 overload up Overload up occurred on
channel 2
» Leg is overloaded
» Hit obstruction
» Reached end stop (before
initialization at upper end-
stop occurs)
• Remove obstruction (P3)
• Remove load
• Initialize if necessary (P1)

9
ERROR
CODE NAME DESCRIPTION POTENTIAL CAUSE TROUBLESHOOTING
E43 Ch3 overload up Overload up occurred on
channel 3
» Leg is overloaded
» Hit obstruction
» Reached end stop (before
initialization at upper end-
stop occurs)
•Remove obstruction (P3)
•Remove load
•Initialize if necessary (P1)
E44 Ch4 overload up Overload up occurred on
channel 4
» Leg is overloaded
» Hit obstruction
» Reached end stop (before
initialization at upper end-
stop occurs)
• Remove obstruction (P3)
• Remove load
• Initialize if necessary (P1)
E47 Ch1 overload down Overload down occurred on
channel 1
» Hit obstruction • Remove obstruction (P3)
• Initialize if necessary (P1)
E48 Ch2 overload down Overload down occurred on
channel 2
» Hit obstruction • Remove obstruction (P3)
• Initialize if necessary (P1)
E49
Ch3 overload down Overload down occurred
on channel 3
» Hit obstruction • Remove obstruction (P3)
• Initialize if necessary (P1)
E50
Ch4 overload down Overload down occurred
on channel 4
» Hit obstruction • Remove obstruction (P3)
• Initialize if necessary (P1)
E53
Ch1 anti-col Anti-collision triggered
on channel 1
» Hit Obstruction • Remove obstruction (P3)
• Initialize if necessary (P1)
E54
Ch2 anti-col Anti-collision triggered
on channel 2
» Hit Obstruction • Remove obstruction (P3)
• Initialize if necessary (P1)
E55
Ch3 anti-col Anti-collision triggered
on channel 3
» Hit Obstruction • Remove obstruction (P3)
• Initialize if necessary (P1)
E56
Ch4 anti-col Anti-collision triggered
on channel 4
» Hit Obstruction • Remove obstruction (P3)
• Initialize if necessary (P1)
E59
Ch1 SLS/PIEZO Safety limit switch activated
on channel 1
» Hit Obstruction • Remove obstruction (P3)
• Initialize if necessary (P1)
E60
Ch2 SLS/PIEZO Safety limit switch activated
on channel 2
» Hit Obstruction • Remove obstruction (P3)
• Initialize if necessary (P1)
E61
Ch3 SLS/PIEZO Safety limit switch activated
on channel 3
» Hit Obstruction • Remove obstruction (P3)
• Initialize if necessary (P1)
E62
Ch4 SLS/PIEZO Safety limit switch activated
on channel 4
» Hit Obstruction • Remove obstruction (P3)
• Initialize if necessary (P1)

10
ERROR
CODE NAME DESCRIPTION POTENTIAL CAUSE TROUBLESHOOTING
E65
Ch1 pulse dir Pulses counted wrong
direction in channel 1
» Motor poles are crossed
» Hall sensor Cables are
crossed
• Check motor cable connections
and integrity (P2)
• Change Desk Leg
• Initialize the system (P1)
E66
Ch2 pulse dir Pulses counted wrong
direction in channel 2
» Motor poles are crossed
» Hall sensor Cables are
crossed
• Check motor cable connections
and integrity (P2)
• Change Desk Leg
• Initialize the system (P1)
E67
Ch3 pulse dir Pulses counted wrong
direction in channel 3
» Motor poles are crossed
» Hall sensor Cables are
crossed
• Check motor cable connections
and integrity (P2)
• Initialize the system (P1)
E68
Ch4 pulse dir Pulses counted wrong
direction in channel 4
» Motor poles are crossed
» Hall sensor Cables are
crossed
• Check motor cable connections
and integrity (P2)
• Initialize the system (P1)
E71
Ch1A shor t Short circuit on channel 1
[If T-splitter is used, short
circuit on 1A]
» Damage to motor cable
» Damage to cable exiting
leg (if applicable)
• Inspect motor cable for damage,
replace if damaged
• Inspect cable exiting leg (if
applicable), replace if damaged.
E72
Ch1B short Short circuit on channel 1
[If T-splitter is used, short
circuit on 1B]
» Damage to motor cable
» Damage to cable exiting
leg (if applicable)
• Inspect motor cable for damage,
replace if damaged
• Inspect cable exiting leg (if
applicable), replace if damaged.
E73
Ch2A short Short circuit on channel 2
[If T-splitter is used, short
circuit on 2A]
» Damage to motor cable
» Damage to cable exiting
leg (if applicable)
• Inspect motor cable for damage,
replace if damaged
• Inspect cable exiting leg (if
applicable), replace if damaged.
E74 Ch2B short Short circuit on channel 2
[If T-splitter is used, short circuit
on 2B]
» Damage to motor cable
» Damage to cable exiting
leg (if applicable)
• Inspect motor cable for damage,
replace if damaged
• Inspect cable exiting leg (if
applicable), replace if damaged.
E75 Ch3A short Short circuit on channel 3
[If T-splitter is used, short circuit
on 3A]
» Damage to motor cable
» Damage to cable exiting leg
(if applicable)
• Inspect motor cable for damage,
replace if damaged
• Inspect cable exiting leg (if
applicable), replace if damaged.
E76 Ch3B short Short circuit on channel 3
[If T-splitter is used, short circuit
on 3B]
» Damage to motor cable
» Damage to cable exiting leg
(if applicable)
• Inspect motor cable for damage,
replace if damaged
• Inspect cable exiting leg (if
applicable), replace if damaged.

11
ERROR
CODE NAME DESCRIPTION POTENTIAL CAUSE TROUBLESHOOTING
E77 Ch4A short Short circuit on channel 4
[If T-splitter is used, short circuit
on 4A]
» Damage to motor cable
» Damage to cable exiting leg
(if applicable)
• Inspect motor cable for damage,
replace if damaged
• Inspect cable exiting leg (if
applicable), replace if damaged.
E78 Ch4B short Short circuit on channel 4
[If T-splitter is used, short circuit
on 4B]
» Damage to motor cable
» Damage to cable exiting leg
(if applicable)
• Inspect motor cable for damage,
replace if damaged
• Inspect cable exiting leg (if
applicable), replace if damaged.
E86 Master Connection to master lost OR
following messages are from
master
[Only used in multi-parallel
system]
» Poor cable connection to
master box
» If followed by another
error code, then codes
being communicated from
master box
• Check connection to master box,
check cable integrity
• If communicating other error
codes, see above
E87 Follower 1 Connection to 1st follower lost
OR following messages are
from 1st follower
[Only used in multi-parallel
system]
» Poor cable connection to
follower box
» If followed by another
error code, then codes
being communicated from
follower box
• Check connection to master box,
check cable integrity
• If communicating other error
codes, see above
E88 follower 2 Connection to 2nd follower lost
OR following messages are
from 2nd follower
[Only used in multi-parallel
system]
» Poor cable connection to
follower box
» If followed by another
error code, then codes
being communicated from
follower box
• Check connection to master box,
check cable integrity
• If communicating other error
codes, see above
E89 Follower 3 Connection to 3rd follower lost
OR following messages are
from 3rd follower
» Damage to motor cable
» Damage to cable exiting leg
(if applicable)
• Inspect motor cable for damage,
replace if damaged
• Inspect cable exiting leg (if
applicable), replace if damaged.
E93 DeskSensor 1 – Activation Detected trigger from LIN bus
safety limit switch, e.g. DS1
» Hit obstruction • Remove obstruction
E94 DeskSensor 1 – No longer
detected
LIN SLS unit (e.g. DS1)
no longer detected
» LIN SLS unit (e.g. DS1) or
cables are not connected
• Ensure DS1 unit and all cables
are correctly mounted.

GLOBAL PRESENCE
LINAK has a well-developed sales and service organization in Europe, Americas,
Asia and Australia. Therefore, we can assist you and your customers locally,
under the global sales concept idea:
Be global, act local.
LUS_Desk_Troubleshooting_Manaul-0819_Publ: 0819_LINAK © 2019
LINAK has a world-class sales and service organisation.
Today we are present in 35 countries all over the world.
For further information, please visit our website: www.linak-us.com
Table of contents
Other Linak Indoor Furnishing manuals

Linak
Linak DESKLINE DL21 User manual

Linak
Linak DESKLINE DESK FRAME 2 User manual

Linak
Linak ECF HFA Shift Electric Sit Stand Desk User manual

Linak
Linak DESKLINE DESK FRAME 2 User manual

Linak
Linak DESKLINE DL5 User manual

Linak
Linak Deskline DPG Series User manual

Linak
Linak DESKLINE DL18 User manual

Linak
Linak DESKLINE DESKLIFT Operating instructions

Linak
Linak Desk Frame 1 User manual