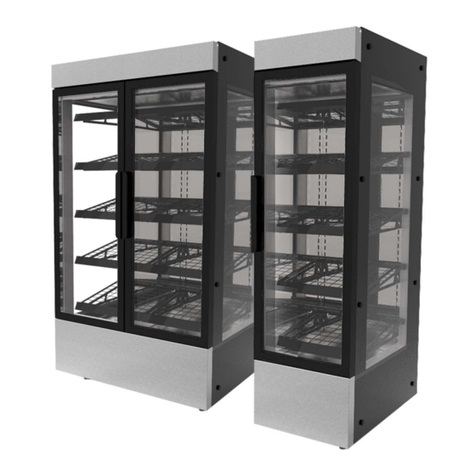
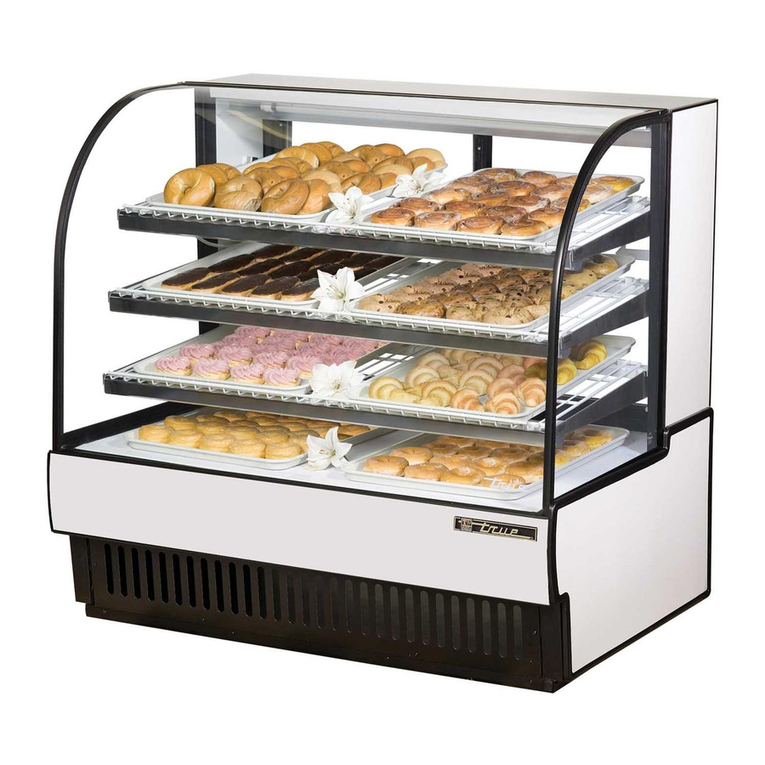
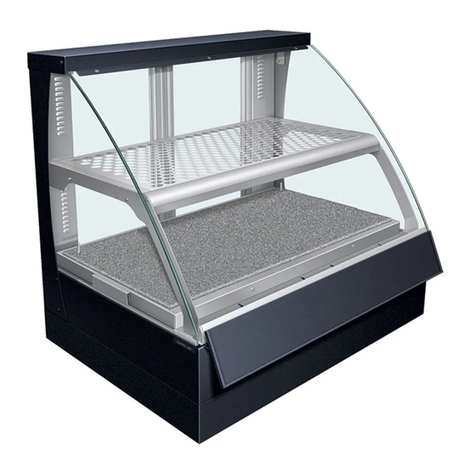
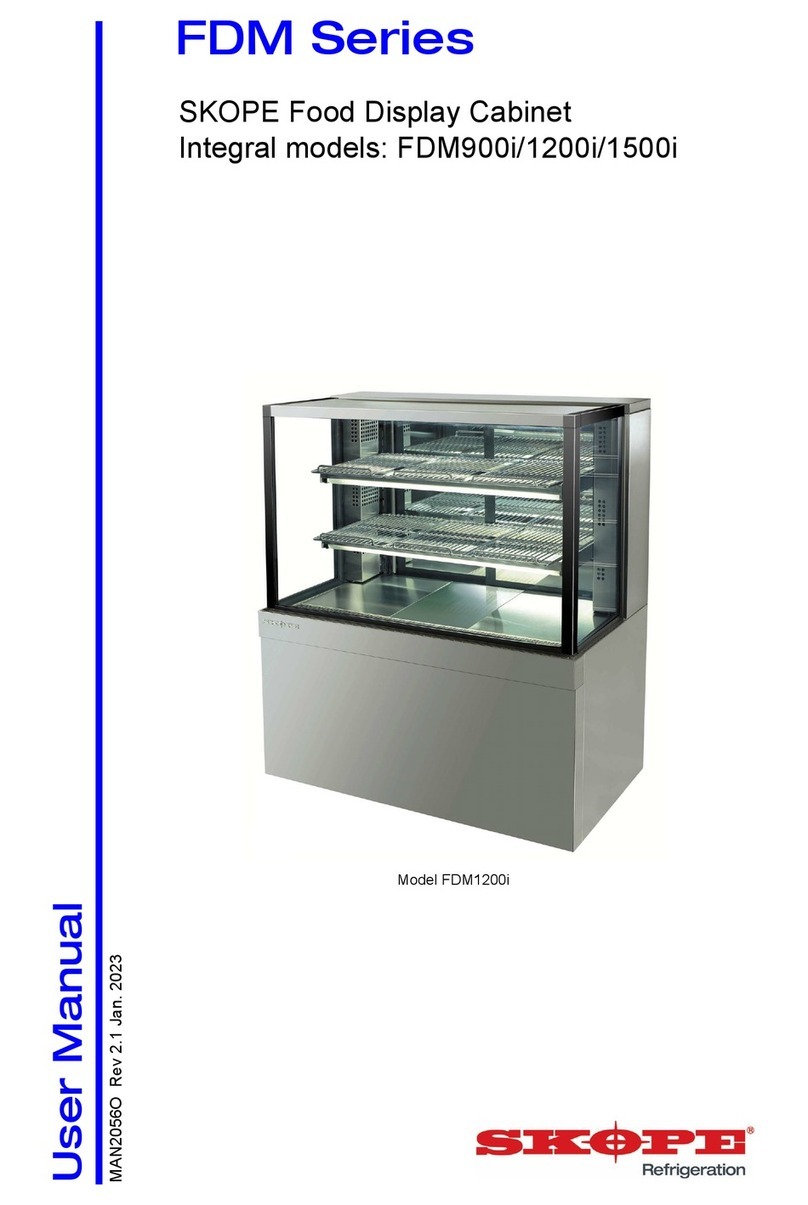
Linde Presenter 0646 User manual

877 945b
Betriebsanleitung
Operating manual
Manuel d’instructions
Manuale d’uso
Presenter 0646
GB
F
I
D
Presenter 0656 CC

2
Sehr geehrte Kundin,
sehr geehrter Kunde!
Bevor Sie Ihr neues Kühlregal in Betrieb nehmen, lesen
Sie bitte diese Betriebsanleitung aufmerksam durch. Sie
enthält wichtige Informationen zum sicheren Gebrauch,
demAufstellen,derNutzungundderPflegedesstecker-
fertigenLinde-Kühlregals Presenter vom Typ0646/56.
Bewahren Sie bitte die Betriebsanleitung zum späteren
Nachschlagen auf. Geben Sie sie an eventuelle Nachbe-
sitzer des Kühlregals weiter.
GebenSiebitteauchIhremmitverantwortlichenPersonal
dieseBetriebsanleitung zum Lesen undstellenSie sicher,
daßdiese Personengruppedie Betriebsanleitungverstan-
den hat und befolgt!
Wenn Sie oder Ihr Personal eine Anweisung aus dieser
Betriebsanleitungnicht verstandenhaben,so wendenSie
sich bitte an Ihren Linde-Kundendienst.
Hinweise zur Benutzung dieser Betriebs-
anleitung
Die Bilder sind innerhalb eines Kapitels durchnumeriert
(z.B. Fig. 3).
Verweise auf eine bildliche Darstellung sind im Text in
Klammern gesetzt. Dabei gibt die erste Zahl die Bild-
nummer und die zweite Zahl, von der ersten durch einen
Bindestrich getrennt, die Position auf dem entsprechen-
den Bild an.
Beispiel: (4-2) bedeutet Fig. 4, Pos. 2.
WichtigeInformationen sind durchPiktogramme gekenn-
zeichnet:
kennzeichnet Arbeits- und Betriebsverfahren, die
genau einzuhalten sind, um eine Gefährdung von
Personenauszuschließen.
kennzeichnet Arbeits- und Betriebsverfahren, die
genaueinzuhalten sind, um Beschädigungenoder
Zerstörungenam Kühlregal zu vermeiden.
kennzeichnetnützliche Informationenund Empfeh-
lungenfür den Betrieb.
Hinweis zur Anlieferung
Überprüfen Sie direkt nach der Anlieferung das
Kühlregal auf eventuelle Transportschäden. Wenn
SieSchädenamKühlregalfeststellen,meldenSie
diesebitteumgehendbeiderverantwortlichenSpedition
oder bei Ihrem Linde-Kundendienst. Die Anschriften fin-
den Sie am Ende dieser Betriebsanleitung.
Dear customer,
Please be sure to read this operating manual carefully
before putting your new refrigerated multideck cabinet
intouse. The manual contains important notes on safety
and proper installation, use and maintenance of the
Linde plug-in refrigerated multideck cabinet Presenter
type 0646/56.
Please keep the manual ready for reference and hand it
over to any future new owner of the cabinet.
Make sure the manual is read by all staff who may work
with the cabinet and that they understand and observe
thecontents.
Should you or your staff be unable to understand any
instructionin this manual, please contact yourLindeSer-
viceOrganization.
How to use this operating manual
Theillustrations are numbered separatelyineach section
(e.g. fig. 3).
Referenceto anillustration inthe textis shownin brackets
with the first digit indicating the no. of the figure and the
second, separated from the first by a hyphen, indicating
the position in that figure.
Example: (4-2) means fig. 4, position 2.
Importantinformationis marked by pictograms:
indicatesworking andoperating procedureswhich
must be strictly observed to rule out any risk to
people.
indicatesworkingandoperatingprocedureswhich
must be strictly observed to avoid any damage to
ordestruction of the cabinet.
indicatesuseful informationand recommendations
foroperation.
Note for delivery
Onarrival,first inspect the refrigerated cabinet for
anydamagesustainedintransit.Allsuch damage
mustbereportedimmediatelytothe carrieror your
Linde Service Organization.The addresses can be found
at the end of this operating manual.
GBD

3
Egregio cliente,
Prima di mettere in funzione il nuovo murale refrigerato,
leggere attentamente il manuale d’uso. Contiene
informazioni importanti relative ad impiego sicuro, posi-
zionamento, cura e manutenzione del murale refrigerato
congruppoincorporato Linde Presenter tipo 0646/56.
Conservare il manuale d’uso per riferimenti futuri.
Consegnarload eventualiacquirenti successividel murale
refrigerato.
Consegnareil manuale d’uso anche al personale addetto
al murale refrigerato, garantire che venga letto, capito e
osservato!
Se l’acquirente del murale refrigerato o il personale non
hanno capito una determinata prescrizione riportata nel
manuale d’uso, rivolgersi al servizio assistenza Linde.
Note sull’impiego del manuale d’uso
Le figure visibili in un capitolo sono numerate
(ad es. fig. 3).
I riferimenti ad una rappresentazione grafica sono messi
fra parentesi nel testo. La prima cifra indica il numero
della figura mentre la seconda, separata dalla prima per
mezzo di una lineetta, specifica la posizione sulla figura
corrispondente.
Esempio: (4-2) significa fig. 4, posizione 2.
Le informazioni importanti sono contrassegnate da
pittogrammi.
Rappresenta processi di lavoro e d’esercizio, che
devono essere osservati attentamente per non
metterein pericolo le persone.
Rappresenta processi di lavoro e d’esercizio, che
devono essere osservati attentamente per evitare
danni o guasti irreparabili al murale refrigerato.
Rappresenta informazioni e suggerimenti utili per
l’eserciziodelmuralerefrigerato.
Nota sulla fornitura
Subito dopo la fornitura del murale refrigerato
controllare se esso presenta danni dovuti al
trasporto. Se si accertano dei danni, segnalare
immediatamente gli inconvenienti alla ditta di spedizione
responsabile o al servizio assistenza Linde. Gli indirizzi
sono riportati alla fine del presente manuale d’uso.
F I
Cher client!
Avant de mettre votre nouvelle vitrine multiponts en
service, veuillez lire attentivement le présent manuel
d’instructions. Il contient des informations importantes
pour le maniement sûr, l’implantation, l’utilisation et
l’entretien de la vitrine multiponts à groupe logé Linde
Presenter, type 0646/56.
Veuillez conserver le manuel pour le consulter ultérieure-
ment.Transmettez-leaux éventuelspropriétairessucces-
sifs de la vitrine.
Veuillez faire également lire le présent manuel d’in-
structions à votre personnel coresponsable et assurez-
vous qu'il l'a compris et qu'il s’y conforme!
Si vous (ou votre personnel) n’avez pas compris une des
instructionsde ce manuel, veuillez vous adresser à votre
service après vente Linde.
Notes concernant l’utilisation de ce manuel
Lesfiguressontnumérotées en suivant dans un chapitre
(p.ex. fig. 3).
Les renvois à une représentation figurative se trouvent
entre parenthèses dans le texte. Le premier chiffre en
indiquelenuméro et le second, séparé du premier par un
trait d’union, la position sur la figure correspondante.
Exemple: (4-2) signifie fig. 4, position 2.
Les informations importantes sont signalées par des
pictogrammes:
indique des méthodes de travail et d’exploitation
qui doivent être rigoureusement respectées pour
exclure une mise en danger de personnes.
indique des méthodes de travail et d’exploitation
qui doivent être rigoureusement respectées pour
éviterdesdétériorationsoudestructions delavitrine
multiponts.
indiquedesinformations etrecommandationsutiles
aufonctionnement.
Note concernant la livraison
Vérifiez directement après la livraison si la vitrine
multiponts présente d’éventuelles avaries de
transport.Si vousen constatez,veuillez lessignaler
immédiatement à l'expéditeur responsable ou à votre
service après vente Linde. Vous trouverez les adresses à
la fin du présent manuel d’instructions.

4
Kapitel Titel Seite
Inhaltsverzeichnis
1 BestimmungsgemäßeVerwendung ................ 6
2 Sicherheitsbestimmungen ............................... 6
3 Übersichtsbild................................................. 10
4 Aufstellung...................................................... 12
4.1 Wahl desAufstellungsortes ............................. 12
4.2 Einzelaufstellung.............................................. 14
4.3 Reihenaufstellung............................................. 14
4.4 Gruppenaufstellung .......................................... 16
4.5 IntegrierteAufstellung ...................................... 18
4.6 Gondel-Kopfaufstellung .................................... 18
4.7 FreieAufstellung .............................................. 20
4.8 EntfernenderTransportverpackungundder
Transportsicherung........................................... 20
4.9 Aufstellvorgang ................................................ 22
4.10 Voraussetzungen fürden
elektrischenAnschluß...................................... 24
5 Inbetriebnahme .............................................. 26
5.1 Maßnahmenvor dererstenInbetriebnahme ..... 26
5.2 In Betrieb setzen.............................................. 28
6 Einstellung der Aufbewahrungstemperatur . 30
6.1 AngabenzurProdukttemperatur....................... 30
6.2 EinstellungdesTemperatursollwertes .............. 32
7 Warenbeschickungund Preisauszeichnung 36
7.1 Umhängenund Schrägstellender
Regalauslagen.................................................. 36
7.2 Preisauszeichnung/Position der Auslagen...... 38
8 AutomatischeVerdampferabtauung ............. 40
9 Reinigung ..........................................................42
9.1 Außenhautreinigen .......................................... 42
9.2 Innenflächen reinigen ....................................... 44
10 Wartung .......................................................... 46
10.1 Verflüssigerlamellen reinigen........................... 46
10.2 Vertikale Leuchtstofflampe wechseln............... 48
10.3 Starter wechseln .............................................. 48
11 Außerbetriebnahme........................................ 50
12 Abhilfe bei Störungen..................................... 52
13 Zubehör/Ersatzteile ........................................ 56
14 Umweltschutz und Entsorgungshinweise ... 58
15 Bestimmungen, Normen, Richtlinien............ 58
16 TechnischeDaten ........................................... 62
LindeService worldwide ........................ 64 - 66
D
Section Title Page
Contents
1 Proper use ........................................................ 6
2 Safetyregulations............................................. 6
3 Generalview ................................................... 10
4 Installation ...................................................... 13
4.1 Selecting the place of installation .................... 13
4.2 Stand-alone installation .................................... 15
4.3 Single-rowline-up ............................................. 15
4.4 Groupinstallation ............................................. 17
4.5 Integratedsiting ............................................... 19
4.6 Back-to-backwithshop-around ends .................19
4.7 Free-standinginstallation.................................. 21
4.8 Removing the transport packaging and
transportguards ............................................... 21
4.9 Installationprocedure ....................................... 23
4.10 Requirements for electrical connection ............ 25
5 Starting ........................................................... 27
5.1 Measures prior to starting ................................ 27
5.2 Settingintooperation ....................................... 29
6 Setting the storage temperature................... 31
6.1 Informationonthe product temperature .............31
6.2 Setting the temperature set point .......................33
7 Product loading and pricing .......................... 37
7.1 Repositioning andincliningthe displayshelves .. 37
7.2 Pricing/Position shelfes..................................... 39
8 Automatic evaporator defrosting.................. 41
9 Cleaning ...........................................................43
9.1 Cleaningtheouter casing................................. 43
9.2 Cleaning the internalsurfaces .......................... 45
10 Maintenance ................................................... 47
10.1 Cleaning the condenserfins ............................. 47
10.2 Changing the vertical fluorescent lamp ............ 49
10.3 Changing the starter......................................... 49
11 Shut down ...................................................... 51
12 Troubleshooting ............................................. 53
13 Accessories/replacement............................... 57
14 Environment protection and disposal notes 59
15 Regulations, standards, codes...................... 59
16 Specifications.................................................. 62
LindeService worldwide ............................... 64 - 66
GB

5
Capitolo Titolo Pagina
Indice
1 Impiegoammesso............................................ 7
2 Norme di sicurezza .......................................... 7
3 Prospetto ........................................................ 11
4 Posizionamento.............................................. 13
4.1 Scelta del luogo di posizionamento.................. 13
4.2 Posizionamentosingolo ................................... 15
4.3 Posizionamentocanalizzato............................. 15
4.4 Posizionamentoagruppo ...................................17
4.5 Posizionamentointegrato ................................. 19
4.6 Posizionamentoagondola .................................19
4.7 Posizionamentolibero ...................................... 21
4.8 Rimozione di imballaggio e protezioni per il
trasporto........................................................... 21
4.9 Operazionediposizionamento ......................... 23
4.10 Premesse per il collegamento elettrico ............ 25
5 Messa in funzione .......................................... 27
5.1 Provvedimenti prima della messa in funzione .. 27
5.2 Messa in esercizio ........................................... 29
6 Regolazionedella temperaturadi conser-
vazione ............................................................ 31
6.1 Indicazioni per la temperatura dei prodotti..........31
6.2 Regolazionedel valorenominaledella
temperatura ........................................................33
7 Introduzione dei prodotti e indicazione dei
prezzi.................................................................37
7.1 Nuovo attacco e inclinazione dei ripiani ........... 37
7.2 Indicazionedeiprezzi/PosizioneRipiano ........ 39
8 Sbrinamentoautomatico dell’evaporatore ... 41
9 Pulizia ................................................................43
9.1 Pulizia del rivestimento superficiale ................. 43
9.2 Pulizia delle superfici interne............................ 45
10 Manutenzione................................................. 47
10.1 Pulizia delle alette delcondensatore................ 47
10.2 Sostituzione della lampada neon verticale ....... 49
10.3 Sostituzione dello starter ................................. 49
11 Messa fuori servizio ....................................... 51
12 In caso di guasti ............................................. 55
13 Accessori/parti di ricambio ............................ 57
14 Protezione dell’ambiente e prescrizioni di
smaltimento e trattamento dei rifiuti ............ 61
15 Disposizioni, norme, direttive ....................... 61
16 Caratteristiche tecniche................................. 63
LindeService worldwide ................................ 64 - 66
F I
Chapitre Titre Page
Table des matières
1 Utilisationcorrecte ........................................... 7
2 Prescriptions de sécurité ................................. 7
3 Vued’ensemble .............................................. 11
4 Implantation.................................................... 13
4.1 Choixdulieu d’implantation ............................. 13
4.2 Implantation isolée.. ......................................... 15
4.3 Mise enlinéaire ................................................ 15
4.4 Implantation dos à dos..................................... 17
4.5 Implantation intégrée........................................ 19
4.6 Implantationentête de gondole .........................19
4.7 Implantationlibre.............................................. 21
4.8 Enlèvement de l’emballage de transport et
desarrêtoirs ..................................................... 21
4.9 Mise en place................................................... 23
4.10 Conditionsduraccordement électrique ............ 25
5 Mise en service ............................................... 27
5.1 Mesures à appliquer avant la première mise en
service ............................................................. 27
5.2 Mettre en service ............................................. 29
6 Réglagedelatempératuredeconservation .....31
6.1 Indications concernant la température des
produits ..............................................................31
6.2 Réglage de la valeur de consigne de
température ........................................................33
7 Chargement des produits et affichage
des prix ........................................................... 37
7.1 Changement de place et inclinaison des
étagères ........................................................... 37
7.2 Affichage des prix/Position Tablette ................ 39
8 Dégivrage automatique de l’évaporateur ..... 41
9 Nettoyage .........................................................43
9.1 Nettoyerl'extérieur .............................................43
9.2 Nettoyerl'intérieur ............................................ 45
10 Maintenance ................................................... 47
10.1 Nettoyer les ailettes du condenseur ................. 47
10.2 Remplacer le tube fluorescent vertical............. 49
10.3 Remplacer le starter......................................... 49
11 Mise hors service ........................................... 51
12 Remèdes en cas de pannes........................... 54
13 Accessoires/pièces derechange ................... 57
14 Protection de l’environnement et
instructions d’élimination .............................. 60
15 Prescriptions, normes, directives ................. 60
16 Caractéristiques techniques.......................... 63
LindeService worldwide ................................ 64 - 66
1 Bestimmungsgemäße
Verwendung
2 Sicherheitsbestimmungen
Das in dieser Betriebsanleitung beschriebene
steckerfertige Kühlregal wurde unter Beachtung der
internationalen Sicherheitsbestimmungen entwik--
kelt und gefertigt. Wie bei jedem elektrisch betriebenen
Gerät muß mit großer Sorgfalt damit umgegangen wer--
den, insbesondere um die elektrische Sicherheit weiter--
hin zu gewährleisten.
Um einen gefahrlosen Betrieb in allen Betriebssituatio--
nen sicherzustellen, müssen folgende Sicherheitsbestim--
mungen beachtet werden:
Versichern Sie sich, daß der Netzstecker vorschrifts--
mäßig und in Übereinstimmung mit dieser Betriebsan--
leitung eingesetzt wird.
Wenden Sie sich an Ihren Linde--Kundendienst, wenn
Sie Zweifel am elektrischen Anschluß, an der Arbeits--
weise oder der Sicherheit Ihres steckerfertigen Kühl--
regals haben.
DGB
2 Safety regulations
The plug--in refrigerated cabinet as described in
this operating manual is designed and manufac--
tured in compliance with the international safety
regulations. Like any electrical appliance, it must be
handled with all due care, particularly with consideration
to ensuring electrical safety.
To ensure safe operation in all service conditions, the
following safety precautions must be observed:
The power plug must be connected in regulation mat--
ter and as instucted in this manual.
Contact your Linde Service Organization if you are in
any doubt about electrical connection, working or safety
of your plug--in refrigerated cabinet.
1 Proper use
Das Kühlregal Presenter 0656 CC
ist ausschließlich für die Präsentation und den Abver--
kauf von Produkten des Unternehmens Coca--Cola be--
stimmt.
Lagern Sie in das Kühlregal nur Getränkedosen,
Getränkeglasflaschen oder PET--Flaschen ein, die eine
Beschicken Sie das Kühlregal abends mit neuer Ware.
Allein der oben beschriebene Einsatz unter Beachtung
der in dieser Betriebsanleitung enthaltenen Vorschriften
zu Aufstellung, Anschluß, Bedienung und Wartung gilt
als bestimmungsgemäße Verwendung. Jede andere Ver--
wendung gilt als nicht bestimmungsgemäß und ist ver--
boten.
The refrigerated multideck cabinet Presenter 0656 CC
is exclusively intended for the
presentation and sales of products from the Coca Cola
company.
Please only store canned drinks, glass bottles of drinks
the cabinet. The cabinet has been tested under test
Put new stock into the cabinet in the evening.
Proper use only means the use as describedabove,
adhering to the specifications on installation, connec--
tion, operation and service. Any other use is regarded
as being contrary to specification and is prohibited.
Temperatur von weniger als 24C besitzen. Das Kühl--
r.F) des PSEL Coca--Cola in Brüssel getestet und
regalwurdeunterdenTestkonditionenB(24C,45%
freigegeben.
or PET bottles with a temperature of less than 24Cin
conditions B (24C, 45% rel. humidity) of the PSEL
Coca--Cola in Brussels and approved.
6
Das Kühlregal Presenter 0646
ist vorrangig für die Lagerung von verpackten Fleisch--
und Wurstwaren, Feinkost, Snacks, Kaltgetränken, ver--
packten Salaten, Molkereiprodukten, Obst und Gemüse
bestimmt.
Lagern Sie in das Kühlregal keine ungekühlte Ware ein
bzw. versuchen Sie nicht, Waren im Regal abzukühlen.
The refrigerated cabinet Presenter 0646 is mainly
intended for storing prepacked fresh and processed meats,
delicatessen, snacks, cold drinks, prepacked salads,
dairy products, fruit and vegetables.
Do not load the refrigerated cabinet with non refrigerated
products or use it to cool products.

7
à Essen et autorisées.
F I
2 Prescriptions de sécurité
La vitrine multiponts à groupe logé décrite dans le
présent manuel a été mise au point et fabriquée en
respectant les prescriptions de sécurité internatio--
nales. Comme pour tout appareil utilisant l’électricité, il
faut le manier avec le plus grand soin, en particulier pour
maintenir la sécurité électrique.
Afin de garantir une exploitation sans danger dans toutes
les situations de service, les prescriptions de sécurité
suivantes doivent être respectées:
Assurez--vousque la fiche de contact est insérée
conformément aux prescriptions et en conformité avec
le présent manuel d’instructions.
Adressez--vous à votre service après vente Linde si
vous avez des doutes quant au raccordement
électrique, au mode opératoire ou à la sécurité de votre
vitrine multiponts à groupe logé.
2 Norme di sicurezza
Il murale refrigerato con gruppo incorporato descritto
in questo manuale èstato sviluppato e
prodotto osservando le norme di sicurezza
internazionali. Perciò come in ogni apparecchiatura ad
azionamento elettrico bisogna procedere con la massima
precauzione, soprattutto per garantire la sicurezza elettrica.
Al fine di garantire un funzionamento sicuro e affidabile in
di sicurezza:
Assicurarsi che la spina di alimentazione venga
impiegata conforme alle prescrizioni e in concordanza
con il manuale d’uso.
Rivolgersi al servizio assistenza Linde se dovessero
sorgere dei dubbi su collegamento elettrico,
funzionamento o sicurezza del murale refrigerato con
gruppo incorporato.
1 Impiego ammesso1 Utilisation correcte
La vitrine multiponts
Presenter 0656
tion et à la vente de produits de l’entreprise Coca Cola.
Ne stockez dans les vitrines multiponts que des canettes
de boisson, bouteilles de boisson en verre ou en PET
dont la température est inférieure à 24dont la température est inférieure à 24
multiponts ont été testées aux conditions de test B (
Remplissez la vitrine multiponts de nouveaux produits
le soir.
Seule décrite ci--dessus, en observant les
et maintenance contenues dans le présent manuel
dinstructionsest considérée comme correcte. Toute
autre utilisation est considérée comme incorrecte et est
interdite.
Il murale refrigerato Presenter 0656
è destinato unicamente alla presentazione e alla vendita
di prodotti
Nel murale conservare solo lattine di bibite, bottiglie di
vetro contenenti bevande o bottiglie PET che presentano
una temperatura inferiore a
controllato e rilasciato nelle condizioni di test B
Caricare il murale di merce nelle ore serali.
delle prescrizioni riportate in questo manuale relative a
posizionamento, collegamento, uso e manutenzione --
viene considerato conforme alle norme. Non sono
permessialtritipidiimpiego.
24C/
45% dhumidité relative) du Coca--Cola PSEL
d’
àBruxelles
l’utilisation
prescriptions d’implantantion, de raccordement, conduite Solo l’utilizzo sopra descritto--premessa l’osservanza
dell’azienda Coca--Cola.
24C. Il mobile e stato
è24C/
umiditarelativadell’aria45%) dalCoca--ColaPSEL
di Bruxelles.
d’uso
tutte le situazioni d’esercizio, osservare le seguenti norme
C. Les vitrines
La vitrine multiponts Presenter 0646
est destinee en priorite au stockage d’articles de boucherie
et de charcureie, d’epicerie fine, de snacks, boissons fraiches,
salades ensachees, produits laitiers, fruits et legumes.
Ne stockez pas de produits non refrigeres ou n’essayez pas
de refrigerer des produits dans la vitrine.
Il murale refrigerato Presenter 0646
e destinato soprattutto alla conservazione di carne e salumi
insaccati, commestibili fini, snacks, bevande fredde,
insalate confezionate, latticini, frutta e verdura.
Nel murale non conservare prodotti non refrigerati o tentare
di refrigerare della merce.
est exclusivement destinee a la presenta--

8
2 Sicherheits-
bestimmungen
• Setzen Sie den Betrieb Ihres
steckerfertigen Kühlregals nicht
fort,wennes nicht einwandfrei ar-
beitetoder wennBeschädigungen
aufgetretensind.ZiehenSieindie-
sem Fall den Netzstecker, lagern
SiedieWare an einen alternativen
Aufbewahrungsort um, und wen-
den Sie sich an Ihren Linde-Kun-
dendienst.
• Ziehen Sie bei der Trennung vom
StromnetzimmeramNetzstecker,
niemals an der Netzleitung.
• EntfernenSieniemals Gehäuseab-
deckungen,sofernesindieser Be-
triebsanleitungnichtausdrücklich
beschrieben wurde. Es könnten
dadurch Teile mit lebensgefährli-
chen Betriebsspannungen freige-
legtwerden.
• Bei beschädigter Netzleitung das
Kühlregal vom Stromnetz durch
Herausziehen des Netzsteckers
aus der Steckdose trennen.
• Verwenden Sie zum Reinigen des
Kühlregals niemals fließendes
Wasser oder Wasser-Hochdruck-
geräte.
• Hantieren Sie niemals selbst an
elektrischen Einrichtungen. Über-
lassen Sie das dem Fachmann.
Sicherheitgeht vor!
• Schließen Sie ein beschädigtes
Kühlregal (z.B.Transportschaden)
niemalselektrisch an.ImZweifels-
fall Kundendienst oder Händler
befragen.
2 Safety regulations
• Removethe cabinetfrom use ifit is
notworkingproperlyorexhibitsany
damage. Disconnect the power
plug, transfer the merchandise to
other cabinets or a coldroom and
call your local Linde Service Orga-
nization.
• When disconnecting the power
plug, always pull on the plug itself
and never the cable.
• Never detach any cover except
wherespecifically instructedin this
manual.Doingsomight exposelive
electrical parts.
• Ifany damage occursto the power
cable, pull the plug to disconnect
the cabinet.
• Never use a water hose or high-
pressure jet to clean the cabinet.
• All work on electrical equipment
must be left to a qualified elec-
trician. Safety first!
• Never connect the cabinet to the
power supply if it is damaged (in
transit or otherwise). When in
doubt,contact your Linde Service
Organization or dealer.
DGB

9
2 Norme di sicurezza
• Interrompere l’esercizio se il murale
refrigeratononfunzionacorrettamente
o se si sono verificati dei guasti. In
questo caso staccare la spina di
alimentazione, immagazzinare i
prodottiinunluogodiconservazione
alternativoepoicontattareilservizio
assistenza Linde.
• Perdisinserirelareteelettrica,stac-
care sempre la spina, mai il cavo
dialimentazione.
• Nonrimuoveremailecoperture del
contenitore, a meno che ciò non
vengadescrittoespressamente nel
presente manuale d’uso. Si po-
trebbero scoprire componenti con
tensionid’esercizio pericolose.
• Se il cavo di alimentazione è dan-
neggiato, separare il murale refri-
gerato dalla rete elettrica stac-
cando la spina dalla presa di cor-
rente.
• Perpulire il murale refrigerato, non
utilizzare mai acqua corrente o
apparecchi ad alta pressione
d’acqua.
• Nonmaneggiare maisui dispositivi
elettrici.Affidare questeoperazioni
aduntecnicospecializzato.Badare
soprattuttoallasicurezza!
• Non allacciare mai un murale
danneggiato (ad es. danni dovuti
al trasporto). In caso di dubbio
contattare il servizio assistenza o
il rivenditore.
FI
2 Prescriptions de
sécurité
• N'utilisez pas votre vitrine multi-
ponts à groupe logé si elle ne
fonctionnepas parfaitement ous’il
s’est produit des détériorations.
Dans ce cas, retirez la fiche de
contact,stockez les produits dans
un autre lieu de conservation et
adressez-vous à votre service
après vente Linde.
• Lors du débranchement, tirez
toujours sur la fiche de contact,
jamais sur le câble.
• N’enlevezjamais de couverclesde
boîtiersdans la mesureoùcela n’a
pas été décrit explicitement dans
le présent manuel d’instructions.
Cela pourrait dégager des pièces
soustensionsdeservicemortelles.
• Sile câble d'alimentationestdété-
rioré, couper la vitrine du réseau
enretirant la fiche de contact de la
prise de courant.
• N’utilisezjamais d’eaucourante ou
d’appareilsà haute pression à eau
pour le nettoyage de la vitrine.
• Ne manipulez jamais vous-même
les installations électriques. Lais-
sezfaire l’expert. Lasécurité avant
tout!
• Ne raccordez jamais électrique-
ment une vitrine endommagée (p.
ex. avaries de transport). En cas
de doute, demander au service
après vente ou au revendeur.

10
Fig. 1
1Lichtschalter
2Netzleitungmit Netzstecker
3Temperaturreglermit Temperaturanzeige
440-mm-Scanner-Preisschienefür Bodenauslage
5Rückluftgitter
6Vertikale Beleuchtung(beidseitig)
7Glasboden
840-mm-Scanner-Preisschiene
9Typschild
10 Bodenauslage
11 Verflüssiger
12 Stellfuß
13 Lüftungsschlitze
AFrischeZuluft
BAbluftSockel
CWarmeAbluft Kopfdecke
A
B
CPR_X_035
1
2
3
4
5
6
7
13
8
9
10
11
12
C
3 Übersichtsbild 3 General view
DGB
1Lightswitch
2Power cable with power plug
3Temperature controllerwith temperaturedisplay
440 mm scanner price marking rail for bottom shelf
5Returnairgrille
6Vertical ligthing (on both sides)
7Glass shelf
840 mm scanner price marking rail
9Type plate
10 Bottomshelf
11 Condenser
12 Levellerfoot
13 Ventilation slots
ACoolingair intake
BAiroutletplinth
CWarm air outlet cabinet top

11
3 Vue d’ensemble 3 Prospetto
FI
1Interruttoreluce
2Cavo di alimentazione con spina
3Regolatorecon indicazione della temperatura
4Portaprezzi scanner 40 mm per piano di
fondo
5Griglia di ripresa aria
6Illuminazione verticale (su entrambi i lati)
7Ripiano in vetro
8Portaprezziscanner40 mm
9Targhettadi identificazione
10 Pianodi fondo
11 Condensatore
12 Piedinoregolabile
13 Feritoiadi aerazione
AMandataaria(fredda)
BRipresaariazoccolo
CRipresa aria calda testata
1Interrupteurd’éclairage
2Câble d'alimentation avec fiche de contact
3Régulateur de température avec indicateur de
température
4Porte-étiquettes scanner 40 mm pour plateau de
cuve
5Grille de reprise d’air
6Eclairagevertical(bilatéral)
7Etagèreenverre
8Porte-étiquettesscanner40 mm
9Plaquesignalétique
10 Plateau de cuve
11 Condenseur
12 Piedréglable
13 Ouïes daération
AArrivée d'air frais
BSortie d’air socle
CSortied’air chaud plafond supérieur
A
B
CPR_X_035
1
2
3
4
5
6
7
13
8
9
10
11
12
C

12
4.1 Wahl des Aufstellungs-
ortes
Für einen störungsfreien Betrieb des
Kühlregalssind beiderWahl desAuf-
stellungsortesunbedingtnachstehen-
de Punkte zu beachten:
- Kühlregal nicht im Freien aufstel-
len.
- Kühlregal nicht in der Nähe von
Wärmequellen, wie z. B. Heizun-
genaufstellen.Direkte Sonnenbe-
strahlung (z.B. durch Fenster) ver-
meiden(Fig. 1).
- KühlregalnichtderZugluftvonVen-
tilatorenoderoffenen Türen(Fig. 2)
aussetzen.
- Abluft von Klima-/Belüftungsan-
lagen(Fig.3)beachten.
- SockelbereichdesKühlregals nicht
mit Gegenständen, wie zum Bei-
spielmit Warenkartons(Fig. 4),zu-
stellen.
- Bei derAufstellungan einer Wand
darauf achten, daß der Ventilator
der Kältemaschine die Raumum-
gebungsluftausdemRaum unge-
hindertüberden Sockelbereichan-
saugen und über die Lüftungs-
schlitze auf der Oberseite wieder
auslassen kann.
- Beider Aufstellung mehrererKühl-
regaleneben-bzw.hintereinander,
unbedingt den Plan zur entspre-
chendenAufstellungbeachten.
Fig. 1
Fig. 2
Fig. 3
Fig. 4
CPR_X_003
SI-016
CRS-010
Air-condition
CRS-011
4 Aufstellung
D

13
4 Installation 4 Posizionamento
FGB I
4 Implantation
4.1 Selecting the place of
installation
In selecting the place of installation,
ensurethat the following instructions
areobserved,thisbeingvitalforpro-
per and troublefree working of the
cabinet:
- Donotinstallthe cabinetoutdoors.
- Do not install the cabinet in the
vicinityofheating radiatorsor other
heatsources.Donotinstallthecab-
inet where it is exposed to direct
sunlight(e.g.throughwindows)(fig.
1).
- Do not install the cabinet where it
is exposed to drafts from ventila-
tors or open doors (fig. 2).
- Pay attention to air outlet from air
conditioners/ventilators(fig. 3)
- Keeptheairintakeandoutletarea
around the plinth area of the
cabinet clear of cartons and other
obstacles (fig. 4).
- Wheninstalling thecabinet against
a wall, make sure that the refri-
geration unit fan is free to take in
the ambient air from the room via
the plinth area and discharge it
throughthe ventilation slotsonthe
top.
- When installing several cabinets
alongside or behind one another,
be sure to observe the specific
installationplan.
4.1 Scelta del luogo di
posizionamento
Pergarantireuneserciziosenzaguasti
del murale refrigerato, osservare
assolutamente i seguenti punti:
- Nonposizionareilmuralerefrigerato
all’aperto.
- Nonposizionareilmuralerefrigerato
in prossimità di sorgenti termiche,
ad es. termosifoni. Evitare irradia-
zionisolaridirette (ades.attraverso
finestre) (fig.1).
- Nonesporreilmuralerefrigeratoalle
correnti d’aria di ventilatori o di
porte aperte (fig. 2).
- Fare attenzione all’aria di scarico
degliimpianti di condizionamento/
ventilazione(fig.3).
- Non chiudere la zona inferiore del
murale refrigerato con oggetti, ad
es. scatole di cartone (fig. 4).
- Durante il posizionamento contro
unapareteassicurarsicheilventi-
latoredell'unità motocondensante
possa aspirare liberamente l’aria
dall’ambiente attraverso la zona
deglizoccoliescaricarenuovamen-
teattraverso laferitoia diaerazione
situata sul lato superiore.
- Duranteilposizionamentodidiversi
muraliadiacentioin tandemosser-
vare assolutamente lo schema
relativoalla rispettiva installazione.
4.1 Choix du lieu
d’implantation
Pour un fonctionnement sans défaut
de la vitrine multiponts, les points
suivants doivent absolument être
observés lors du choix du lieu
d’implantation:
- Ne pas installer la vitrine à ciel
ouvert.
- Ne pas installer la vitrine multi-
ponts à proximité de sources de
chaleur,commep. ex. chauffages.
Eviterl’ensoleillement direct(p.ex.
par une fenêtre) (fig. 1).
- Ne pas exposer la vitrine au
courantd’airdeventilateurs ou de
portes ouvertes (fig. 2).
- Observer la sortie d’air des instal-
lations de conditionnement d’air/
d’aération(fig. 3).
- Ne pas obstruer le soubassement
de la vitrine avec des objets,
comme p. ex. cartons de produits
(fig. 4).
- En cas d’implantation murale,
veiller à ce que le ventilateur du
groupe frigorifique puisse aspirer
sansentravel’airambiantdulocal
à l'avant du soubassement et
l'évacuer par les ouïes d’aération
sur la face supérieure.
- Encas d’implantation de plusieurs
vitrines l’une à côté de l’autre ou
l’une derrière l’autre, observer
absolument le plan concernant
l’implantationcorrespondante.

14
MöglicheAufstellungsformen sind:
- Einzelaufstellung an einer Wand
oder in einer Ecke (Fig. 5).
- Reihenaufstellung an einer Wand
(Fig.6).
- Gruppenaufstellung (Rücken an
Rücken, Fig. 7 auf Seite 16).
- Integrierte Aufstellung (Fig. 9 auf
Seite18).
- Gondel-Aufstellung(Fig.10aufSei-
te18).
- Freie Aufstellung(Fig. 11aufSeite
20).
BeiallenAufstellungsformenist
unbedingt darauf zu achten,
daßderungehinderteLuftaus-
trittaus denLüftungsschlitzenauf der
Kopfdecke gewährleistet bleibt und
einWärmestauausgeschlossenist.Nur
so ist ein störungsfreier Betrieb ge-
währleistet.
4.2 Einzelaufstellung
Bei der Einzelaufstellung gegen eine
Raumwandist derungehinderte Luft-
austrittan der Kopfdecke zugewähr-
leisten.
4.3 Reihenaufstellung
Bei der Aufstellung mehrerer Kühl-
regale nebeneinander ist zwischen
denSeitenwänden derKühlregale bei
normalen Umgebungsbedingungen
kein Abstand erforderlich.
Fig. 6
Fig.5
CPR_X_036
CPR_X_037
4 Aufstellung
D

15
Installationoptions are:
- Stand-alone installation against a
wall or in a corner (fig. 5)
- Single-row line-up installation
against a wall (fig. 6)
- Group installation (back- to-back,
fig. 7, page 16)
- Integrated siting (fig. 9, page 18)
- Back-to-back with shop-around
ends (fig. 10, page 18)
- Free-standingunit(fig. 11,page20)
In all installation options, air
exit must be unhindered
throughthe ventilation slotsin
the cabinet top to exclude accu-
mulationof heat. Onlythen is trouble-
freeoperationguaranteed.
4.2 Stand-alone installation
When the cabinet is installed as
stand-alone unit against a wall the
unhinderedescape of air through the
canopy ceiling must be guaranteed.
4.3 Single-row line-up
When cabinets are installed side by
side,no distanceisrequired between
the end walls of the refrigerated
cabinets under normal ambient
conditions.
Esempi di posizionamento:
- Posizionamentosingolocontrouna
parete o in un angolo (fig. 5)
- Posizionamento in fila contro una
parete (fig. 6)
- Posizionamentoa gruppo(schiena
a schiena , fig. 7 a pag. 16)
- Posizionamento integrato (fig. 9 a
pag.18)
- Posizionamentoagondola(fig.10
a pag. 18)
- Posizionamento libero (fig. 11 a
pag.20)
In tutte le forme di posiziona-
mento assicurarsi che venga
garantita assolutamente la
libera uscita dell’aria dalle feritoie di
aerazione situate sulla testata e che
siaesclusaunacongestione dicalore.
Solo così è possibile garantire un
eserciziosenzaguasti.
4.2 Posizionamento singolo
Peril posizionamento singolo contro
una parete del locale assicurarsi che
venga garantita la libera uscita
dell’aria sulla testata.
4.3 Posizionamento cana-
lizzato
Perilposizionamentodidiversimurali
adiacenti non è necessaria - in
condizioniambientalinormali-alcuna
distanza fra le spalle.
Les formes d’implantation possibles
sont les suivantes:
- Implantation isolée le long d’un
mur ou dans un coin (fig. 5)
- Mise en linéaire le long d’un mur
(fig.6)
- Implantation dos à dos (fig. 7 à la
page16)
- Implantation intégrée (fig. 9 à la
page18)
- Implantationentêtedegondole(fig.
10 à la page 18).
- Implantationlibre(fig.11àlapage
20)
Ence qui concerne toutes les
formes d’implantation, il faut
absolument veiller à ce que
l'airsortesans encombreparlesouïes
d’aération sur le plafond supérieur et
qu’une accumulation de chaleur soit
exclue.Unfonctionnementexemptde
défaut n’est garanti que de cette
manière.
4.2 Implantation isolée
En cas d’implantation isolée contre
un mur la sortie d’air sans encombre
doitêtreassuréeauplafondsupérieur.
4.3 Mise en linéaire
En cas d’implantation de plusieurs
vitrines multiponts l’une à côté de
l’autre, une distance entre les joues
n'estpas nécessaireà desconditions
d’ambiancenormales.
4 Installation 4 Posizionamento
FGB I
4 Implantation

16
4.4 Gruppenaufstellung
Bei einer Aufstellung von zwei Kühl-
regalen Rücken an Rücken, können
die Kühlregale bedenkenlos bündig
aneinander gestellt werden, da die
warmeAbluft über dasLuft-Austritts-
gitter an der Kopfdecke abgeleitet
wird.
ÜberstehendeSeitenwändenicht
versetzt,sondernsichberührend
zusammenschieben(7-1).
Fig. 7
CPR_X_039
Fig. 8
CPR_X_038
1
4 Aufstellung
D
Bedingtdurchdieneukonzipier-
teWarmluftableitung, sindauch
weitere Aufstellmöglichkeiten
realisierbar, wie z. B. Dreieck (Fig. 8),
Trapez, usw.

17
4 Installation
4.4 Group installation
When installing two cabinets back-
to-backthey can be positioned flush
withoneanothersincethewarmoutlet
airis dischargedthrough theair outlet
grille on the cabinet top.
Do not offset protruding end
wallsbutpush themtogether so
thatthey touch (7-1).
4 Posizionamento
4.4 Posizionamento a
gruppo
L’aria caldaviene scaricataattraverso
lagriglia diuscita situatasullatestata,
quindi i due murali possono essere
sistemati a raso quando vengono
posizionati schiena a schiena.
Avvicinare le spalle sporgenti
non in posizione sfalsata bensì
acontatto(7-1).
FGB I
4 Implantation
4.4 Implantation dos à dos
En cas d’implantation de deux
vitrines multiponts dos à dos, les
vitrines multiponts peuvent être
placées à fleur l’une contre l’autre
sansscrupules,car l’airchaudsortant
est évacué par la grille de sortie d’air
au plafond supérieur.
Pousser l’une contre l’autre les
joues débordantes non pas
décalées,maissetouchant(7-1).
.
Thanks to the newly designed
warm air discharge, other
installations are also possible,
e.g.triangular (fig.8),trapezoidal, etc.
Grâce à l’évacuation d’air
chaud nouvellement conçue,
d’autres possibilités d’implan-
tation sont également réalisables,
commep. ex. triangle(fig.8), trapèze,
etc.
Grazie al nuovo sistema di
scarico dell’aria calda è possi-
bile realizzare ulteriori forme di
posizionamento,ades.a triangolo(fig.
8), a trapezio ecc.

18
4.5 Integrierte Aufstellung
Bei einer Aufstellung, bei der das
KühlregalinLadenbauelemente(Fig.
9) integriert wird, ist durch entspre-
chendeMaßnahmen sicherzustellen,
daß die Warmluft an der Kopfdecke
ungehindertaufsteigen kann.
Fig. 9
Fig. 10
4.6 Gondel-Kopfaufstellung
Bei der Gondel-Aufstellung (Fig. 10)
wird das Kühlregal an die Kopfseite
vonLadenbauelementenplaziert.
CPR_X_040
CPR_X_041
4 Aufstellung
D

19
4 Installation
4.5 Integrated siting
If the refrigerated cabinet is sited in
suchawaythatitisintegratedintonon-
refrigerated shop equipment (fig. 9),
corresponding measures are to be
taken to ensure that the warm air can
rise freely at the cabinet top.
4 Posizionamento
4.5 Posizionamento inte-
grato
Per il posizionamento in cui il murale
refrigeratovieneintegrato(fig.9) con
elementi d’arredamento, garantire -
adottando misure adeguate - che
l’aria calda possa salire liberamente
sulla testata.
FGB I
4 Implantation
4.5 Implantation intégrée
Ence quiconcerne l’implantationlors
de laquelle la vitrine multiponts (fig.
9) est intégrée dans des matériels
d'équipement non-réfrigérés, il faut
prendredesmesuresadéquatespour
que l’air chaud puisse monter sans
encombre au plafond supérieur.
4.6 Back-to-back with
shop-around ends
When cabinets are installed back to
backwith shop-around ends(fig.10),
the cabinet is located at the end of
non-refrigeratedshop equipment.
4.6 Implantation en tête de
gondole
En cas d’implantation en tête de
gondole (fig. 10), la vitrine multiponts
est placée en tête de gondole avec
des matériels d'équipement non-
réfrigérés.
4.6 Posizionamento a
gondola
Nelposizionamentoagondola(fig.10)
il murale refrigerato viene sistemato
allatesta di elementi d'arredamento.

20
4.7 Freie Aufstellung
DasKühlregalkannohneweitereMon-
tagefreiimRaumaufgestelltwerden
(Fig. 11), da es serienmäßig eine
Rückwandverkleidungbesitzt.
Damitdas Kühlregalflexibelverscho-
ben werden kann, sollte es mit Fahr-
zubehöraufgerüstet werden.
Fahrzubehör zählt zu den Lin-
de-Zubehörteilen und kann
nachträglich bestellt werden
(Kap. 13).
Fig. 13
Fig. 11
4.8 Entfernen der Trans-
portverpackung und
der Transportsicherung
- Verpackungsbänderdurchtrennen.
- Verpackungskartonnachoben ab-
nehmen.
- Andenvier Stellfüßen jeweils zwei
Sechskantschrauben(13-1)mit ei-
nem Schlüssel (SW10) heraus-
schrauben.Transportsicherungen
(13-2) wie auf der dem Kühlregal
beiliegenden,separatenAufstellan-
leitung(Teile-Nr.868997,sieheFig.
12)gezeigt, entfernen.
- Kühlregal von der Palette (13-3)
schieben.
Beim Schieben das Gewicht
des Kühlregals (Kap. 16) be-
rücksichtigen.
Transportsicherungenfüreinen
möglichenspäteren Transport
aufbewahren.
CPR_X_042
10
CPR_X_028
Fig. 12
10
12
3
CPR_X_007
4 Aufstellung
D
This manual suits for next models
1
Table of contents
Other Linde Display Case manuals