manuals.online logo
Brands
  1. Home
  2. •
  3. Brands
  4. •
  5. LINDR
  6. •
  7. Kitchen Appliance
  8. •
  9. LINDR LINDRT GRAND Assembly instructions

LINDR LINDRT GRAND Assembly instructions

Other LINDR Kitchen Appliance manuals

LINDR CWP User manual

LINDR

LINDR CWP User manual

LINDR 3893 User manual

LINDR

LINDR 3893 User manual

LINDR PYGMY 20 User manual

LINDR

LINDR PYGMY 20 User manual

LINDR PYGMY 30/K profi User manual

LINDR

LINDR PYGMY 30/K profi User manual

LINDR Green Line PYGMY PRO KITCHEN User manual

LINDR

LINDR Green Line PYGMY PRO KITCHEN User manual

Popular Kitchen Appliance manuals by other brands

Saturn ST-EK8037 manual

Saturn

Saturn ST-EK8037 manual

BOSKA Pro 853560 instruction manual

BOSKA

BOSKA Pro 853560 instruction manual

Enders 7909 instruction manual

Enders

Enders 7909 instruction manual

Kalorik USK PPG 37241 operating instructions

Kalorik

Kalorik USK PPG 37241 operating instructions

Scarlett SC-FD421001 instruction manual

Scarlett

Scarlett SC-FD421001 instruction manual

FoodSaver V4925 owner's manual

FoodSaver

FoodSaver V4925 owner's manual

Course	Housewares B416144 quick start guide

Course Housewares

Course Housewares B416144 quick start guide

AEG SANTO Series operating instructions

AEG

AEG SANTO Series operating instructions

Melissa 643-036 instruction manual

Melissa

Melissa 643-036 instruction manual

cecotec ROCK'NTOAST 3IN1 instruction manual

cecotec

cecotec ROCK'NTOAST 3IN1 instruction manual

Gourmia GMF225 instructions

Gourmia

Gourmia GMF225 instructions

Electrolux EKM7 Series Instruction book

Electrolux

Electrolux EKM7 Series Instruction book

Magio MG-965 instruction manual

Magio

Magio MG-965 instruction manual

Keimling Naturkost Excalibur 56301WH Operation manual

Keimling Naturkost

Keimling Naturkost Excalibur 56301WH Operation manual

Beper 90.071 use instructions

Beper

Beper 90.071 use instructions

Geryon E2900-M user manual

Geryon

Geryon E2900-M user manual

Morphy Richards 46718 owner's manual

Morphy Richards

Morphy Richards 46718 owner's manual

Kenwood A995 manual

Kenwood

Kenwood A995 manual

manuals.online logo
manuals.online logoBrands
  • About & Mission
  • Contact us
  • Privacy Policy
  • Terms and Conditions

Copyright 2025 Manuals.Online. All Rights Reserved.

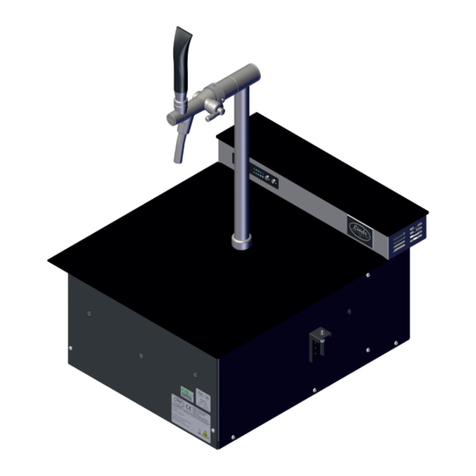
Návod na montáž Výčepního stojanu Lindr T GRAND
1. Vyjměte nohu stojanu č.1 z balení a připravte na desku stolu. Vyberte správné umístění stojanu, tak
aby špičky výčepních kohoutů směřovaly do 1/3 odkapní misky od stojanu viz nákres.
2. Vyvrtejte do desky stolu 4 otvory o Ø 10mm pro montážní šrouby, které budou umístěny v každém z
rohů základny nohy, dále pak otvor o Ø 48-80mm pro zapojení nápojového vedení, který bude mít
střed v průsečíku otvorů pro šrouby viz šablona.
3. Nohu stojanu připevněte k výčepní desce protažením šroubů č.20 vyvrtanými otvory, ze spodu
výčepní desky nasuňte na šrouby podložky č.21 a zajistěte maticemi č.22.
4. Na nohu stojanu nasaďte vlastní tělo stojanu č.3 a pootočením zajistěte.
5. Na šroubení krajních kohoutů nasaďte distanční kroužky č.11 a na středový kohout distanční kroužek
č.11 a distanční trubku č.10.
6. Do otvorů v těle stojanu umístěte výčepní kohouty a zajistěte pomocí spojovacího materiálu.
7. Protáhněte stojanem kabely pro osvětlení, zapojení viz el. schéma.
8. Na držák reklamy č. 12 (15) nasuňte trubku reklamy č.13 (16) a lehce zajistěte pomocí stavěcích
šroubů (červíků) a takto sestavené přišroubujte pomocí šroubů na tělo stojanu č.3.
9. Zapojte napájecí trafo do el. sítě, na taplite č.14(17) připojte konektor (pokud nebude svítit,
konektor otočte), zasuňte taplite č.14(17) do trubky reklamy č.13 (16) a dotáhněte zlehka stavěcí
šrouby (červíky).
10. Zapojte nápojové vedení.
11. Umístěte do výřezů boční reklamu č.9.
12. Přišroubujte spojky č.7 zajistěte šrouby č. 18 a 1 ks spojky nohy č.4 a zajistěte šrouby č.19
13. Přišroubujte vrchní kryt č.8
Body 7-9 pouze pro verzi s osvětlením.
Montážní video:
https://youtu.be/nzS6usQkHg0
Instructions for assembly –Dispense Tower Lindr T GRAND
1. Remove the leg of stand No.1 from the box and prepare on the desk. Choose the correct
location for the tower so that the tip of the taps are directed to the 1/3 of drip tray from the
tower, as shown on the drawing.
2. Drill 4 holes to the table top with a diameter of 10 mm for mounting bolts, which will be
located at each corner of the leg´s base, then drill another hole with diameter 48-80 mm for
connecting the beverage line, see template.
3. Attach the leg of the stand to a bar desk by passing the screws No.20 through the drilled
holes. From the bottom of the bar desk slide the washers No.21 onto the screws and lock
with nuts No.22.
4. Fit the body of the stand No.3 onto the leg of the stand and twist to secure.
5. Attach the spacers No.11 on the outer fitting of taps, for the central tap put a ring spacer
No.11 and No.10.
6. Place the taps into the holes in the body of the tower and secure with fasteners.
7. Pull the cables for lighting through the tower, see. diagram.
8. Slide the stainless steel ring No.13 (16) onto the advertising holder no. 12 (15) and lightly
secure with set screws and thus assembled with the screws on the body stand No.3.
9. Plug the power transformer into electrical network, taplite No.14 (17), connect (if it is not
lit, turn the connector), insert the taplite No.14 (17) into the advertising tube No.13 (16)
and lightly tighten the set screws.
10. Connect the beverage line.
11. Place the side advertising No.9. into the cutouts.
12. Screw the couplings No.7, secure with srews No. 18 and 1 pc. of leg coupling No.4 and secure
by the screws No.19.
13. Screw the top cover No.8
Points 7-9 only for version with lighting.
Assembly video:
https://youtu.be/nzS6usQkHg0
120
150 150
101,60
203203
120
95 450
M
8
326
87
406
122
222
120
150 150
101,60
203203
120
95 450
M
8
326
87
406
122
167
267
101,60
150 150150 150
353 353
120
706
122
222
120
M
8
95 450
326
87
101,60
150 150150 150
353 353
120
706
267
122
167
120
M
8
95 450
326
87
1
20
4 x
21
4 x
22
4 x
11
3 x
10
919
2 x
4
18
4 x
9
7
2 x
8
12
3 x
13
3 x
14
3 x
15
3 x
16
3 x
17
3 x
3
1
20
4 x
21
4 x
22
4 x
11
5 x
10
9
18
2 x
4
19
8 x
9
7
4 x
8
12
5 x
13
5 x
14
5 x
15
5 x
16
5 x
17
5 x
3
M 1:6
1
20
4 x
21
4 x
22
4 x
11
5 x
10
9
18
2 x
4
19
8 x
9
7
4 x
8
12
5 x
13
5 x
14
5 x
15
5 x
16
5 x
17
5 x
3
M 1:6
AC/DC adapter
Model: FD41VD-5-500
PRI: 230-240V ~ 50Hz 0,1A
SEC: 5.0V = 500mA
5 Volt DC
5 Volt DC
Taplite
5V DC
Taplite
5V DC
Taplite
5V DC
Taplite
5V DC
Taplite
5V DC
Zapojení osvětlení
LE0548
Platný od datumu vydání
-
CZ
konst02
Oddělení Technický referent Kreslil Přezkoušel
Druh dokumentu Status dokumentu
Název, doplňující název Č. dokumentu
1/1
Změna
Datum vydání Jazyk
01.02.2017
List
Měřítko