Benutzerhandbuch Deutsch
Einführung
Wir freuen uns, dass Ihre Wahl auf ein LINDY-Produkt gefallen ist und danken Ihnen für Ihr Vertrauen. Sie
können sich jederzeit auf unsere Produkte und einen guten Service verlassen. Dieser 100m Cat.6 HDMI
4K60, Audio, IR & RS232 HDBaseT Extender unterliegt einer 2-Jahres LINDY Herstellergarantie und
lebenslangem kostenlosen, technischen Support. Bitte lesen Sie diese Anleitung sorgfältig und bewahren
Sie sie auf. Der Lindy C6 HDBaseT HDMI 18G & IR Extender ist eine leistungsstarke Komplettlösung für
die Übertragung von HDMI-Signalen über große Entfernungen via Cat.6-Netzwerkkabel. HDBaseT ist ein
weltweit anerkannter Standard für die qualitativ hochwertige Verteilung von AV-Inhalten und anderen
Technologien, einschließlich Strom und Steuerungsdaten, über größere Entfernungen mit
kostengünstigen Cat.6- Kabeln (oder höher). Durch die Unterstützung von Auflösungen bis zu 4K Ultra
HD können Videos in atemberaubender Klarheit wiedergegeben werden. Die zusätzliche Unterstützung
von HDR (High Dynamic Range) ermöglicht die Darstellung von Inhalten mit verbesserter Helligkeit,
größeren Schwarz- und Weißkontrasten und einem viel breiteren Farbspektrum. Somit steht eine
zuverlässige Lösung für auffälliges Digital Signage im Einzelhandel, immersive Displays bei
Veranstaltungen oder ansprechende Setups in größeren Konferenzräumen oder Vorlesungssälen zur
Verfügung. HDBaseT™ und das HDBaseT Alliance-Logo sind eingetragene Warenzeichen der HDBaseT
Alliance. Bitte beachten Sie: Die angegebenen Längen und Auflösungen sind bei einer direkten
Verbindung zwischen Sender und Empfänger mit einem hochwertigen Cat.6-Kabel möglich. Die
Verwendung eines anderen Kabeltyps oder der Einsatz von Wandplatten, Kopplern oder Patchpanels
kann zu einer Reduzierung der angegebenen Entfernungen führen.
Lieferumfang
38340
▪HDBaseT HDMI Extender, Transmitter & HDBaseT HDMI Extender, Receiver
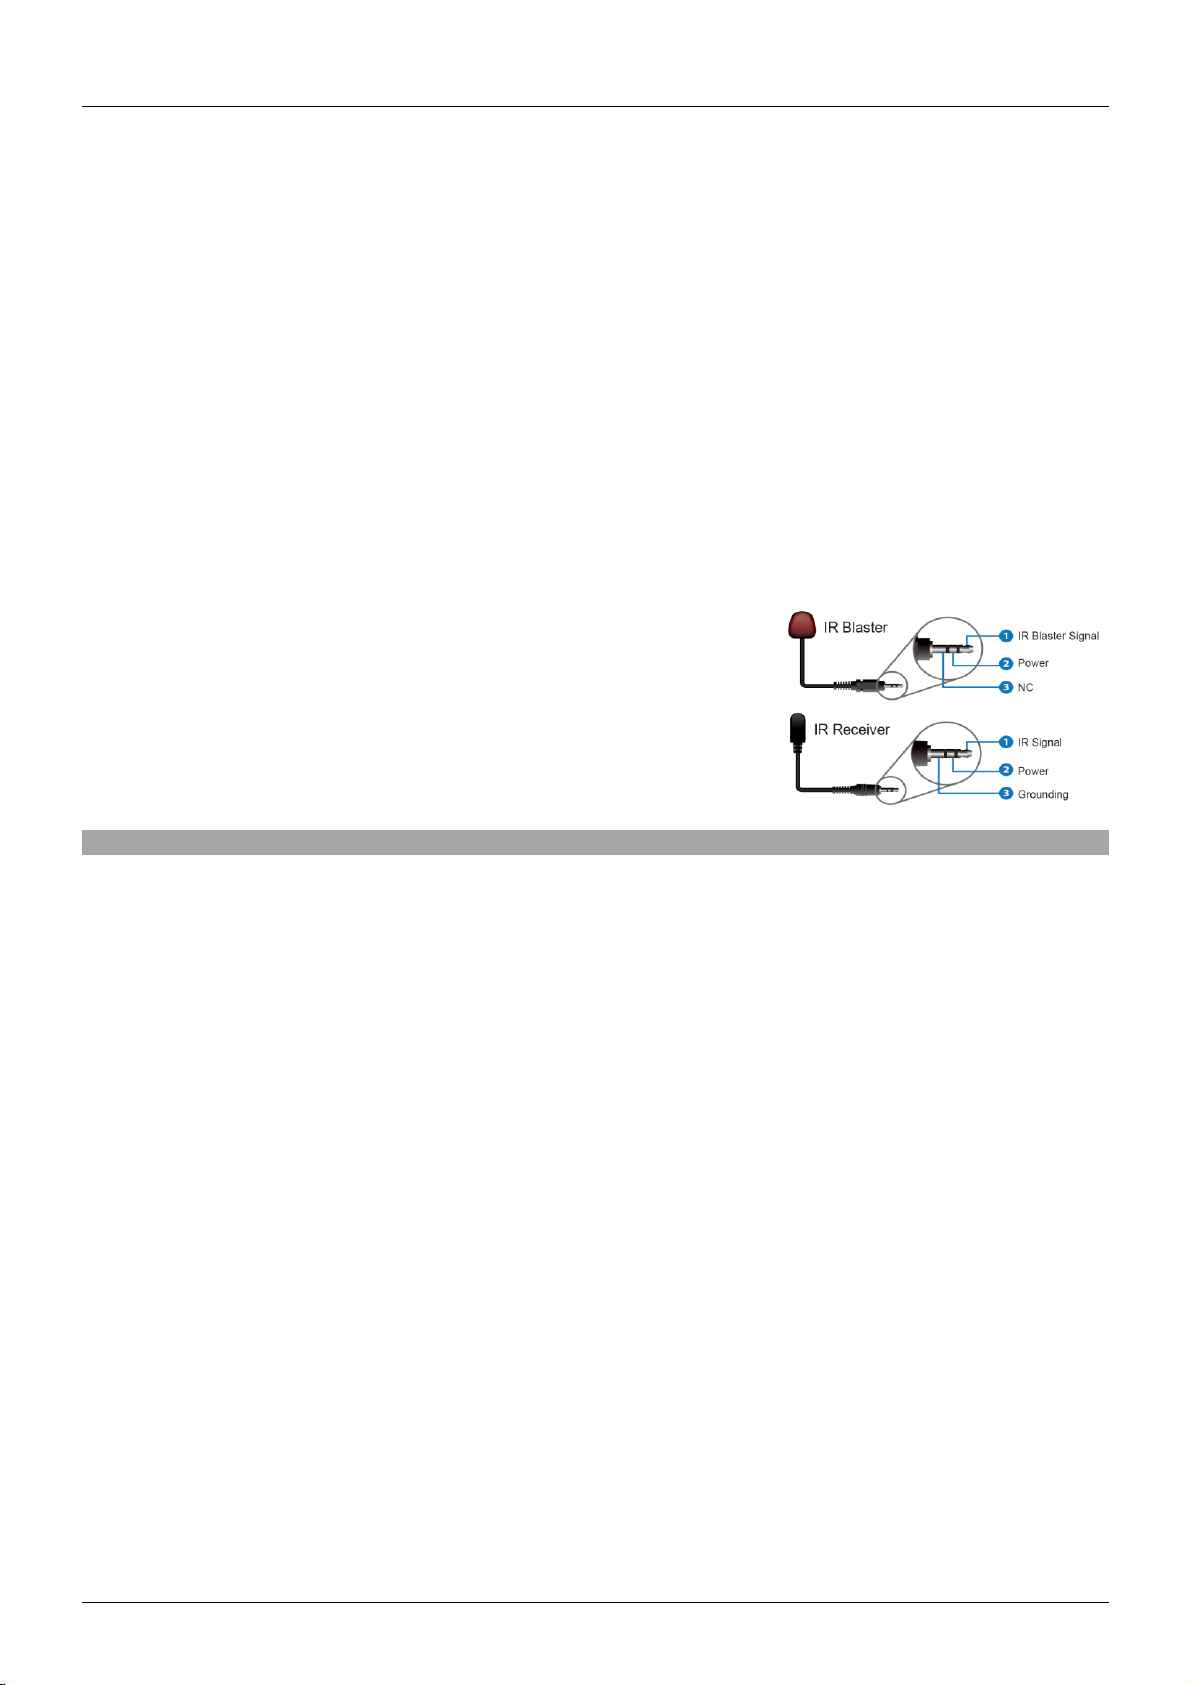
▪IR-Emitterkabel, 1.5m & IR-Receiverkabel, 1.5m
▪4 x Montagehalterung & 8x Schrauben
▪2 x 3-Pin Terminal Blocks
▪24VDC 1A Multi-Country Netzteil (EU, UK, US & AUS), DC-Buchse mit verschraubbarem Anschluss:
5.5/2.1mm
▪Lindy Handbuch
38341
▪HDBaseT HDMI Extender, Transmitter
▪IR-Emitterkabel, 1.5m & IR-Receiverkabel, 1.5m
▪2 x Montagehalterung & 4x Schrauben
▪3-Pin Terminal Block
▪24VDC 1A Multi-Country Netzteil (EU, UK, US & AUS), DC-Buchse mit verschraubbarem Anschluss:
5.5/2.1mm
▪Lindy Handbuch
38342
▪HDBaseT HDMI Extender, Receiver
▪IR-Emitterkabel, 1.5m & IR-Receiverkabel, 1.5m
▪2 x Montagehalterung & 4x Schrauben
▪3-Pin Terminal Block
▪24VDC 1A Multi-Country Netzteil (EU, UK, US & AUS), DC-Buchse mit verschraubbarem Anschluss:
5.5/2.1mm
▪Lindy Handbuch