This product is subject to continuous technological development.
The OSD and the functionality may differ slightly from the one described here 3
The transmitter and receiver are connected with shielded Cat.5e/6/7 or LC-duplex cables. To achieve
maximum distances using cat. 6/7 direct connection please use high-quality solid core CAT 6 or higher cable,
E.g. LINDY no. 12047 / 12048.
Connect the power supply and switch on all devices. After connecting or
turning on, the transmitter and receiver automatically perform a cable or
connection test and calibrationfor approximately 5-10 seconds. During this
process the status LED on the front panel will flash different colours; the
meaning also is printed on the front panel.
When using HDMI monitors and HDMI/DP graphic cards colour distortions may occur because the EDID
signal of the monitor is forwarded by the Extender. In this case, set the graphics output to RGB signal, max.
32 bit or 8 bit colour depth, without HDCP. Or use a DVI output on the graphic card. Alternatively the DDC
settings of the extender can be set to a fixed preset value –see further below.
USB connections are hot pluggable. It is normal that after plugging a USB device this must be first recognized
and re-loaded. Via the Extender, a slightly larger amount of time is required for this than for direct computer
connections.
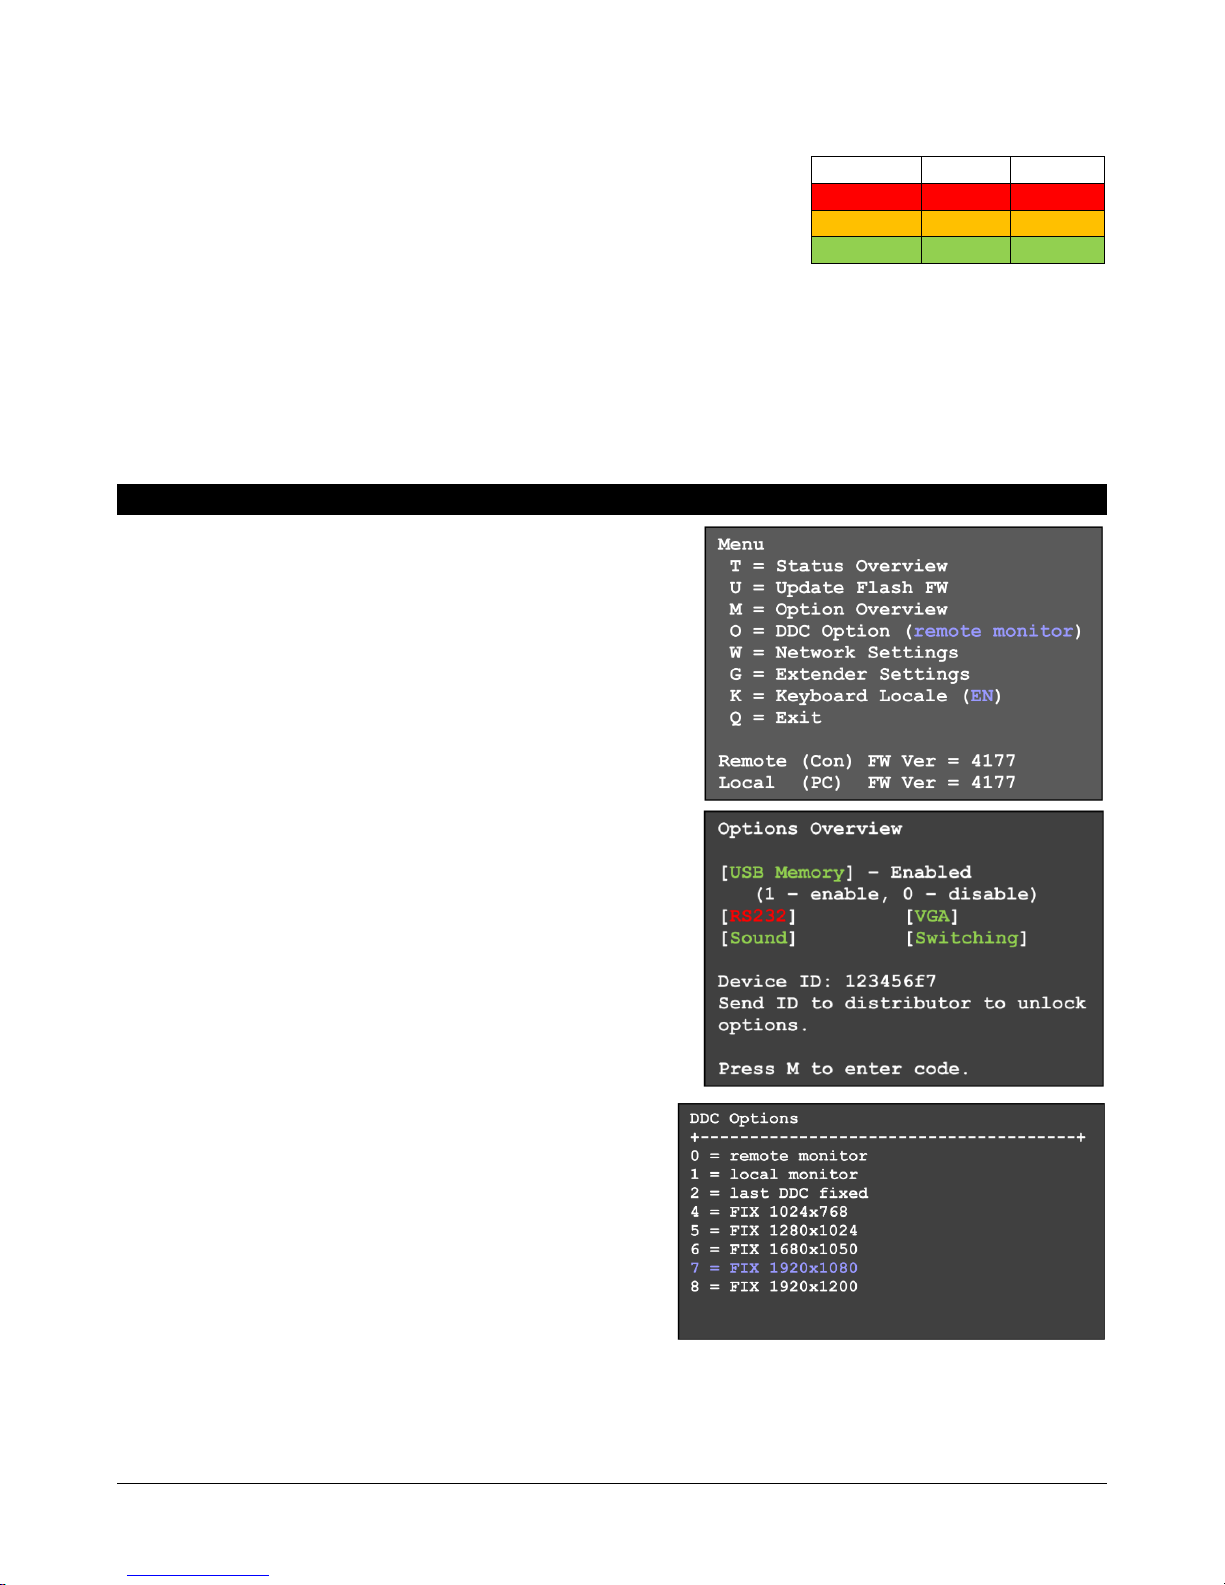
On Screen Menu
In the on screen menu device settings can be configured and
displayed. It also is used to update the firmware as well as for
activation of fee-based upgrade options like mass storage,
audio, VGA, RS232, and the switching option.
By security reason (configurable setting) the on screen menu
can be accessed only in the first few minutes after switching
on the Extender. To access the OSD the "Scroll Lock" key on
the keyboard must be pressed 5 times in quick succession. If
the OSD does not appear because the lock function is already
active, turn the Extender off/on and try again.
Menu item "U" is used to perform a firmware update. The
firmware is available on request at the LINDY tech support.
Menu item "M" indicates the installed options. The USB mass
storage support may temporarily be switched off if installed. To
change the options, you must purchase a fee-based activation
code dependent on the device ID for each RX. Note the device
ID displayed in the menu and contact LINDY support. This
activation code can be entered after entering the command "M"
in this menu.
Menu item "O" adjusts the treatment of the DDC/EDID
data. 0 or 1 defines to use the data of either the remote or
local monitor; the other settings define to use preset
EDID/DDC and resolutions.
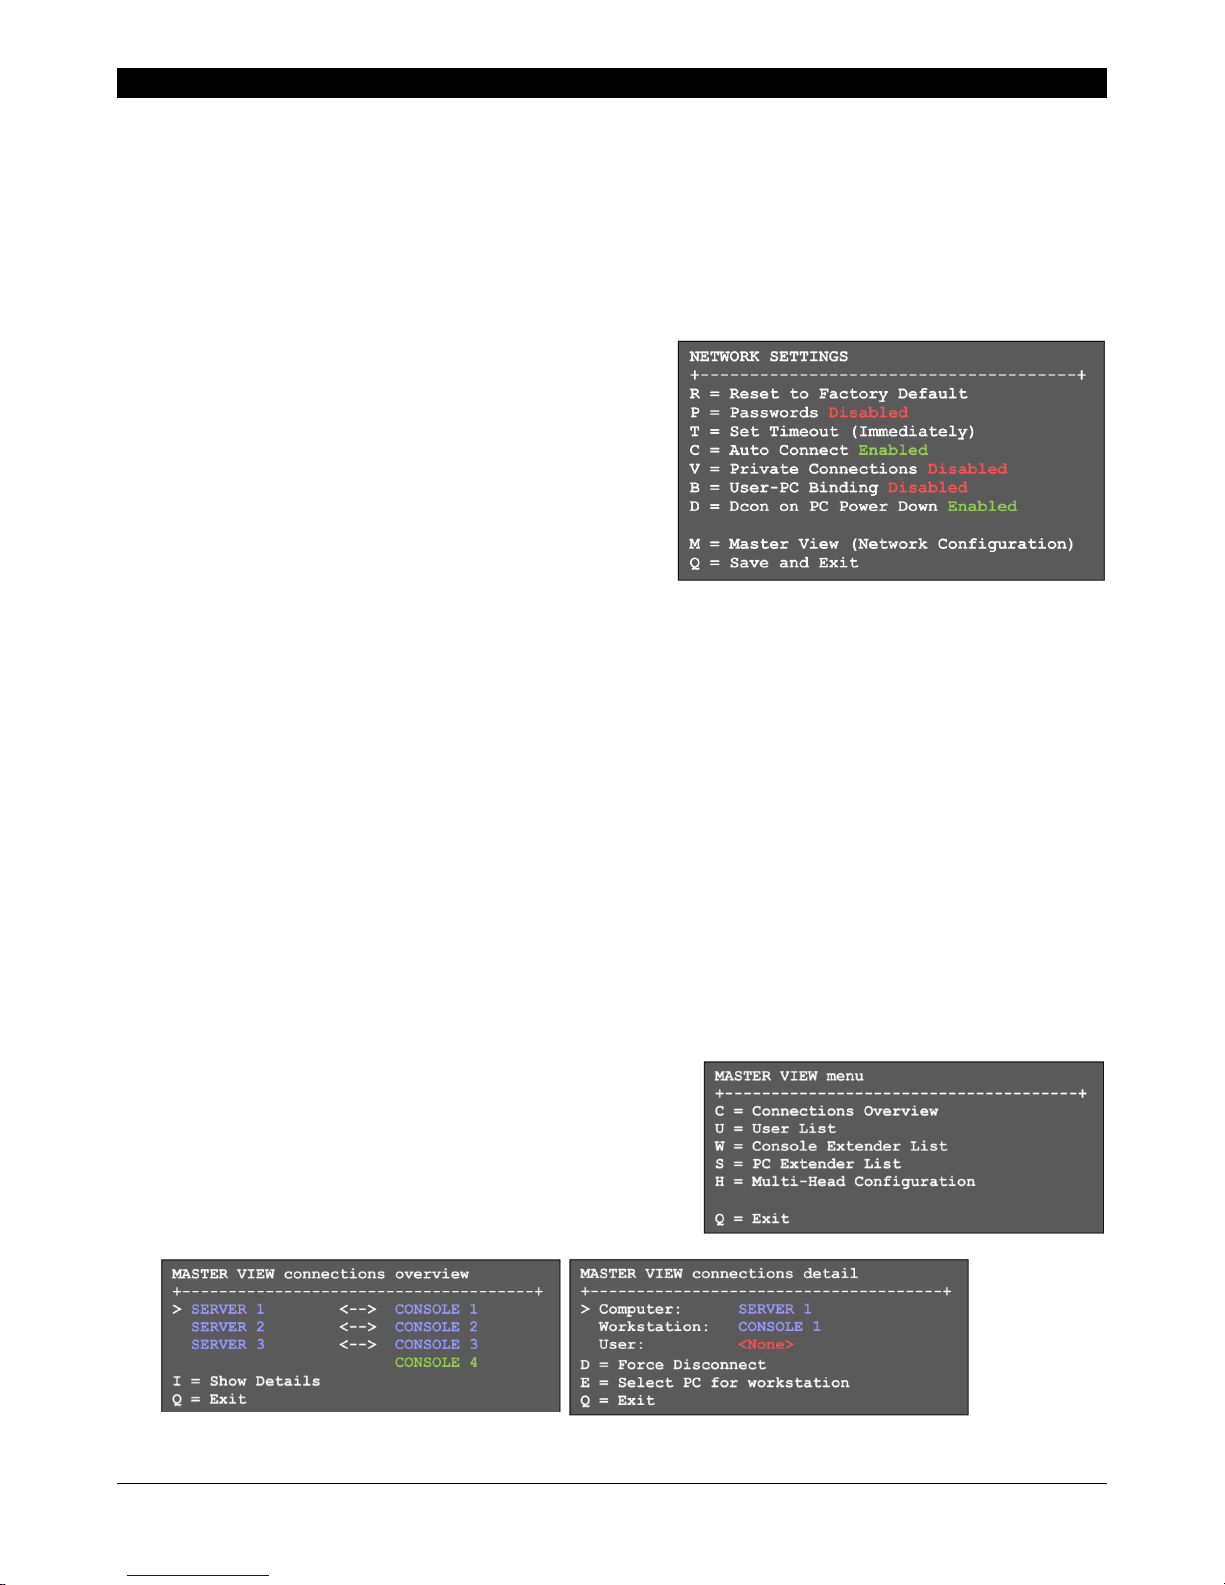
Menu item "W" - network settings: refer to the switching
section.
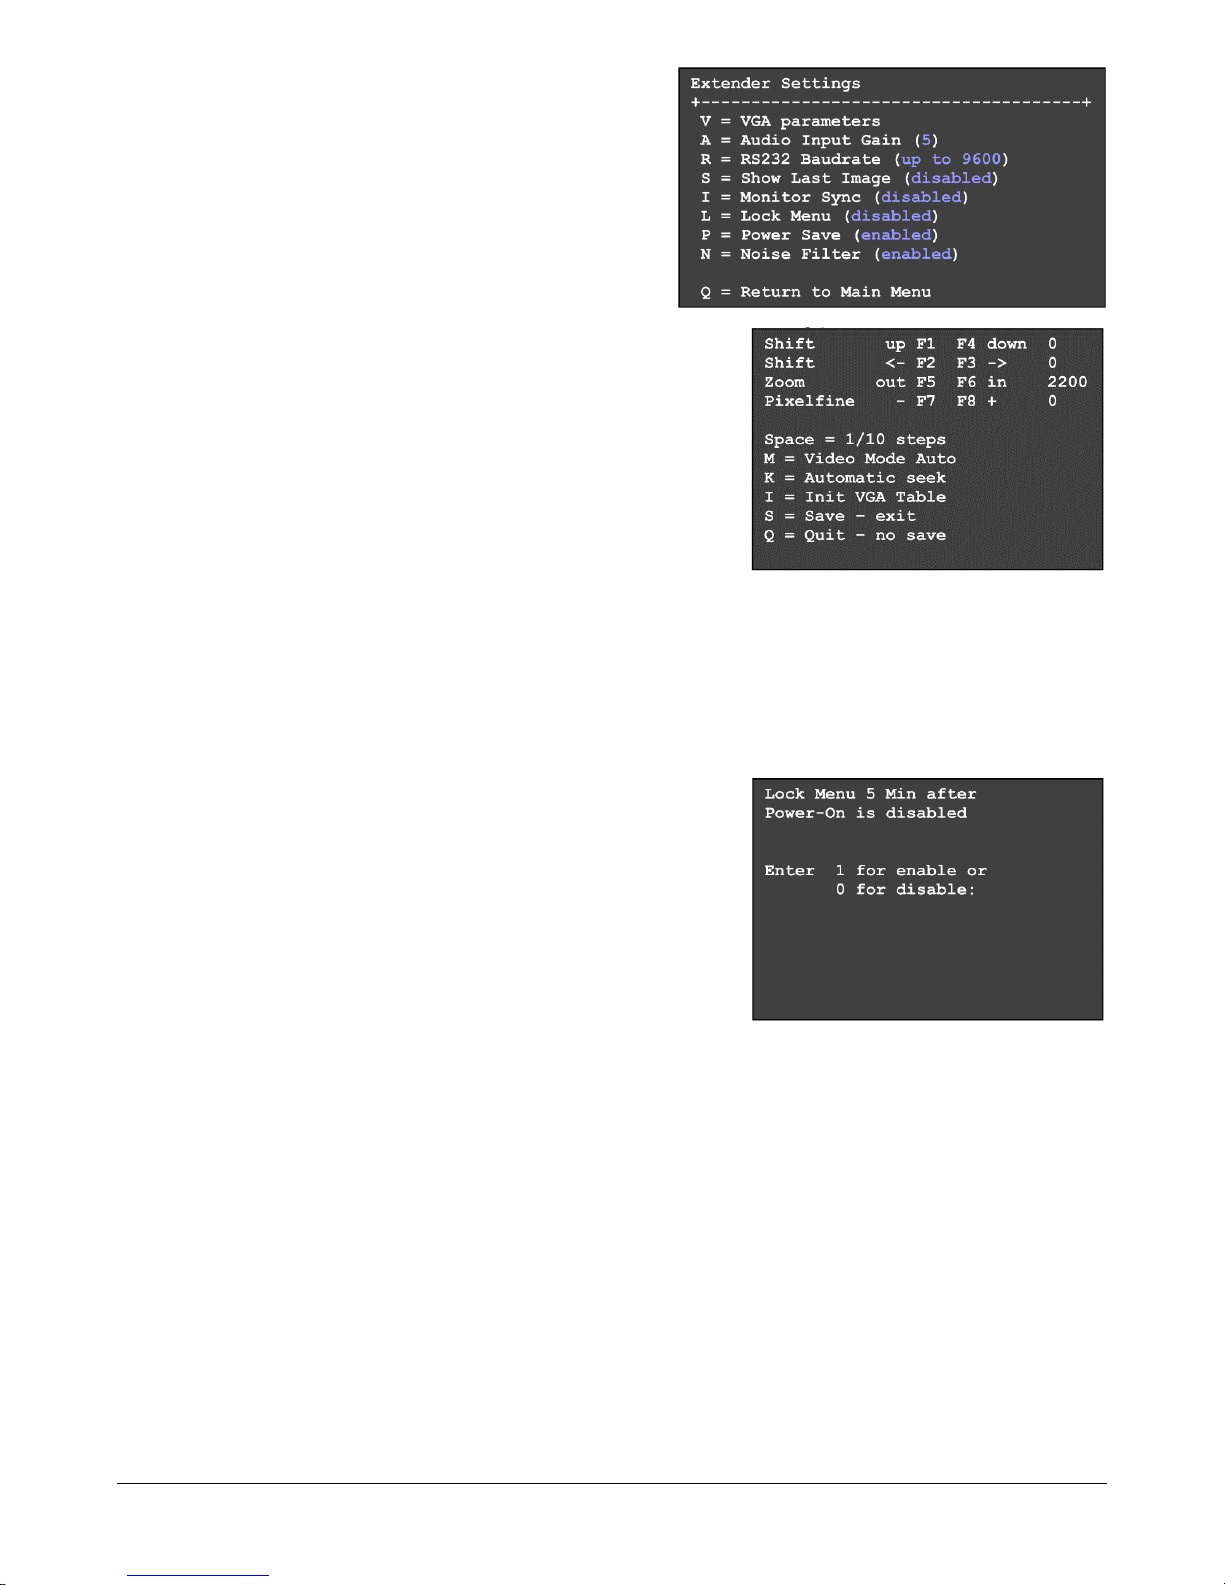
Sub-menu item "K" - keyboard language. Currently, the
language layout can be selected between German, English,
French. Swiss and Italian may be added in the future.