manuals.online logo
Brands
  1. Home
  2. •
  3. Brands
  4. •
  5. Linear
  6. •
  7. Transmitter
  8. •
  9. Linear miniTransmitter Delta-3 Series Administrator guide

Linear miniTransmitter Delta-3 Series Administrator guide

Other Linear Transmitter manuals

Linear DXS-32 User manual

Linear

Linear DXS-32 User manual

Linear DXS-32/EC User manual

Linear

Linear DXS-32/EC User manual

Linear DXS-64 User manual

Linear

Linear DXS-64 User manual

Linear LINEARCOM3000 User manual

Linear

Linear LINEARCOM3000 User manual

Linear MegaCode MCT-3 User manual

Linear

Linear MegaCode MCT-3 User manual

Linear XT-1H User manual

Linear

Linear XT-1H User manual

Linear DT-3 Plus 1 Administrator guide

Linear

Linear DT-3 Plus 1 Administrator guide

Linear DX DXT-41 User manual

Linear

Linear DX DXT-41 User manual

Linear DOOR/WINDOW TRANSMITTER DXT-31 User manual

Linear

Linear DOOR/WINDOW TRANSMITTER DXT-31 User manual

Linear DT-2A Administrator guide

Linear

Linear DT-2A Administrator guide

Linear DX DXT-61 Technical manual

Linear

Linear DX DXT-61 Technical manual

Linear MDT User manual

Linear

Linear MDT User manual

Linear XT-4 User manual

Linear

Linear XT-4 User manual

Linear Delta-3 DTG User manual

Linear

Linear Delta-3 DTG User manual

Linear MVP User manual

Linear

Linear MVP User manual

Linear Multi-code 4140 User manual

Linear

Linear Multi-code 4140 User manual

Linear Multi-Code MCS307010 User manual

Linear

Linear Multi-Code MCS307010 User manual

Linear GT-31 User manual

Linear

Linear GT-31 User manual

Linear 2 GIG 2GIG-Z-BRDG-433 Configuration guide

Linear

Linear 2 GIG 2GIG-Z-BRDG-433 Configuration guide

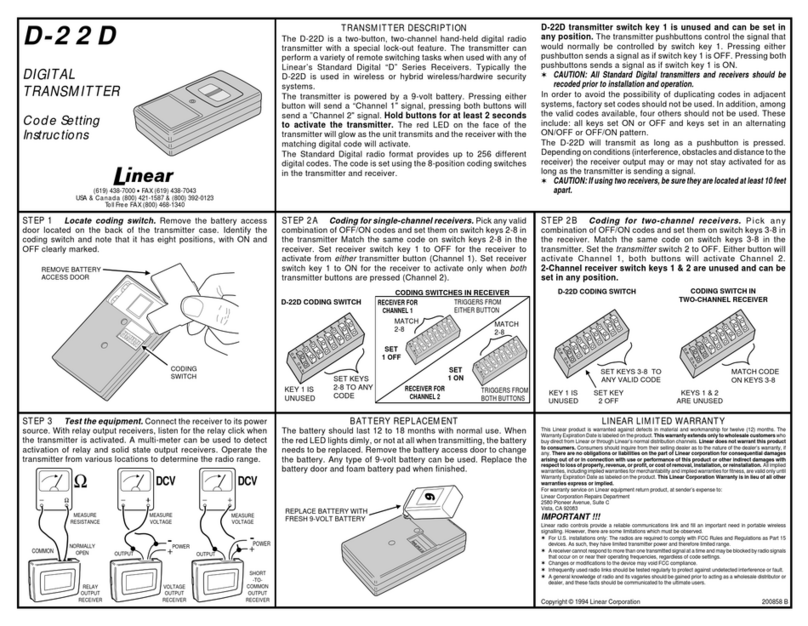
Linear D-22D Administrator guide

Linear

Linear D-22D Administrator guide

Linear MULTI-CODE 4140 User manual

Linear

Linear MULTI-CODE 4140 User manual

Linear DXS-64 User manual

Linear

Linear DXS-64 User manual

Linear AT7400 User manual

Linear

Linear AT7400 User manual

Linear ET-2 User instructions

Linear

Linear ET-2 User instructions

Popular Transmitter manuals by other brands

Seneca K120RTD installation manual

Seneca

Seneca K120RTD installation manual

Nautel GV40 installation manual

Nautel

Nautel GV40 installation manual

HumanTechnik cm-light operating instructions

HumanTechnik

HumanTechnik cm-light operating instructions

INOR APAQ C130 TC User instructions

INOR

INOR APAQ C130 TC User instructions

FeinTech ABT00102 instruction manual

FeinTech

FeinTech ABT00102 instruction manual

Geo Web Pack quick start guide

Geo

Geo Web Pack quick start guide

Inovonics EchoStream EN1210W installation instructions

Inovonics

Inovonics EchoStream EN1210W installation instructions

IKONNIK KA-6 quick start guide

IKONNIK

IKONNIK KA-6 quick start guide

Rohde & Schwarz SR8000 Series System manual

Rohde & Schwarz

Rohde & Schwarz SR8000 Series System manual

Audio Technica UniPak ATW-T93 Installation and operation

Audio Technica

Audio Technica UniPak ATW-T93 Installation and operation

NIVELCO EasyTREK SCA-300 Series Programming manual

NIVELCO

NIVELCO EasyTREK SCA-300 Series Programming manual

Honeywell 5816WMBR installation instructions

Honeywell

Honeywell 5816WMBR installation instructions

Kamstrup READy MTU Installation and operation guide

Kamstrup

Kamstrup READy MTU Installation and operation guide

Omega ZW Series user guide

Omega

Omega ZW Series user guide

ABB Field 264H Instructions for installation

ABB

ABB Field 264H Instructions for installation

Dejero EnGo 3x manual

Dejero

Dejero EnGo 3x manual

Rosemount 4600 Reference manual

Rosemount

Rosemount 4600 Reference manual

RKI Instruments M2A 65-2643RK-05-04 Operator's manual

RKI Instruments

RKI Instruments M2A 65-2643RK-05-04 Operator's manual

manuals.online logo
manuals.online logoBrands
  • About & Mission
  • Contact us
  • Privacy Policy
  • Terms and Conditions

Copyright 2025 Manuals.Online. All Rights Reserved.

FCC & IC Notice
This device complies with Part 15 of the FCC Rules and Industry Canada
license exempt standard(s). Operation is subject to the following two
conditions:
1) This device may not cause harmful interference, and
2) This device must accept any interference received, including
interference received that may cause undesired operation.
Le présent appareil est conforme aux CNR d’Industrie Canada
applicables aux appareils radio exempts de licence. L’exploitation est
autorisée aux deux conditions suivantes:
1) l’appareil ne doit pas produire de brouillage, et
2) l’utilisateur de l’appareil doit accepter tout brouillage
radioélectrique subi, même si le brouillage est susceptible d’en
compromettre le fonctionnement.
WARNING: Changes or modications not expressly approved by the
manufacturer could void the user’s authority to operate the equipment.
IMPORTANT !!!
Linear radio controls provide a reliable communications link and ll an
important need in portable wireless signaling. However, there are some
limitations which must be observed.
• For U.S. installations only: The radios are required to comply with
FCC Rules and Regulations as Part 15 devices. As such, they have
limited transmitter power and therefore limited range.
• A receiver cannot respond to more than one transmitted signal at
a time and may be blocked by radio signals that occur on or near
their operating frequencies, regardless of code settings.
• Infrequently used radio links should be tested regularly to protect
against undetected interference or fault.
• A general knowledge of radio and its vagaries should be gained
prior to acting as a wholesale distributor or dealer, and these facts
should be communicated to the ultimate users.
Delta-3 Series
miniTransmitter
Digital Transmitter
Code Setting Instructions
USA & Canada (800) 421-1587 & (800) 392-0123
(760) 438-7000 - Toll Free FAX (800) 468-1340
www.nortekcontrol.com
Copyright © 2019 Nortek Security & Control LLC 106914 E
PRINTER’S INSTRUCTIONS:
INSTR,CODE SET,MINI XMTR - P/N: 106914 E - INK: BLACK - MATERIAL: 20 LB. MEAD BOND - SIZE: 8.500” X 5.500” - TOLERANCE +/- .125” SCALE: 1-1 - PRINT 2 SIDES
LIMITED WARRANTY
This Nortek Security & Control LLC product is warranted against defects
in material and workmanship for twenty-four (24) months. This warranty
extends only to wholesale customers who buy direct from Nortek or
through Nortek’s normal distribution channels. Nortek Security & Control
LLC does not warrant this product to consumers. Consumers should
inquire from their selling dealer as to the nature of the dealer’s warranty,
if any. There are no obligations or liabilities on the part of Nortek Security
& Control LLC for consequential damages arising out of or in connection
with use or performance of this product or other indirect damages
with respect to loss of property, revenue, or prot, or cost of removal,
installation, or reinstallation. All implied warranties, including implied
warranties for merchantability and implied warranties for tness, are
valid only until the warranty expires. This Nortek Security & Control LLC
Warranty is in lieu of all other warranties express or implied.
All products returned for warranty service require a Return Authorization
Number (RA#). Contact Nortek Security & Control Returns at
1-855-546-3351 for an RA# and other important details.
WARNING: Changes or modications not expressly approved by the
manufacturer could void the user’s authority to operate the equipment.
NOTE: This equipment has been tested and found to comply with the
limits for a Class B digital device, pursuant to Part 15 of the Federal
Communications Commission (FCC) rules. These limits are designed
to provide reasonable protection against harmful interference in
a residential installation. This equipment generates, uses and can
radiate radio frequency energy and, if not installed and used in
accordance with the instructions, may cause harmful interference to
radio communications. However, there is no guarantee that interference
will not occur in a particular installation. If this equipment does cause
harmful interference to radio or television reception, which can be
determined by turning the equipment off and on, the user is encouraged
to try to correct the interference by one or more of the following
measures:
• Reorient or relocate the receiving antenna.
• Increase the separation between the equipment and receiver.
• Connect the equipment into an outlet on a circuit different from
that to which the receiver is connected.
• Consult the dealer or an experienced radio/TV technician for help.
DESCRIPTION
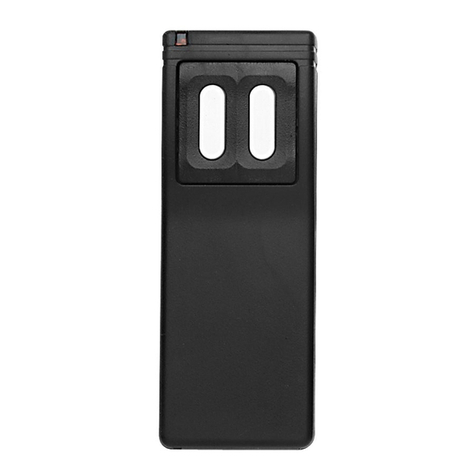
The miniTransmitter is one of the smallest portable signaling
units manufactured by Linear. This wireless transmitter owes
its miniature size to state-pf-the-art circuit technology. Only
5/8 inches thick, the miniTransmitter measures 1-3/8 inches
wide by 1-7 /8 inches high. It is compatible with all Linear
standard digital receivers.
CHOOSING A CODE
To code the miniTransmitter with the receiver it operates, set
the eight-digit system code to the precise digital system code
set in the receiver. Do not retain the original factory-set code.
TWIST LOOPS
TO REMOVE
DOOR
REMOVE BATTERY TO
ACCESS CODE
SWITCH
Figure 1: Coding Switch Location
Figure 2: Toggle Coding Switch
In addition, among the 256 valid codes available, four of them
should not be used because they are too often duplicated.
These codes are (1) all ON; (2) all OFF; (3) alternating ON/OFF;
(4) alternating OFF/ON.
CODE SWITCH LOCATION
Remove the battery cover and battery (see Figure 1), to access
the miniTransmitter's toggle coding switch (see Figure 2).
SWITCHES 1, 4,
AND 7 ARE ON
CODE SETTING
The coding is performed simply by using a paper clip or
similarly pointed object (not a pencil or pen) to ip the eight
switches to On or OFF position. A toggle switch set to the
system code 1, 4, 7 ON appears in Figure 2.
Reinstall battery observing polarity. Replace battery cover.
CHECK-OUT AND TEST
After matching the digital code set in the transmitter to the
receiver code, test the system.
CAUTION: Be sure the door or gate is in sight and the area is
clear prior to testing.
To test the transmitter, perform the following steps.
Step 1: Move at least 6 feet away from the receiver, and push
the miniTransmitter button. Receiver activation indicates that
the transmitter is operating properly and that the transmitter/
receiver's digital codes are correctly matched.
NOTE: The miniTransmitter transmits continuously while the
button is held down, terminating when the button is released.
Step 2: Operate the transmitter from various locations within
the area where it will be used. This will help to locate possible
null areas where structural steel and/or certain appliances may
interfere with transmission.
NOTE: If the transmitter fails to activate the
receiver, first check the coding switches in
the receiver to make sure that the receiver's
digital code system matches that of the
miniTransmitter.
Next, check the battery and replace it if it’s
weak.
Although the battery should last for two years
with normal use, it’s good practice to install a
new battery every year.
A slowly flashing or steadily lit LED on the
transmitter indicates that the battery is too
low for transmission to occur. A rapidly
flickering light during transmission indicates
that the unit is operating properly.