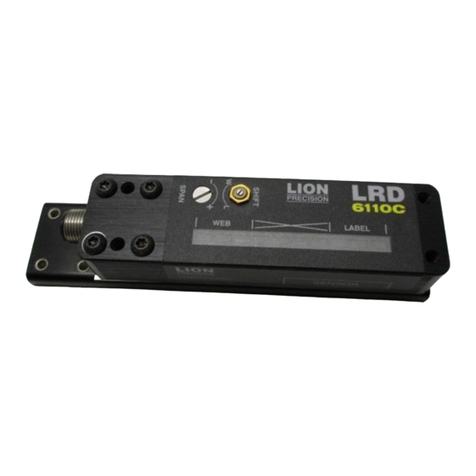
Setup Procedure
1. Web must remain in contact with the mounting plate.
2. Label must pass under the [-SENSOR-] indicator.
3. Small labels should be centered under the [-SENSOR-] indicator.
4. When properly setup, the lights will move between WEB and LABEL. The lights in the
“X” region should only light briefly during the transition between WEB and LABEL
regions.
Sensor Setup
1. Turn Span at least four turns counter-clockwise, then
two turns clockwise (this is the mid-point of the
adjustment range)
The adjustment can be over turned without damage.
2. Place web (liner) only in sensor
3. Adjust Shift until LED #2 is on, then adjust Shift just to
the point where LED #1 is on.
WARNING: The Shift adjustment will break if turned too
far. Do NOT exert extra force when adjustment stops
turning.
4. Slowly move a label gap through the sensor and verify
that the indicator lights LED#1 as the gap passes
through the sensor. If it does not, adjust Shift as
necessary until it does.
5. Setup complete
If the setup does not give reliable results (usually for labels
less than 1"), turn Span four turns clockwise (maximum gain)
and repeat steps 2-5. It is important that the indicator only
cross the “X” region during transition from web to label.
See the LRD6110 setup video at www.labelsensors.com
Notes:
1) The LRD6110 may not work reliably with solid foil labels. For solid foil labels, use
the LRD8200
Two-Year Warranty details at: www.lionprecision.com/warranty.html
