Lion Precision LRD6300 User manual

Light/Dark Switching Outputs
Dark
Light
Outputs
Outputs
L / D
L / D
Mechanical Detail
5.50"
1.00"
25.4mm
1.25"
0.30"
7.6mm
1.085"
27.6mm
Gap 0.03"
0.76mm
3.4"
86.4mm
1.20"
30.5mm
0.80"
20.3mm
0.60"
15.2mm
0.20"
5.1m
m
0.60"
15.2mm
M4x.7
(x4) 140mm
31.8mm
Specifications
Power supply Voltage 12-24 VDC (reverse polarity protected)
Current 80mA max
Response time On or Off 20 µs max
Switching Frequency 10 kHz max
Output Output Current (sinking or sourcing) 150 mA max (overload protected)
Switching output PNP or NPN, dark or light switching
Temperature Operating Range 40°F to 140°F (4°C to 60°C)
Protections Supply Inverse Polarity Protection
Switching output Short Circuit and Overload Protection
Two-Year Warranty details at: www.lionprecision.com/warranty.html
User’s Guide
for the
LRD6300 and LRD6300C
Label Sensors
Lion Precision
St. Paul, MN, USA
651-484-6544
www.lionprecision.com
Document Number: M017-6300.004
Description
The Lion Precision LRD6300 Label Sensor uses capacitive technology to sense label edges for
registration, counting, splice detection or other applications. Capacitive technology provides the
fastest and most accurate edge detection method available.
The LRD6300 has an integral cable; the LRD6300C has an M12 connector.
Connecting to the Sensor
Warnings:
Sensor body is connected to Ground.
Sensors must not be attached to voltages in excess of 30VRMS or 60VDC.
All power must be off when installing the sensor.
Use of the equipment in any other manner may impair its safety and EMI protections.
Some older model LRD sensors have different wire colors. If you are replacing an older/other model,
the “Other Model Color Reference” will help you quickly replace the older sensor with the LRD6300.
LRD6300(C)
Wire Color
Other
Model
Color
Reference Connection Notes
Brown (1) Red +Vin (12-
24VDC)
80mA
max
White (2) Green NPN Output 150mA
max
Blue (3) Black Ground
Connected
to sensor
body
Black (4) Blue PNP Output 150mA
max.
Brown N/A
No longer
used
Sensor Configuration
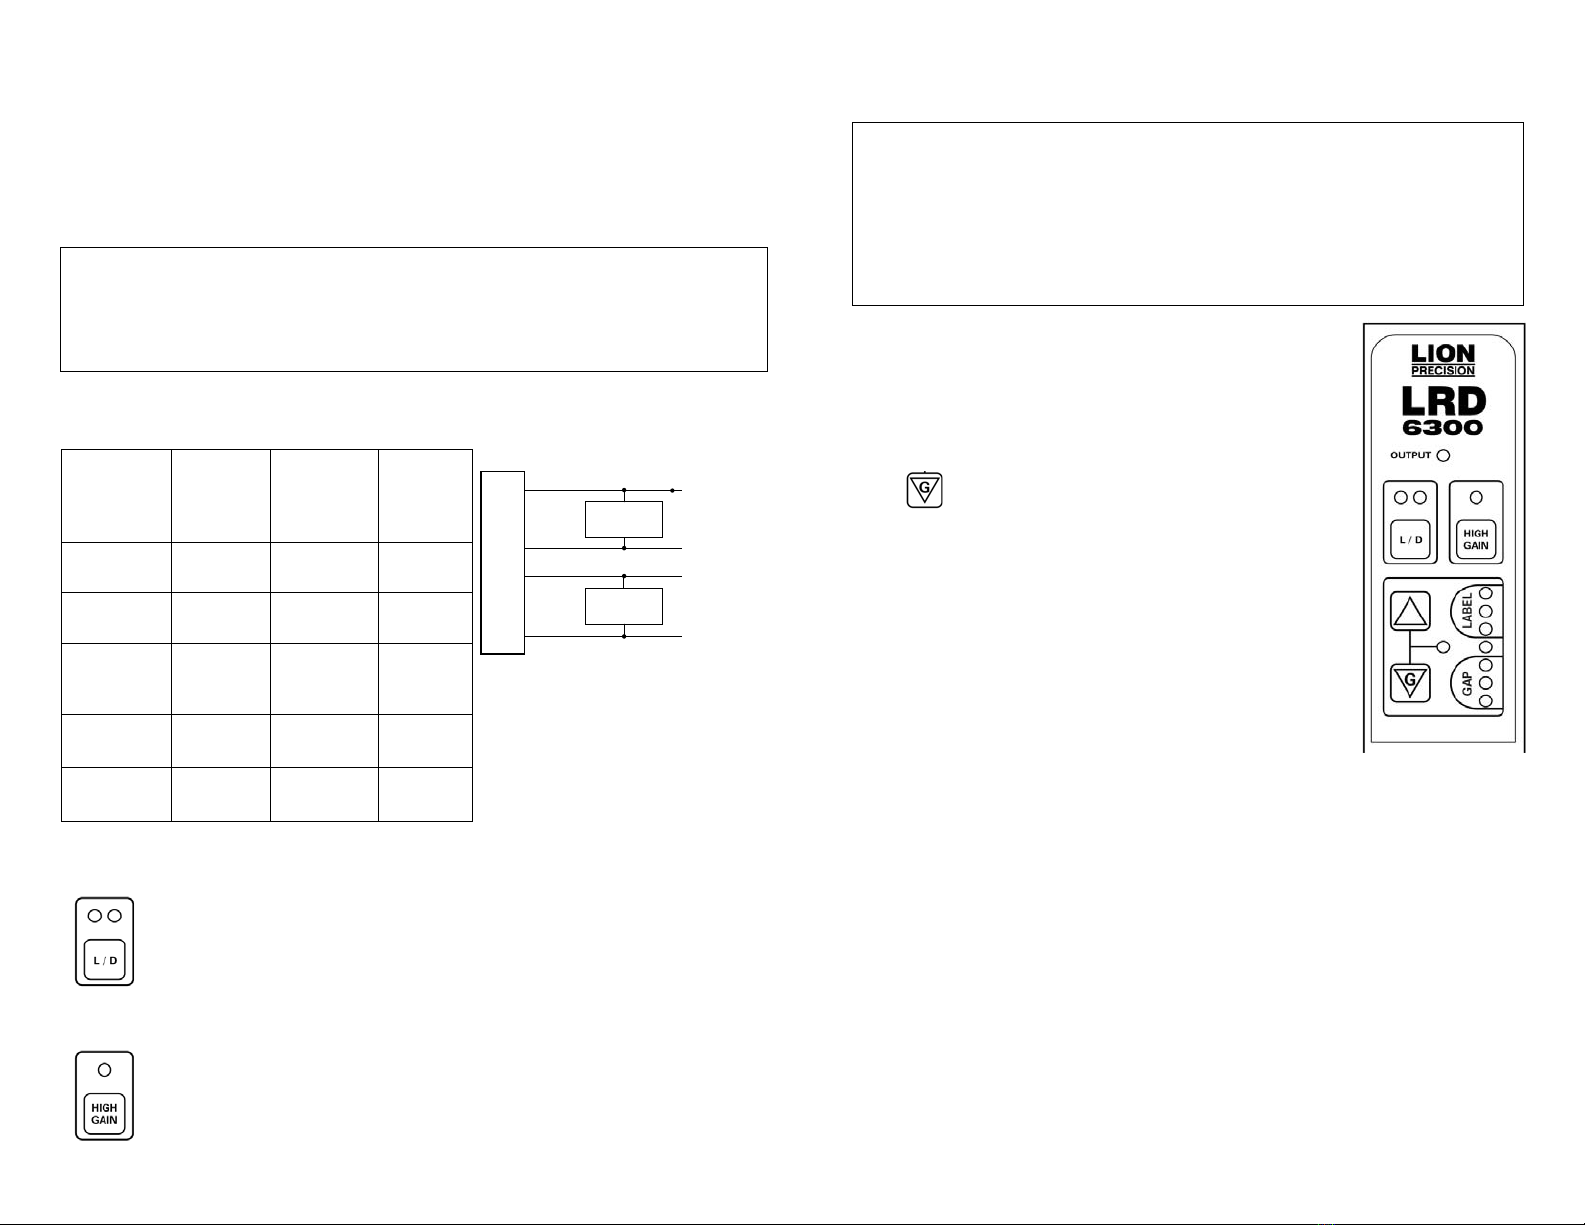
Light/Dark Switching
In “Light” switching mode, the sensor outputs are active/on during the gap. In “Dark”
switching mode, the sensor outputs are active/on during the label. Switch modes by
pressing the button. Do not change while running.
High Gain Mode
Only use High Gain mode when necessary. Very small or very thin labels may not
consistently move the light bar between the LABEL and GAP areas. In this case, use the
High Gain mode by pressing the button. Do not change while running.
AutoGap must be performed after activating High Gain.
Setup
1. Web must remain in contact with the base/mounting plate during operation.
2. Label must pass under the [-SENSOR-] indicator.
3. Small labels should be centered under the [-SENSOR-] indicator.
4. When properly setup, the lights in the gray LABEL area will be on when a label is present,
and lights in the gray GAP area will be on when a gap is present.
5. All lights flashing rapidly indicates over-current condition, likely caused by wiring error.
AutoGap Setup
1. Start with High Gain off.
2. Remove a label from the web.
3. Place the area of the missing label in the sensor (liner only).
4. Press for at least 1 second (lights begin to move back and forth).
5. Release the button.
6. Setup complete.
7. Verify the light bar goes into the gray GAP area during gaps between
labels and into the gray LABEL area during labels. If necessary, use
arrow keys to adjust manually.
If light bar is not moving at least three or four lights, turn on High Gain.
Manual Adjustment
When running, the light bar should extend from the gray LABEL area to the
gray GAP area. The up and down arrows can be used to fine tune the
adjustment if necessary.
If the adjustments reach the end of their range, the last light in the GAP or LABEL area will flash
three times when the button is pressed.
The light bar may move toward LABEL while the Up arrow is pressed. This is because the sensor
body is deflecting and making the slot smaller. It will return when the button is released and will not
affect setup.
Metal/Foil Label Setup
AutoGap Setup on a missing label area may not work reliably for rectangular metallic labels (foil or
metalized Mylar). In this case, place an actual gap in the sensor (use alignment groove on the
sensor). Then hold the Gap button down for AutoGap as above. Move labels slowly through the
sensor. Use manual adjustments if necessary to ensure the light bar is in the LABEL area during
labels and GAP area during gaps. If the sensor still cannot be adjusted for reliable operation, you
may need the LRD8200 Ultrasonic Sensor.
See the LRD6300 setup video at www.lrd6300.com
1 (Brown) +12 to 24VDC
NPN Output
150mA max.
PNP Output
150mA max.
Ground
2 (White)
3 (Blue)
NPN Load
PNP Load
4 (Black)
This manual suits for next models
1
Other Lion Precision Accessories manuals

Lion Precision
Lion Precision LIONEYE 2 User manual

Lion Precision
Lion Precision CPL350 User manual

Lion Precision
Lion Precision Elite Series User manual

Lion Precision
Lion Precision LRD8200 User manual

Lion Precision
Lion Precision LRD6110 User manual

Lion Precision
Lion Precision ECL202 User manual

Lion Precision
Lion Precision LRD2100 User manual

Lion Precision
Lion Precision LRD2100 User manual

Lion Precision
Lion Precision LRD6300 User manual

Lion Precision
Lion Precision LRD 5100 User manual


