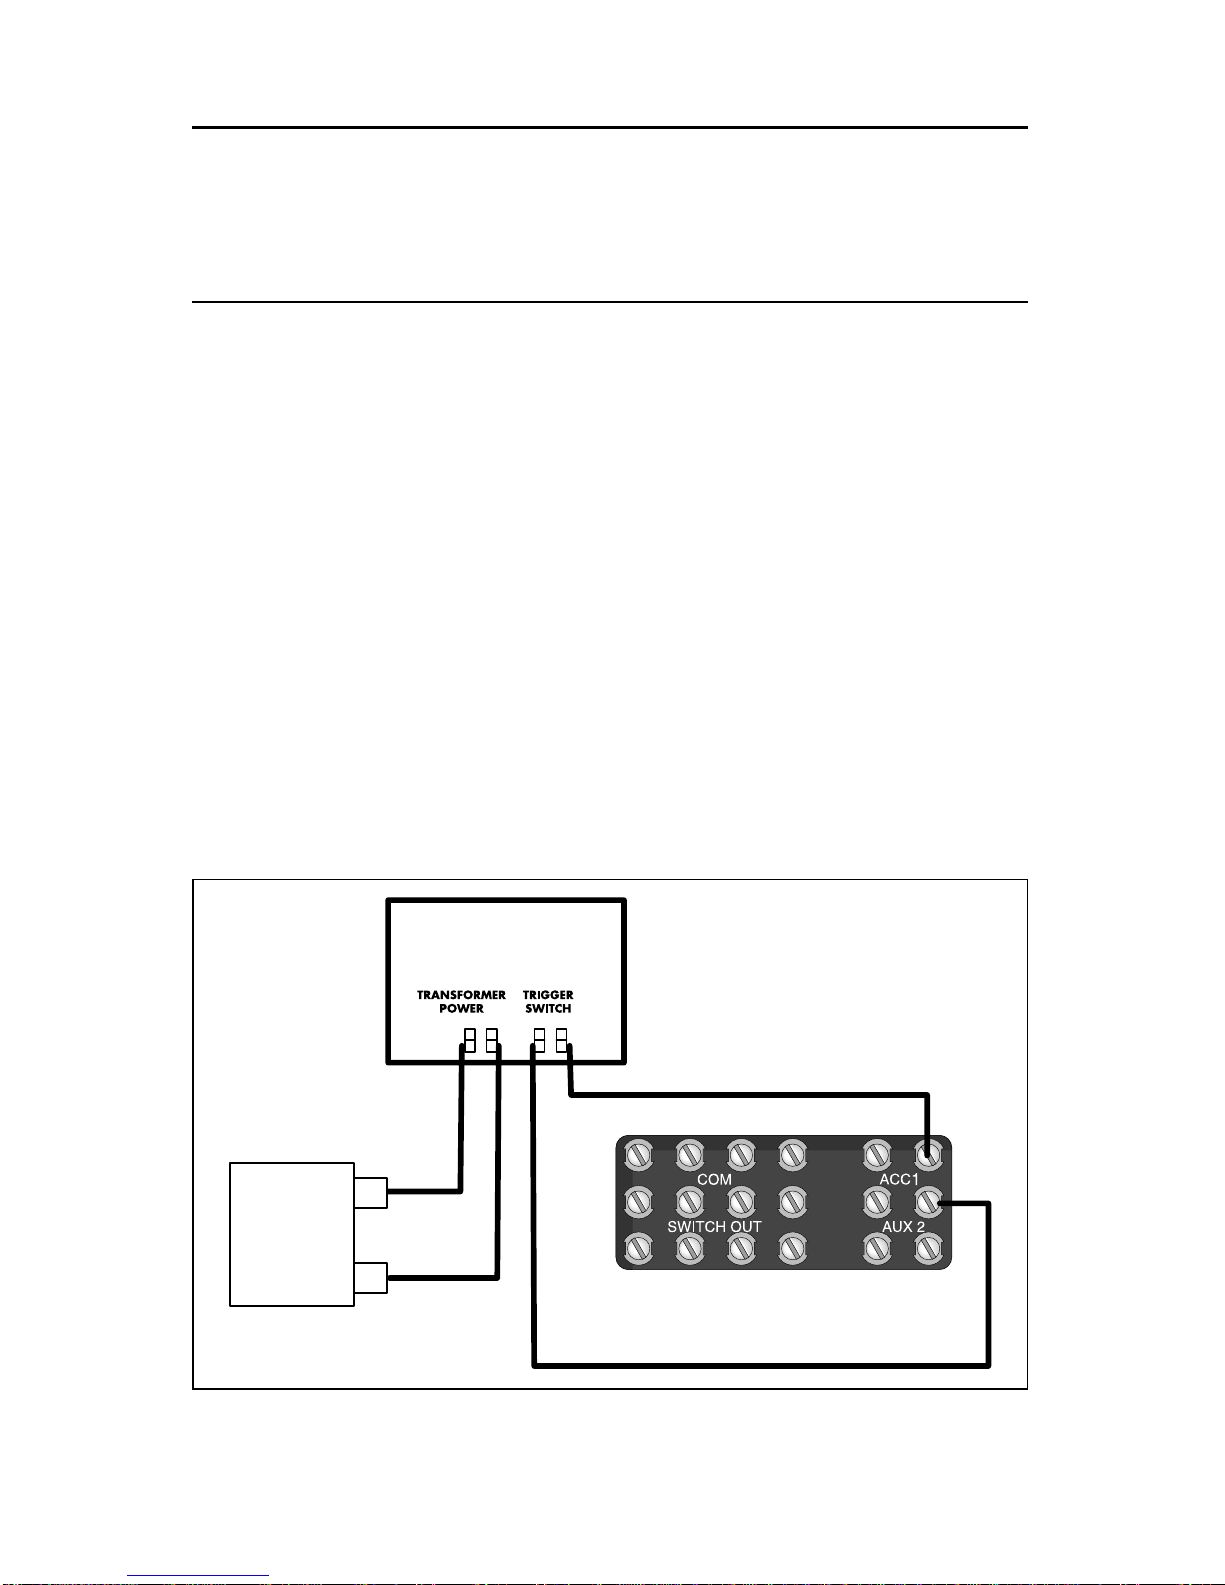
To operate properly, your Heliport requires
12-18 volts (AC). You can supply power
to this accessory in two ways: wiring directly
to your transformer OR wiring to a Lionel
LockOn (available separately) that is
attached to the track. Figure 1 illustrates the
following procedure.
To make the proper connections, the
ends of the wires must be stripped back 1/4”
to 3/8”. Use a pair of wire strippers or a
sharp knife to strip the wires.
Only an adult should perform
this task! Always use care
when stripping wires.
1. Attach one wire to the “U” terminal of
your transformer OR to one terminal on
your Lionel LockOn (available separate-
ly).
LockOn Users! Attach the LockOn to
any section of straight track. Fit the cen-
ter lip of the LockOn onto the edge of the
outside rail and press the LockOn
upward so that the spring contact snaps
onto the center rail. To attach wires to
the LockOn, simply depress the spring
clip and insert the bare end of the wire
into the exposed opening. Release the
clip, and gently tug on the wire to be
sure that you have a good connection.
2. Connect this wire to one of the spring
clips labeled TRANSFORMER CLIPS at
the bottom of the accessory.
To attach this wire, simply depress
the spring clip and insert the bare
end of the wire into the exposed opening.
Release the clip, and gently tug on the wire
to be sure that you have a good connection.
3. Attach another wire to the “A” terminal
on your transformer OR to the other ter-
minal on your Lionel LockOn.
4. Connect this wire to the other spring clip
labeled TRANSFORMER CLIPS at the
bottom of the accessory.
5. To wire the launch switch, attach one
wire to the each of the spring clips
labeled TRIGGER SWITCH at the bottom
of the accessory.
6. Connect each of these wires to the termi-
nals on the separate switch (included
with your accessory).
At this point, you have supplied power to the
accessory and wired the control button.
Wiring your Lionel Heliport for conventional (non-Command) operation
4
Note!
Caution!