Little Tikes Tire Twister User manual

DE
B.
A.
0417-0-GR
XX
Beide Tasten vorwärts drücken, damit das Auto
vorwärts fährt. (Beide Tasten nach hinten
drücken, damit das Auto rückwärts fährt.)
X
Die rechte Taste nach vorne drücken,damit
das Auto nach links fährt. (Die rechte Taste
nach hinten drücken, damit das Auto
rückwärts nach links fährt.)
X
Die linke Taste nach vorne drücken, damit
das Auto nach rechts fährt. (Die linke Taste
nach hinten drücken, damit das Auto
rückwärts nach rechts fährt.)
X
X
Die Tasten wie dargestellt gedrückt halten,
damit sich das Fahrzeug im Kreis dreht. (Die
Tasten in der entgegengesetzten Richtung
gedrückt halten, damit sich das Fahrzeug in
der entgegengesetzten Richtung dreht.)
FAHREN, DREHEN, ÜBERSCHLÄGE MACHEN!
FAHREN IM RIESENREIFEN
1. Das Fahrzeug so in den Riesenreifen setzen, dass die Autoreifen über den Rippen innerhalb des Riesenreifens platziert sind.
2. Den Riesenreifen auf den Fußboden stellen.
3. Um sicherzustellen, dass das Fahrzeug die richtige Frequenz aufnimmt, zuerst das Fahrzeug einschalten,dann die
Fernsteuerung einschalten.
4. Bitte die Bedienungsmuster für die Fernsteuerung weiter unten beachten.Während sich das Fahrzeug im Riesenreifen
bewegt,dreht und rotiert der Riesenreifen!
5.
Während der Vorwärtsfahrt die Richtung umkehren, damit das Fahrzeug Überschläge rückwärts und vorwärts im Reifen macht.
BITTE BEACHTEN:Wenn das Spielen beendet ist, zuerst das Fahrzeug ausschalten,dann die Fernsteuerung.
FAHREN DES RC FAHRZEUGS
1. Um sicherzustellen, dass das Fahrzeug die richtige Frequenz aufnimmt, zuerst das Fahrzeug einschalten,dann die
Fernsteuerung einschalten.
2. Das RC Fahrzeug auf den Boden stellen.
3. Wie unten in den Zeichnungen dargestellt auf die Tasten der Fernsteuerung drücken.
BITTE BEACHTEN:Wenn das Spielen beendet ist, zuerst das Fahrzeug ausschalten,dann die Fernsteuerung.
GLEICH GEHT’S LOS
1. Mit einem Kreuzschlitzschraubenzieher (nicht enthalten) die Schraube und die Batteriefachabdeckung von
der Unterseite der Fernsteuerung entfernen.(Siehe Abb.2)
2. Zwei (2) 1,5 V Alkali-Mignonzellen AA (LR6), nicht enthalten,in der im Batteriefach angegebenen Polrichtung
(+/-) einlegen. (Siehe Abb. 2)
3. Die Batteriefachabdeckung wieder einsetzen und die Schraube festziehen.
Abb. 2
1,5 V AA / LR6
1,5 V AA / LR6
WICHTIGER HINWEIS:
Sollte das Spielzeug nicht richtig funktionieren,das Produkt zurücksetzen,indem die Batterien
entnommen und erneut eingelegt werden.Sollte die Funktion danach noch nicht wiederhergestellt
sein, die Batterien bitte durch neue Alkali-Mignonzellen ersetzen.
Abb. 1
1,5 V AA / LR6
1,5 V AA / LR6
BAND
Vor Spielbeginn muss ein ERWACHSENER neue Alkali-Batterien (nicht enthalten) in das FAHRZEUG und in
die FERNSTEUERUNG einlegen. Und so funktioniert es:
1.Mit einem Kreuzschlitzschraubenzieher (nicht enthalten) die Schraube und die Batteriefachabdeckung
von der Unterseite des Fahrzeugs entfernen. (Siehe Abb. 1)
2.
Drei (3) 1,5 V Alkali-Mignonzellen AA (LR6), nicht enthalten,in der im Batteriefach angegebenen Polrichtung
(+/-) einlegen. (Siehe Abb. 1)
BITTE BEACHTEN: Die Fahrzeugbatterien werden in verschiedenen Lagen mit einer Batterie in der unteren Lage
und zwei Batterien darüber eingelegt.Das Band im Batteriefach wie dargestellt positionieren,
bevor die Batterien eingelegt werden.Das Band ist beim Herausnehmen der Batterien hilfreich,
wenn diese ausgetauscht werden müssen.
3. Die Batteriefachabdeckung wieder einsetzen und die Schraube festziehen.
FERNSTEUERUNG
638541GR
3+ JAHRE
BEAUFSICHTIGUNG DURCH EINEN ERWACHSENEN EMPFOHLEN.
EINLEGEN DER BATTERIEN DURCH EINEN ERWACHSENEN ERFORDERLICH.
C.
INHALT
A. 1 Little Tikes® RC Tire Twister™ Fahrzeug
B. 1 Riesenreifen
C. 1 Fernsteuerung
Die Abbildungen dienen nur der Veranschaulichung und können
von dem tatsächlichen Inhalt abweichen.
EINLEGEN DER BATTERIEN
RENNWAGEN
WICHTIGE INFORMATIONEN
• Mit dem ferngesteuerten Fahrzeug NICHT auf der Straße, in Bereichen mit Verkehr oder hohem Fußgängeraufkommen
spielen.
• NICHT auf das Fahrzeug stellen, setzen oder damit werfen, da dies zu irreparablen Schäden und/oder Verletzungen
führen kann.
• Den Reifen dieses Spielsets NICHT für andere Spielzeuge, Fahrzeuge, wie etwa Wagen, Dreiräder,etc., oder in einer nicht
in dieser Anleitung beschriebenen Weise verwenden.
• Das Fahrzeug bzw.den Reifen nicht mit Möbeln,Wänden,Tieren, Menschen, etc.kollidieren lassen, da dies zu
Verletzungen und/oder Schäden am Produkt führen kann.
• Lange Haare oder lose Bänder, wie z. B.Schnürsenkel, von den sich drehenden Rädern FERNHALTEN.
• Das Fahrzeug bzw.den Riesenreifen NICHT durch Wasser, Schmutz, etc. fahren lassen.
GARANTIE
Es gelten die gesetzlichen Garantiebestimmungen.
FCC-KONFORMITÄT
BITTE BEACHTEN:Dieses Gerät ist getestet worden und erfüllt die Grenzwerte für digitale Geräte der Klasse B,entsprechend
Teil 15 der FCC-Vorschriften. Diese Grenzwerte wurden festgelegt, um einen vernünftigen Schutz gegen gefährliche
Störungen bei häuslichen Installationen zu bieten.Dieses Gerät erzeugt, benutzt und strahlt Hochfrequenzsignale aus und
kann, wenn es nicht entsprechend der Anleitung installiert oder benutzt wird, Störungen im Funkverkehr verursachen. Es
besteht jedoch keine Garantie, dass es nicht zu Störungen bei bestimmten Gerätekonstellationen kommen kann. Sollte
dieses Gerät Störungen beim Radio- oder Fernsehempfang verursachen, was Sie überprüfen können, indem Sie das Gerät
aus- und wieder einschalten, wird der Verbraucher gebeten, zu versuchen, die Störung durch eine der folgenden
Maßnahmen zu beheben:
• Die Empfangsantenne neu ausrichten oder an einem anderen Ort aufstellen.
• Den Abstand zwischen dem Gerät und dem Empfänger vergrößern.
• Das Gerät an einer Steckdose eines Stromkreislaufs anschließen,an dem der Empfänger nicht angeschlossen ist.
• Lassen Sie sich vom Händler oder einem erfahrenen Radio/Fernsehtechniker beraten.
Dieses Gerät entspricht Teil 15 der FCC-Vorschriften. Der Betrieb unterliegt folgenden zwei Bedingungen:(1) Dieses Gerät
darf keine gefährlichen Störungen verursachen und (2) das Gerät muss auch solche Störungen akzeptieren,die eine
Beeinträchtigung des Betriebs zur Folge haben.
Achtung:Um sicherzustellen, dass das Gerät weiterhin die Vorschriften erfüllt, dürfen keine Veränderungen oder
Modifikationen daran vorgenommen werden,die nicht ausdrücklich von der für die Kompatibilität verantwortlichen
Partei genehmigt wurden,da sonst die Betriebserlaubnis für den Benutzer erlöschen kann.
SICHERHEITSHINWEISE ZU BATTERIEN
•
Akkus dürfen nur unter Aufsicht eines Erwachsenen aufgeladen werden.Nur Alkali-Mignonzellen AA (LR6) verwenden
(5 erforderlich).
• Keine alten und neuen Batterien zusammen einlegen.
• Keine Alkali- oder Standard (Zink-Kohle)-Batterien mit aufladbaren Batterien kombinieren.
• Die Batterien in der angegebenen Polrichtung (+/-) einlegen und die Anweisungen des Spielwaren- und des
Batterieherstellers beachten.
• Alte und verbrauchte Batterien umgehend aus dem Produkt entfernen.
• Alte und verbrauchte Batterien ordnungsgemäß entsorgen und nicht vergraben,verbrennen oder über den Hausmüll
entsorgen.
• Nicht versuchen,normale Batterien aufzuladen.
• Akkus müssen vor dem Aufladen aus dem Produkt entnommen werden.
• Das Aufladen der Akkus muss unter Aufsicht eines Erwachsenen durchgeführt werden, nachdem die Akkus aus dem
Produkt entnommen wurden.
• Die Anschlussklemmen nicht kurzschließen.
•
Die Batterien sollten aus dem Produkt herausgenommen werden, wenn es voraussichtlich längere Zeit nicht benutzt wird.
© The Little Tikes Company,
eine Firma von MGA Entertainment.
LITTLE TIKES® ist in den USA und anderen Ländern ein Warenzeichen von
Little Tikes. Alle Logos, Namen, Charaktere, Ähnlichkeiten, Bilder, Claims und
das Erscheinungsbild der Verpackung sind in Besitz von Little Tikes.
Vertrieben durch:
MGA Entertainment (Netherlands) B.V.
Klipperaak 201
2411ND Bodegraven
Netherlands
Gedruckt in China
„Umweltschutz ist Ehrensache!“
Hinweis zur Entsorgung:
Dieses Produkt ist mit dem Symbol für die selektive Entsorgung von elektrischer Ausrüstung versehen (WEEE). Das heißt, dass dieses Produkt
der EU Direktive 2002/96/EC entsprechend entsorgt werden muss, um die entstehenden Umweltschäden zu minimieren.Weitere
Informationen erhalten Sie bei Ihrer lokalen oder regionalen Behörde.Aus diesem selektiven Entsorgungsprozess ausgeschlossene
elektronische Produkte stellen wegen der Präsenz gefährlicher Substanzen eine Gefahr für die Umwelt und die Gesundheit dar.
Besuch unsere Internetseite
auf www.littletikes.com,
um dein Produkt zu
registrieren!
Diese Anleitung für mögliche Rückfragen bitte aufbewahren.Sie enthält wichtige Informationen.
www.littletikes.com
Tire Twister™Tire Twister™

B.
A.
Pečujme o životní prostředí!
Všechny výrobky označené symbolem přeškrtnutého kontejneru na odpadky se nesmí vyhazovat spolu s ostatním neseparovaným
odpadem z domácnosti, ale je nutné je likvidovat samostatně. Organizace pověřené recyklací k tomu zřídily tzv.místa zpětného
odběru,kde jsou bezplatněodebírány staré přístroje z domácností.
Baterie nevyhazujte do běžného domácího odpadu.Odneste je na některé z míst zpětného odběru.
Tento manuál si prosím uschovejte, obsahuje důležité informace.
www.littletikes.com
© The Little Tikes Company, společnost MGA Entertainment.
LITTLE TIKES® je ochrannou známkou společnosti Little Tikes v USA
i ostatních zemích.Všechna loga, jména, znaky,zřetelné
podobnosti, obrázky,slogany a vzhled balení jsou vlastnictvím
Little Tikes.
MGA Entertainment (Netherlands) B.V.
Klipperaak 201
2411 ND Bodegraven
Nizozemsko
Vytištěno v Číně
0417-0-GR
Navštivte naše webové stránky
www.littletikes.com
a zaregistrujte svůj produkt!
XX
Stiskněte obětlačítka dopředu, auto se bude
pohybovat dopředu. (Stiskněte obětlačítka
dozadu,auto se bude pohybovat dozadu.)
X
Stiskněte pravé tlačítko dopředu,auto se
otočí doleva. (Stiskněte pravé tlačítko
dozadu,auto se otočí doleva dozadu.)
X
Stiskněte levé tlačítko dopředu, auto se
otočí doprava. (Stiskněte levé tlačítko
dozadu,auto se otočí doprava dozadu).
X
X
Stiskněte a podržte tlačítka, jak je
naznačeno na obrázku, auto se bude
otáčet dokola. (Stiskněte a podržte opačná
tlačítka, auto se bude otáčet v opačném
směru.)
JÍZDA, OTÁČENÍ, PŘEVRACENÍ!
ŘÍZENÍ TIRE TWISTER
1. Nastavte auto do pneumatiky a ujistěte se, že auto je usazeno okolo výstupkůna pneumatice.
2. Pneumatiku postavte na zem.
3. Abyste se ujistili,že auto zachytí správnou frekvenci,přepněte přepínačdo polohy ON nejprve na autěa poté na dálkovém
ovládání.
4. Schéma pro řízení najdete níže.Když se auto uvnitřpneumatiky hýbe,pneumatika se bude otáčet a rotovat.
5. Při jízděvpřed otočte rychle směr dozadu a auto se překlopí dozadu a dopředu uvnitřpneumatiky.
POZNÁMKA: Když si přestanete hrát, nejprve vypněte auto,poté vypněte dálkové ovládání.
ŘÍZENÍ AUTA
1. Abyste se ujistili,že auto zachytí správnou frekvenci,přepněte přepínačdo polohy ON nejprve na autěa poté na dálkovém
ovládání.
2. Auto postavte na zem.
3. Stiskněte knoflíky na dálkovém ovládání tak,jak je naznačeno na obrázcích níže.
POZNÁMKA: Když si přestanete hrát, nejprve vypněte auto,poté vypněte dálkové ovládání.
RYCHLÝ START
1. Křížovým šroubovákem (není součástí balení) vyšroubujte šroubek a uvolněte kryt přihrádky na baterie na
spodní stranědálkového ovládání. (Obr. 2)
2. Vložte dvě(2) nové 1,5 V AA alkalické baterie (nejsou součástí balení) a ujistěte se, že póly (+) a (-) směřují
správným směrem, jak je naznačeno uvnitřpřihrádky na baterie. (Obr. 2)
3. Vraťte na místo kryt přihrádky na baterie a utáhněte šroubek.
Obr. 2
1.5V AA / LR6
1.5V AA / LR6
DŮLEŽITÁ POZNÁMKA:
V případě, že produkt nebude fungovat správně,restartujte jej vyjmutím a znovu vložením baterií.
Pokud nedojde k obnovení funkcí, nahraďte baterie novými alkalickými bateriemi.
Obr. 1
1.5V AA / LR6
1.5V AA / LR6
STUŽKA
Předtím, než si děti začnou hrát,je třeba, aby DOSPĚLÁ OSOBA vložila do AUTA a DÁLKOVÉHO OVLÁDÁNÍ
nové alkalické baterie.Zde je návod:
1. Křížovým šroubovákem (není součástí balení) vyšroubujte šroubek a uvolněte kryt přihrádky na baterie
na spodní straněauta. (Obr. 1)
2. Vložte tři (3) nové 1,5 V AA alkalické baterie (nejsou součástí balení) a ujistěte se, že póly (+) a (-) směřují
správným směrem, jak je naznačeno uvnitřpřihrádky na baterie. (Obr. 1)
Poznámka: Baterie se vkládají ve dvou vrstvách – jedna baterie na dno přihrádky na baterie a dvězbývající
baterie na ni.Stužku uvnitřnastavte před vložením baterií tak, jak je naznačeno na obrázku níže.
Stužka vám pomůže vyjmout baterie z přihrádky,když je třeba baterie vyměnit.
3. Vraťte na místo kryt přihrádky na baterie a utáhněte šroubek.
DÁLKOVÉ OVLÁDÁNÍ
638541GR
VĚK: OD 3 LET
DOPURUČUJEME, ABY HRANÍ DĚTÍ DOHLÍŽELA DOSPĚLÁ OSOBA A VLOŽENÍ
BATERIÍ PROVEDLA ROVNĚŽ DOSPĚLÁ OSOBA.
C.
OBSAH BALENÍ
A. 1 auto na dálkové ovládání Little Tikes® RC Tire Twister™
B. 1 pneumatika
C. 1 dálkové ovládání
Obrázky jsou pouze ilustrativní.
Styly se mohou lišit od skutečného obsahu.
VLOŽENÍ BATERIÍ
AUTO
DŮLEŽITÉ INFORMACE
• Nehrajte si s RC Tire Twister™ na ulici nebo tam, kde je automobilový provoz nebo v místech,kde je hustý provoz chodců.
• Nestoupejte si a nesedejte si na RC Tire Twister™. Rovněž s ním neházejte. Mohlo by to způsobit zranění okolním
osobám a nenávratné poškození produktu.
• Nezkoušejte používat„pneumatiku“ z této hračky jako kolo k jiné hračce nebo k jinému vozidlu,jako třeba k vozíku,
tříkolce apod.nebo k jakémukoli jinému účelu,než je popsán v tomto návodu.
• Nenajíždějte autem / pneumatikou do nábytku,zdí, domácích mazlíčků, lidí apod., mohlo by to způsobit zranění lidem a
domácím mazlíčkům a mohlo by dojít k nenávratnému poškození produktu.
• Nepřibližujte k otáčejícím se kolům auta dlouhé vlasy, oblečení a obuv s volnými šňůrkami, např. tkaničkami od bot.
• Autem / pneumatikou neprojíždějte vodou, blátem apod.
ZÁRUKA
Pro informace o záruce prosím kontaktujte svého prodejce.
BEZPEČNOSTNÍ INFORMACE K BATERIÍM
• Nabíjecí baterie nabíjejte pouze pod dozorem dospělé osoby. Používejte pouze alkalické baterie typu“AA“ (LR6), produkt
vyžaduje 5 baterií.
• Nemíchejte staré a nové baterie.
• Nemíchejte alkalické, standardní (zinko-uhlíkové) nebo nabíjecí baterie.
• Ujistěte se,že baterie jsou vloženy správněa dodržujte pokyny výrobce produktu a baterií.
• Vybité baterie z produktu vždy vyjměte.
• Baterie správnězlikvidujte:nepalte je a nezakopávejte je.
• Nenabíjejte nenabíjecí baterie.
• Nabíjecí baterie před nabíjením vyjměte z produktu.
• Nabíjecí baterie nabíjejte pouze pod dozorem dospělé osoby. Nabíjecí baterie před nabíjením vyjměte z produktu.
• Baterie nespojujte nakrátko.
• Pokud produkt po delší čas nepoužíváte, vyjměte baterie, abyste předešli jejich možnému vytečení a poškození
jednotky.
CZ
Tire Twister™Tire Twister™
B.
A.
Starajme sa o životné prostredie!
Všetky výrobky označené symbolom preškrtnutého kontejnera na odpadky sa nesmú vyhadzovaťspolu s ostatným neseparovaným
odpadom z domácnosti, ale je nutné ich likvidovaťsamostatne.Organizácie poverené recykláciou k tomu zriadili tzv.miesta spätného
odberu,kde sú bezplatne odoberané staré prístroje z domácností.
Batérie nevyhadzujte do bežného domáceho odpadu. Odneste ich na niektoré z miest spätného odberu.
Tento manuál si prosím uschovajte, obsahuje dôležité informácie.
0417-0-GR
XX
Stlačte obi dve tlačidlá dopredu, auto sa
bude pohybovaťdopredu. (Stlačte obi dve
tlačidlá dozadu,auto sa bude pohybovať
dozadu.)
X
Stlačte pravé tlačidlo dopredu, auto sa otočí
doľava. (Stlačte pravé tlačidlo dozadu,auto
sa otočí doľava dozadu.)
X
Stlačte ľavé tlačidlo dopredu, auto sa otočí
doprava. (Stlačte ľavé tlačidlo dozadu,auto
sa otočí doprava dozadu).
X
X
Stlačte a podržte tlačidlá,ako je
naznačené na obrázku, auto sa bude
otáčaťdokola. (Stlačte a podržte opačné
tlačidlá, auto sa bude otáčaťv opačnom
smere.)
JAZDA,TOČENIE, PREVRÁTENIE!
RIADANIE TIRE TWISTER
1. Nastavte auto do pneumatiky a uistite sa,že auto je usadené okolo výstupkov na pneumatike.
2. Pneumatiku postavte na zem.
3. Aby ste sa uistili,že auto zachytí správnu frekvenciu, prepnite prepínačdo polohy ON najprv na aute a potom na diaľkovom
ovládaní.
4. Schéma pre riadenie nájdete nižšie.Keďsa auto vnútri pneumatiky hýbe, pneumatika sa bude otáčaťa rotovať.
5. Pri jazde vpred otočte rýchlo smer dozadu a auto sa preklopí dozadu a dopredu vo vnútri pneumatiky.
POZNÁMKA: Keďsa prestanete hrať, najprv vypnite auto,potom vypnite diaľkové ovládanie.
RIADENIE AUTA
1. Aby ste sa uistili,že auto zachytí správnu frekvenciu, prepnite prepínačdo polohy ON najprv na aute a potom na diaľkovom
ovládaní.
2. Auto postavte na zem.
3. Stlačte gombíky na diaľkovom ovládaní tak,ako je naznačené na obrázkoch nižšie.
POZNÁMKA: Keďsa prestanete hrať, najprv vypnite auto,potom vypnite diaľkové ovládanie.
RÝCHLY ŠTART
1. Krížovým skrutkovačom (nie je súčasťou balenia) vyskrutkujte skrutku a uvoľnite kryt priehradky na batérie
na spodnej strane diaľkového ovládania .(Obr. 2)
2. Vložte dve (2) nové 1,5 V AA alkalické batérie (nie sú súčasťou balenia) a uistite sa, že póly (+) a (-) smerujú
správnym smerom,ako je naznačené vo vnútri priehradky na batérie. (Obr. 2)
3. Priehradku na batérie uzatvorte krytom a starostlivo zaskrutkujte skrutku.
Obr. 2
1.5V AA / LR6
1.5V AA / LR6
DÔLEŽITÁ POZNÁMKA:
V prípade,že produkt nebude fungovaťsprávne, reštartujte ho vybratím a znovu vložením batérií.
Pokiaľnedôjde k obnoveniu funkcií, nahraďte batérie novými alkalickými batériami.
Obr. 1
1.5V AA / LR6
1.5V AA / LR6
STUŽKA
Kým si deti začnú hrať, je potrebné,aby DOSPELÁ OSOBA vložila do AUTA a DIAĽKOVÉHO OVLÁDANIA
nové alkalické batérie.Tu je návod:
1. Krížovým skrutkovačom (nie je súčasťou balenia) vyskrutkujte skrutku a uvoľnite kryt priehradky na
batérie na spodnej strane auta. (Obr. 1)
2. Vložte tri (3) nové 1,5 V AA alkalické batérie (nie sú súčasťou balenia) a uistite sa, že póly (+) a (-) smerujú
správnym smerom,ako je naznačené vo vnútri priehradky na batérie. (Obr. 1)
Poznámka: Batérie sa vkladajú v dvoch vrstvách - jedna batéria na dno priehradky na batérie a dve
zostávajúce batérie na ňu. Stužku vnútri nastavte pred vložením batérií tak,ako je naznačené na
obrázku nižšie.Stužka vám pomôže vybraťbatérie z priehradky,keďje potrebné batérie
vymeniť.
3. Priehradku na batérie uzatvorte krytom a starostlivo zaskrutkujte skrutku.
DIAĽKOVÉ OVLÁDANIE
638541GR
VEK: OD 3 ROKOV
ODPORÚČAME, ABY HRANIE DETÍ DOZERALA DOSPELÁ OSOBA A
VLOŽENIE BATÉRIÍ VYKONALA TIEŽ DOSPELÁ OSOBA.
C.
OBSAH BALENIA
A. 1 auto na diaľkové ovládanie Little Tikes® RC Tire Twister™
B. 1 pneumatika
C. 1 diaľkové ovládanie
Obrázky sú iba ilustratívne.
Štýly sa môžu líšiťod skutočného obsahu.
VLOŽENIE BATÉRIÍ
AUTO
DÔLEŽITÉ INFORMÁCIE
• Nehrajte sa s RC Tire Twister™ na ulici alebo tam, kde je automobilová prevádzka, alebo v miestach,kde je hustá
premávka chodcov.
• Nestúpajte a nesadajte si na RC Tire Twister™. Rovnako s ním nehádžte.Mohlo by to spôsobiťzranenie okolitým osobám
a nenávratné poškodenie produktu.
• Neskúšajte používať"pneumatiku" z tejto hračky ako koleso k inej hračke alebo k inému vozidlu,ako napríklad k vozíku,
trojkolke pod.,alebo na akékoľvek iné účely, než je popísané v tomto návode.
• Nevrážajte autom / pneumatikou do nábytku, stien, domácich maznáčikov, ľudí a pod.,mohlo by to spôsobiťzranenie
ľuďom a domácim maznáčikom a mohlo by dôjsťk nenávratnému poškodeniu produktu.
• Nepribližujte k otáčajúcim sa kolesám autá, dlhé vlasy alebo oblečenie a obuv s voľnými šnúrkami, napr. šnúrkami od
topánok.
• Autom / pneumatikou neprechádzajte vodou, blatom a pod.
ZÁRUKA
Pre informácie o záruke kontaktujte prosím svojho predajca.
BEZPEČNOSTNÉ INFORMÁCIE K BATÉRIAM
• Nabíjacie batérie nabíjajte iba pod dohľadom dospelej osoby.Používajte iba alkalické batérie typu“AA“ (LR6), produkt
vyžaduje 5 batérií.
• Nemiešajte staré a nové batérie.
• Nemiešajte alkalické, štandardné (zinkovo-uhlíkové) alebo nabíjacie batérie.
• Uistite sa, že batérie sú vložené správne a dodržujte pokyny výrobcu produktu a batérií.
• Vybité batérie z produktu vždy vyberte.
• Batérie správne zlikvidujte: nepáľte ich a nezakopávajte ich.
• Nenabíjajte nenabíjacie batérie.
• Nabíjacie batérie pred nabíjaním vyberte z produktu.
• Nabíjacie batérie nabíjajte iba pod dohľadom dospelej osoby.Nabíjacie batérie pred nabíjaním vyberte z produktu.
• Batérie nespojujte nakrátko.
• Pokiaľprodukt dlhší čas nepoužívate, vyberte batérie, aby ste predišli ich možnému vytečeniu.
SK
Tire Twister™Tire Twister™
www.littletikes.com
© The Little Tikes Company, spoločnosťMGA Entertainment.
LITTLE TIKES® je ochrannou známkou spoločnosti Little Tikes v USA
aj ostatných krajinách. Všetky logá, mená, znaky, viditeľné
podobnosti, obrázky, slogany a vzhľad balenia sú vlastníctvom
Little Tikes.
MGA Entertainment (Netherlands) B.V.
Klipperaak 201
2411 ND Bodegraven
Holandsko
Vytlačené v Číne
Navštívte naše webové stránky
www.littletikes.com a
zaregistrujte svoj produkt!

B.
A.
‘Let’s care for the environment!’
The wheelie bin symbol indicates that the product must not be disposed of with other household waste.
Please use designated collection points or recycling facilities when disposing of the item.
Do not treat old batteries as household waste. Take them to a designated recycling facility.
Please keep this manual as it contains important information.
MGA Entertainment UK Ltd
50 Presley Way
Crownhill
Milton Keynes
MK8 0ES
Bucks, UK
0800 521 558
www.littletikes.com
www.littletikes.co.uk
© The Little Tikes Company,
an MGA Entertainment company.
LITTLE TIKES® is a trademark of Little Tikes in
the U.S. and other countries. All logos, names, characters,
likenesses, images,slogans, and packaging appearance are the
property of
Little Tikes.
Little Tikes Consumer Service
2180 Barlow Road Hudson, Ohio 44236 U.S.A.
1-800-321-0183
Printed in China
0417-0-GR
Visit our website at
www.littletikes.com
to register your product and
to enter our sweepstakes.
(No purchase necessary)
XX
Press both buttons forward,
car will move forward.(Press both
buttons back, car will move backward.)
X
Press right button forward,
car will turn left. (Press right
button backward,car will back left.)
X
Press left button forward, car will turn
right. (Press left button backward, car will
back right.)
X
X
Press and hold buttons as shown,
car will spin in a circle. (Press and hold
opposite buttons,car will spin in the
opposite direction.)
DRIVE IT, SPIN IT, FLIP IT !
DRIVING THE TIRE TWISTER
1. Set the car inside the monster tire making sure the car tires straddle the ribs inside the monster tire.
2. Place the monster tire on the floor.
3. To assure your car will pick up the correct frequency, switch the car ON first, then switch the remote control ON.
4. Follow the remote control patterns below. As the car inside the monster tire moves, the monster tire will turn,twist and spin!
5. While going forward,reverse the direction and the car will flip backward and forward inside the monster tire.
NOTE: When finished playing,first turn off the car, then turn off the remote control.
DRIVING THE RC CAR
1. To assure your car will pick up the correct frequency, switch the car ON first, then switch the remote control ON.
2. Place the car on the floor.
3. Press the buttons on the remote control as shown in the diagrams below.
NOTE: When finished playing,first turn off the car, then turn off the remote control.
QUICK START
1. Using a Phillips screwdriver (not included) remove the screw and battery compartment cover from the
underside of the remote.(Fig. 2)
2. Install two (2) fresh 1.5V AA alkaline batteries (not included) making sure the (+) and (-) ends face the proper
direction as indicated inside the battery compartment. (Fig. 2)
3. Replace the compartment cover and tighten the screw.
Fig. 2
1.5V AA / LR6
1.5V AA / LR6
IMPORTANT NOTE:
In the event of a malfunction, reset the item by removing and replacing the batteries. If function is
still not restored, replace the batteries with fresh alkaline batteries.
Fig. 1
1.5V AA / LR6
1.5V AA / LR6
RIBBON
Before playing, an ADULT must install fresh alkaline batteries in the CAR and REMOTE. Here’s how:
1. Using a Phillips screwdriver (not included) remove the screw and battery compartment cover from the
underside of the car. (Fig.1)
2. Install three (3) fresh 1.5V AA alkaline batteries (not included) in the car making sure the (+)and (-) ends
face the proper direction as indicated inside the battery compartment. (Fig. 1)
NOTE: Car batteries are layered with one battery inserted on the bottom layer and the two remaining batteries
above it.Position ribbon inside the battery compartment as shown before installing batteries.Ribbon will
aid in battery removal when batteries need to be replaced.
3. Replace the compartment cover and tighten the screw.
REMOTE CONTROL
638541GR
AGES 3+ YEARS
ADULT SUPERVISION RECOMMENDED.
ADULT BATTERY INSTALLATION REQUIRED.
C.
CONTENTS
A. 1 Little Tikes® RC Tire Twister™Car
B. 1 Monster Tire
C. 1 Remote Control
Illustrations are for reference only.
Styles may vary from actual contents.
BATTERY INSTALLATION
RACE CAR
IMPORTANT INFORMATION
• DO NOT play with RC Tire Twister™ in the street or where there is vehicular traffic or in heavily traveled areas with
pedestrians.
• DO NOT stand on,sit on or throw RC Tire Twister™ as doing so can result in injury to the person and irreversible damage
to the unit.
• DO NOT attempt to use the “tire”portion of this toy as a wheel on any other toy or vehicle such as a wagon, tricycle,etc.
or in any manner other than the manner described in this manual.
• DO NOT run car/tire into furniture, walls, pets, people etc., as doing so may cause injury to the people and pets and
irreparable damage to the unit.
• DO NOT allow long hair or loose apparel such as shoestrings near the turning wheels of the car.
• DO NOT drive car/tire through water, mud, etc.
LIMITED WARRANTY
The Little Tikes Company makes fun,high quality toys.We warrant to the original purchaser that this product is free of
defects in materials or workmanship for one year * from the date of purchase (dated sales receipt is required for proof of
purchase). At the sole election of The Little Tikes Company, the only remedies available under this warranty will be the
replacement of the defective part or replacement of the product.This warranty is valid only if the product has been
assembled and maintained per the instructions.This warranty does not cover abuse,accident, cosmetic issues such as
fading or scratches from normal wear, or any other cause not arising from defects in material and workmanship.*The
warranty period is three (3) months for daycare or commercial purchasers. U.S.A and Canada: For warranty service or
replacement part information, please visit our website at www.littletikes.com, call 1-800-321-0183 or write to:Consumer
Service,The Little Tikes Company, 2180 Barlow Road, Hudson OH 44236, U.S.A. Some replacement parts may be available
for purchase after warranty expires—contact us for details. Outside U.S.A and Canada: Contact place of purchase for
warranty service.This warranty gives you specific legal rights,and you may also have other rights, which vary from
country/state to country/state.Some countries/states do not allow the exclusion or limitation of incidental or
consequential damages,so the above limitation or exclusion may not apply to you.
FCC COMPLIANCE
NOTE:This equipment has been tested and found to comply with the limits for a Class B digital device, pursuant to Part 15
of the FCC Rules.These limits are designed to provide reasonable protection against harmful interference in a residential
installation. This equipment generates, uses and can radiate radio frequency energy and, if not installed and used in
accordance with the instructions,may cause harmful interference to radio communications.However,there is no guarantee
that interference will not occur in a particular installation. If this equipment does cause harmful interference to radio or
television reception,which can be determined by turning the equipment off and on,the user is encouraged to try to correct
the interference by one or more of the following measures:
• Reorient or relocate the receiving antenna.
• Increase the separation between the equipment and receiver.
• Connect the equipment into an outlet on a circuit different from that to which the receiver is connected.
• Consult the dealer or an experienced radio/TV technician for help.
This device complies with Part 15 of the FCC Rules.Operation is subject to the following two conditions: (1) This device
may not cause harmful interference,and (2) this device must accept any interference received, including interference that
may cause undesired operation.
Warning: Changes or modifications to this unit not expressly approved by the party responsible for compliance could
void the user’s authority to operate the equipment.
This device complies with Industry Canada Licence-exempt RSS-210.Operation is subject to the following two conditions:
(1) this device may not cause interference, and (2) this device must accept any interference, including interference that
may cause undesired operation of the device.
BATTERY SAFETY INFORMATION
•
Charging of rechargeable batteries should only be done under adult supervision. Use only size“AA”(LR6) alkaline batteries
(5 required).
• Do not mix old and new batteries.
• Do not mix alkaline, standard (carbon-zinc), or rechargeable batteries.
• Be sure to insert the batteries correctly and follow the toy and battery manufacturer’s instruction.
• Always remove exhausted or dead batteries from the product.
• Dispose of dead batteries properly: do not burn or bury them.
• Do not attempt to recharge non-rechargeable batteries.
• Remove rechargeable batteries from the product before recharging.
• Charging of rechargeable batteries should only be done under adult supervision with batteries removed from product.
• Avoid short-circuiting battery terminals.
• Remove batteries before placing the unit into storage for a prolonged period of time.
ENG
Tire Twister™Tire Twister™
Table of contents
Languages:
Other Little Tikes Motorized Toy Car manuals

Little Tikes
Little Tikes 627426090-R2-3/04 User manual

Little Tikes
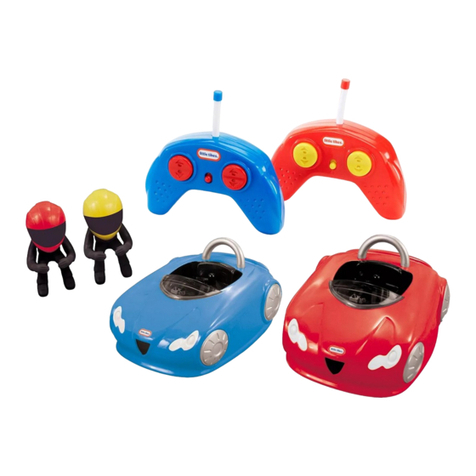
Little Tikes RC WHEELZ Bumper Cars User manual

Little Tikes
Little Tikes RC WHEELZ Tire Twister User manual

Little Tikes
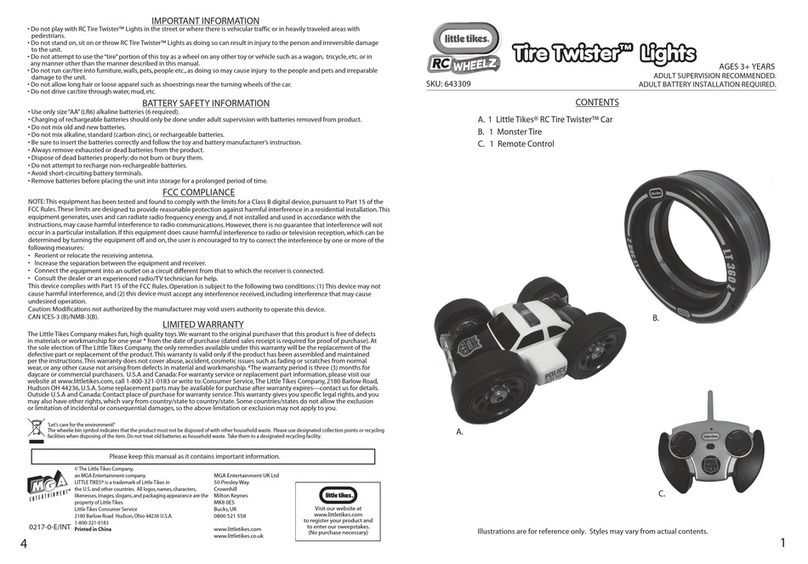
Little Tikes RC WHEELZ Tire Twister Lights User manual

Little Tikes
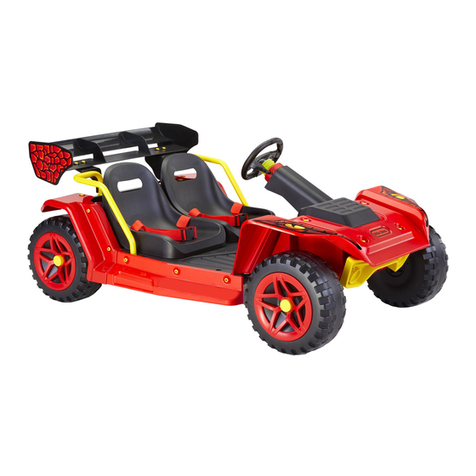
Little Tikes Dino Dune Buggy User manual

Little Tikes
Little Tikes 173059E3 User manual

Little Tikes
Little Tikes LTXtreme AIR CHARGERS 3-IN-1 STUNT LOOP TRACK... Datasheet

Little Tikes
Little Tikes COZY TRUCK 642319M User manual

Little Tikes
Little Tikes Bumper Car User manual

Little Tikes
Little Tikes SLAMMIN' RACERS Police Car User manual