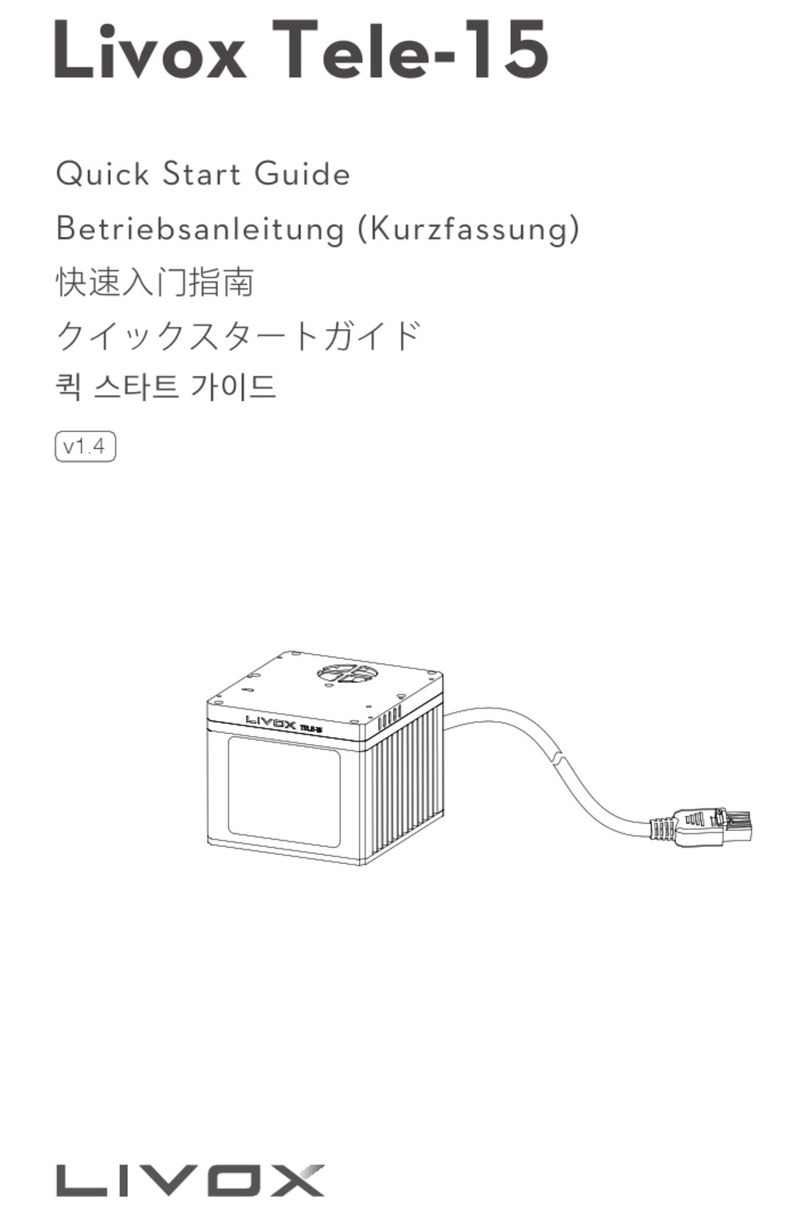
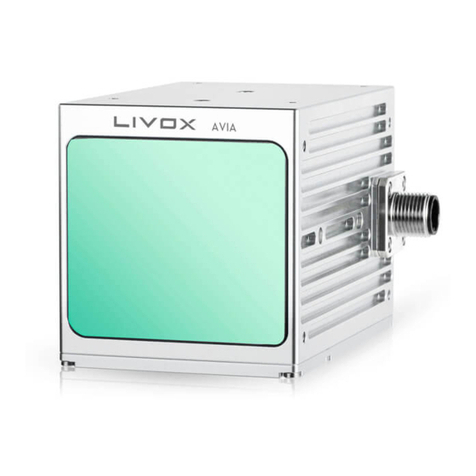
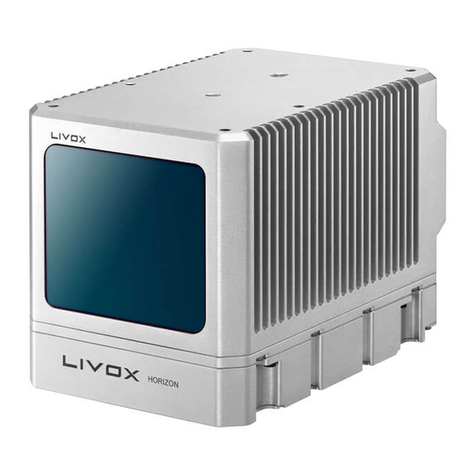
Livox Mid-40 User manual

Quick Start Guide
快速入门指南
クイックスタートガイド
Betriebsanleitung (Kurzfassung)
v1.0
Livox Mid-40


Livox Mid-40 Quick Start Guide
1
Disclaimer
This product is NOT a toy and is not suitable for children under the age of 16. Adults should keep the
product out of the reach of children and exercise caution when operating this product in the presence
of children.
This product incorporates various advanced technologies. However, inappropriate use of the product
could result in personal injury or property damage. Please read the materials associated with the
product before your rst use of the product.
These documents are included in the product package and/or are available online on the LIVOXTM
Technology Company Limited ("Livox") website (www.livoxtech.com).
The information in this document aects your safety and your legal rights and responsibilities. Read
this entire document carefully to ensure proper conguration before use. Failure to read and follow the
instructions and warnings in this document may result in serious injury to yourself or others, damage
to or loss of your Livox product, or damage to other objects in the vicinity.
By using this product, you hereby signify that you have read this disclaimer carefully and that you
understand and agree to abide by the terms and conditions herein. EXCEPT AS EXPRESSLY
PROVIDED IN LIVOX AFTER-SALES SERVICE POLICIES AVAILABLE AT www.livoxtech.
comSERVICE, THE PRODUCT AND ALL MATERIALS, AND CONTENT AVAILABLE THROUGH THE
PRODUCT ARE PROVIDED “AS IS” AND ON AN “AS AVAILABLE” BASIS, WITHOUT WARRANTY OR
CONDITION OF ANY KIND, EITHER EXPRESS OR IMPLIED. LIVOX DISCLAIMS ALL WARRANTIES
OF ANY KIND, EXCEPT AS EXPRESSLY PROVIDED IN LIVOX AFTERSALES SERVICE POLICIES,
WHETHER EXPRESS OR IMPLIED, RELATING TO THE PRODUCT, PRODUCT ACCESSORIES, AND
ALL MATERIALS, INCLUDING: (A) ANY IMPLIED WARRANTY OF MERCHANTABILITY, FITNESS
FOR A PARTICULAR PURPOSE, TITLE, QUIET ENJOYMENT, OR NONINFRINGEMENT; AND (B)
ANY WARRANTY ARISING OUT OF COURSE OF DEALING, USAGE, OR TRADE. LIVOX DOES
NOT WARRANT, EXCEPT AS EXPRESSLY PROVIDED IN LIVOX WARRANTY, THAT THE PRODUCT,
PRODUCT ACCESSORIES, OR ANY PORTION OF THE PRODUCT, OR ANY MATERIALS, WILL
BE UNINTERRUPTED, SECURE, OR FREE OF ERRORS, VIRUSES, OR OTHER HARMFUL
COMPONENTS, AND DOES NOT WARRANT THAT ANY OF THOSE ISSUES WILL BE CORRECTED.
NO ADVICE OR INFORMATION, WHETHER ORAL OR WRITTEN, OBTAINED BY YOU FROM THE
PRODUCT, PRODUCT ACCESSORIES, OR ANY MATERIALS WILL CREATE ANY WARRANTY
REGARDING LIVOX OR THE PRODUCT THAT IS NOT EXPRESSLY STATED IN THESE TERMS.
YOU ASSUME ALL RISKS FOR ANY DAMAGE THAT MAY RESULT FROM YOUR USE OF
OR ACCESS TO THE PRODUCT, PRODUCT ACCESSORIES, AND ANY MATERIALS. YOU
UNDERSTAND AND AGREE THAT YOU USE THE PRODUCT AT YOUR OWN DISCRETION AND
RISK, AND THAT YOU ARE SOLELY RESPONSIBLE FOR ANY PERSONAL INJURY, DEATH,
DAMAGE TO YOUR PROPERTY (INCLUDING YOUR COMPUTER SYSTEM OR MOBILE DEVICE OR
LIVOX HARDWARE USED IN CONNECTION WITH THE PRODUCT) OR THIRD PARTY PROPERTY,
OR THE LOSS OF DATA THAT RESULTS FROM YOUR USE OF OR INABILITY TO USE THE
PRODUCT. SOME JURISDICTIONS MAY PROHIBIT A DISCLAIMER OF WARRANTIES AND YOU
MAY HAVE OTHER RIGHTS THAT VARY FROM JURISDICTION TO JURISDICTION.
Livox accepts no liability for damage, injury or any legal responsibility incurred directly or indirectly
from the use of this product. The user shall observe safe and lawful practices including, but not limited
to, those set forth in these Safety Guidelines. You shall be solely responsible for all your behaviors
when using this product.

Livox Mid-40 Quick Start Guide
2
Livox Mid-40 ×1 Livox Converter ×1 Mounting Bracket ×1 Optical Window
Cleaning Cloth ×1
Screws Package×1
(M3)
* The cables package includes a sync cable and power cable.
In the Box
Cables Package * ×1
Warnings
1. Be careful when using LIVOX MIDTM-40 in conditions with low visibility (e.g., foggy or stormy
weather). In such conditions, the detection range may be reduced.
2. When mounting the Livox Mid-40, make sure there is enough space for ventilation for the air inlet
and air outlet (at least 10 millimeters from the nearest objects). It is normal for the temperature
of the Livox Mid-40 to increase during use. If the air inlet or air outlet is blocked, however, the
temperature increase will be more signicant, which may negatively aect the performance and
may lead to permanent damage.
3. DO NOT touch the optical window of the Livox Mid-40. Dust and stains on the optical window can
negatively aect the performance. Use compressed air, isopropyl alcohol, or lens cloths to clean
the optical window correctly (refer to the Livox Mid Series User Manual for more information on
how to clean optical windows).
4. When customizing Livox Mid-40 power cables, make sure the current-carrying capacity of the
cable can support the power requirement of Livox Mid-40. Otherwise, the product may become a
re hazard or be damaged permanently.
5. In order to avoid electric shocks or radiation exposure, DO NOT disassemble the Livox Mid-40. If
an accessory or product part needs to be replaced, contact Livox for support.
6. The Livox Mid-40 is classied as a Class 1 Laser Product (IEC/EN 60825-1: 2014) and is safe
under all normal conditions of use.
7. Liquid damage is not covered under warranty.
8. DO NOT drop the Livox Mid-40.
9. The Livox Mid-40 Quick Start Guide contains important information. Make sure to read before rst
use and keep for reference.

Livox Mid-40 Quick Start Guide
3
1. Introduction
The Livox Mid-40 is a high-performance LiDAR sensor that can be used for multiple applications
including autonomous driving, robot navigation, dynamic path planning, and high-precision
mapping. Livox Mid-40’s unique non-repetitive scanning technology ensures a high-density point
cloud, and precisely detects every detail inside its eld of view (FOV). Users can check the real-
time point cloud using Livox Viewer, and a software development kit (SDK) is provided to help
develop customizable applications using the data acquired from the point cloud. Livox Mid-40’s
high reliability ensures that it can work properly even in adverse weather conditions.
The Livox Mid-40 has a detection range of up to 260 meters.*
* This distance can be reached when the target object reects 80% or more of incident light (e.g., grey concrete
walls and roads have a reectivity range from 15% to 30%, while white plaster walls have a reectivity range
from 90% to 99%) in an environment with a temperature of 77° F (25° C).
Livox Mid-40 Livox Converter
1. Optical Window
2. Fan (Air Inlet)
3. Mounting Holes
4. LiDAR Connector
5. Air Outlet
1. LiDAR Connector Port
2. Power Port
3. Ethernet Port
4. Sync Port
1
2
3
4
1
2 3 4
5
2. Installation and Connection
FOV Range
The circular FOV of Livox Mid-40 is 38.4°. When mounting the sensor, make sure that the FOV is
not blocked by any objects.
45.70
38.4° 19.2°
38.4° 19.2°
Unit: mm

Livox Mid-40 Quick Start Guide
4
Mounting the Livox Mid-40 with Mounting Bracket
When the base is outtted with ¼ inch mounting holes, it is recommended to rst attach the Livox
Mid-40 to the mounting bracket and then mount the Livox Mid-40 using the ¼ inch mounting hole
on the mounting bracket. There are several M3 screw holes available on the sides of the mounting
bracket to help you mount the Livox Mid-40 based on your demands.
Mounting the Livox Converter
Refer to the dimensions below to mount the Livox Conveter correctly.
Unit: mm
Unit: mm
Unit: mm
52
58
24.9
32
50 4×M2 5
69
18
44
88
49
44 44
1/4-20
UNC
3-M3 6
3-M3 6
3-M3 6
Mounting the Livox Mid-40 without Mounting Bracket
Refer to the dimensions and the mounting holes in the diagrams below to mount or embed the
Livox Mid-40 to or in an appropriate place on the target base.
69
15.60
45.70
76
37
4-M3 6
3×4 1.2
88
66
54
42
24
20.30
4
1.23
7
16
40.50

Livox Mid-40 Quick Start Guide
5
• Make sure both the Livox Converter and the PC are connected to the LAN port on the router.
• The working voltage of the Livox Mid-40 is 10 V to 16 V. The voltage of most vehicles is 12 V, so most
vehicles batteries can be used to power the Livox Mid-40. When connecting the Livox Converter to the
external power source, make sure the positive and negative ends of the power cable are connected
correctly. If the voltage of the external power source exceeds 16 V, the Livox Mid-40 may be damaged.
Connection
Connecting the Cables
Power Cable
Sync Cable
Connecting the Livox Mid-40
The data of Livox Mid-40 can be transmitted by using an Ethernet cable. Addresses are assigned
by default to a Livox Mid-40 using the Dynamic Host Configuration Protocol (DHCP). It is
recommended to use a router for the rst time connecting the Livox Mid-40. You can assign a
static IP address to the Livox Mid-40, allowing you to connect to your computer directly using an
Ethernet cable. For more information, please refer to the Livox Mid Series User Manual.
A
AA
B
A
AA
B
PC
Livox Converter
Livox Mid-40
Ethernet Cable
External Power
Source
Ethernet Cable
Router with DHCP
Red (Positive); Black (Negative)
White (SYNC-); Blue (SYNC+); Black (GND)
Connects to the Livox Converter power port
Connects to the Livox Converter sync port
1. Connect the Livox Mid-40 to the Livox Converter.
2. Connect the PC and the Livox Converter to the router using Ethernet cables.
3. Connect the Livox Converter to an external power source.
Refer to the Livox Mid Series User Manual for more information.

Livox Mid-40 Quick Start Guide
6
• The Livox Mid-40 Quick Start Guide explains how to connect a single Livox Mid-40 and how to
check the point cloud. If there are multiple Livox Mid-40 sensors, please rst connect all the sensors
by following Step 5 or by clicking
. When there are more than one Livox Mid-40 sensors, before
checking their point cloud, make sure to import the extrinsic parameter by clicking
. By importing
the extrinsic parameter, point cloud data from multiple Livox Mid-40 sensors can be combined
together to give the nal point cloud data. For more information on connecting multiple sensors,
download the Livox Mid Series User Manual.
• Download and read the Livox Mid Series User Manual for more information on how to use Livox
Viewer.
3. Downloading and Using Livox Viewer
Visit www.livoxtech.com to download the latest Livox Viewer to check the point cloud. Livox
Viewer supports WINDOWS®7/8/10 (64 bit).
1. Download the le named Livox Viewer.
2. Unzip the le and click to open the .exe le named Livox Viewer.
3. Launch Livox Viewer, and click
. There will be a pop-up window. Users can check all
Livox LiDAR sensors in the Local Area Network (LAN) on this pop-up window.
4. Click "LiDAR" on the top of the pop-up window.
5. Select the Livox Mid-40 you want to check, and click to connect. Alternatively, select
the Livox Mid-40 you want to check, right click, and click "Connect".
6. After connecting, click to view the point cloud data.
Model Mid-40
Laser Wavelength 905 nm
Laser Safety ①Class 1 (IEC 60825-1:2014)
Detection Range ② (@100 klx) 90 m @ 10% reectivity
130 m @ 20% reectivity
260 m @ 80% reectivity
FOV 38.4° (circular)
Range Precision (1σ @ 20 m) 2 cm ③
Angular Accuracy < 0.1°
Beam Divergence 0.28° (Vertical) × 0.03° (Horizontal)
Point Rate 100,000 points/s
False Alarm Ratio (@100 klx) ④< 0.01%
Operation Temperate Range -4° to 149° F (-20° to 65° C)
IP Rating IP67 ⑤
Power ⑥10 W (Average)
Power Supply Voltage Range 10 ~ 16 V (DC Power supply only)
Specications

Livox Mid-40 Quick Start Guide
7
Model Mid-40
Laser Wavelength 905 nm
Laser Safety ①Class 1 (IEC 60825-1:2014)
Detection Range ② (@100 klx) 90 m @ 10% reectivity
130 m @ 20% reectivity
260 m @ 80% reectivity
FOV 38.4° (circular)
Range Precision (1σ @ 20 m) 2 cm ③
Angular Accuracy < 0.1°
Beam Divergence 0.28° (Vertical) × 0.03° (Horizontal)
Point Rate 100,000 points/s
False Alarm Ratio (@100 klx) ④< 0.01%
Operation Temperate Range -4° to 149° F (-20° to 65° C)
IP Rating IP67 ⑤
Power ⑥10 W (Average)
Power Supply Voltage Range 10 ~ 16 V (DC Power supply only)
①The beam divergence of the Livox Mid-40 is 0.28° (Vertical) × 0.03° (Horizontal). The divergence of the
embedded laser, however, is approximately 8.0° (Vertical) × 25.2° (Horizontal), which was measured at full
width at half maximum. The maximum power of the embedded laser may exceed 33 mW. In order to avoid
being injured by the laser, DO NOT disassemble the Livox Mid-40.
②Livox Mid-40 cannot detect objects which are less than 1 m away. Please contact Livox if you require your
Livox Mid-40 to detect objects within a range of 1 m.
③Tested in an environment at a temperature of 77° F (25° C) with a target object that has a reectivity of 80%
and is 20 meters away from the Livox Mid-40. The actual environment may dier from the testing environment.
The gure listed is for reference only.
④The false alarm ratio of the noise created by the stray light in a test environment of 100 klx at a temperature of
77° F (25° C).
⑤The Livox Mid-40 has an overall IP rating of IP67, while the fan has an IP rating of IP55.
⑥After powering on, Livox Mid-40 will reach the peak power value which may last for around 20 s. The
lower the temperature is, the higher the peak power value will be. For example, when the temperature is
-4° F (-20° C), the peak power value will be 40 W. Please make sure the power supply is suitable based on
the peak power value of the Livox Mid-40. Refer to the Livox Mid Series User Manual for more information.
Dimensions 88×69×76 mm
Weight Approx. 710 g

Livox Mid-40 快速入门指南
8
免责声明
本产品不适合未满 16 岁的人士使用。请勿让儿童接触本产品,在有儿童出现的场景操作时请务
必特别小心注意。
使用前请仔细阅读并遵循本产品说明书指导,同时遵守任何相关的国家和国际安全条例。本产品
是一款激光探测测距仪,在电源正常工作及各部件未损坏的情况下将提供三维激光扫描功能。访
问www.livoxtech.com 获取完整的《Livox MidTM 系列用户手册》、最新说明和警告。香港览沃
科技有限公司(以下简称“LivoxTM”)保留更新所有文档的权利。
请务必在使用产品之前仔细阅读本文档和《用户手册》,了解您的合法权益、责任和安全说明;
否则,可能带来财产损失、安全事故和人身安全隐患。一旦使用本产品,即视为您已理解、认可
和接受本文档全部条款和内容。使用者承诺对自己的行为及因此而产生的所有后果负责。使用者
承诺仅出于正当目的使用本产品,并且同意本文档全部条款和内容及 Livox 可能制定的任何相关
政策或者准则。
Livox 不承担因用户未按本文档、《用户手册》使用产品所引发的一切损失。 在遵从法律法规
的情况下,Livox 享有对本文档的最终解释权。Livox 有权在不事先通知的情况下,对本条款进
行更新,改版或终止。
警 告
1. 在空气能见度较差的情况下(例如雾霾、暴雨天气),Livox Mid-40 的有效检测范围将会减小,
使用时请格外小心。空气能见度较好情况下,Livox Mid-40 的有效检测范围请查看参数列表。
2. 安装时,请确保 Livox Mid-40 的出风口和入风口留有足够的通风空间(至少 10mm 空间无遮
挡)。工作时,产品温度将会有所上升,此为正常现象。若遮挡出风口和入风口,可能导致
产品温度过热,影响其性能甚至造成产品损坏。
3. 切勿用手触摸 Livox Mid-40 窗口。若 Livox Mid-40 窗口上有污点或灰尘等杂质,请使用压缩
空气除尘罐,酒精以及镜头清洁布进行清洁(具体清洁方式,请查看《Livox Mid 系列用户手
册》),以免污点灰尘等影响产品性能。
4. 如使用线材包配件自行定制电源线,请确认所使用的线材负载能力达到产品功耗需求,否则
可能导致产品损坏,甚至引发火灾。
5. 为减少触电危险以及防止可能存在的光辐射危险,请勿私自拆开或改装本产品。本产品不包
含用户可维修零件,需售后服务请联系 Livox。
6. Livox Mid-40 满足 Class 1 激光产品安全要求(IEC/EN 60825-1:2014),可于正常情况下安全
使用。
7. 因液体造成的损坏不在保修范围内。
8. 切勿摔落 Livox Mid-40。
9. 包装或说明书中含有重要信息,应保留。

Livox Mid-40 快速入门指南
9
Livox Mid-40 ×1 电源转接插座 × 1 安装底座 × 1 镜头清洁布 × 1
螺钉包 × 1(M3)
*线材包中包含一根同步信号线和一根电源线。
物品清单
1. 简介
Livox Mid-40 是一款高性价比、安全可靠的激光探测测距仪传感器,可广泛应用于包括无人
驾驶环境感知、机器人导航、动态路径规划、高精度测绘等众多领域。该款激光探测测距仪
采用独有的非重复扫描技术,提供更高密度的点云,精确探测视场中的每个细节。用户可通
过Livox Viewer 软件实时获取三维图像,更能基于 Livox SDK 进行开发,轻松获取 3D 点云
数据,满足个性化的应用需求。Livox Mid-40 的高可靠性设计,有效确保无论是极寒天气还
是酷热环境下都能稳定运行。
Livox Mid-40 最大探测距离可达 260 米。**
** 当环境温度为 25℃,目标物体的表面反射率为大于等于 80% 时(水泥地或路面的反射率为 15~30%,白色
石膏墙的反射率为 90%~99%)。
Livox Mid-40 电源转接插座
1. 窗口
2. 风扇(入风口)
3. 安装孔
4. 激光探测测距仪连接头
5. 出风口
1. 激光探测测距仪连接头接口
2. 电源接口
3. 以太网线接口
4. 同步信号口
线材包 * ×1
1
2
3
4
51
2 3 4

Livox Mid-40 快速入门指南
10
2. 安装连线
有效视场角(FOV)范围
Livox Mid-40 的FOV 为38.4°,如下图所示。安装时请注意 FOV 的有效范围,避免遮挡
FOV 区域。
使用安装底座
若所需安装 Livox Mid-40 的安装孔为 ¼英寸口,可通过将 Livox Mid-40 安装至安装底座,
然后再通过安装底座的 ¼英寸口,将 Livox Mid-40 安装至合适位置。安装底座侧面还配有
多个 M3 螺丝孔,用户可根据需求进行固定。
单位:mm
单位:mm
69
18
44
88
49
44 44
1/4-20
UNC
3-M3 6
3-M3 6
3-M3 6
45.70
38.4° 19.2°
38.4° 19.2°
单位:mm
直接安装 Livox Mid-40
请根据下图所示的 Livox Mid-40 尺寸大小及安装孔位尺寸,将 Livox Mid-40 安装至合适位置。
69
15.60
45.70
76
37
4-M3 6
3×4 1.2
88
66
54
42
24
20.30
4
1.23
7
16
40.50

Livox Mid-40 快速入门指南
11
安装电源转接插座
请根据下图所示的电源转接插座尺寸大小及安装孔位尺寸,将其安装至合适位置。
单位:mm
52
58
24.9
32
50 4×M2 5
连 线
线 序
线材包中的同步信号线及电源线线序如下,请确保按照线序(或正负极)正确连接。
电源线
同步信号线
连 接
Livox Mid-40 通过以太网进行数据通信,出厂时默认采用动态主机配置协议(DHCP)分配
IP 地址给到 Livox Mid-40。第一次使用时推荐通过路由器与电脑连接。如需将 Livox Mid-40
设置成静态 IP 直接与电脑连接,请查看《Livox Mid 系列用户手册》获取详细信息。
A
AA
B
A
AA
B
PC
电源转接插座
Livox Mid-40
使用以太网线
连接外部电源
使用以太网线
路由器(DHCP)
红色(正极);黑色(负极)
白 色( SYNC-); 蓝 色( SYNC+); 黑色(地线)
连接至电源转接插座电源接口
连接至电源转接插座同步信号接口
更多详细信息请参见《Livox Mid 系列用户手册》。

Livox Mid-40 快速入门指南
12
• 本文以单个Livox Mid-40 为例进行说明,如需查看多个 Livox Mid-40 的点云视图,则按照步骤 5中
的描述逐个连接 Livox Mid-40,或者点击连接所有 ,将局域网内的所有设备连接。当查看超过 1个
Livox Mid-40 的点云图时,需点击 按键对所有的 Livox Mid-40 的坐标系进行外部参数导入。通过
导入外部参数,可整合多个 Livox Mid-40 的数据,并输出最终的点云图。详细内容,请前往官网下
载并查看《Livox Mid 系列用户手册》。
• 关于 Livox Viewer 更详细的使用方法,及每个按钮的详细说明,请查阅《Livox Mid 系列用户手册》。
3. 下载并安装 Livox Viewer
用户可前往 Livox 官网 www.livoxtech.com Livox Mid-40 页面下载最新的 Livox Viewer,查
看点云图。Livox Viewer 仅支持 Windows®7/8/10 (64 位)。
1. 下载 Livox Viewer 文件。
2. 解压文件,并于已解压的文件中打开文件名为 Livox Viewer 的应用程序。
3. 打开后点击 ,将会弹出设备管理窗口。若当前局域网中已有 Livox 设备,则管理窗口
中将会自动显示该设备。
4. 于管理窗口上方勾选 LiDAR。
5. 选择需要查看的 Livox Mid-40,点击图标 完成连接。或选择需要查看的 Livox Mid-40
后,单击鼠标右键,选择 Connect 完成连接。
6. 连接完成后,点击开始播放图标 ,即可观察到所选设备的点云图像。
型号 Mid-40
激光波长 905 nm
安全级别①Class 1 (IEC 60825-1:2014)
量程②(@100 klx) 90 m @ 10% 反射率
130 m @ 20% 反射率
260 m @ 80% 反射率
FOV 38.4°圆形
距离精度 (1σ @ 20m) 2 cm ③
角度精度 < 0.1 º
规格参数
1. 将Livox Mid-40 上的雷达连接头插入电源转接插座的雷达连接头接口。
2. 使用以太网线,分别连接电源转接插座和个人电脑至路由器。
3. 通过电源转接插座的电源接口连接外部电源。
• 使用路由器进行连线时,请确保连接至 Livox Mid-40 以及个人电脑的以太网线都接入路由器的 LAN
接口。
• Livox Mid-40 的工作电压为 10V-16V,与市面上常见的汽车电池电压相同。当连接至汽车电池时,请
注意电源接口按照正负极正确连接。若外部电源电压超过 16V,可能导致设备损坏。

Livox Mid-40 快速入门指南
13
①激光探测测距仪中内置激光器辐射光的发散角为 25.2°( 水 平 ) × 8°(竖直)(半高宽,FWHM),最大激光
功率可能超过 33mW。切勿拆开 Livox Mid-40,以免造成危险。
②当被测物体距离 Livox Mid-40 小于 1m 时,Livox Mid-40 无法对其进行测量。若您想使用 Livox Mid-40 探
测1m 以内的物体,请联系 Livox 公司。
③测试条件为环境温度 25℃,目标物体距离 20 m,反射率为 80%。具体指标与测试条件相关,以实测结果为准。
④在100klx 日光条件下,环境温度 25℃,环境杂散光产生的虚警噪点的比例。
⑤Livox Mid-40 主体部分防护级别为 IP67,风扇部分防护级别为 IP55。
⑥设备启动时,在持续 20 秒内存在高峰值功率。周围温度越低,峰值功率越高,例如 -20℃时,峰值功率可
达40 W,请合理设计电源,更多详细信息请参见《Livox Mid 系列用户手册》
光束发散角度 0.28°( 竖直 ) ×0.03°( 水平 )
数据率 100,000 points/s
虚警率 (@100 klx) ④< 0.01%
工作温度 -20 ˚C 至65 ˚C
防护级别 IP67 ⑤
功率⑥10 W ( 平均 )
供电电压范围 10 ~ 16 V ( 仅支持直流电源 )
尺寸 88×69×76 mm
重量 约 710 g

Livox Mid-40 クイックスタートガイド
14
免責事項
警告

Livox Mid-40 クイックスタートガイド
15
Livox Mid-40 × 1 Livox コンバーター× 1 取り付けブラケット× 1 光学ウィンドウクリー
ニングクロス× 1
ネジパッケージ× 1
(M3)
同梱物
ケーブルパッケージ *
× 1

Livox Mid-40 クイックスタートガイド
16
1. はじめに
*
Livox Mid-40 Livox Converter
1
2
3
4
1
2 3 4
5
2. 取り付けと接続
FOV 範囲
45.70
38.4° 19.2°
38.4° 19.2°

Livox Mid-40 クイックスタートガイド
17
Livox Mid-40 の取り付け(取り付けブラケットあり)
Livox コンバーターの取り付け
52
58
24.9
32
50 4×M2 5
69
18
44
88
49
44 44
1/4-20
UNC
3-M3 6
3-M3 6
3-M3 6
Livox Mid-40 の取り付け(取り付けブラケットなし)
69
15.60
45.70
76
37
4-M3 6
3×4 1.2
88
66
54
42
24
20.30
4
1.23
7
16
40.50

Livox Mid-40 クイックスタートガイド
1818
•
•
接続
ケーブルの接続
Livox Mid-40 の接続
A
AA
B
A
AA
B
Table of contents
Languages:
Other Livox Accessories manuals
Popular Accessories manuals by other brands

Orno
Orno OR-AE-1310 Operating and instalation instructions

PCB Piezotronics
PCB Piezotronics IMI SENSORS 080A132 Installation and operating manual

Motorline professional
Motorline professional CORTINA ZIP User's and installer's manual

Lakeland
Lakeland PLATE WARMER Instruction booklet

EVE
EVE 10EBY9901 Get started

Genius
Genius EasyPen M610X user manual