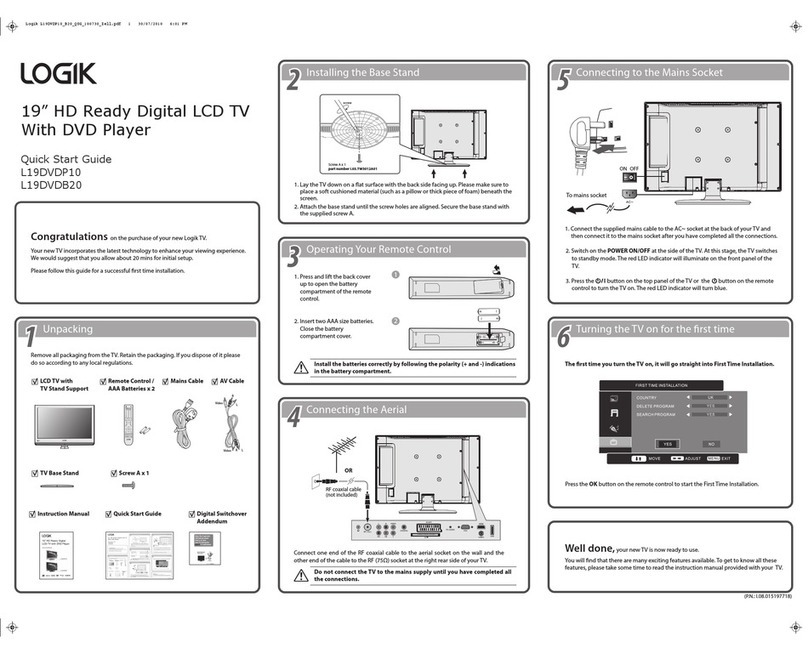
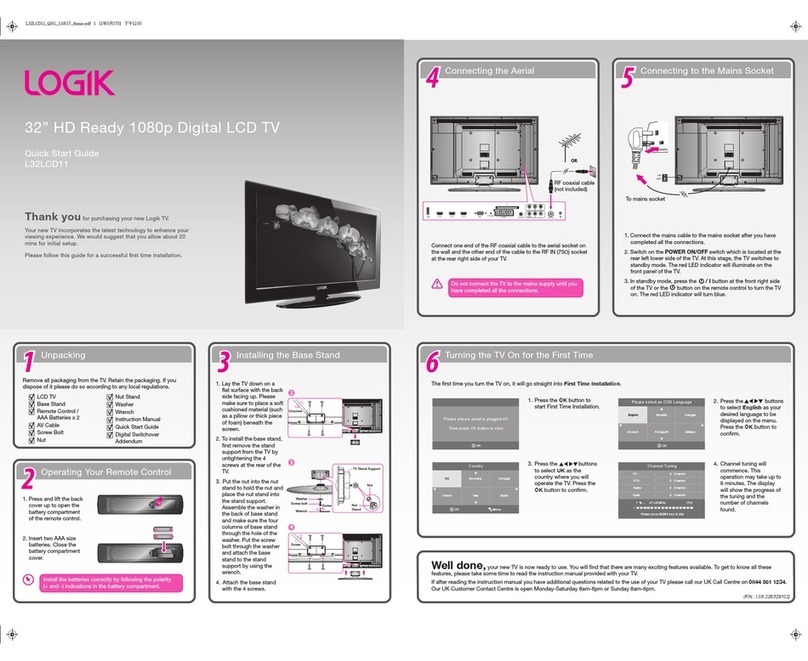
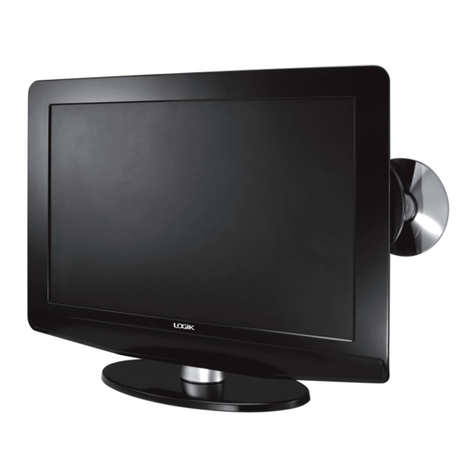
Logik LCXW19LN1 User manual

-Before Attempting to connect, operate or adjust this product, please save and read the User Guide completely.
-The style, parts, and accessories of the product shown in this guide may be different due to various models.
-The design and specications are subject to change without notice.
Contents and
Safety information
Getting startedConnectionsRemote controlInitial settingBasic operationOSD operationTroubleshooting &
Specications
How to use your LCD TV
82-233-00043
LCXW19LN1

Contents and
Safety information
Getting started Connections Remote control Initial setting Basic operation OSD operation
2
Troubleshooting &
Specications
3
Contents and
Safety information
Getting startedConnectionsRemote controlInitial settingBasic operationOSD operationTroubleshooting &
Specications
Contents
Contents ........................................................................................................................... Page 2
FCC and safety information ........................................................................................... Page 3
Important safety instruction ........................................................................................... Page 4
Precautions ...................................................................................................................... Page 5
Getting started ................................................................................................................. Page 6
-Adjusting the view angle of LCD TV .................................................................................................... Page 6
-Installing the LCD TV on the wall ......................................................................................................... Page 6
-Top panel ............................................................................................................................................. Page 7
-Front panel ........................................................................................................................................... Page 7
-Rare panel ............................................................................................................................................ Page 8
Connections ..................................................................................................................... Page 9
-Connecting to aerial ............................................................................................................................. Page 9
-Connecting to SKY Box/ DVD Recorder/ Satellite Receiver ............................................................... Page 9
-Connecting to external audio/video devices ......................................................................................... Page 10
-Connect to personal computer ............................................................................................................. Page 11
Remote Control ............................................................................................................... Page 12
-Remote control functions ..................................................................................................................... Page 12
-Insert batteries to remote control ......................................................................................................... Page 13
-Remote control operation range .......................................................................................................... Page 13
Initial settings .................................................................................................................. Page 14
-Turning on the power ........................................................................................................................... Page 14
-Setting TV OSD language .................................................................................................................... Page 14
-Setting TV system ................................................................................................................................ Page 14
-Setting SOUND system ........................................................................................................................ Page 14
-Setting TV channels ............................................................................................................................. Page 14
Basic operation ............................................................................................................... Page 15
-Changing to different TV channels ....................................................................................................... Page 15
-Sound volume ...................................................................................................................................... Page 15
-Sleep timer ........................................................................................................................................... Page 15
-TV type ................................................................................................................................................. Page 15
-Channel skip ........................................................................................................................................ Page 15
-Channel setup ...................................................................................................................................... Page 15
-Fine tune .............................................................................................................................................. Page 15
-Switching input signal ........................................................................................................................... Page 15
-Program settings .................................................................................................................................. Page 16
-Teletext operation ................................................................................................................................ Page 16
OSD operation ................................................................................................................. Page 17
-Picture menu (TV/AV mode) ................................................................................................................ Page 17
-Sound menu (TV/AV/PC mode) ........................................................................................................... Page 18
-Channel menu (TV mode) .................................................................................................................... Page 19
-Setup menu (TV/AV/PC mode) ............................................................................................................ Page 20
-OSD menu (TV/AV/PC mode) .............................................................................................................. Page 21
-PC menu (PC mode) ............................................................................................................................ Page 22
Troubleshooting .............................................................................................................. Page 23
Specication..................................................................................................................... Page 24
Contents and
Safety information
Getting started Connections Remote control Initial setting Basic operation OSD operation
2
Troubleshooting &
Specications
3
Contents and
Safety information
Getting startedConnectionsRemote controlInitial settingBasic operationOSD operationTroubleshooting &
Specications
CAUTION
Keep product out of direct sunlight. Exposure to direct sunlight or extreme heat may cause damage or
malfunction. To prevent re or shock hazard, do not expose to rain or moisture.
FCC and Safety information
FCC Notice:
This equipment has been tested and found to comply with the limits for a Class B digital device pursuant
to part 15 of the FCC Rules. These limits are designed to provide reasonable protection against harmful
interference in a residential installation. This equipment generates, uses and can radiate radio frequency
energy and, if not installed and used in accordance with the instructions, may cause harmful interference
to radio communications. However, there is no guarantee that interference will not occur in a particular
installation. If this equipment does cause harmful interference to radio or television reception, which
can be determined by turning the equipment off and on, the user is encouraged to try to correct the
interference by one or more of the following measures:
– Reorient or relocate the receiving aerial.
– Increase the separation between the equipment and receiver.
–
Connect the equipment into an outlet on a circuit different from that to which the receiver is connected.
– Consult the dealer or an experienced radio/TV technician for help.
The lightning with arrowhead symbol, within an equilateral triangle, is intended to alert the
user to the presence of uninsulated “dangerous voltage” within the product’s enclosure that may
be of sufcient magnitude to constitute a risk of electric shock to persons.
The exclamation point within an equilateral triangle is intended to alert the user to
the presence of important operating and maintenance (servicing) instructions in the
literature accompanying the appliance.
CAUTION
RISK OF ELECTRIC SHOCK
DO NOT OPEN
This symbol on the product or in the instructions means that your electrical and electronic equipment
should be disposed at the end of its life separately from your household waste. There are separate
collection systems for recycling in the EU.
For more information, please contact the local authority or your retailer where you purchased the
product.

Contents and
Safety information
Getting started Connections Remote control Initial setting Basic operation OSD operation
4
Troubleshooting &
Specications
5
Contents and
Safety information
Getting startedConnectionsRemote controlInitial settingBasic operationOSD operationTroubleshooting &
Specications
l Damage
Never use your TV if it is damaged in any way. Always place your TV on a at level surface avoiding anywhere which
may be subject to strong vibration.
l Weather
It is advisable to unplug the aerial during an electrical storm.
l Temperature
Avoid extremes of temperature, either hot or cold, place your TV well away from heat sources such as radiators or
gas/electric res.
l Naked Flames
Naked ames such as candles and night lights should not be placed on or near your TV.
l Ornaments
Vases and other water containers or lamps should not be put on top of your TV set.
l Moisture
Do not allow your TV to be exposed to rain, moisture, dust. If any liquid is spilt into your TV it can cause serious dam-
age. If you spill any liquid into your TV switch it off at the mains immediately. Contact your store.
l Ventilation
The TV must be well ventilated. Do not cover your TV or place it inside a small conned space. Make sure that there
is a gap of at least 10cm on both sides and 20 cm at the top.
l Interference
Do not place your TV on or near appliances which may cause electromagnetic interference (TV or Hi-Fi speakers). If
you do, it may adversely affect the working of the unit, and cause a distorted picture or sound.
l Screen Burn
A characteristic of Plasma and LCD TV Panels is that displaying the same image for a long time may cause a
permanent after-image to remain on the screen. This is called screen burn. Most pictures shown on your TV will be
constantly moving and ll the screen.
Important safety instructions
Examples of images that you need to watch out for are as follows (this is not an all-inclusive list):
Black Bars: If black bars appear at the left/right or top/bottom of the screen it is recommended to change the
format so that the picture lls the entire screen.
TV Channel Logos: e.g. Shopping channel logos and pricing displays - especially if they are bright and
stationary. Moving or low-contrast graphics are less likely to cause ageing of the screen.
PIP and Multipip: Do not view for long periods of time using the PIP or Multipip functions.
Time Displays
Teletext: Do not view a stationary page for long periods of time.
TV/DVD Menus: e.g. Listings of DVD disk content.
Pause Mode: Do not leave the screen in pause mode for long periods of time, e.g. When watching DVDs or
videos.
Note: To prevent screen burn if viewing any of the above for long periods of time, reduce contrast and bright-
ness when viewing. Once burn-in occurs it will never disappear completely.
l Batteries
Batteries are easily swallowed by young children. Do not allow young children to play with the remote control unit.
l Covers
Do not remove any xed covers as this may expose dangerous voltages.
l Standby
The standby button on the remote control doesn’t switch off the TV completely and the TV will continue to draw
electricity from the mains supply. Therefore in the interests of safety and to avoid unnecessary energy consumption,
never leave your TV in standby while unattended for long periods of time, e.g. overnight, while on holiday or while
out of the house.
l Power Cord
Make sure your TV or TV stand is not resting on top of the power cord, as the weight of the TV may damage the cord
and create a safety hazard. Make sure that the mains plug is easily accessible.
l Packaging
If you can store the packaging it will prove useful should you need to transport the TV to protect it while it is in
transit. Try to reuse packaging wherever you can. If you cannot store it, contact your local authority for details of your
nearest recycling facilities.

Contents and
Safety information
Getting started Connections Remote control Initial setting Basic operation OSD operation
4
Troubleshooting &
Specications
5
Contents and
Safety information
Getting startedConnectionsRemote controlInitial settingBasic operationOSD operationTroubleshooting &
Specications
Please read these precautions before operating the unit
nPower cord protection
To avoid any malfunctions of the unit, and to protect against electric shock, re or personal injury, please
observe the following.
l Hold the plug rmly when connecting or disconnecting the AC power cord.
l Keep the AC power cord away from heating appliances.
l Never put any heavy object on the AC power cord.
l Do not attempt to repair or reconstruct the AC power cord in any way.
nPlacement
Avoid placing the unit in areas of:
l Direct sunlight or heating radiators, or closed automobiles
l High temperature (over 35 C) or high humidity (over 90%)
l Much dust as the internal parts may be seriously damaged.
nNon-use periods
When the unit is not being used, turn it off. When left unused for a long period of time, the unit should
be unplugged from the household AC outlet.
nNo ngers or other objects inside
l Touching internal parts of the unit is dangerous, and may cause serious damage to the unit. Do not attempt to
disassemble the unit.
l Do not put any foreign object on the disc tray.
nKeep away from water/magnet
l Keep the unit away from vases, tubs, sinks, etc. If liquids are spilled into the unit, serious damage could
occur.
l Never bring a magnet or magnetized object near the unit.
nStacking
l Place the unit in a horizontal position, and do not place anything heavy on it.
nCondensation
Moisture may form on the lens in the following conditions:
l Immediately after a heater has been turned on
l In a steamy or very humid room
l When the unit is suddenly moved from a cold environment to a warm one If moisture forms inside the unit, it may
not operate properly. In this case, turn on the power and wait about one hour for the moisture to evaporate.
Precautions
Proper positioning of this LCD TV
1. Locate the LCD TV in the room where light does not strike the screen directly.
2. Avoid the LCD TV exposes to sunlight and other sources of heat.
3. Make sure enough space for ventilation between TV and wall.
4. Do not cover the ventilator when using the LCD TV.
5. Total darkness or over brightness on the picture screen can cause eyestrain, soft and indirect lighting environment
is recommend for watching.
6. Do not use solutions to clear LCD panel such as petroleum, the panel can be cleaned with a damp cloth.
7. The LCD TV adapter is operated on AC 110-240V,50/60Hz.

Contents and
Safety information
Getting started Connections Remote control Initial setting Basic operation OSD operation
6
Troubleshooting &
Specications
7
Contents and
Safety information
Getting startedConnectionsRemote controlInitial settingBasic operationOSD operationTroubleshooting &
Specications
Thank you for you purchasing this LCD TV.
Before you start using this device, please read this User Guide to help you
operate this LCD TV.
Adjusting the view angle of LCD TV
1. The vertical angle could be adjusted to 5˚ forward and 10˚ backward.
2. Hold the LCD TV stand with one hand to prevent slipping when adjusting the angle.
Installing the LCD TV on the wall
1. Unscrew 5 screws of stand cover in the rear cabinet.
2. Unscrew 6 screws and then remove the stand of LCD TV.
3. Attach the wall-mount kit to the TV. Please refer to the instructions supplied with the additional
purchase of wall-mount kit on how to mount the TV on the wall
1
2
3
5˚ 10˚
Example: 75mmx75mm
mini wall-mount
NOTE:
We strongly recommend that this product is installed by qualied personnel with enough skill and
competence. Dixons Stores Group cannot assume liabilities for damage caused by
mistake in installation, mounting, misuse or modication.

Contents and
Safety information
Getting started Connections Remote control Initial setting Basic operation OSD operation
6
Troubleshooting &
Specications
7
Contents and
Safety information
Getting startedConnectionsRemote controlInitial settingBasic operationOSD operationTroubleshooting &
Specications
Front Panel
6 7 8 9
Top Panel
1. MENU button
Press to display the main menu.
2. VOLUME +/- button
Press to adjust the volume level.
3. CHANNEL +/- button
Press to select TV channel.
4. SOURCE button
Press to toggle through the input signals
connected to TV. (TV/AV/SVIDEO/PC/
SCART 1/SCART 2)
5. POWER button
Press to turn on/off the LCD TV.
6. Speaker
7. LCD screen
8. Power indicator
The power indicator lights in blue when turning
on the power, lights in red when in standby
mode.
9. Remote sensor
Receives signals from the remote control.
MENU -VOLUME+ -CHANNEL+ SOURCE POWER
1 2 3 4 5

Contents and
Safety information
Getting started Connections Remote control Initial setting Basic operation OSD operation
8
Troubleshooting &
Specications
9
Contents and
Safety information
Getting startedConnectionsRemote controlInitial settingBasic operationOSD operationTroubleshooting &
Specications
Rear Panel
10. TV Stand
11. Stand cover
12. DC IN connector
13. PC INPUT jack
Connect to VGA output jack on PC or other
D-sub output devices, such as Set Top
Box.
14. SCART 1 IN/OUT jack
Connects to European type SCART input
or output connector on other audio/video
devices.
15. SCART 2 IN jack
Connects to European type SCART output
connector on other audio/video devices.
16. ANTENNA IN jack
Connects the 75-ohm coaxial cable to
aerial or CATV.
17. EARPHONE jack
Output sound signal to earphone, when the
earphone is plugged into this LCD TV, the
build-in speaker will close automatically .
18. PC AUDIO in jack
Connects the audio output jack on PC.
19. L/R AUDIO in jacks
Connects to the L/R audio output jacks on
an audio/video device.
20. VIDEO IN jack
Connects to video output jack on other
video device.
21. S-VIDEO IN jack
Connects to S-video output jack on other
video device.
SVIDEO IN VIDEO IN AUDIO IN PC AUDIO IN EARPHONE
17
18
19
20
21
DC IN PC IN SCART 1 IN/OUT SCART 2 IN ANTENNA IN
12 13 14 15 16
10 11

Contents and
Safety information
Getting started Connections Remote control Initial setting Basic operation OSD operation
8
Troubleshooting &
Speci cations
9
Contents and
Safety information
Getting startedConnectionsRemote controlInitial settingBasic operationOSD operationTroubleshooting &
Speci cations
Connecting to an aerial (antenna)
• Connects the 75-ohm coaxial cable to an Aerial or CATV.
Connecting to Set Top Box/DVD Recorder/
Satellite Receiver (not supplied)
SCART
(not supplied)
DC IN PC IN SCART 1 IN/OUT SCART 2 IN ANTENNA IN
Aerial/Cable/Satellite
(not supplied)
DC IN PC IN SCART 1 IN/OUT SCART 2 IN ANTENNA IN
SCART OUT SCART OUT
Aerial/Cable
(not supplied)
or
Example
(not supplied)

Contents and
Safety information
Getting started Connections Remote control Initial setting Basic operation OSD operation
10
Troubleshooting &
Speci cations
11
Contents and
Safety information
Getting startedConnectionsRemote controlInitial settingBasic operationOSD operationTroubleshooting &
Speci cations
Connecting to external audio/video devices
• Use the Audio/Video/S-video/Scart cables to connect with external audio/video signal sources.
Example: Game/DVD Player/
DVD Recorder/Camcorder/VCR
or
Audio cable
(not supplied)
S-video cable
(not supplied)
SCART
(not supplied)
Video cable
(not supplied)
Red
White
Yellow
Red
White
Yellow
DC IN PC IN SCART 1 IN/OUT SCART 2 IN ANTENNA IN
SVIDEO IN VIDEO IN AUDIO IN PC AUDIO IN EARPHONE
Earphone
(not supplied)

Contents and
Safety information
Getting started Connections Remote control Initial setting Basic operation OSD operation
10
Troubleshooting &
Speci cations
11
Contents and
Safety information
Getting startedConnectionsRemote controlInitial settingBasic operationOSD operationTroubleshooting &
Speci cations
Connecting to personal computer
• This device also can connect to a computer as computer monitor, you can output audio and video
signals from your computer to this LCD TV.
• Connect to your computer via audio and video(D-sub connector) cables.
• The computer resolution will be automatically detected when you switch to PC mode. (If the LCD TV
does not detect it automatically, refer to PC Menu/AUTO details on page 22.)
D-sub connector
(not supplied)
PC or Laptop
(not supplied)
DC IN PC IN SCART 1 IN/OUT SCART 2 IN ANTENNA IN
Audio cable
(not supplied)
SVIDEO IN VIDEO IN AUDIO IN PC AUDIO IN EARPHONE
Note:
We suggest to use the VGA cable with a magnetic
ring on each end to prevent radio frequency and
electro-magnetic interference (EMI/RFI).
Magnetic ring

Contents and
Safety information
Getting started Connections Remote control Initial setting Basic operation OSD operation
12
Troubleshooting &
Specications
13
Contents and
Safety information
Getting startedConnectionsRemote controlInitial settingBasic operationOSD operationTroubleshooting &
Specications
Remote control functions
Vol +/- Button: Adjust volume level
Picture Button: Switch to different
brightness settings
(NATIVE/SOFT/
BRIGHT/PERSONAL)
0-9 Number Buttons:
Direct access the channel
by press 0-9 buttons
Recall Button: Return to the last
viewed channel
Wide Button: Switch to
panoramic screen (16:9),
Normal (4:3)
Reveal Button:
Display or hide teletext information
Size Button:
Adjust the size of teletext display
screen
Power Button: Power on/off
Menu Button: Main menu
Text Button: Turn on/off teletext function
Index Button:
Return to index page of teletext
Mix Button:
Change the level of transparency
Source Button:
Select different input sources
(TV/AV/SVIDEO/PC/SCART/SCART 2)
Info Button:
Display source (TV/AV/SVIDEO/PC/
SCART/SCART 2) information.
MTS Button:
Mono/Stereo/Dual I/Dual II selection
Mute Button: Turn on/off the sound
Cursor Buttons:
▲(Up) ▼(Down) ◄(Left) ►(Right)
Select menu/setup items or settings
CH +/- Button: Select previous or
next channel
Sleep Button: Set timer of sleeping
Hold Button:
Lock the current page of teletext
Subpage Button:
Open the subpage of teletext
OK Button:
Confirm the selection or exit to the
previous menu
Red/Green/Yellow/Blue Buttons:
Teletext topic selection
NOTE:
• The remote control may differ due to variance in packaging.

Contents and
Safety information
Getting started Connections Remote control Initial setting Basic operation OSD operation
12
Troubleshooting &
Specications
13
Contents and
Safety information
Getting startedConnectionsRemote controlInitial settingBasic operationOSD operationTroubleshooting &
Specications
Insert batteries to remote control
1. Remove the battery cover of remote control.
2. Insert 2 AAA batteries in the correct position
3. Replace the battery cover.
NOTE:
• Alkaline batteries are recommended.
• Remove batteries when the remote control is not using for a long time.
• Make sure the batteries are properly aligned according to the (+) and (-) poles.
Remote control operation range
30º
30º
Remote sensor
NOTE:
• Do not point bright lights at the remote control signal sensor.
• Do not place objects between the remote control unit and the remote control signal sensor.
• Do not use this remote control unit while operating the remote control unit of other equipment.
3
2
1
• Point the remote control unit no more than 5 meters from the remote control sensor and within 60° of
the front of the unit.
• In addition, the operating distance may vary according to the brightness of the room.

Contents and
Safety information
Getting started Connections Remote control Initial setting Basic operation OSD operation
14
Troubleshooting &
Specications
15
Contents and
Safety information
Getting startedConnectionsRemote controlInitial settingBasic operationOSD operationTroubleshooting &
Specications
Turning on the power
MENU -VOLUME+ -CHANNEL+ SOURCE POWER
Power button
Setting TV channels
Setting TV system
1. Press the Menu button.
2. Press ◄►buttons to select CHANNEL.
and press ▼button to select TV SYS.
3. Press ◄►buttons to select the TV system. It
depends on the system is used in your location
(e.g. for the UK, the system should be set to
PAL).
4. Press Menu/OK to leave the main menu.
TV SYS. PAL ►
►
Setting TV OSD language
1. Press the Menu button.
2. Press◄►buttons to select OSD and
press▼button to LANGUAGE.
3. Press◄►buttons to select the language you
want to display.
4. Press Menu/OK twice to leave the main
menu.
1. Plugs the supplied AC power cord to the
power outlet.
2. Press the POWER button on the top of LCD
TV, or from remote control.
3. The screen display will appear after a few
seconds.
Note:
• To turn off the power, press the POWER button again.
• The power indicator lights in blue when you turn on the
power, and in red when you turn off power.
Setting SOUND system
1. Press the Menu button.
2. Press ◄►buttons to select CHANNEL.
and press ▼button to select SOUND SYS.
3. Press ◄►buttons to select the SOUND
system. It depends on the system is used in
your location. (e.g. for the UK, the system is
“I”)
4. Press Menu/OK twice to leave the main
menu.
SOUND SYS. B/G ►
►
• Before watching TV programs, the TV channel
setting is necessary.
• After the aerial has been connected, position
it at a proper location that allows good
reception.
1. Switch to TV mode on the remote control.
2. Press Menu button to display the main menu.
3. Press◄►buttons to select CHANNEL.
4. Press ▼button to select COUNTRY.
5. Press ◄►buttons repeatedly to select the the
country in which you are located.
6. Press▲▼button to select AUTO SCAN.
7. Press ►, the TV will start to search and
store all the channels available in your area.
Please be patient, this process will take a few
minutes.
8. When the auto scan process is complete, you
may need to press Menu/OK twice in order to
return to your TV screen.
AUTO SCAN 2
146.05 MHz VHF L
AUTO SCAN ►
COUNTRY UK ►
►

Contents and
Safety information
Getting started Connections Remote control Initial setting Basic operation OSD operation
14
Troubleshooting &
Specications
15
Contents and
Safety information
Getting startedConnectionsRemote controlInitial settingBasic operationOSD operationTroubleshooting &
Specications
Changing to different TV
channels
• Press 0-9 NUMBER buttons on the remote
control to input channel’s number, the channel
will change after few seconds.
• Use the CH +/- to switch channels on the remote
control or on the top of the TV
Channel button
MENU -VOLUME+ -CHANNEL+ SOURCE POWER
or
Sound volume
• Press VOLUME +/- on the remote control or
on the top of the TV to increase or decrease the
volume level.
Note:
• To silence the sound, press MUTE on the remote
control. Press MUTE again or VOLUME +/- twice to
cancel the mute.
MENU -VOLUME+ -CHANNEL+ SOURCE POWER
Volume button
or
Sleep timer
• This function allows you to set up the LCD TV
automatically to turn off the power.
• Press SLEEP button to set up sleeping timer.
You can set up 15/30/45/60 minutes, each press
of SLEEP button.
TV type
• This function allows you to select your preferred
TV type while you are watching TV programmes.
• Press Wide button to toggle following:
Panoramic screen (16:9)/Normal (4:3)
• This function can not work on PC mode.
Channel skip
1. Press the Menu button.
2. Press◄►buttons to select CHANNEL,
and press▼button to go to the CHANNEL
item.
3. Press◄►to select the TV channel you want
to skip.
4. Press▼to select SKIP, and then press
ON/OFF.
Channel setup
1. Press the Menu button.
2. Press◄►buttons to select CHANNEL,
and press▼button to go to the CHANNEL
item.
3. Press◄►to select the TV channel you want to
replace.
4. Press▼to select MANUAL, and then
press◄► to scan through the channels until
you nd the channel you want to set up.
Fine tune
1. Press the Menu button.
2. Press◄►buttons to select CHANNEL, and
press▼button to go to CHANNEL item.
3. Press◄►to select the TV channel you want to
ne tune.
4. Press▼to select FINE, and then
press◄►buttons to adjust.
Switching input signals
• This LCD TV can input different external
signals from AV equipment and PC (TV/AV/
SVIDEO/ PC/SCART 1/SCART 2).
1. Press SOURCE button on the top of the LCD
TV or from remote control.
2. Press -CHANNEL button (LCD TV)
or▲▼(remote control) to select the source you
want to input, and then press SOURCE (LCD
TV) or OK (remote control) button to confirm.
MENU -VOLUME+ -CHANNEL+ SOURCE POWER
Source button
or
+

Contents and
Safety information
Getting started Connections Remote control Initial setting Basic operation OSD operation
16
Troubleshooting &
Specications
17
Contents and
Safety information
Getting startedConnectionsRemote controlInitial settingBasic operationOSD operation
Troubleshooting &
Specications
Text
Press the Text button to display the teletext
information.
Red/Green/Yellow/Blue
The features of these four colored buttons are
dened on different channels , each button will
correspond to various colored page numbers.
Index
Press Index button to return to the main index
page of teletext.
Hold
Press Hold button to hold the current teletext
page when the browsing multi-page information.
Press it again to release it.
Mix
Press Mix button to adjust the transparent level
of teletext background.
Reveal
Press Reveal button to display the hidden
teletext , press it again to hide it.
Size
Press Size button to adjust the size of teletext
display screen.
Subpage
Sometimes there are too much information on
teletext, the channel will divide it to subpage,
press Subpage button to switch directly to next
subpage.
Teletext operation
• Teletext is a variety of information services
which provided by television broadcast
companies. The content of teletext is only
available if the channel transmits it.
Text Index Hold Sleep
Mix Reveal Size Subpage
Program settings
Before you customize your program settings,
make sure you have already followed the
“Setting TV channels” procedures (refer to page
14).
1. Press the Menu button.
2. Press◄►buttons to select CHANNEL.
3. Press▼button to select PROGRAM, then
press ► to bring up the PROGRAM menu.
Note: The programs listed below are
examples only.
NAME
1. Press▲▼buttons to select the channel
you want to rename, then press Red
button to enter the NAME menu.
2. Press ▲▼buttons to add the first character
in the highlighted row. Press ►button and
repeat the process to add more characters.
3. Press Red button to confirm or Green
button to cancel.
DELETE
1. Press▲▼buttons to select the channel
you want to delete.
2. Press Green button to enter the DELETE
menu. The selected channel will be
highlighted.
3. Press Red button to delete or Green
button to cancel.
SWAP
1. Press ▲▼buttons to select the channel
you want to swap.
2. Press Yellow button to enter the SWAP
menu.
3. Press▲▼buttons to select the channel
you want to swap with the previously
selected channel.
4. Press Red button to swap or Green button
to cancel.
Red Green Yellow
PROGRAM
NAME DELETE SWAP
8
9
10
11
12
13
14
15
16
17
18
19
20
21
1 CH 1
2 CH 2
3 CH 3
4 CH 4
5 CH 5
6 CH 6
7 CH 7

Contents and
Safety information
Getting started Connections Remote control Initial setting Basic operation OSD operation
16
Troubleshooting &
Speci cations
17
Contents and
Safety information
Getting startedConnectionsRemote controlInitial settingBasic operationOSD operation
Troubleshooting &
Speci cations
Picture Menu (TV/AV Mode)
Item Option Description
PICTURE CONTRAST Increase or decrease the picture contrast.
BRIGHTNESS Adjust the picture to brighter or darker.
HUE* Adjust the picture’s color tone.
SATURATION Increase or decrease the color’s saturation.
SHARPNESS Adjust the picture sharper or softer.
COLOR
TONE
NORMAL Adjust the screen background color, depending on
your preference.
WARM
COOL
PICTURE
MODE
PERSONAL Picture mode provides three different customized
settings (except PERSONAL item) which allow you
to select your preferred setting quickly and directly.
If you adjust one of the following items: CONTRAST/
BRIGHTNESS/HUE/SATURATION/SHARPNESS/
COLOR TONE, the PICTURE mode will change to
PERSONAL item automatically.
NATIVE
SOFT
BRIGHT
CONTRAST
BRIGHTNESS
HUE
SATURATION
PICTURE
* Hue only can work on NTSC mode.
1. Press Menu button to enter the main menu.
2. Press ◄(Left) ►(Right) to select PICTURE.
3. Press ▲(Up) ▼(Down) button select the option,
and then press ◄(Left) ►(Right) to adjust the
parameter.
4. Press OK or Menu button to leave parameter
setting, press OK or Menu twice to leave the
main menu.

Contents and
Safety information
Getting started Connections Remote control Initial setting Basic operation OSD operation
18
Troubleshooting &
Speci cations
19
Contents and
Safety information
Getting startedConnectionsRemote controlInitial settingBasic operationOSD operation
Troubleshooting &
Speci cations
Sound Menu (TV/AV/PC Mode)
Item Option Description
SOUND BASS Increase or decrease lower pitch sounds.
TREBLE Increase or decrease higher pitch sounds.
BALANCE Adjust the sound of right and left speakers’ balance.
SOUND MODE NEWS Sound mode provides four different customized
settings (except PERSONAL item) which allow you
to select your preferred equalizer setting quickly
and directly. If you adjust one of the following items:
BASS/TREBLE/BALANCE, the SOUND mode will
change to PERSONAL item automatically.
THEATER
HALL
PERSONAL
STEREO
MTS* MONO MTS allows you to select audio signals while you are
watching TV programs. These options depend on
signals transmitted from broadcast stations.
STEREO
DUAL I
DUAL II
* MTS item only can be used when you are TV mode.
MTS function also can be selected by the remote control.
BASS
TREBLE
BALANCE
SOUND MODE ◄ PERSONAL ►
SOUND
1. Press Menu button to enter the main menu.
2. Press ◄(Left) ►(Right) to select SOUND.
3. Press ▲(Up) ▼(Down) button select the option,
and then press ◄(Left) ►(Right) to adjust the
parameter.
4. Press OK or Menu button to leave parameter
setting, press OK or Menu twice to leave the
main menu.

Contents and
Safety information
Getting started Connections Remote control Initial setting Basic operation OSD operation
18
Troubleshooting &
Speci cations
19
Contents and
Safety information
Getting startedConnectionsRemote controlInitial settingBasic operationOSD operation
Troubleshooting &
Speci cations
Channel Menu (TV Mode)
Item Option Description
CHANNEL AUTO SCAN Before watching TV programs for the rst time on
this LCD TV, you have to operate “AUTO SCAN”
procedure. It can help you to auto search TV
channels.
CHANNEL Display the channel you are watching, select channel
or set up the channel for SKIP/MANUAL/FINE items.
TV SYS. PAL Select the TV system according to the system is used
in your location.
Note:
This function also can work on AV mode.
SECAM
AUTO
SOUND SYS. B/G Select the sound system according to the system
available in your area.
I
D/K
L
L’
AUTO
SKIP ON Skip the channel you do not want to watch. (Refer to
Channel skip on page 15 for details)
OFF Turn off the skip function.
MANUAL Set up the TV channel. (Refer to Channel setup on
page 15 for details)
FINE This function allows you to slightly adjust the received
channel with a weak signal. (Refer to Fine tune on
page 15 for details)
COUNTRY UK/IRELAND/DENMARK/FINLAND/ITALY/NORWAY/SPAIN/
SWEDEN/LUXEMBOURG/FRANCE/CZECH./POLAND/
HUNGARY/AUSTRIA/GERMANY/SWITZERLAND/BELGIUM/
NETHERLANDS
PROGRAM This function allows you to customize your program settings.
(Refer to Program settings on page 16 for details)
AUTO SCAN ►
CHANNEL 1
TV SYS. ◄ PAL ►
SOUND SYS. ◄ B/G ►
CHANNEL
1. Press Menu button to enter the main menu.
2. Press ◄(Left) ►(Right) to select CHANNEL.
3. Press ▲(Up) ▼(Down) button select the option,
and then press ◄(Left) ►(Right) to adjust the
parameter.
4. Press OK or Menu button to leave parameter
setting, press OK or Menu twice to leave the
main menu.

Contents and
Safety information
Getting started Connections Remote control Initial setting Basic operation OSD operation
20
Troubleshooting &
Speci cations
21
Contents and
Safety information
Getting startedConnectionsRemote controlInitial settingBasic operationOSD operation
Troubleshooting &
Speci cations
SETUP(TV/AV/PC Mode)
Item Option Description
SETUP AUTO OFF
(TV/AV Mode)
ON If no signal (TV/AV/S-VIDEO/SCART) input to LCD
TV, the LCD will go into screen saver mode, after
15minutes, the screen will turn off automatically.
OFF Turn off this function.
TXT
LANGUAGE
EAST Select the teletext language according to the
system is used in your area.
WEST
ARABIC
RUSSIAN
TXT E/W EAST In some countries, the broadcast companies
transmit different teletexts to different areas, this
function allows you to select the suitable teletext.
WEST
AUTO OFF ◄ ON ►
TXT LANGUAGE ◄ EAST ►
TXT E/W ◄ WEST ►
SETUP
1. Press Menu button to enter the main menu.
2. Press ◄(Left) ►(Right) to select SETUP.
3. Press ▲(Up) ▼(Down) button select the option,
and then press ◄(Left) ►(Right) to adjust the
parameter.
4. Press OK or Menu button to leave parameter
setting, press OK or Menu twice to leave the
main menu.
Option Description
AUTO OFF
(PC Mode)
AUTO ON The LCD TV will go into standby mode
after 15 minutes if it is not used.
AUTO OFF Signal input Turn off this function.
No signal input The LCD TV will go into standby mode
after 15 seconds.
Table of contents
Other Logik LCD TV manuals

Logik
Logik L26DIGB10 User manual

Logik
Logik L22DVDB10E User manual

Logik
Logik L37DIGB10 User manual

Logik
Logik L19DIGB11 User manual

Logik
Logik L24DVDB21 User manual

Logik
Logik L32LCD11 User manual

Logik
Logik L19LDVB19 User manual

Logik
Logik L22FED13 User manual

Logik
Logik L24DIGB11 User manual

Logik
Logik L32DIGB20 User manual

Logik
Logik L40LCD11 User manual

Logik
Logik L40DIGB20 User manual

Logik
Logik L19DVDP10 User manual

Logik
Logik L26DIGB10 User manual

Logik
Logik L19LDIB10 User manual

Logik
Logik L19DIGB10 User manual

Logik
Logik L24HE14 User manual

Logik
Logik L22DIGB11 User manual

Logik
Logik LCX27WN2 Operating and installation instructions

Logik
Logik L26DVDB10 User manual