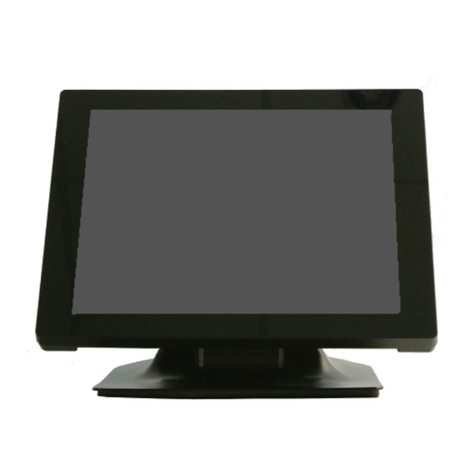
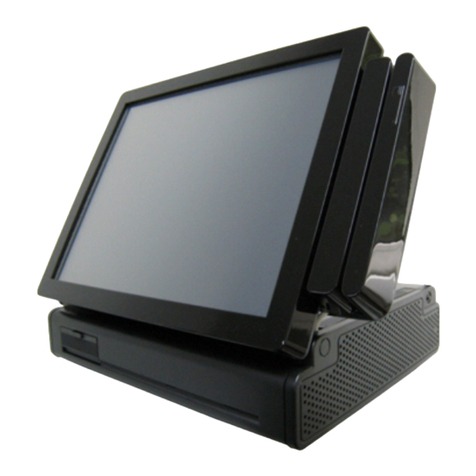
Longshine RCT150 User manual

Flexible True Flat High Performance
RCT150
USER MANUAL
15” All-in-One True Flat Touch Screen POS System
Version: 1.0
Date: Jan 30, 2015
POS Terminal

RCT150
ii
About this Manual
Thank you for purchasing RCT150 All-in-One system. This terminal offers all the enhanced features
and is easy to connect to various optional devices for optimal performance. This user manual
describes how you can setup and connect your terminal.
Copyright
The information in this guide is subject to change without prior notice.© Copyright 2015
All rights reserved. This product and related documentation are protected by copyright and are
distributed under licenses restricting their use, copying, and distribution. No part of this
documentation may be reproduced in any form by any means without prior written authorization
of the manufacturer and its licensors, if any.

RCT150
iii
Federal Communications Commission (FCC)
Declaration of Conformity
This device complies with part 15 of the FCC Rules. Operation is subject to the following two
conditions:
1. This device may not cause harmful interference.
2. This device must accept any interference received, including interference that may cause
undesirable operation.
This equipment has been tested and found to comply within the limit of a Class A digital device,
pursuant to Part 15 of the FCC Rules. These limits are designed to provide reasonable protection
against harmful interference in a residential installation. This equipment generates, uses, and can
radiate radio frequency energy and, if not installed and used in accordance with the instructions,
may cause harmful interference to radio communications. However, there is no guarantee that
interference will not occur in a particular installation. If this equipment does cause harmful
interference to radio or television reception, which can be determined by turning the equipment
off and on, the user is encouraged to try to correct the interference by one or more of the
following measures:
zReorient or relocate the interference receiving antenna.
zIncrease the distance of separation between the equipment and interference receiver.
zConnect the equipment to a power outlet on a circuit different from that to which the
interference receiver is connected.
zConsult the dealer or an experienced radio/TV technician for help.
WARNING:
Use the included AC p
ower cord so as not to interfere with radio and television reception.
If you use other cables, it may cause interference with radio and television reception.
WARNING:
TO PREVENT FIRE OR SHOCK HAZARD, DO NOT EXPOSE THIS APPLIANCE TO RAIN OR MOISTURE.
WARNING:
This is a equipment of Class A. This device could cause interferences in residential areas; in the case of
interferences it can be demand from the user to provide appropriate solutions for it.
WARNING:
The use of shielded cables for connection of
the monitor to the graphics card is required to assure compliance
with FCC regulations. Changes or modifications to this unit not expressly approved by the party responsible for
compliance could void the user’s authority to operate this equipment.
RoHS


RCT150
iv
BEFORE YOU PROCEED
3 Read the safety notices and the User Manual carefully before using the product.
4 Keep the box and packaging in case the product needs to be shipped in the future.
5 Follow the product and warning label instructions.
6 For safety reasons, only qualified service personnel should open the terminal.
7Any changes or modifications that do not follow the instructions in this manual will void
this product/s warranty.
! SAFETY PRECAUTIONS
In the interest of safety, please observe the following precautions:
Power Requirement:
This product is designed to 250W ATX power supply.
Never connect to any outlet or power supply having a different voltage or frequency.
! POWER SUPPLY SAFETY NOTICE
zDisconnect this terminal from the AC outlet before cleaning. Use only a moistened cloth
for cleaning.
zCheck the voltage of the power source when connecting the equipment to the power
outlet. Make sure the voltage of the power outlet conforms within voltage range of the
terminal. Failure to comply may cause the electric shock or damage to the terminal. If
you are not sure of the electricity voltage that you are using, contact your local
electricity company.
zTo avoid electric shocks, disconnect the power cord from the electrical outlet before
relocating the system.
zDo not overload electric power outlets to avoid fire or electric shocks.
zProtect the power cord from being walked on or pinched particularly at plug.
zIf the equipment is not used for a long time, disconnect the equipment from the mains
to avoid damage.
zNever allow liquid into ventilation openings. This could cause fire or electrical shock.

RCT150
v
! OPERATING INSTRUCTIONS
zKeep the User Manual for future reference.
zFollow the product label instructions.
zLay this terminal Upside down on a stable safe surface when installing. Heavy objects
placed on the product can cause damage or obstruct proper ventilation.
zIf one of the following situations arises, notify a qualified service technician immediately:
The power cord or plug is damaged.
The terminal has been dropped and damaged.
The terminal does not function according to the user manual.
The terminal has obvious signs of damage.
zDo not place the unit where with high humidity and dust. They can cause extensive
damage. Avoid places where unit is likely to be exposed to oily fumes and vapors.
zPlaces exposed to direct sunlight, or near heating appliances can attain extremely high
temperatures, which may deform the cabinet, or can become a prime cause of damage.
zThe operating ambient temperature range is 0 ᩹C to 40 ᩹C F ( 32 ᩹- 104 ᩹)), and
humidity of 10% - 90%. When using the unit on the system rack, be sure to keep this
ambient temperature inside the range.
zAvoid shaky places or hot-springs areas where hydrogen sulfide and acidic ions are likely
to be generated.
zWhen transporting this unit, make sure it is not likely to be subjected to impacts. They can
be a prime cause for damage.

RCT150
7
CONTENTS
1. Introduction ................................................................................................................................... 8
1.1 How to use this manual ............................................................................................. 8
1.2 A Visual tour of RCT150 ............................................................................................. 9
1.2a What comes with RCT150 ............................................................................ 11
1.2b Dimensions of RCT150 and its optional peripheral ..................................... 12
1.3 Features of RCT150 ................................................................................................. 14
1.4 IO Interface ........................................................................................................... 15
2. Hardware setup ......................................................................................................................... 16
2.1 Pre-installation notice ............................................................................................. 16
2.2 Hardware assembly................................................................................................. 16
2.2.1 HDD / SSD .................................................................................................... 16
2.3 Optional peripherals installation ............................................................................ 20
2.3.1 Magnetic Stripe Reader Installation./ 2-1 MSR+Ibutton module ................ 20
2.3.2 2-Line VFD customer display ........................................................................ 23
2.3.3 Second 7” 4-Line LCD display / 7” LCD display / 10” LCD display ................ 25
3. Service manual ......................................................................................................................... 26
3.1 Touch panel ........................................................................................................... 26
3.2 LCD Panel ............................................................................................................... 27
3.3 Motherboard ........................................................................................................... 28
4. Specification............................................................................................................................. 30

RCT150
8
1. Introduction
Welcome
Thanks you for choosing RCT150. RCT150 was designed to help enhancing your business
flexibility by offering a superior customer experience.
1.1 How to use this manual
This manual contains all the information needed for setting up a RCT150. In addition, you can
also consult the manual for the instructions to assemble / to service the terminal and to install
the optional peripherals.
zIntroduction to RCT150 and this user manual.
zAll necessary information for hardware setup.
zSpecifications of RCT150 and configuration of the motherboard.
zInformation for troubleshooting RCT150.

RCT150
9
1.2 A Visual tour of RCT150
Before you start, please take a few moments to become familiar with RCT150 Terminal.
Elegant, Solid, Fashionable and Compact Design
Touch screen
Base / Stand
Zero-Bezel Design
VFD/Second display
mounting hole
Function
button
MSR mounting
hole

RCT150
10
“Very Easy Maintenance”
Step 1: Please position the terminal as shown below
on a working table with “soft protective pad”.
Step 2: Please remove the circled five
screws.
Step 3: The back cover can now be removed.
Only authorized system engineers are advised to disassemble the device.
Please be aware that unauthorized modifications will void your warranty.
You are advised to contact your authorized suppli
er for technical support.
Please follow the instructions to reach all inner components:

RCT150
11
1.2a What comes with RCT150
Please check if your packaging contains below listed items before setting up your RCT150. If any
of the items is missing or damaged, please contact your supplier immediately.
¾Main system with hidden power supply in the case.
¾CD for product User Manual, Touch Kits and Peripherals Drivers & Utilities.
¾M/B CD for user manual, drivers and utilities.
¾AC power cord.
Optional Items:
¾MSR
¾2-1 MSR+iButton module
¾Second 7” 4-Line LCD display / 7” LCD display
/ 10” LCD display
¾VFD customer display
RCT with MSR module
RCT with VFD module
RCT with second 7” 4-Line LCD display /
7” LCD display / 10” LCD display
RCT with 2-1 MSR+iButton module

RCT150
12
1.2b Dimensions of RCT150 and its optional peripheral
15” RCT150 dimensions:
15” RCT150 with MSR integrated:
15” RCT150 with 2-1 MSR+iButton module
integrated
:
15” RCT150 with second 7” LCD monitor
integrated:

RCT150
13
15” RCT150 with second 10” LCD monitor
integrated:
15” RCT150 with VFD customer display
integrated
:

RCT150
14 Version: 1.0
1.3 Features of RCT150
Low power consumption
LV (Low Voltage) design of the device is embedded
with a unique chipset and CPU renders power
saving f
unction.
Saving cost of ownership
Modular design provides the owner with the
following benefits:
(a) cost effectiveness,
(b) customization flexibility, and
(c) Easy maintenance.
Dust/water proof
RCT150 features a highly durable, rigorously tested
design that is reliable and dependable in rugged
environments.
Environment protection
Environmental friendly, RoHS compliant product.
High Stability
RCT150 has a longer overall system MTBF to
provide a higher stability during operation.

RCT150
15 Version: 1.0
1.4 IO Interface
IO interface is located at the bottom of the display. To clearly see IO interface you must remove
the cable cover.
Chart of the connector panel:
Item No
Description
A
Power supply AC input
B
12V DC out
C
VGA OUT
D
6 USB 2.0 Port
E
Mic/Line out
F
HDD slot
G
PS/2 Keyboard
H
Gigabit - LAN Port
I
LPT Port
J
COM1 –COM5 Serial Ports
(COM2-5 power selectable for jumper setting RI/ +5V/ +12V MAX power output)
D
E
A
B
C
J
I
H
F
G
12V DC output is connected back-end
products require fire retardant case
Max 1A

RCT150
16 Version: 1.0
2. Hardware setup
Getting Started
This section describes how to install or to replace accessories and component on your RCT150.
2.1 Pre-installation notice
Before you start installing RCT150 terminal, please read the following notices carefully.
1. Do not plug in or unplug any interior devices, such as memory module when the system
power is still on.
2. For installation and compatibility, DDR3 RAM Module provided by the manufacturer is
strongly recommended.
3. The USB device connector is Hot Swap. Do not plug in or unplug any connectors other than
USB devices when the power is still on.
4. Do not insert or remove any devices or components from RCT150 while the power is still on.
5. Please make sure that flat touch screen will be well protected by soft pad on working table.
When positioning RCT150 with display facing downwards.
2.2 Hardware assembly
Please make sure that the system power is turned off and the power supply is disconnected
when making any hardware changes to RCT150.
2.2.1 HDD / SSD
Step 2: Please remove the HDD or SSD
screw.
Step 1: Please position the terminal as
shown below
on a working table with
“soft protective pad”.

RCT150
17 Version: 1.0
Step 7: Please push in HDD or SSD into the terminal
where indicated below.
Step 4: Then remove HDD or SSD from
the tray.
Step 3: Dismounting HDD or SSD from the
tray requires two screws to be removed.
Step 6: Please tighten left and right screws
indicated below to fix HDD or SSD in place.
Step 5: Please insert new HDD or SSD
into the tray.
Step 8: Please tighten the circled screw
to
complete the installation.

RCT150
18 Version: 1.0
2.2.2 Memory
Step 1: Please remove five screws indicated below
to expose memory module.
Step 2: Please see below where RAM module
can be reached for replacement.

RCT150
19 Version: 1.0
Please follow the instructions below to change memory on RCT150.
1. Make sure that the terminal and all other peripherals which are connected to the terminal
have been powered down and unplugged.
2. Disconnect all power cords and cables.
3. Locate the SO-DIMM socket on the system board.
4.
Push down the module until the clips at each end of the socket lock into position. You will
hear a distinctive click, indicating the module is correctly locked into position
2.2.3 Mini-PCI-E ,m-SATA SSD
Step 1: Please position the terminal as shown below
on a working table with “soft protective pad”.
Clip
Clip
Step 2: Please remove the circled five
screws.
Step 3: Mini PCI-E Connecter can then be found where circled.

RCT150
20 Version: 1.0
2.3 Optional peripherals installation
2.3.1 Magnetic Stripe Reader Installation./ 2-1 MSR+Ibutton module
Step 1: Please position the terminal as shown below
on a working table with “soft protective pad”.
Step 4: Connect Pin Head and push header directly
into Mini PCI
-E Connecter.
Step 5: Please reverse step 1~2 to assemble the terminal.
Step 2: Please remove the circled five
screws.

RCT150
21 Version: 1.0
Step 3: Please refer to the chart below for P/N assignment of USB.
Step 4: Please tightly plug in the connector into USB pin header in correct orientation.
MSR
Pin
No
function
9
NC
7
GND
5
USB+
3
USB
1
5V
Table of contents
Other Longshine Touch Terminal manuals

Longshine
Longshine COBRA15 User manual

Longshine
Longshine POS GT-150 Series User manual

Longshine
Longshine GFT-150 Series User manual

Longshine
Longshine 15IW Series User manual

Longshine
Longshine COBRA15 User manual

Longshine
Longshine RDT-150F Series User manual

Longshine
Longshine CRANE 1 User manual

Longshine
Longshine POS GFT-150 Series User manual

Longshine
Longshine GFT-150 Series User manual