manuals.online logo
Brands
  1. Home
  2. •
  3. Brands
  4. •
  5. Lonza
  6. •
  7. Laboratory Equipment
  8. •
  9. Lonza 4D-Nucleofector User manual

Lonza 4D-Nucleofector User manual

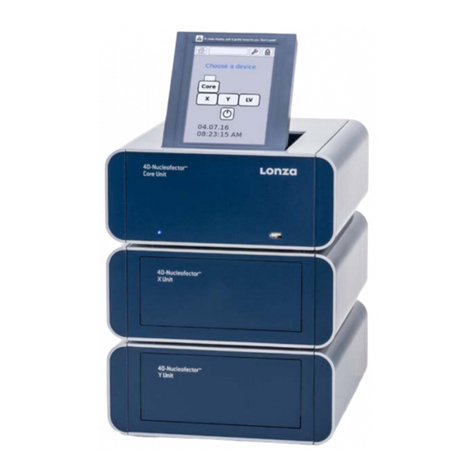
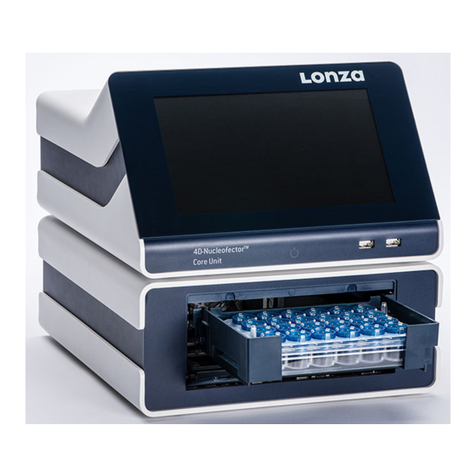
4D-Nucleofector®
Next Generation
Quick Guide
Installation of units
1. Unpack the units
2. Connect the cables as shown
3. Switch on the device at the rear
4. Press the power button at the front
The core unit will automatically detect the functional units attached.
Starting an experiment
1. Pick the vessel type you will use in your experiment by tapping on
the vessel symbol (A)
2. Select the wells to dene by tapping on the well or dragging across
the screen for denition of more than one sample at once
3. Press “Next” to see a summary of all dened wells (this step is
only enabled if all selected samples are fully dened (Sample Type,
Pulse Code and Solution))
4. Load the sample in the Nucleocuvette® Vessel
5. Press “Start” to run the experiment (C)
A
B
C
Prior to rst use please read the manual provided with the USB stick or at www.lonza.com/new-4d-nucleofector and
read the safety instructions carefully.
• Pick sample type (B)
• Choose pulse code and solution or pick a
predened cell type code
• Press “Deselect” to remove the selection
H
E
F
G
D
For 96-well Unit:
• switch between plate view and strip view for more details
• In plate view select the wells and tap on edit to dene the sample (D)
Using predened and saved experiments
1. Tap on the accordion symbol in the left top corner of the home
screen
2. Select “Experiment”
3. Find the experiment by scrolling the screen or using the arrows at
the right side
4. Choose the experiment by tapping in the checkmark box beside the
experiment name (E)
5. Press “Load”(F)
6. Check the conditions dened and press “Next” to see a summary of
all dened wells
7. Load the sample
8. Press “Start” to run the experiment (G)
The home screen
1. You can reach the home screen any time by tapping on the
accordion menu and selecting Home (H)
2. You can start a new experiment by tapping on the vessel type
3. Load experiments by selecting “Top experiments”
4. Change the settings by tapping on the gear symbol in the upper
right corner and selecting “Settings”
J
I
K
L
MN O
For detailed information download the manual at www.lonza.com/new-4d-nucleofector or
nd it on the USB stick provided with this device.
System settings
1. By tapping the gear symbol and selecting “Settings” (I), the system
settings screen is shown
• Change time and date or time and date format (J)
• Adjust display brightness (K)
• Adjust volume or mute sound (L)
• Select “Experiment autonaming” to automatically name the
experiment with date and time created (M)
• Check for Network (N)
• Receive information on Firmware version (O)
2. “Open and Close Drawer” are only visible if a vessel was selected
before tapping on the gear icon.
3. Shutdown will apply the transportation lock (only if not unselected
in settings menu) and safely shutdown the 4D-Nucleofector®
System
Lonza Cologne GmbH – 50829 Cologne Germany
The Nucleofector® Technology is covered by patent and/or patent
pending rights owned by the Lonza Group Ltd or its aliates.
All trademarks belong to Lonza, registered in USA, EU or CH or to
third party owners and used only for informational purposes. The
information contained herein is believed to be correct and corre-
sponds to the latest state of scientic and technical knowledge.
However, no warranty is made, either expressed or implied, regar-
ding its accuracy or the results to be obtained from the use of such
information and no warranty is expressed or implied concerning
the use of these products. The buyer assumes all risks of use and/
or handling. Any user must make his own determination and satisfy
himself that the products supplied by Lonza Group Ltd or its a-
liates and the information and recommendations given by Lonza
Group Ltd or its aliates are (i) suitable for intended process or
purpose, (ii) in compliance with environmental, health and safety
regulations, and (iii) will not infringe any third party’s intellectual
property rights. The user bears the sole responsibility for determin
-
ing the existence of any such third party rights, as well as obtaining
any necessary licenses. For more details: www.lonza.com/legal.
©2021 Lonza. All rights reserved.
CD-DS047 06/21
Contact us
North America
Customer Service: +1 800 638 8174 (toll free)
Fax: +1 301 845 8338
order.us@lonza.com
Scientic Support: +1 800 521 0390 (toll free)
scientic.support@lonza.com
Europe
Customer Service: +32 87 321 611
order.europe@lonza.com
Scientic Support: +32 87 321 611
scientic.support.eu@lonza.com
International
Contact your local Lonza distributor
Customer Service: +1 301 898 7025
scientic.support@lonza.com
International Oces
Australia +61 3 9550 0883
Belgium +32 87 321 611
Brazil +55 11 4028 8000
China +86 21 6305 8866
France 0800 91 19 81 (toll free)
Germany 0800 182 52 87 (toll free)
India +91 124 6052941
Japan +81 3 6264 0660
Luxemburg +32 87 321 611
Singapore +65 6521 4379
The Netherlands 0800 022 4525 (toll free)
United Kingdom 0808 234 97 88 (toll free)

Other manuals for 4D-Nucleofector

3

Other Lonza Laboratory Equipment manuals

Lonza 4D-Nucleofector User manual

Lonza

Lonza 4D-Nucleofector User manual

Lonza Amaxa HT Nucleofector User manual

Lonza

Lonza Amaxa HT Nucleofector User manual

Lonza PyroTec PRO Instructions for use

Lonza

Lonza PyroTec PRO Instructions for use

Lonza Amaxa Nucleofector II User manual

Lonza

Lonza Amaxa Nucleofector II User manual

Lonza PAGEr Minigel Chamber User manual

Lonza

Lonza PAGEr Minigel Chamber User manual

Lonza 4D-Nucleofector User manual

Lonza

Lonza 4D-Nucleofector User manual

Popular Laboratory Equipment manuals by other brands

Planet IPOE-162 user manual

Planet

Planet IPOE-162 user manual

starlight LED3-P user manual

starlight

starlight LED3-P user manual

PerkinElmer OPTIMA 8000 Customer Hardware and Service Guide

PerkinElmer

PerkinElmer OPTIMA 8000 Customer Hardware and Service Guide

PerkinElmer TriNEST Instrument manual

PerkinElmer

PerkinElmer TriNEST Instrument manual

Biotage PRESSURE+ 48 user manual

Biotage

Biotage PRESSURE+ 48 user manual

Thermo Scientific Neslab EX-7 Installation, Operation, Basic Maintenance

Thermo Scientific

Thermo Scientific Neslab EX-7 Installation, Operation, Basic Maintenance

LaboGene CoolSafe instruction manual

LaboGene

LaboGene CoolSafe instruction manual

Relyon plasma piezobrush PZ2-i operating instructions

Relyon plasma

Relyon plasma piezobrush PZ2-i operating instructions

PAXXO PACTOSAFE 4.0 Original instructions

PAXXO

PAXXO PACTOSAFE 4.0 Original instructions

Optika Italy ACCESSORIES Series instruction manual

Optika Italy

Optika Italy ACCESSORIES Series instruction manual

10x Genomics Visium CytAssist user guide

10x Genomics

10x Genomics Visium CytAssist user guide

Teledyne FALCON GC Operation and maintenance manual

Teledyne

Teledyne FALCON GC Operation and maintenance manual

Hardy Diagnostics QuickSlide AFB-PRO User's operation manual

Hardy Diagnostics

Hardy Diagnostics QuickSlide AFB-PRO User's operation manual

MingTai SUN18-III Operation manual

MingTai

MingTai SUN18-III Operation manual

Hettich UNIVERSAL 320 operating instructions

Hettich

Hettich UNIVERSAL 320 operating instructions

Sartorius Centrisart G-26C operating manual

Sartorius

Sartorius Centrisart G-26C operating manual

Sigma 8KS operating manual

Sigma

Sigma 8KS operating manual

LBX instruments INC-R user manual

LBX instruments

LBX instruments INC-R user manual

manuals.online logo
manuals.online logoBrands
  • About & Mission
  • Contact us
  • Privacy Policy
  • Terms and Conditions

Copyright 2025 Manuals.Online. All Rights Reserved.