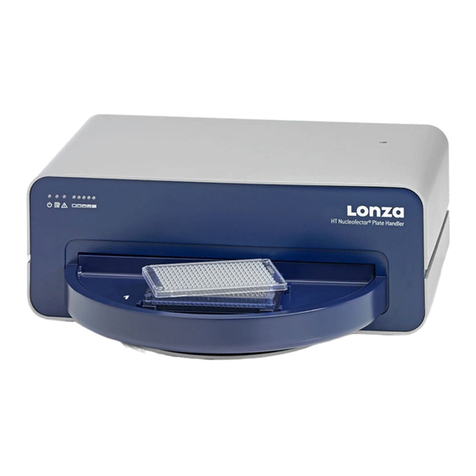
Lonza Amaxa Nucleofector II User manual

Amaxa™ Nucleofector™ II Manual

For future protocol updates, also check www.lonza.com/cell-database
For more information and future program updates,
check www.lonza.com/nucleofection-program-update
Nucleofector™ II CD-ROM
Nucleofector™ II Chip Card

Contents
1
Contents
1.0 The Amaxa™ Nucleofector™ Technology 3
2.0 Operating Instructions 5
2.1 Restrictions 5
2.2 Maintenance 5
2.3 Safety Instructions–Please Read Carefully 6
2.4 Waste Disposal 7
2.5 Nucleofector™ II Device Components 7
2.6 Set-up Instructions 7
2.7 Instructions for Using the Nucleofector™ II Device 8
2 .7.1 Main menu and program execution 8
2.7.2 Selection of Nucleofector™ Programs by program code–“Free Program Choice” 8
2.7.3 Selection of Nucleofector™ Programs by name of cell type–“Cell Type List” 8
2 . 7. 4 Selection and storage of Nucleofector™ Custom Programs 9
2.7.5 Program execution 9
2.8 Additional Nucleofector™ II Settings and Options 10
2.8.1 Change of standard settings 10
2.8.2 Motor 10
2.8.3 Display contrast 10
2.8.4 Beep on/o 10
2.8.5 Change of start mode 10
2.8.6 Language 11
2.8.7 Software version 11
2.8.8 Upgrading program software 11
2.8.9 Serial number 11
2.8.10 96-well mode 11

2
3.0 Troubleshooting 12
4.0 Nucleofector™ II Device Error Codes 14
5.0 Appendix 16

3
The Amaxa™ Nucleofector™ Technology 1.0
1.0 The Amaxa™
Nucleofector™
Technology
Since its introduction in 2001, a constantly growing interest in
the scientic community and industrial markets established
the Amaxa™ Nucleofector™ Technology as a leading transfection
Technology all around the world. A continuously increasing number
of publications from many dierent research areas reect how the
Nucleofector™ Technology drives research in numerous dierent
cell types and applications.
The Nucleofector™ Technology oers you more opportunities than
any other transfection method to approach your research topics
from many dierent angles.
Transfection of virtually any cell
With over 100 protocols for cell lines optimized by Lonza’s R&D
team, more than 500 entries in the online cell data base and
almost 50 Nucleofector™ Kits for dierent primary cells, the
Nucleofector™ Technology is clearly the transfection method-of-
choice for virtually any dicult-to-transfect cell type.
Transfection of any substrate
The Nucleofector™ Technology oers high exibility with respect
to applications, since the same transfection parameters apply
for any nucleic acid substrate used. DNA vectors, e.g., expression
plasmids or shRNA vectors, and RNA, e.g., siRNA duplexes, can
be transfected using our transfection protocols. It is the ideal
tool to help you answer the scientic questions in your day-to-
day applications such as over-expression studies, gene silencing
approaches, protein expression, generation of stable clones and
many more.
Constant Innovation
At Lonza, we believe that listening to our customers needs is the
best way to develop innovative products that exactly meet your
demands. In line with this dedication, the Nucleofector™ II Device
was developed which oers a larger graphic display, a motor-
driven carousel, the possibility to store individual programs for
optimized cell lines and to perform bacterial transformations.
In addition, the Nucleofector™ II Device serves as the program
delivery unit for Lonza’s Nucleofector™ 96-well Shuttle™ System,
a 96-well transfection unit that allows e.g., high throughput
transfection of siRNA and cDNA libraries in virtually any cell,
including primary cells.
What has been our mission in the past will continue to be so in
the future–providing you with innovative transfection solutions to
help you thrive and excel in your research.

4
Components of the Nucleofector™ Technology
The Nucleofector™ Technology is based on two unique components,
the Nucleofector™ Device that delivers the specically developed
electrical parameters and Nucleofector™ Kits that contain cell-
specic and optimized Nucleofector™ Solutions.
The Nucleofector™ II Device with Kit Components
As part of the Nucleofector™ Technology, Lonza provides cell-type
specic Amaxa™ Optimized Protocols for many dierent cell lines
and primary cells. An up-to-date database of the continuously
growing range of Amaxa™ Optimized Protocols can be found on our
homepage at www.lonza.com/cell-database.
If no Amaxa™ Optimized Protocol for your cell line of interest is
available, we oer a Cell Line Optimization Nucleofector™ Kit
enabling you to easily establish the Nucleofector™ Technology
for your specic cell line. For ne-tuning after the optimization
process, please contact our Scientic Support Teams.
Phone Europe/World: +49 (0)221-99199-400
USA: 800-521-0390
E-mail Europe/World: scientic.support.eu@lonza.com
USA: scientic.support@lonza.com

Operating Instructions 2.0
5
2.1 Restrictions
Medical use restrictions
The Nucleofector™ Technology is intended for research and
investigational use by professionals only. Please note that Lonza’s
Nucleofector™ Technology is not intended to be used for diagnostic
purposes, for testing or treatment in humans.
License statement
Lonza Cologne GmbH is holder of various patents, patent
applications, copyrights and technical and scientic experience
with respect to the Nucleofector™ Technology. Use of Lonza’s
Nucleofector™ Technology and/or related software requires a
license from Lonza Cologne GmbH.
Purchasers are granted a non-exclusive, non-transferable
license for a limited use of Lonza’s Nucleofector™ Technology and
related software for research and development purposes, the
terms of which are disclosed in detail in the license agreement
accompanying the shipped Nucleofector™ Device. Commercial
application is allowed under Lonza’s license for for-prot-entities.
Both licenses exclude in particular any right to manufacture, copy,
reproduce, transmit, distribute, seIl, lease, transfer or sublicense
Lonza’s Nucleofector™ Technology and/or related software to any
third party. For license information contact Lonza Cologne GmbH
by phone +49 (0)221-99199-0 or e-mail ip.cologne@lonza.com.
2.2 Maintenance
The Nucleofector™ II Device requires very little maintenance to
assure reliable operation. To clean and disinfect the case, rst
unplug the power supply. Use a damp cloth to wipe down the
outer case (water or 70–80% ethanol). Avoid wetting the cuvette
holder within the cuvette carousel and the connectors located on
the rear of the device.
The Nucleofector™ II Device has been designed for use under
a sterile hood with or without UV radiation source. Prolonged
exposure of the outer casing to UV light will lead to discoloration
with no functional impairment of the Nucleofector™ Device. When
laminar ows are sterilized on a regular basis by UV radiation
overnight we recommend protection of the device by appropriate
shielding or removal during extended UV exposure.
The Nucleofector™ II Device is protected by two main fuses. Both
are inside a receptacle incorporated in the inner power socket (see
Figure 2, page 7). In case of a blown fuse, you can easily replace
it. Disconnect the Nucleofector™ II Device from power and insert
a small at screwdriver into the slot on the right-hand side of the
receptacle to pull it open. To function, both the upper and lower part
of the receptable must hold working fuses in the inner positions.
Blown fuses can usually be identied by molten interrupted
wires inside the glass tube. Only use T630mA or L250V fuses to
substitute blown fuses.
2.0 Operating Instructions

6
2.3 Safety Instructions–
Please Read Carefully
This symbol means that there is a risk of electric shock. An electric
shock could cause death or personal injury.
The Nucleofector™ II Device has been certied by international
safety standards and is safe to use when operated in accordance
with this manual.
This device is designed to deliver variable high voltage electrical
impulses for the purpose of introducing nucleic acids into
eukaryotic and prokaryotic cells.
These electrical impulses can be DEADLY.
Therefore, use this device with care and take the following
precautions:
— Only use the device once you have read and understood the
Nucleofector™ II Manual. The manual should be accessible
for all users. Make sure that each potential user reads and
understands it.
— Do not open the device. The device does not contain user-
serviceable parts. Under no circumstances should circuit
components be interfered with, as they can deliver an electric
shock even when system is not in operation.
— Do not alter the device in any manner.
— Do not obstruct the movement of the carousel of the
Nucleofector™ Device.
— Do not plug any non-Lonza-certified connectors into the
external electrodesockets attherearside oftheNucleofector™
Device. The sockets are high-voltage outputs that can deliver
electric shocks via any non-Lonza device that is connected to
the Nucleofector™ Device. They are designed to connect Lonza
certified add-on devices to the Nucleofector™ II Device, e.g.,
the 96-well Shuttle™ Device.
— Only use the device when it is set on top of a safe, plain and
stable table or bench.
— Place the device such that easy removal of the power cord is
possible at any time.
— Do not expose the device to a humid environment.
— The device shall not be exposed to direct sunlight nor be
placed in a hot environment.
— The device is not approved for use in fire or explosion
endangered areas, nor for use with inflammable or explosive
media.
— Employ precautions against great impact and vibration in
moving and transporting the Nucleofector™ II Device.
— Use the device with Lonza’s certified Nucleofector™ Solutions
and Lonza certified cuvettes only. Use of any other solution
or cuvettes from any other source than Lonza will preclude all
warranty and liability claims.
— Standard Nucleofector™ Solutions and 96-well Nucleofector™
Solutions (used for the Nucleofector™ 96-well Shuttle™
System) are not compatible. Please do not use the
Nucleofector™ II Device with the 96-well Nucleofector™
Solutions.
— Unpack the cuvettes just prior to the experiment. Make sure
that the outer contact areas are dry.
— If any fluid has been spilled in the close vicinity of the
Nucleofector™ II Device, safety may be compromised. Ensure
that no fluid has been in contact with or entered the device.
— If any fluid has been spilled at the device, the safety may be
compromised. To confirm that the use of the device is safe,
contact Lonza Scientific Support for actions or precautions.
— Never place any foreign object on the device to avoid the risk
of equipment damage.
— Do not enter or place foreign objects in the carousel area of
the Nucleofector™ II Device.
— If any foreign object has entered the Nucleofector™ II Device,
safety may be compromised. To confirm that the use of the
device is safe, contact Lonza Scientific Support for actions or
precautions.
— If the Nucleofector™ II Device has been damaged, ensure that
the device can not be used by any personnel and contact
Lonza Scientific Support for assistance.
— All service shall be performed by Lonza authorized personnel
only.
— Handling of device parts that has the possible risk of sample
contamination shall always be performed with protective
gloves and any disposal of such parts must be according to
Federal, state or local procedures for clinical waste handling
and disposal. Use secure leak proof containers and avoid
unprotected handling of such parts.
Lonza Cologne GmbH disclaims all warranties and shall in no
event be liable for any kind of damages caused by or arising out of
any operation or use in violation of the above safety and handling
instructions.

7
Operating Instructions 2.0
2.4 Waste Disposal
Disposal of consumables from Nucleofector™ Kits (cuvettes,
pipettes and Nucleofector™ Solutions): Discard cuvettes, pipettes
and expired Nucleofector™ Solution residuals in a biohazard
container. Refer to your local waste management organization and
to the relevant laboratory safety instructions for proper disposal
practices.
2.5 Nucleofector™ II Device
Components
The Nucleofector™ II Device is delivered with the following
components:
— 1 Nucleofector™ II Device
— 1 Power cord
— 1 Nucleofector™ II Manual
Front panel of the Nucleofector™ II Device
1 Power button
2 Graphic display
3 “Up” button
4 “Down” button
5 Functional button “menu”
6 Functional button “options”
7 “X” button with start, exit or enter function
8 Automatic cuvette carousel
9 Cuvette holder
10 Chipcard slot
Rear side of Nucleofector™ II Device
Figure 2
11 Power cord receptacle
12 Spare fuse
13 External electrode sockets
For use within the Nucleofector™ 96-well Shuttle™ System
14 Receptacle for USB connection to Laptop
15 Receptacle for Serial connection to 96-well Shuttle™
The Nucleofector™ II Device comes with default programs and
contains a chipcard reader (10) below the front handle for program
updates.
2.6 Set-up Instructions
1. Remove all packing material.
2. Attach the power cord to the receptacle on the rear side of the
Nucleofector™ II Device (11) and plug it into an appropriate
electrical outlet. The device will automatically be in the stand-
by mode. Turn on the device by pressing the orange power
button in the upper left corner of the front panel (1). The
device performs a self test accompanied by a short intro in
the front graphic display (2). After powering up, the display
shows the main menu “Free Program Choice” (Figure 3.).
The start mode can be changed to the last program used as
described in chapter 2.8.5.
13 1112
14 15
1
510 7
6 4 9
2 3 8
Figure 3
Figure 1
Amaxa® Nucleofector® II Device

8
2.7 Instructions for Using the
Nucleofector™ II Device
2 .7. 1 Main menu and program execution
The Nucleofector™ II Device oers two separate ways for program
selection. Programs can either be chosen by direct selection of
the program code, e.g., A-023, in the “Free Program Choice”
mode (Figure 3), which is comparable to program selection in
Nucleofector™ I Device. As a convenient alternative, programs
can also be selected by cell type code using the “Cell Type List”
(Figure 4). This list is divided in three consecutive sections:
1. All programs from currently available Amaxa™ Optimized
Protocols are led under the specic cell type name in
alphabetical order (Figure 4).
2. This alphabetical list for eukaryotic cells is followed by a list
of programs for the transformation of bacteria (for details
please contact Lonza’s Scientic Support Teams (Europe/
World: +49 (0)221-991 99-400; USA: 800-521-0390) and ask
for the latest developments and experimental support).
3. The last section comprises custom programs (see 2.7.4.)
in chronological order. In addition, custom programs can
be found in the “Custom Programs” mode. You can switch
program modes by pressing the functional button “menu” (5)
several times until the required program mode appears and
conrm by pressing the functional button “go” (6).
Note
Only custom programs can be stored or deleted by the user. The
program codes of the Nucleofector™ II Device consist of two parts:
a one-digit alphabetical code followed by a three-digit numerical
code, e.g., A-023. This corresponds to the program code A-23 of
the Nucleofector™ I Device.
2.7.2 Selection of Nucleofector™ Programs by
program code–“Free Program Choice”
1. Turn on the Nucleofector™ II Device by using the power button
(1). Nucleofector™ II Device starts in the “Free Program
Choice” mode (Figure 3). If it does not start in the “Free
Program Choice” press the functional button “menu” (5)
repeatedly until “Go to Free Program Choice” appears and
conrm this pressing the functional button “go” (6).
2. The alphabetical rst digit blinks. Choose the appropriate
letter of the program code by using the “Up” and “Down”
buttons (3,4). Then move the cursor with the functional
buttons “<<” and “>>” (5,6) to the numerical three-digit code.
Select the appropriate number of the program code with the
“Up” and “Down” buttons (3,4). Continual pressing of the “Up”
and “Down” buttons allows for fast scrolling of choices. Your
Nucleofector™ II Device is now ready for program execution
(see 2.7.5).
2.7.3 Selection of Nucleofector™ Programs by
program code–“Free Program Choice”
1. Turn on the Nucleofector™ II Device by using the power button
(1). If the Nucleofector™ II Device starts in the “Free Program
Choice” mode (Figure 3), exit this mode by pressing the “X”
button (7). Press the functional button “menu” (5) several
times until “Go to Cell Type List” appears and conrm this
choice by pressing the functional button “go” (6).
2. Choose the appropriate program for your cell type (Figure
4) by navigating through the pre-programed list using the
“Up” and “Down” buttons (3, 4). The programs are displayed
in alphabetical order. The list is organized by rst the cell
name (e.g., T cells), descriptions of the species and further
details of the cell type are given in line two. Line four shows
the corresponding program itself. In cases where two or more
programs are available, the third line indicates the specicity
of the program such as for higher transfection eciency or for
higher cell viability. Your Nucleofector™ II Device is now ready
for program execution (see 2.7.5).
Mode Program can be
edited deleted
“Free Program Choice” Yes No
“Cell Type List” (pre-programmed) No No
“Custom programs” Yes Yes
Figure 4

9
Operating Instructions 2.0
2 . 7. 4 Selection and storage of Nucleofector™
Custom Programs
The Nucleofector™ II Software provides the option to add programs
to the Cell Type List by storing the appropriate program under a
new individual name. In this way information about an optimized
program for a particular cell type can be stored directly in the
Nucleofector™ II Device.
1. Turn on the Nucleofector™ Device by using the power button
(1).
If the Nucleofector™ II Device starts in the “Free Program
Choice” mode (Figure 3), exit this mode by pressing the “X”
button (7).
2. Press the functional button “options” (6). Select “new” from
the popup menu by using the “Up” and “Down” buttons (3, 4)
and conrm with “X” button (7). The menu jumps to a free
custom program memory location (Figure 5).
3. The cursor blinks at the starting position. Scroll through the
character set by using the “Up” and “Down” button (3,4) to
enter the desired text and move to the consecutive character
positions with the functional button “>>” (6). By using the
functional button “<<” (5) the cursor moves one step back
and deletes the entered character.
4. After entering the desired name for the program, conrm
the name by pressing the “X” button (7). The cursor
automatically jumps to the program code position. Then
choose the appropriate letter of the program code, e.g., A-023
by using the “Up” and “Down” buttons (3,4). Then move the
cursor with the functional button “>>” (6) to the numerical
three-digit code. Select the appropriate program number with
“Up” and “Down” buttons (3,4). In order to save the custom
program press the “X” button (7) and choose “yes” in the
arising window by pressing the left functional button (5). Exit
and save by pressing the “X” button (7).
5. Saved custom programs can be selected by navigating
through the “Cell Type List” using the “Up” and “Down” buttons
(3, 4). Custom programs are listed after the pre-programmed
cell-type list, in chronological order. Additionally, for faster
access the programs are listed separately in the “Custom
Programs” mode.
6. In order to modify or delete a saved custom program, navigate
to the corresponding program in the “Cell Type List” or
“Custom Program” mode using the “Up” and “Down” buttons
(3, 4) and subsequently press the functional button “options”
(6). Move to “Edit” or “Delete” in the popup menu (Figure 6)
using the “Up” and “Down” buttons (3, 4) and select it with
the “X” button (7). In case you want to edit your program, you
may now modify any position of the custom program entry by
the procedure described above for custom program entry. To
leave the popup menu without any action press the functional
button ”options” (6) again.
7. Leave the edit or delete mode, save the changes, and return
to the main menu by pressing the “X” button (7).
8. Your Nucleofector™ II Device is now ready for program
execution (see 2.7.5).
2.7.5 Program execution
1. After you have chosen the correct program, place the closed
cuvette lled with 100 µl Nucleofection™ Sample in the cuvette
holder (9). For program execution press the “X” button (7).
The cuvette carousel (8) closes automatically (see 2.7.2)
and the program is executed. Subsequently, the carousel
automatically rotates back to reveal the cuvette. “OK” will
appear on the display if the program has been successfully
completed. After addition of 500 µl pre-warmed medium (see
4.1 and 4.2) remove the Nucleofection™ Sample from the
cuvette with the plastic pipette provided in the Nucleofector™
Kit. Discard cuvettes after one use.
Figure 5
Figure 6

10
Note
Only use fresh Lonza certied cuvettes, which have passed
rigorous quality tests. Use of both uncertied cuvettes and re-
use of Lonza certied cuvettes (after even one use), impairs
experimental results, proper function of the device and risks
damaging of the Nucleofector™ II Device itself.
2. Press the “X” button (7) to acknowledge. The device can be
re-used immediately after the last program execution.
3. In case the device was unable to execute a program or the
program was not completed successfully, the display will
indicate the error type and error code. For more information
on specic errors, see chapter 6. To continue working, press
the “X” button (7) to acknowledge the error message. The
device can then be re-used immediately.
4. When you have nished working, please remove the last
cuvette from the cuvette holder (9) and switch o the
Nucleofector™ II Device by pressing the power button (1).
Note
The Nucleofector™ Programs available correspond to the list
of Amaxa™ Optimized Protocols that are provided with the
Nucleofector™ Kits which can be downloaded at www.lonza.com/
protocols. If the Nucleofector™ Program you want to apply is not
available on your device, please contact the Lonza Scientic
Support Team to receive a chipcard to update the program
software.
2.8 Additional Nucleofector™ II
Settings and Options
2.8.1 Change of standard settings
In order to change the settings of your Nucleofector™ II Device,
press the functional button “menu” (5). By repeatedly pressing
the button “menu” (5) you will rst pass the three program mode
options “Go to Free Program Choice”, “Go to Cell Type List” and
“Go to Custom Programs” and then be guided through the settings.
To return from any sub-menu to the main menu press the
“X” button (7).
2.8.2 Motor
The cuvette carousel (8) is connected to a motor which enables
automatic movement movemant of cuvette into position by closing
and opening the cuvette holder carousel. In the menu settings you
can choose between “on” for fully automated turning or “o” for
manual opening and closing.
Note
In case you have switched o the motor option in the menu, you
will have to rotate the carousel manually by 180° clockwise. The
carousel must be turned completely to the blocked position so that
the cuvette contacts the electrodes.
For safety reasons, the motor of the Nucleofector™ II Device is
equipped with a sensitive blockage detection. If closing of the
carousel is hindered, e.g., by an inserted nger, the motor stops
immediately and returns to its starting position. The display shows
the corresponding error code (Err2 = Inappropriate or no cuvette or
carousel not closed). Continue working by pressing the “X” button
(7) to exit the error mode.
2.8.3 Display contrast
In order to optimize readability of the display, change of the display
contrast is possible by pressing the “Up” and “Down” buttons
(3,4). The change has to be conrmed by pressing the functional
button “set” (5). By leaving the submenu without pressing “set”,
the change is reversed in order to reduce the risk of modifying the
contrast in such way that you may have diculties reading the
display.
2.8.4 Beep on/o
Thebeepfollowingtheswitch-onofthedeviceanderroneousprogram
execution can be inactivated by choosing “o” with pressing the
“Up” and “Down” buttons (3,4). The default setting is “on”.
2.8.5 Change of start mode
The Nucleofector™ II Device can either start in the “Free Program
Choice” mode or with the last program used. Choose the appropriate
option by pressing the “Up” and “Down” buttons (3,4). The default
setting is “Free Program Choice”.

11
Operating Instructions 2.0
2.8.6 Language
The Nucleofector™ II Device oers a language option. The default
setting is English. It can be switched to Japanese (or back to
English) by pressing the “Up” and “Down” buttons (3,4). The
change has to be conrmed by pressing the functional button “set”
(6). By leaving the submenu without pressing “set”, the change is
reversed in order to reduce the risk of modifying the language by
mistake.
2.8.7 Software version
Press the functional button “menu” (6) to view the current
software version of the Nucleofector™ II Device that comprise the
operating programs of your Nucleofector™ II Device (for updating
the program software see 2.8.8).
2.8.8 Upgrading program software
1. In order to upgrade the program list on your Nucleofector™ II
Device, insert the chipcard with the novel software version
provided by Lonza into the chipcard reader slot (10)
(Figure 7).
2. After the Nucleofector™ II Device recognizes the chip card,
conrm loading of the novel Nucleofector™ Software by
pressing the “X” button (7).
3. The upgrade starts with a program table. Conrm by pressing
the “X” button.
4. Secondly, the list of optimized programs is loaded. Conrm
again with the “X” button (1). The stored custom programs
will be neither deleted nor overwritten by upgrading novel
non-custom optimized programs.
5. Conrm the software upgrade and return to the main menu
by pressing the “X” button (1) and remove the chip card from
the chipcard reader slot.
Figure 7
2.8.9 Serial number
Press the functional button “menu” (6) to view the serial number
of your Nucleofector™ II Device.
2.8.10 96-well mode
When using the Nucleofector™ II Device within the Nucleofector™ 96-
well Shuttle™ System, it has to be connected to the 96-well Shuttle™
Device via high-voltage cables (13) and serial data cable (15) and
to the Laptop via USB data cable (14) (for details please refer to the
manual of the “Nucleofector™ 96-well Shuttle™ System”). As soon
as the Nucleofector™ 96-well Shuttle™ Software which is controlling
the system is started, the Nucleofector™ II Device switches into
“96-well mode” (as shown on the display) and the buttons of the
Nucleofector™ II Device are locked (except for the power button
(1)). It is then controlled by the PC-based Nucleofector™ 96-well
Shuttle™ Software.

12
The following troubleshooting guide may be helpful if experiments
using the Nucleofector™ II Device do not work as expected. The listed
comments are intended to help optimize experimental conditions.
Should you have any questions regarding the Nucleofector™ II
Device, please do not hesitate to contact Lonza’s Scientic Support
Team.
3.0 Troubleshooting
Europe/World
Phone +49 (0)221-99199-400
Fax +49 (0)221-99199-499
scientic.support.eu@lonza.com
www.lonza.com/nucleofection-support
USA
Phone 800-521-0390
Fax 301-845-8338
scientic.support@lonza.com
www.lonza.com/nucleofection-support
Problem Possible error What happened?
Low survival rate
Cells remained too long
in the cuvette.
Cells are damaged
by harvesting or
through handling.
Cells are stressed
by culture conditions.
Cells are stressed
by centrifugation.
Multiple use of cuvettes.
To avoid damage to the cells, transfer cells immediately into pre-warmed medium
(37°C). We recommend removing the sample from the cuvette directly after
Nucleofection™.
Avoid severe conditions during harvesting, especially centrifugation at higher
speed and overexposure to trypsin. Pipette cells smoothly. Use a plastic pipette
provided in the kit for removal of cells from the cuvette. Add 500 µl pre-warmed
medium to the cuvette before removal of the cells.
Cells should be viable and in culture for a certain number of passages. Freshly
thawed cells should not be used for Nucleofection™. Avoid excessive cell densities
or cell conuencies since this may negatively inuence the viability of the cells
after Nucleofection™. For detailed recommendations on passage number, cell
density and conuence please refer to the individual Amaxa™ Optimized Protocol.
Centrifuge at lower speed (90xg).
We strongly recommend using cuvettes only once, because the electric pulses
that are applied drastically reduce their quality and impair their physical integrity.

13
Troubleshooting 3.0
Problem Possible error What happened?
Low survival rate
Low gene transfer
Poor DNA quality.
Plasmid amount is too low.
High cell conuency/density.
Too high or too low cell number
in the cuvette.
Poor DNA quality.
Plasmid DNA used should be of high purity. We strongly recommend the use of
high quality products for plasmid purication such as QIAGEN Endo Free® Plasmid
Kits. Do not use procedures involving phenol or chloroform treatment.
We recommend a plasmid amount between 1–5 µg DNA per sample. If both
gene transfer eciency and cell mortality are low, the plasmid amount can be
increased up to 10 µg per sample. Increasing the DNA amount may lead to higher
gene transfer eciencies but at the same time may result in higher cell mortality.
Gene transfer eciency into many cell types is poor if the cells are too dense at
the time of harvest. Please follow guidelines in the Amaxa™ Optimized Protocols.
We recommend using 1 x 10⁶–5 x 10⁶cells per sample for cell lines and
2 x 10⁵–5 x 10⁶cells per sample for primary cells. Please refer to the Amaxa™
Optimized Protocol for specic details.
Plasmid DNA used should be of high purity. We strongly recommend the use of
high quality products for plasmid purication such as QIAGEN Endo Free® Plasmid
Kits. Do not use procedures involving phenol or chloroform treatment.

14
The following guide indicates possible Nucleofector™ Error Codes
and provides suggestions to solve the problem on your own. Should
these suggestions not resolve the problem, please call Lonza’s
Scientic Support Team (Europe/World: +49 (0)221-99199-400;
USA: 800-521-0390). Alternatively use our internet and e-mail based
scientic support at www.lonza.com/nucleofection-support. If the
Nucleofector™ II Device has to be returned for repair, please contact
our Scientic Support Team for shipping and warranty instructions.
Arc discharge correction
4.0 Nucleofector™ II Device
Error Codes
Arcing is a complete or partial discharge circumventing the sample
and is often accompanied by a ash and a noise. This problem
is usually caused by imperfect cuvettes or cuvette lling. The
Nucleofector™ II Device is equipped with a hardware safety that
immediately detects arc formation at its beginning to protect the
cells from damage. After the arc interruption the Nucleofector™ II
Device resumes program execution. Normally, the program can
be completed successfully (“arc discharge correction 1 or 2”) and
only limited dierences in transfection eciency can be observed.
When repeated arc discharges within one program occurs, it might
be impossible for the Nucleofector™ II Device to complete program
execution. In this case (“Err8 - Arc discharge”) signicant impacts
on transfection eciency might be detected. Discard the possibly
damaged cuvette and its contents, reset the device by pressing
the “X” button (1), and repeat the experiment with a new cuvette.
It is not necessary to switch o the Nucleofector™ II Device.
Code Possible error What happened? Procedure
Arc discharge
correction 1 or 2
Inappropriate cuvette or
Nucleofector™ Solution or
inappropriate volume in the
cuvette or device possibly
defective.
Device possibly generated an
arc discharge. Program was
automatically resumed and
successfully completed. A limited
impairment on eciency and
vitality has to be presumed.
Reset device by pressing any
button. Utilize sample if maximum
eciency is not essential or try
again with a new sample. For
further samples check if the
volume in the cuvette is 100 µl.
WEAK–Re-used cuvette or
inappropriate solution
Re-used cuvette or inappropriate
Nucleofector™ Solution.
A weak pulse occurred. Only
sub-optimal eciency might be
achieved.
Acknowledge the error message
by pressing any button; utilize
the sample if maximum eciency
is not essential. Otherwise, try a
new sample.

15
Nucleofector™ II Device Error Codes 4.0
HC LC
Code Possible error What happened? Procedure
Err1A–
Internal communication failure
Internal error or device possibly
defective.
No pulse generated. Acknowledge the error message
by pressing any button; try to
apply program a second time. If
Err1A re-occurs, switch o the
device, wait for 2 seconds and
switch on again.
Err1B–
Internal communication failure
Internal error or device possibly
defective.
Pulse generated with unclear
outcome.
Acknowledge the error message
by pressing any button; utilize
sample if maximum eciency is
not essential. Otherwise, try with
a new sample. If Err1B re-occurs,
switch o the device, wait for
2 seconds and switch on again.
Err2–
Inappropriate or no cuvette or
carousel not closed
Inappropriate or no cuvette.
Inappropriate Nucleofector™
Solution or inappropriate volume.
Carousel motor is switched o.
No pulse generated. Check cuvette. Check type and
volume of Nucleofector™ Solution.
Cuvette can be re-applied. If
carousel is not closed, close it
manually or change motor option
to “on” (see 2.7.2).
Err3–
Device possibly defective
Device overheated or possibly
defective.
Very weak pulse generated. Switch o the device. Wait for
2 minutes, switch on again; repeat
the program with a new sample.
Err7–
Supply voltage too low
Supply voltage insucient or
device has been switched o for
a long time.
No pulse generated. Acknowledge the error message
by pressing any button. Try again
with a new cuvette.
Err8–
Arc discharge
Inappropriate cuvette or
Nucleofector™ Solution or
inappropriate volume in the
cuvette or device possibly
defective.
Device possibly generated an arc
discharge leading to incomplete
program execution. A substantial
impairment on eciency and
viability has to be presumed.
Acknowledge the error message
by pressing any button. Check the
volume of Nucleofector™ Solution.
Try again with a new cuvette.
Err9–
Inappropriate solution,
volume or cuvette
Inappropriate cuvette or
Nucleofector™ Solution or volume
or device possibly defective.
Device possibly generated an
overcurrent.
Acknowledge the error message
by pressing any button. Try again
with new cuvette.
Err11–
DSP error
Internal error or device possibly
defective.
Pulse possibly omitted. Switch the device o and on
to reset. Try again with a new
sample.
Err12–
Motor error
Carousel motor failure. Motor blocked, or motor control
communication defective, or
device possibly defective.
Acknowledge the error message
by pressing any button. Try again.

16
5.0 Appendix
Technical data
Power supply 100–110 VAC or 230 VAC
50–60 Hz
self-regulating
Power consumption 50 VA/fuse T630mA L250V
Temperature range +15°C to +40°C, non-condensing
Altitude < 2000 m above sea level
Safety class EN 61010-1
UL 61010A-1
IP 20
Weight 2.8 kg
6.2 lb
Dimensions
(w x d x h)
30 x 23 x 11 cm
11.8 x 9.6 x 4.3 in
Manufacturing date The manufacturing year is encoded by the second and third digit of the serial number, e.g., serial number x06xxxxx
was manufactured in 2006.

17
Appendix 5.0
Notes

Contact Information
North America
Customer Service: 800-638-8174
Scientic Support: 800-521-0390
E-mail: scientic.support@lonza.com
Online Ordering: www.lonza.com
Europe
Customer Service: 00 32 87 321 611
Scientic Support: 00 49 221 99199 400
E-mail: scientic.support.eu@lonza.com
Online Ordering: www.lonza.com
International
Contact your local Lonza Distributor
Customer Service: 301-898-7025, ext. 2322
Fax: 301-845-8291
E-mail: scientic.support@lonza.com
International Offices
Australia 61 3 9550 0883
Austria 0800 201 538
Belgium 00 32 87 321 611
Brazil 55 11 2069 8800
Denmark 45 43 56 74 00
France 0800 91 19 81
Germany 0800 182 52 87
India 91 22 4342 4000
Italy 0039 0363 45710
Japan 81 3 5566 0612
Poland 48 22 833 87 45
Singapore 65 64914214
Spain 34 902 531 366
Sweden 020 140 4410
Switzerland 0800 83 86 20
The Netherlands 0800 022 4525
United Kingdom 44 118 979 5234
Lonza Cologne GmbH
50829 Cologne, Germany
For Research Use Only. Not for use in diagnostic procedures.
Manufacturer and distributor information: Nucleofector™ II Device is manufactured
by Lonza Cologne GmbH, Nattermannallee 1, 50829 Cologne, Germany and
distributed in the US by Lonza Walkersville, Inc. (8830 Biggs Ford Road, Walkersville,
MD 21793).
The use of this product, alone or in combination with materials and/or methods of
others, may require a license from a third party. User shall be fully responsible for
determining whether and from whom it requires such license and for obtaining such
license.
The Amaxa™ Nucleofector™ Technology, comprising Nucleofection™ Process,
Nucleofector™ Device, Nucleofector™ Solutions, Nucleofector™ 96-well Shuttle™
System and 96-well Nucleocuvette™ Plates and Modules is covered by patent and/or
patent pending rights owned by Lonza Cologne GmbH.
Amaxa, Nucleofector, Nucleofection, Nucleocuvette, maxGFP and 96-well Shuttle are
either registered trademarks or trademarks of Lonza Cologne GmbH in Germany and/
or the U.S. and/or other countries.
Other product and company names mentioned herein are the trademarks of their
respective owners.
Amaxa™ Nucleofector™ Kits contain a proprietary nucleic acid coding for a proprietary
copepod protein uorescent protein intended to be used as a positive control with
Lonza products only. Any use of the proprietary nucleic acid or protein other than
as a positive control with a Lonza product is strictly prohibited. Use in any other
application requires a license from Evrogen. To obtain such a license, please contact
The information contained herein is believed to be correct and corresponds to the
latest state of scientic and technical knowledge.However, no warranty is made,
either expressed or implied, regarding its accuracy or the results to be obtained
from the use of such information and no warranty is expressed or implied concerning
the use of these products. The buyer assumes all risks of use and/or handling. No
statement is intended or should be construed as a recommendation to infringe any
existing patent.
© Copyright 2009, Lonza Cologne GmbH. All rights reserved.
TS-Nucleo II Manual-1 11/08
DMA-1002_2009-02-26
Table of contents
Other Lonza Laboratory Equipment manuals
Popular Laboratory Equipment manuals by other brands

Agilent Technologies
Agilent Technologies 6850 Series II User information

Grant-bio
Grant-bio Vortexer PV1 operating instructions

SCIEX
SCIEX X500 QTOF System user's guide

Cardinal Health
Cardinal Health CHH05RESA manual

Fisher Scientific
Fisher Scientific Isotemp user manual

REPLIGEN
REPLIGEN TangenX PRO PD user guide

Dürr Technik
Dürr Technik SICOLAB mini ENDO Installation and operating instructions

Kendro
Kendro SORVALL Legend MACH 1.6/R instruction manual

Izon
Izon qNano user manual

SUSS
SUSS MicroTec Delta10TT Operator Manual and Technical Documentation

Elmi
Elmi CM-50MP user manual

Precision
Precision 280 Series Installation and operation manual