manuals.online logo
Brands
  1. Home
  2. •
  3. Brands
  4. •
  5. Lorex
  6. •
  7. IP Camera
  8. •
  9. Lorex LNC100 Series User manual

Lorex LNC100 Series User manual

LNC100 Series Quick Setup Guide - English - R1
www.lorextechnology.com
SIMPLY
AWARE™
WIRELESS NETWORK CAMERA
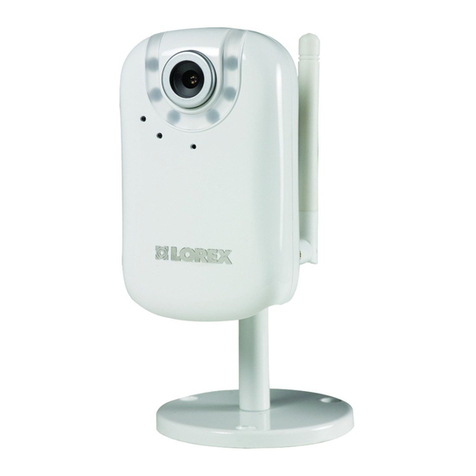
LNC100 LOREX PING SERIES
QUICK START GUIDE
Information in this document is subject to change without notice.
As our products are subject to continuous improvement, Lorex
Technology Inc. and our subsidiaries reserve the right to modify
product design, specifications and prices, without notice and
without incurring any obligation.
E&OE © 2013 LOREX. All rights reserved.
The Lorex Ping includes the following:
• 1 x Camera
• 1 x Camera power adapter and USB power cable
• 1 x Ethernet cable
• 1 x Mounting kit
• 1 x Quick Start Guide
• 1 x Software/documentation CD
It’s all on the Web
www.lorextechnology.com
Camera Overview
1Getting Started
2
See reverse for Wi-Fi Setup
2: Connect an Ethernet cable (included) to the NET port on
the camera and connect the other end to your router (not
included). The blue Network LED on the camera will glow
blue when the camera is connected to your network.
Optional
If your router supports WPS press and
hold the WPS button on your router until
the WPS light turns on.
Then, press the WPS button on the
camera within 1 minute. The camera
will automatically connect to your WiFi
network and the blue Network LED on the
camera will turn on.
WPS
SD
WPS
WPS
SD
WPS
NOTE: For Mac software and
instructions, please visit
www.lorextechnology.com
Once your camera is connected to
your wired or wireless network, you
can connect to your camera using your
PC, Mac, iPhone, iPad, or Android
phone or tablet.
Connecting to
your Camera
1. Connect the power adapter cable to the power
adapter using the USB connector. Plug the power
cable into the back of the camera.
Ethernet Cable
Internet
LAN
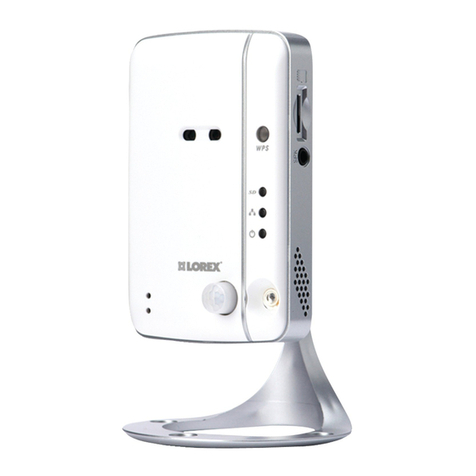
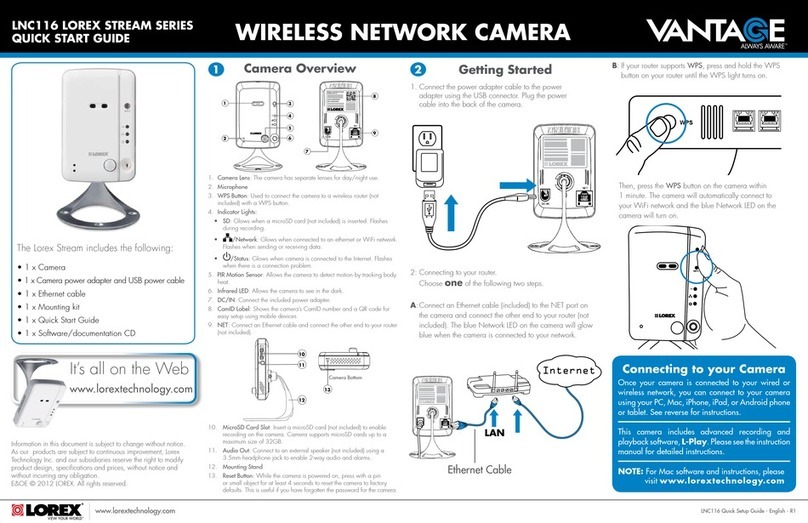
1. Camera Lens: The camera has separate lenses for day/night use.
2. Microphone
3. WPS Button: Used to connect the camera to a wireless router (not
included) with a WPS button.
4. Indicator Lights:
• SD: Glows when a microSD card (not included) is inserted. Flashes
during recording.
• /Network: Glows when connected to an ethernet or WiFi network.
Flashes when sending or receiving data.
• /Status: Glows when camera is connected to the Internet. Flashes
when there is a connection problem.
5. PIR Motion Sensor: Allows the camera to detect motion by tracking body
heat.
6. Infrared LED: Allows the camera to see in the dark.
7. DC/IN: Connect the included power adapter.
8. CamID Label: Shows the camera’s CamID number and a QR code for
easy setup using mobile devices
9. NET: Connect an Ethernet cable and connect the other end to your router
(not included).
WPS
SD
1
2
3
4
5
6
CamID: XXXXXXXXXXXX
MAC: XXXXXXXXXXXX
7
9
8
10. MicroSD Card Slot: Insert a microSD card (not included) to enable
recording on the camera. Camera supports microSD cards up to a
maximum size of 32GB.
11. Audio Out: Connect to an external speaker (not included) using a
3.5mm headphone jack to enable 2-way audio and alarms.
12. Mounting Stand
13. Reset Button: While the camera is powered on, press with a pin
or small object for at least 4 seconds to reset the camera to factory
defaults. This is useful if you have forgotten the password for the camera.
Camera Bottom
RESET
13
SPK
11
10
12
1-20122012
901 Elkridge Landing Road, Suite 100
Linthicum, Maryland 21090
USA
Lorex Technology Inc.
250 Royal Crest Court
Markham, Ontario L3R 3S1
Canada
www.lorextechnology.com LNC100 Series Quick Setup Guide - English - R1
CONNECTING TO YOUR CAMERA ON PC
CONNECTING TO YOUR CAMERA ON
iPHONE, iPAD AND ANDROID
1. Download Lorex Ping from the App Store (iPhone/iPad) or
Google Play Store (Android).
iPhone/iPad: iOS v4.0 or higher and a valid iTunes account.
Android: Android v.2.3 or higher.
System Requirements:
2. Tap the Lorex Ping icon from the home screen
to open Lorex Ping. Lorex Ping opens to the
Camera List.
4. Under Name, enter a new name for your camera.
Connecting from an iPhone, iPad &
Android
A
7. Tap the name of the
camera in the Camera List
to connect to the camera.
6. Under Password, enter the camera password. If this is the
first time connecting to the camera, enter lorex. Press Done.
10. Tap the name of the camera in Camera List again to
connect to the camera.
8. You will be prompted to create your own password.
Tap OK.
9. Create a new password. Tap OK/Done.
1. Connect to your camera using Lorex Ping.
Your mobile device must be connected to your WiFi, not
your 3G/mobile network.
8. To return to the camera list:
iPhone: Press Camera Settings, ID/Password, and then Back
to exit the edit camera screen.
iPad: Press next to the camera name to exit the edit camera
screen.
Android: Press Camera Settings then Camera List to exit the
edit camera screen.
9. Tap the camera in the Camera List to connect. If you cannot
connect, check to make sure you have entered the correct
wireless password and that the camera is in signal range of
your wireless router.
WiFi Setup on iPhone, iPad & Android
B
NOTE: The camera must be connected to your router using an
Ethernet cable before you can set it up to use WiFi.
6. Tap the name of your WiFi network, enter the password,
and tap OK. Wait for the update to complete.
7. Remove the Ethernet cable from the camera. It will connect
to the wireless network. When it is connected, the blue
Network LED will be on or flashing.
4. Tap Network then WiFi Network.
NOTE: The camera must be connected to your router using an
Ethernet cable before you can set it up to use WiFi.
1. Install L-View on a PC in your local network (must be connected
to the same router as the camera) and connect to the camera.
3. Enter the camera admin user name and password if prompted
to do so. Click Log in.
Default admin name: admin
Default admin password: ____________ (leave blank)
8. When successful, Status will say Test Success. If unsuccessful,
double check your wireless password and make sure your camera
is close enough to the wireless router to get a good signal.
9. Remove the Ethernet cable from the camera.
To install L-View:
1. Install the L-View software from
the CD or download from
www.lorextechnology.com
6. Double-click the camera or drag the camera to a display
screen to connect to the camera.
3. Under Name, enter a camera name of your choice.
4. Under CamID, enter the Cam ID number printed on the
camera.
5. Under Password, enter the camera password. The default
password is lorex. Click OK.
Enter a camera name
Enter a camera ID
Enter the camera Password
(default: lorex)
9. Double-click the camera again under Camera List to connect.
8. Create a new password for the camera.
To connect to your camera:
1. Double-click the L-View icon to run L-View.
2. Click + next to Camera List.
7. L-View will prompt you to create your own password for the
camera. Click OK.
Connecting from a PC
A
WiFi Setup on PC
B
2. Right-click on the camera
ID in the Auto Search area
and click Web Configure.
4. Click on Network and then WiFi Security.
5. Click WiFi Scan and select your WiFi network from the list.
WiFi Scan
Click your WiFi
network from the list
7. Click WiFi Security again and click WiFi Test.
WiFi test
6. Under WPA-PSK Key or WEP Key, enter the WiFi password.
Click Save and Apply.
Save & Apply
Enter WiFi Password
(WPA-PSK or WEP)
Your camera admin user name and password differs from
the password used to connect to your camera to view video.
3. Click +to add a camera.
3. Tap Camera Settings. Enter the camera’s admin username
and password.
Default admin name: admin
Defalult admin password: ____________ (leave blank)
5. Slide Wi-Fi to ON (iPhone/iPad) or
check the checkbox ON (Android)
Only use these steps if your Router does not support WPS.
OPTIONAL
Only use these steps if your Router does not support WPS.
OPTIONAL
NOTE: QR code setup is not compatible with 1st generation
iPads. If you have a 1st generation iPad, manually enter the
CamID printed on the camera.
5. Under ID, press the QR code ( ) button and line up the QR
code printed on the back of the camera using the camera on
the phone. The CamID will automatically be entered.
Alternatively, you can manually enter the CamID, found on
the back of your camera.
CamID #
CamID: XXXXXXXXXXXX
MAC: XXXXXXXXXXXX
Your camera admin user name and password differs from
the password used to connect to your camera to view video.
2. Tap the arrow button to open the
edit camera screen. or
Other manuals for LNC100 Series

1

Other Lorex IP Camera manuals

Lorex E861AB Series User manual

Lorex

Lorex E861AB Series User manual

Lorex LNC216 Series User manual

Lorex

Lorex LNC216 Series User manual

Lorex LBC8183 User manual

Lorex

Lorex LBC8183 User manual

Lorex SG7530PK4 User manual

Lorex

Lorex SG7530PK4 User manual

Lorex LNB9272 SERIES User manual

Lorex

Lorex LNB9272 SERIES User manual

Lorex LNC104 Installation and operation manual

Lorex

Lorex LNC104 Installation and operation manual

Lorex LKB384X Series User manual

Lorex

Lorex LKB384X Series User manual

Lorex LNE3003 User manual

Lorex

Lorex LNE3003 User manual

Lorex VANTAGE LDC6080 Series User manual

Lorex

Lorex VANTAGE LDC6080 Series User manual

Lorex LNZ3522B User manual

Lorex

Lorex LNZ3522B User manual

Lorex LNC104 User manual

Lorex

Lorex LNC104 User manual

Lorex E891AB Series User manual

Lorex

Lorex E891AB Series User manual

Lorex LNC104 User manual

Lorex

Lorex LNC104 User manual

Lorex W482CAD Series User manual

Lorex

Lorex W482CAD Series User manual

Lorex LEV2750A Series User manual

Lorex

Lorex LEV2750A Series User manual

Lorex Vantage LNC116 User manual

Lorex

Lorex Vantage LNC116 User manual

Lorex VANTAGE LBC6050 Series User manual

Lorex

Lorex VANTAGE LBC6050 Series User manual

Lorex Vantage LBC7051 User manual

Lorex

Lorex Vantage LBC7051 User manual

Lorex LN Series User manual

Lorex

Lorex LN Series User manual

Lorex LB2221AC1B User manual

Lorex

Lorex LB2221AC1B User manual

Lorex LNC230 User manual

Lorex

Lorex LNC230 User manual

Lorex LNBW421 Series User manual

Lorex

Lorex LNBW421 Series User manual

Popular IP Camera manuals by other brands

AVYCON CAT5 quick start guide

AVYCON

AVYCON CAT5 quick start guide

VADDIO ClearSHOT 10 USB installation guide

VADDIO

VADDIO ClearSHOT 10 USB installation guide

Foscam FI8910W user manual

Foscam

Foscam FI8910W user manual

Leadtek Amor C101 user manual

Leadtek

Leadtek Amor C101 user manual

D-Link SECURICAM Network DCS-2100+ manual

D-Link

D-Link SECURICAM Network DCS-2100+ manual

Nextiva S5250 Quick installation guide

Nextiva

Nextiva S5250 Quick installation guide

DSE RA-N1250 user manual

DSE

DSE RA-N1250 user manual

ACTi KCM-5211 user manual

ACTi

ACTi KCM-5211 user manual

Eneo HDD-2080Z03IR D user manual

Eneo

Eneo HDD-2080Z03IR D user manual

Allied Vision Technologies AVT Stingray Technical manual

Allied Vision Technologies

Allied Vision Technologies AVT Stingray Technical manual

trungloi ICS7200 Quick instillation guide

trungloi

trungloi ICS7200 Quick instillation guide

Tenda C50sV4.0 user manual

Tenda

Tenda C50sV4.0 user manual

OpenEye CM-816 user manual

OpenEye

OpenEye CM-816 user manual

Hubble HUGO quick start guide

Hubble

Hubble HUGO quick start guide

NST CPT2IP user manual

NST

NST CPT2IP user manual

Comelit 40678 user manual

Comelit

Comelit 40678 user manual

DivioTec NDR554P Quick installation guide

DivioTec

DivioTec NDR554P Quick installation guide

Kerbl 81890 Instructions for use

Kerbl

Kerbl 81890 Instructions for use

manuals.online logo
manuals.online logoBrands
  • About & Mission
  • Contact us
  • Privacy Policy
  • Terms and Conditions

Copyright 2025 Manuals.Online. All Rights Reserved.