Loveshaw LITTLE DAVID CAC60 Series User manual

LITTLE DAVID
OWNERS MANUAL
CAC60 / CAC61series
(Standard & High Speed)
THE LOVESHAW CORPORATION LOVESHAW - EUROPE
2206 EASTON TURNPIKE, BOX 83 UNIT 9, BRUNEL GATE
SOUTH CANAAN, PA 18459 W. PORTWAY INDUSTRIAL ESTATE
ANDOVER, HAMPSHIRE SP103SL
TEL: (570) 937-4921 ENGLAND
FAX: (570) 937-4370 44-264-3575-11

Part and Instruction Manual
Loveshaw Pressure Sensitive Tape Cartridge
CAC60 series – 2” wide tape
CAC61 series – 3” wide tape
This is a combined manual for the CAC60 series – 2” wide tape and the CAC61 series –
3” wide tape. Take care when ordering parts. Make sure it is for the correct width
cartridge.
For stainless steel cartridge parts add the suffix “SS” to the part numbers depicted in
the assembly drawings.

Theory of Operation: (Standard)
Pressure sensitive tape is applied to the corrugated box as it passes by the
cartridge. The box will contact the front arm roller which has pressure sensitive
tape adhesive side facing outward towards the oncoming box. The front leading
side of the box will contact the front roller arm and the tape will adhere to the
box. As the box continues to move forward the front roller arm and knife arm will
be rotated into the frame of the cartridge. The amount of force exerted on the
box as tape is being applied is adjustable by changing the position of the main
spring. The front arm initial application force can be set to accommodate the
strength of the box as well as the sturdiness of the contents in the box.
As the front arm application roller transitions from the leading panel of the box
to the top major flaps the knife arm is retracted into the cartridge and the knife
blade guard is fully retracted uncovering the blade. As the knife arm rotated
into the cartridge the knife activation spring extends, generating cut force.
As the box proceeds pass the cartridge the front arm roller will no longer
contact the major flaps of the box, but the rear wipe roller will still contact the
major flaps. Eventually as the box travels the knife arm will completely stop
contacting the major flaps of the box. This will allow the knife arm to travel back
towards its home position allowing the knife blade to puncture and cut through
the tape. As the box continues move the rear wipe arm roller will no longer
contact the major flaps of the box. This will allow the wipe arm roller to spring
out of the cartridge and contact the rear tab length of tape and press against the
trailing panel of the box.
The box travelling pass the cartridge is the vehicle which pulls the tape through
the cartridge. The cartridge is design to run most pressure sensitive tapes with
no required adjustments. However in some cases it may be necessary to adjust
tape tensions. The cartridge will operate at speeds up to 80 feet/minute.

Theory of Operation: (High Speed)
Pressure sensitive tape is applied to the corrugated box as it passes by the
cartridge. The box will contact the front arm roller which has pressure sensitive
tape adhesive side facing outward towards the oncoming box. The front leading
side of the box will contact the front roller arm and the tape will adhere to the
box. As the box continues to move forward the front roller arm and knife arm will
be rotated into the frame of the cartridge. The amount of force exerted on the
box as tape is being applied is adjustable by changing the position of the main
spring. The front arm initial application force can be set to accommodate the
strength of the box as well as the sturdiness of the contents in the box.
As the front arm application roller transitions from the leading panel of the box
to the top major flaps a separate wipe down spring is engaged. The sole
purpose of this spring is to add speed to the rear wipe roller actuation to insure
the rear tape tab is completely wiped to the rear trailing panel of the box. At this
time the knife arm is retracted into the cartridge and the knife blade guard is
fully retracted uncovering the blade. As the knife arm rotated into the cartridge
the knife activation spring extends, generating cut force.
As the box proceeds pass the cartridge the front arm roller will no longer
contact the major flaps of the box, but the rear wipe roller will still contact the
major flaps. Eventually as the box travels the knife arm will completely stop
contacting the major flaps of the box. This will allow the knife arm to travel back
towards its home position allowing the knife blade to puncture and cut through
the tape. As the box continues move the rear wipe arm roller will no longer
contact the major flaps of the box. This will allow the wipe arm roller to spring
out of the cartridge and contact the rear tab length of tape and press against the
trailing panel of the box. The rear wipe arm roller booster spring starts the wipe
and the main cartridge spring finishes the wipe sequence.
The box travelling pass the cartridge is the vehicle which pulls the tape through
the cartridge. The cartridge is design to run most pressure sensitive tapes with
no required adjustments. However in some cases it may be necessary to adjust
tape tensions. The cartridge will operate at speeds up to 170 feet/minute.

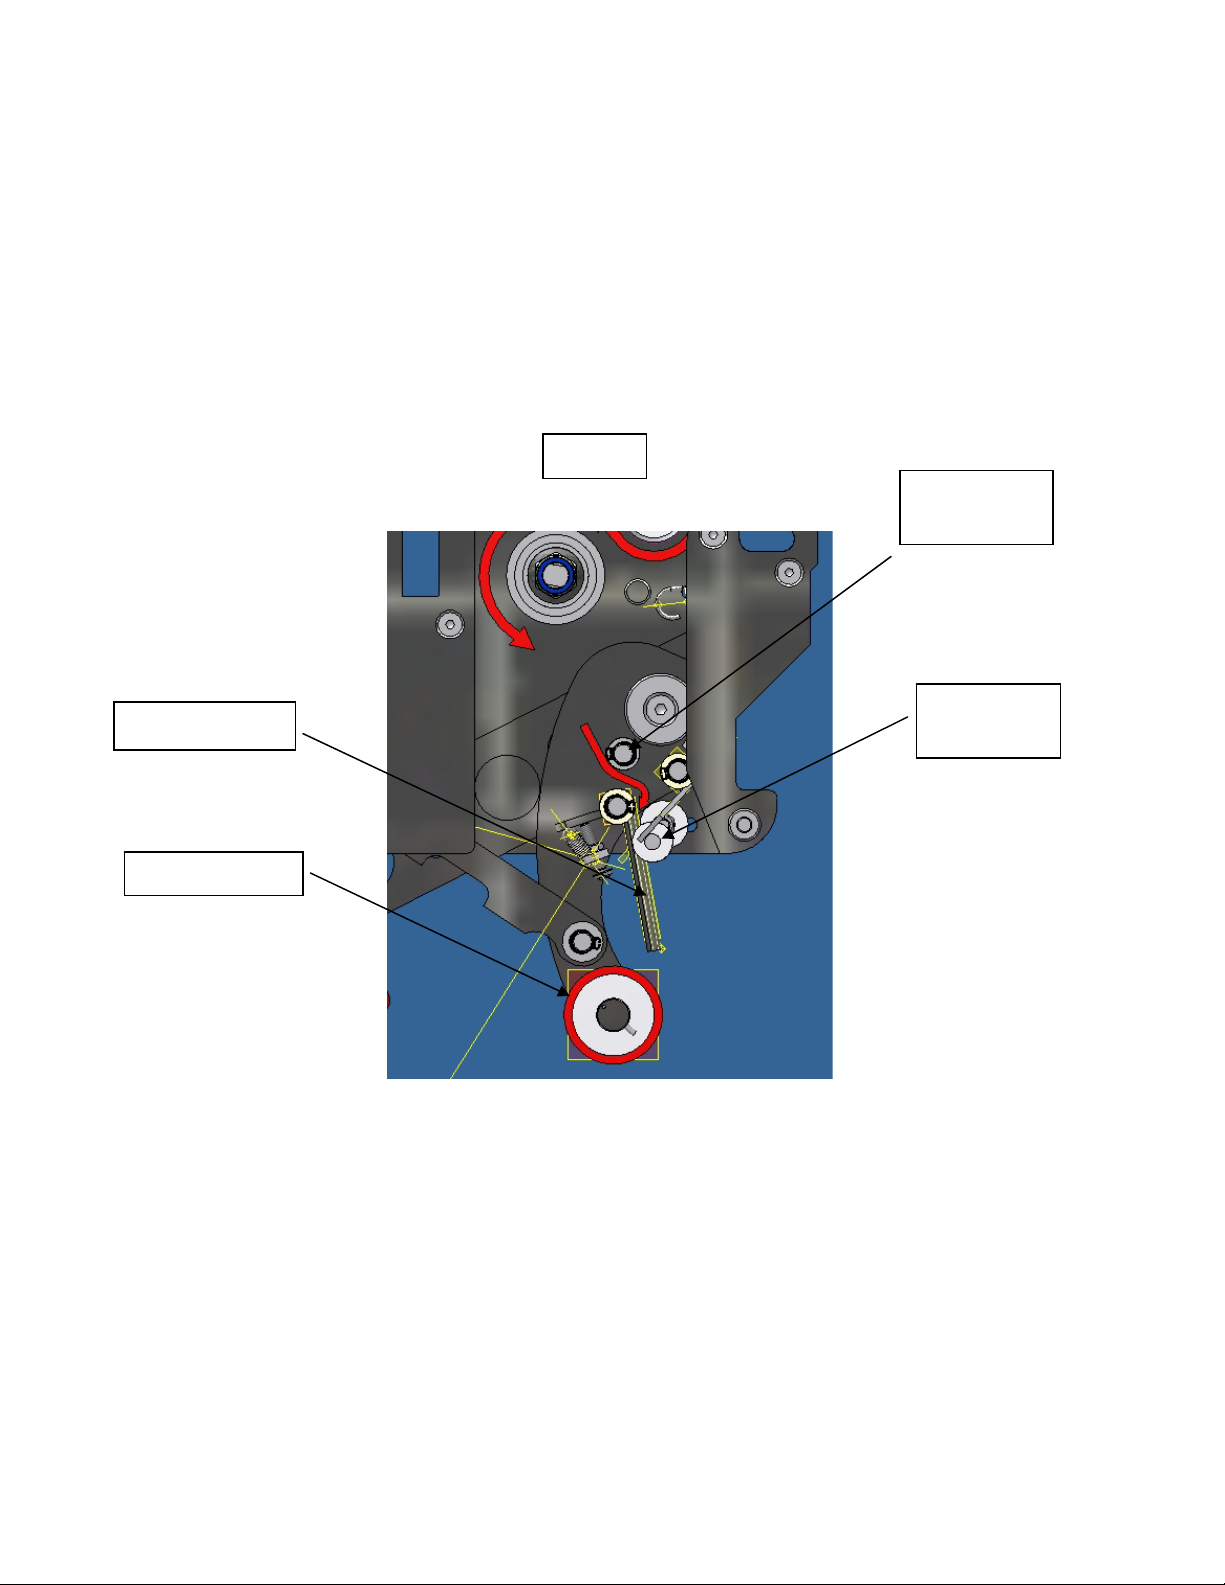
Theory of Operation: (Pneumatic Cartridge)
Pressure sensitive tape is applied to the corrugated box as it passes by the
cartridge. The box will contact the front arm roller which has pressure sensitive
tape adhesive side facing outward towards the oncoming box. The front leading
side of the box will contact the front roller arm and the tape will adhere to the
box. As the box continues to move forward the front roller arm and knife arm will
be rotated into the frame of the cartridge. At this box position the leading edge
of the box will trigger a photo eye. The photo eye will energize a solenoid valve
which will switch air pressure to the two cylinders in the tape cartridge. One
cylinder acts against or balance out the knife arm spring the other acts against
or balances out the main spring that biases the front roller arms. The amount of
force the biased arms place on top of the box can be adjust with and air
regulator. The front arm initial application force can be set to accommodate the
strength of the box as well as the sturdiness of the contents in the box.
As the front arm application roller transitions from the leading panel of the box
to the top major flaps a separate wipe down spring is engaged. The sole
purpose of this spring is to add speed to the rear wipe roller actuation to insure
the rear tape tab is completely wiped to the rear trailing panel of the box. At this
time the knife arm is retracted into the cartridge and the knife blade guard is
fully retracted uncovering the blade. As the knife arm rotated into the cartridge
the knife activation spring extends, generating cut force.
As the box proceeds pass the cartridge the front arm roller will no longer
contact the major flaps of the box, but the rear wipe roller will still contact the
major flaps. At this point the box will move past the photo eye the engaged the
pneumatic balance. The solenoid valve will de-energize and all of the air
pressure will be evacuated and the normal spring biasing will apply pressure to
the box. Eventually as the box travels the knife arm will completely stop
contacting the major flaps of the box. This will allow the knife arm to travel back
towards its home position allowing the knife blade to puncture and cut through
the tape. As the box continues to move the rear wipe arm roller will no longer
contact the major flaps of the box. This will allow the wipe arm roller to spring
out of the cartridge and contact the rear tab length of tape and press against the
trailing panel of the box. The rear wipe arm roller booster spring starts the wipe
and the main cartridge spring finishes the wipe sequence.
The box travelling pass the cartridge is the vehicle which pulls the tape through
the cartridge. The cartridge is design to run most pressure sensitive tapes with

no required adjustments. However in some cases it may be necessary to adjust
tape tensions. The cartridge will operate at speeds up to 170 feet/minute.
Important Safety Notices:
Before installing operating or servicing the tape cartridges read
carefully and understand the following precautions:
Never service the tape cartridges when installed in an
operating machine.
Use lock out / tag out protocols before installing or removing
cartridges from machinery.
Do not bypass or remove safety guard on knife blade.
Observe caution when near tape cartridge knife. The knife
blade is protected by a locking cover which is held closed by
the link bar.
Never make any adjustments to the tape cartridges when
installed in an operating machine.

Tape Threading:
The first step is to place the tape roll, on the cartridge exspandable tape core.
The tape core diameter is adjustable by turning the adjustor nut. Turning the
adjustor nut c.w. the core diameter increases and turning it c.c.w. the tape core
diameter decreases. Decrease the tape core enough in order to place the tape
roll on the core. Now turn the adjustor nut clockwise until the tape roll is
snuggly held. (refer to figure1)
Tape roll must be placed on tape core with adhesive side of tape facing to the
right. Refer to figure 2 for proper orientation.
Thread the tape over white roller. Threading arrows are installed throughout
the tape path of the cartridge to aid in threading. The back of the tape, the non
adhesive side rides against the surface of the white roller. (refer to figure 3)
Adjustor
nut
Figure1Figure2
Adhesive
side

The tape is then threaded around the knurled tape tension roller. The adhesive
side of the tape contacts the knurled roller. Refer to figure 4.
Figure3Whitetape
roller
Knurledtensionroller
Figure4

The tape is then threaded between the black knurled roll and the tape guide
plate. The adhesive side of the tape will contact the two tape guide rollers as it
is pulled through the guide plate assembly until it is at rest on the front arm
roller. The adhesive side of the tape will be facing away from the front arm
roller. Refer to figure 5.
Figure5
Blackknurled
roller
Frontarmroller
TapeguideplateTapeguide
rollers

Adjustments:
Aligning tape :
Aligning tape side to side with in the cartridge frame is done by changing
the position of the tape core. This is done by first loosening the tape core
locking screw with a 3mm hex key. Turn the tape core locking screw
counter clockwise allowing for the desired amount of adjustment to be
made. Now turn the tape core height adjusting nut until the desired result
is obtained. By turning the tape core height adjusting nut clockwise the
tape core height position will decrease moving the tape closer to the mill
stand side of the cartridge. By turning the tape core height adjusting nut
counter clockwise the tape core height position will increase. This will
make the tape track further away from the mill stand. After each
adjustment always tighten the tape core locking screw. Failure to do so
will allow the tape core position to change as tape is being pulled of f the
tape roll. Refer to figure 6
Figure6
Tapecoreheight
lockin
g
screw
Tapecoreheight
adjustingnut
Tapecorefriction
dragadjustorring
MillStand

Setting tape core drag:
The tape core drag setting is factory set to not allow a full roll of tape to
free wheel as tape is being pulled off it. The drag setting may need to be
adjusted if the tape cartridge is being operated at high speed or if the tape
adhesive is causing the roll to over rotate as the tape it is being pulled of
the roll. Refer to figure 6.
Setting the knurled tension roller:
The knurled tension roller is factory set to its minimum resistance setting.
This setting works for all standard tape applications. The tension roller
setting may need to be adjusted if a thick mill tape is being used. By
increasing the tension it aids in cutting the tape. To increase the tension
turn the adjustment nut clockwise. To decrease the tension turn the
adjustment nut counterclockwise Refer to figure7.
Setting main spring tension:
Setting the main spring tension is done by moving the end of the spring to
a different preset position. The main spring tension is factory set to a mid
position. The spring is set from lightest to stoutest dependant on the
strength of the corrugated box and the fill of the contents. Void filled,
weak corrugated boxes would be set to the lightest setting while strong
corrugated box with overfill would process better with the main spring set
Figure7
Tensionroller
adjustornut

stronger. The main spring only effects the application and wipe rollers.
Refer to figure 8.
Setting booster spring compression
The booster spring aids in rear tab wipe. The booster spring preloads the
wipe roller arm so when the trailing edge of the box releases the wipe
roller the arm can travel out at a higher rate of speed and contact the rear
tab and secure it to the back panel of the box. The booster adjuster is
factory set to lightly engage when the front roller arm is completely
Figure8
Mainspringtension
adjustment
Strongest
setting
Weakest
setting
Mainspring
Booster
spring
Booster
adjustment

retracted. The booster setting is adjusted stronger when the cartridge is
operated at higher application speeds. Refer to figure 8.
Setting the rear tab cut adjustor:
The rear tab cut adjustor is factory set to operate at 60 to 80ft/min belt
speed. If the cartridge is operating at higher speeds the adjustor would
need to move in order to shorten the rear tab length. The adjustor only
alters the rear tab length. The front tab length is fixed and cannot be
adjusted. Refer to figure 9.
Front arm stopper adjustment:
The front arm stop adjustment is factory set to insure that the front arm
roller stays in contact with major flaps of the box. This allows for a tight
tape seal across the horizontal length of the box. The adjustor does not
need to be adjusted for normal applications. In some cases it may be
Figure9
Tabadjustor
Increase
Decrease

necessary to adjust the stop depending on the type of machine that the
cartridge is being used in. If the cartridge is placed in a machine and the
tape is not being applied to the major flaps with enough pressure an
adjustment will be necessary. This will be evident by inspecting the box
as it exits the machine. Normal symptoms include the tape bridging
across the major flaps, or the tape bunching up on the major flaps after
the tape was cut. Refer to figure 10A & 10B.
Figure10A
Jamnut
Frontarm
stopper
Figure10B
Boxline
Recommended1/16"to
1/8"interference

Maintenance:
Application / Wipe roller replacement:
Roller replacement is a tool less procedure. Simply push down on
retaining pin and slide roller off the shaft. Install new roller by lining the
angular pin notch on the undercut side of the roller with the retaining pin.
Then push the roller onto the shaft all the way until the retaining pin
protrudes through other side of the roller and extends out to hold the
roller in place. Take caution to install replacement roller with undercut
facing toward arm away from retaining pin. Refer to figure 11.
Knife blade replacement:
Knife blade replacement is a tool less procedure. Simply push down on
release bar and pull knife blade out. Fold back the knife guard by first
rotating the front roller arm inward towards the rear wipe arm. Then
Fi
g
ure11
Retainin
g
p
in

rotate the knife guard back until the knife blade is fully exposed. While
holding the knife guard open slowly release the front roller arm and allow
it to extend outward. This will allow the knife guard locking mechanism to
hold the knife guard open for easy blade replacement. The knife blades
have open slots to allow for easy slide on / off replacements. The knife
blade is notch for proper orientation of the blade. Refer to figure 12A and
12B.
Oil Pad:
Regularly lubricate oil pad with SAE #30 non-detergent oil. Never use
penetrating type oil; this will dissolve the adhesive which secures the pad
to the knife guard. Refer to figure 12A.
Warning: – Use extreme care when working near the knife blade. The
blade is extremely sharp. If care is not taken severe personal injury can
occur.
Fi
g
ure12A
Locatingnotch
OILPAD

Knife guard is shown open in both figures.
Figure12B
Bladereleasebar

TROUBLESHOOTING:
ProblemCauseCorrectiveAction
Thetapeisnotcut,
orthecutisnot
clean.
Knifebladeisdamagedorneedstobe
cleaned.
Tapetensionneedstobeincreased.
Tapeisnotcenteredonrollers.
Knifespringmissingorworn.
Adhesivebuild‐uponblade.
Replaceknifeblade.
Increasedragonknurledtension
roller.
Adjusttapecoreheight.
Replacespring.
Cleanblade‐Oilthefeltpadonknife
guard
Fronttapetab
lengthtoolong.
Cartridgethreadedincorrectly.
Tapetensionneedstobeincreased.
Tapeisnotcenteredonrollers.
Followthreadingarrowsoncartridge.
Increasedragonknurledtension
roller.
Adjusttapecoreheight.
Reartapetabnot
fullywipeddown.
Reartablengthtoolong.
Mainspringtensiontoweak.
Boosterspringnotengaged.
Adjustreartabadjuster.
Adjustmainspringtension.
Adjustboosterspringcompression.
Reartapetabtoo
long.
Tabadjusternotsetproperly.
Knifespringworn.
Notenoughtapetension.
Adjustreartabadjuster.
Replaceknifespring.
Increasedragonknurledtension
roller.
Tapecoredoesnot
fitintomachine
opening.(bottom)
Tapetensionarmeithermisalignedor
bent.
Straightenarmsoitisparallelwith
themillstand.Thenre‐adjusttape
coreheight.
Tapebridgingor
poorsealonbox.
Mainspringtensiontoweak.
Frontarmstopnotadjustedcorrectly.
Increasemainspringtension.
Adjuststoptoallowwiperollersto
contactboxmajorflaps.
"L"clipping
(prematuretape
cutting)
Frontarmstopnotadjustedcorrectly.
Adjuststopsothewiperollersaren't
allowedtoretracttoofarinto
cartridgebody.

Balanceairpressuresettoohigh.
(Pneumaticcartridgeonly)
Reduceairpressure;GREENhose.
(Pneumaticcartridgeonly)
ProblemCauseCorrectiveAction
Majorflapsbeing
damagedonbox.
(weakvoidedbox)
Mainspringtensiontoostrong.
Boosterspringengagedtoaggressive.
Airpressureforbalancetoolow.
(Pneumaticcartridgeonly)
Reducemainspringtension.
Reducecompressiononboostspring.
Increaseairpressureonbalance
(GREEN),(Pneumaticcartridgeonly)
CAUTION:Wheninstallingthecartridgeintothecasesealer,maintaincontrolof
thecartridgeasitisloweredintoitshousing;DONOTallowittoslamorfree
fallintoplace.Failuretodosocoulddamageandvoidwarrantyonpartsofthe
cartridge.
Tapeisbeing
adheredtofrontof
box.Tapegetting
wrappedaround
rearwiperoller.
Frontrollerarmdoesn'thaveenough
tension.
Tapebrokenincartridge.
Tapeadhesivenotaggressiveenough.
Increasemainspringpressure.
See"Tapebreakingincartridge"
below.
Inquireaboutdifferenttape
adhesives.
Tapebreakingin
cartridge.
Cutintaperoll.
Tapenotthreadedcorrectly.
Tapepathroller(s)boundup.
Toomuchdragontensionroller.
Changerolloftape.
Followthreadingarrowsoncartridge.
Checkrollers‐freeup/replace.
Reducetapetension.

ExplodedDrawingsForOrderingSpareParts
ThefollowingdrawingsrepresentseveraldifferentmodelsoftheCAC60/60
seriescartridges.Pleasereadcarefullytoensurethecorrectpartnumberis
chosenbeforeorderingspareparts.
ExplanationOfPartsList:
Eachdrawingcontainsatablewithapartslist.Theitemnumbers
representthecorrespondingballooncalloutsonthedrawings.Someofthe
drawingshavetwotables.Onefora2"widetapecartridgeandonefora3"wide
tapecartridge.Eachtablehasacolumnforastainlesssteelsuffix,"SS"anda
mirrorimagesuffix,"MI".Anyofthepartsthathaveasuffixindicatedintheir
rowrequirethesuffixtobeaddedtotheendofthepartnumberforastainless
steeland/ormirrorimagecartridge.
Example1:
RefertoTable1forthefollowingexample.Ifyouwantedtoordera,"LinkBar",
foryourstainlesssteelcartridge.Findthepartinthecorrespondingtable.The
partnumberforastandardcarbonsteelcartridgeis,"CAC60‐0007‐5".The
cartridgeyourorderingisstainlesssteel.Checkthecolumnundertheheading,
"SS".Ifa,"SS",isintherowforthepartyouareordering,than"SS"mustbe
addedtotheendofthepartnumber.Inthisexample"SS"isindicatedintherow
forthe,"LinkBar".Sothepartnumberwouldbeasfollows."CAC60‐0007‐5SS"
Example2:
This manual suits for next models
1
Table of contents
Other Loveshaw Industrial Equipment manuals

Loveshaw
Loveshaw LITTLE DAVID CF5 User manual

Loveshaw
Loveshaw Little David CF25 User manual

Loveshaw
Loveshaw LITTLE DAVID CAC51 User manual

Loveshaw
Loveshaw LD16AP User manual

Loveshaw
Loveshaw Little David LD16AR User manual

Loveshaw
Loveshaw LITTLE DAVID LD7D/3 Parts list manual

Loveshaw
Loveshaw CASEFORM 40 User manual