3.3 Operation Using the Light Engine Control Pod"
1. Move the master power switch on the lower left of the SPECTRA rear panel (Figure 5) to the ON position. A
green LED next to the switch indicates that power to the light engine is ON.
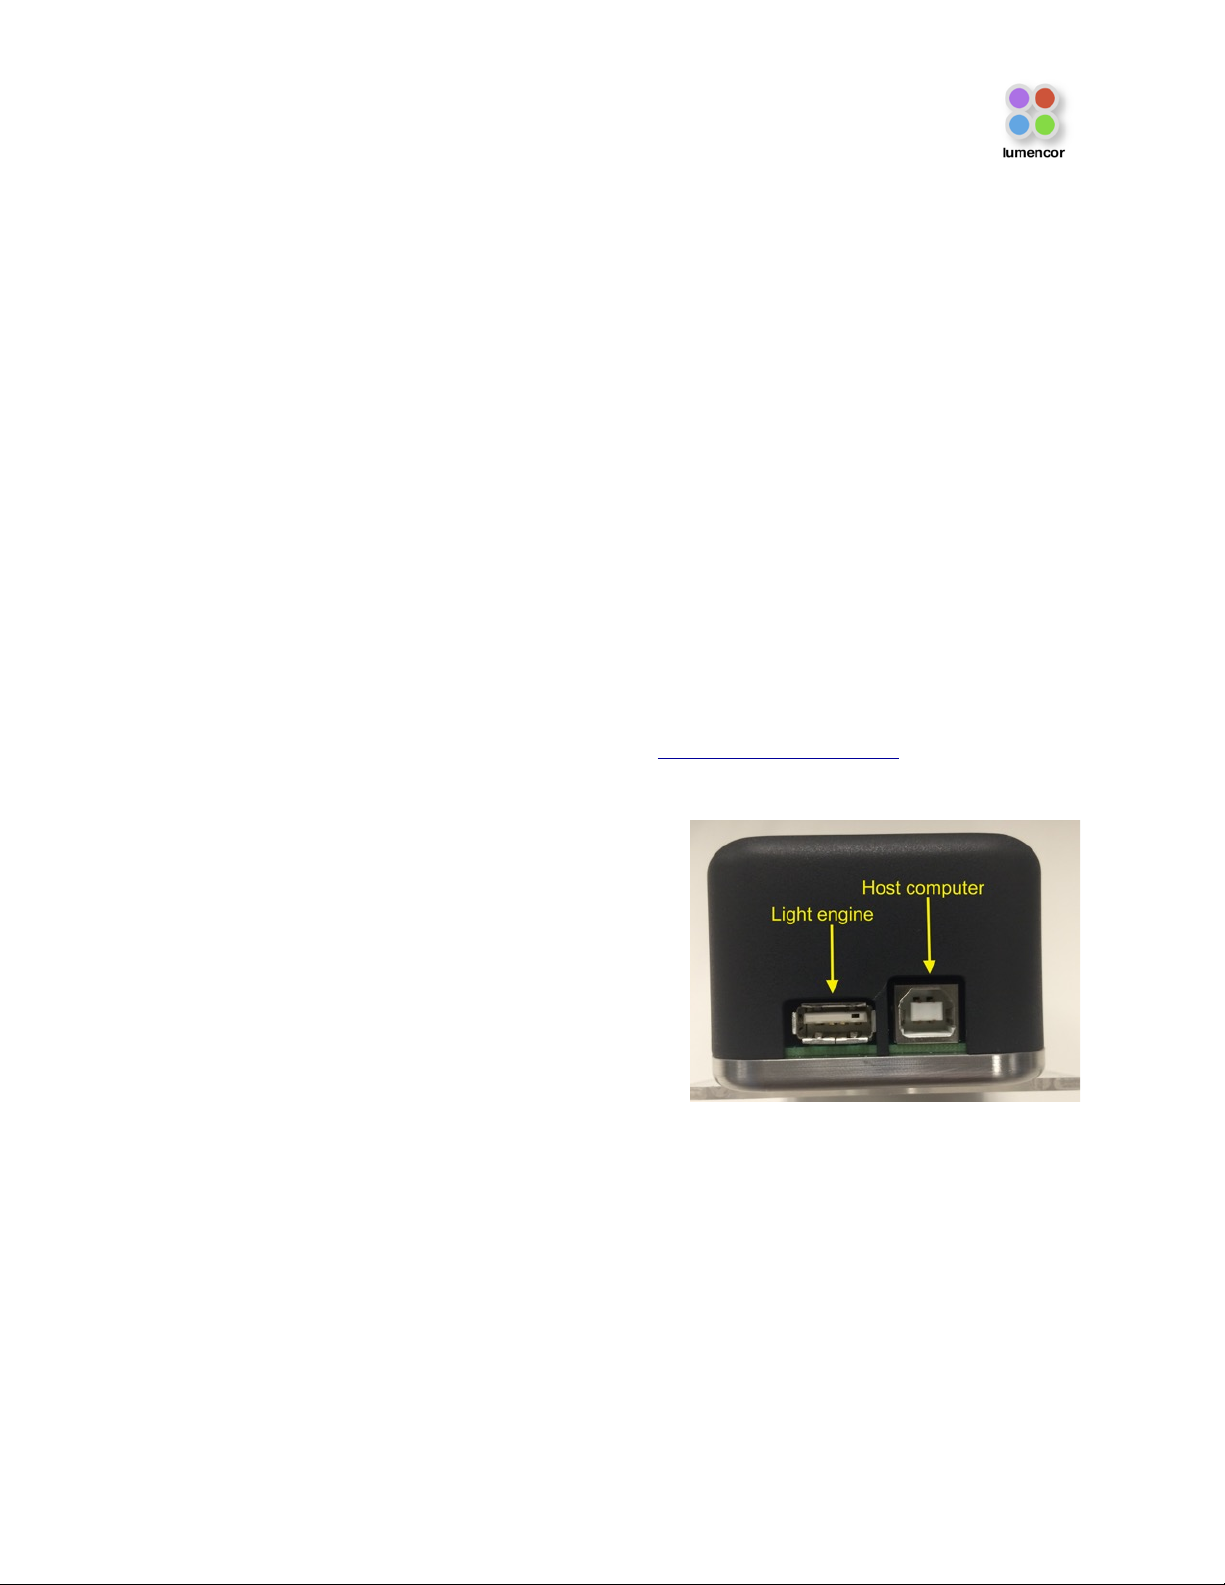
2. Connect the USB A port of the light engine control pod accessory (83-10007) to the RS-232 port on the
SPECTRA (Figure 5) using the USB-to-RS-232 cable (29-10011). Connect the USB B port of the control pod
to a USB A port on a host computer [1].
3. Press and hold the right button on the pod until a menu of light engines appears. Turn the rotary dial to select
“SPECTRA” from the menu. Press the right button again to return to the main (0–100 analog intensity) display
screen.
4. Before turning the light output on, be sure the output end of the light guide or optical fiber is safely directed into
an enclosed optical path (e.g. microscope input collimator or a beam dump).
5. Press the left button to select the desired color channel. Successive presses will cycle through the available
color channels.
6. Press the right button to turn the selected light source on [2]. Adjust the output intensity using the rotary dial.
Press the right button again to turn the selected light source off.
7. Press and hold the left button to view a digital rendition of the intensity setting [3,4]. Press the right button to
return to the main display screen.
8. Serial commands sent from a host computer to the USB B port of the control pod will automatically switch the
pod from local to pass-through mode, indicated by the message “PC pass through mode active” shown on the
pod display screen. Local command mode is disabled as long as pass-through mode remains active.
9. To quit pass-through mode and return to local command mode, press the right button on the pod twice [5].
10. Further details of control pod operation are provided in a downloadable instruction sheet.
Notes
[1] When configured for pass-through operation, the host
computer supplies electrical power to the pod. The pod will
turn on when the connection is made. For stand-alone
operation (no pass-through), connect a DC power supply
(5V/500mA) to the USB B port of the pod.
[2] There is no warm-up time; the light engine output
stabilizes less than 1 second after the light output is switched
on. Light output can be switched off during intervals when it
is not required for active viewing or data collection. After light
output is switched off, the cooling fan will continue to run for
5 minutes, after which it will automatically stop until light
output is turned back on.
[3] Output intensity can be set from 0–100% in 1% increments;
however operation in the 0–5% range is not recommended.
[4] The current intensity settings are internally stored. When the
pod is powered down, the settings are retained and will be restored at the next restart.
[5] Changes to light output ON/OFF status and intensity level made on the host computer during pass-through
operation will be automatically replicated in the pod settings.


 Light Engine User manual")