INSTRUCTIONS FOR USE –
PLEASE READ ALL INSTRUCTIONS BEFORE USE.
SAFETY GUIDELINES –
PLEASE READ BEFORE USE
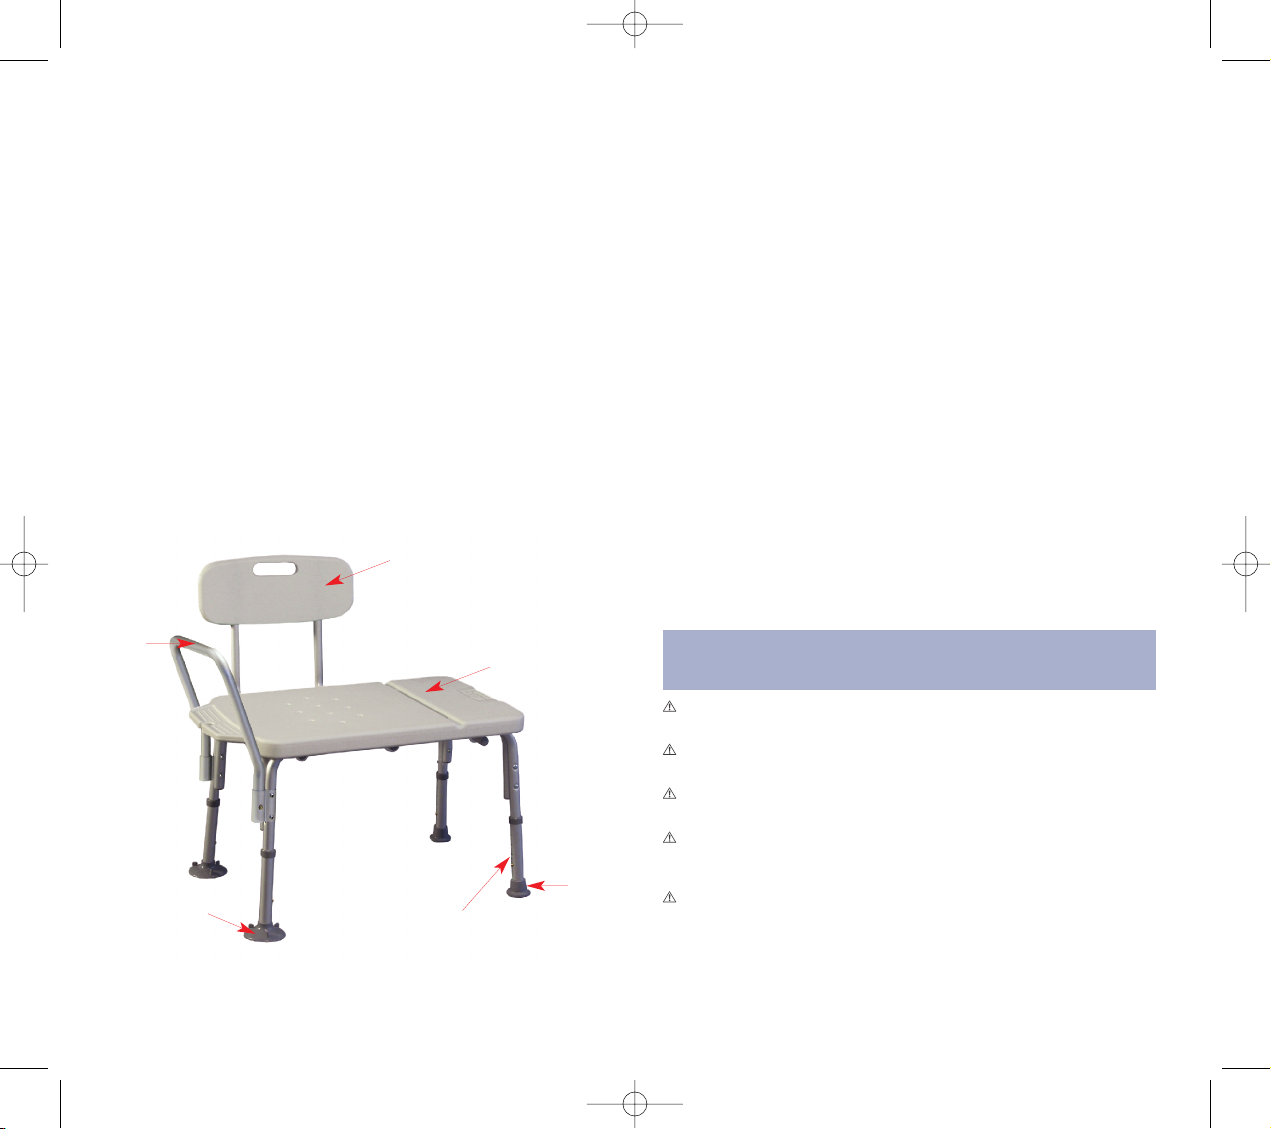
Height
Adjustment
Holes
Platform
Support
Arm
HEIGHT ADJUSTMENT
1. Depress the height adjustment button and slide the lower leg upward or
downward until the height adjustment button is fully engaged in the
desired hole.
2. Repeat for other 3 legs.
Note: Legs inside the tub may be adjusted to a different height than the legs
outside the tub; however, the legs inside the tub should be adjusted to
the same height, and the legs outside the tub should be adjusted to
the same height.
Note: Transfer benches should be adjusted to a height just above the tub wall.
Note: When removing a transfer bench from the tub, always release the
suction cups by pinching the two tabs together.
MAINTENANCE
• Use a mild soap and water solution, rinse with clear water, then dry with
a soft cloth. Ensure that commode is well rinsed before using.
• Never use organic solvents, abrasive cleaners or scouring pads on
any part of commode
• Check fit and tightness of all nuts, bolts and knobs weekly to ensure
that commode is safe to use.
• To guarantee the best service from your commode, always specify Lumex
replacement parts, available from your Graham-Field Health Products dealer.
C
CA
AU
UT
TI
IO
ON
N:
:This product should not be used without proper instruction
from a healthcare professional.
C
CA
AU
UT
TI
IO
ON
N:
:Item 7927A has a maximum user weight limitation of 250 lbs.
Item 7929 has a maximum user weight limitation of 400 lbs.
C
CA
AU
UT
TI
IO
ON
N:
:Lumex assumes no responsibility for any damage or injury
caused by improper installation, assembly or use of this product.
C
CA
AU
UT
TI
IO
ON
N:
:Ensure that all four transfer bench legs are adjusted to the
same height, and that all height adjustment buttons protrude fully
through adjustment holes before use.
C
CA
AU
UT
TI
IO
ON
N:
:If components are damaged or missing, contact your dealer
immediately. DO NOT use substitute parts.
Tip
Suction Cup
Back Support
SET-UP
1. Remove frame, back, support arm and legs from box.
2. Insert support arm into frame until support arm buttons protrude fully
through channel guide holes.
3. Place frame on side on a working surface.
4. Locate channel guides (4 each) on underside of seat. Align seat support
tubes with channel guides.
5. Slide seat support tubes through channel guides until seat support tube
buttons protrude fully through channel guide holes.
6. Attach suction cup legs to frame on same side as support arm. Attach
flange tips to frame legs on opposite side of frame from support arm.
Note: When the transfer bench is in the tub, it should face the faucets with
the support arm on inside of tub.
7. Adjust seat height as directed in Height adjustment section.
7929 7/15/05 11:17 AM Page 2


