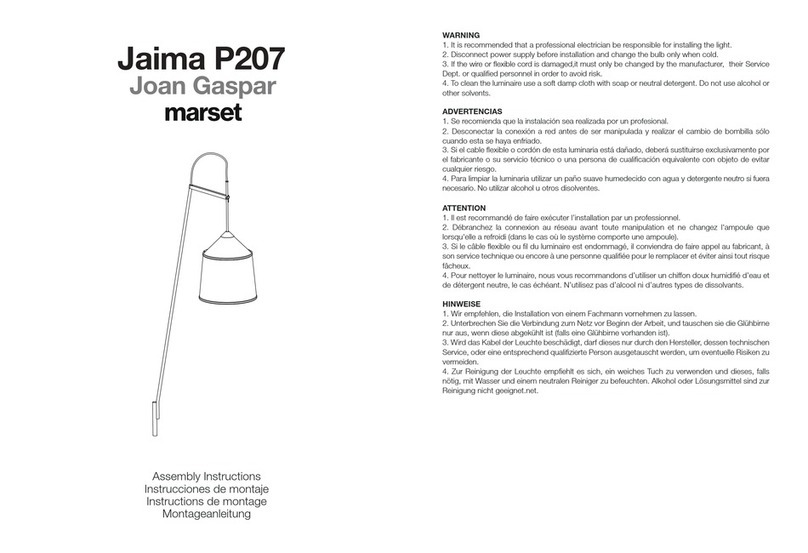
Lumina PERLA 28 User manual

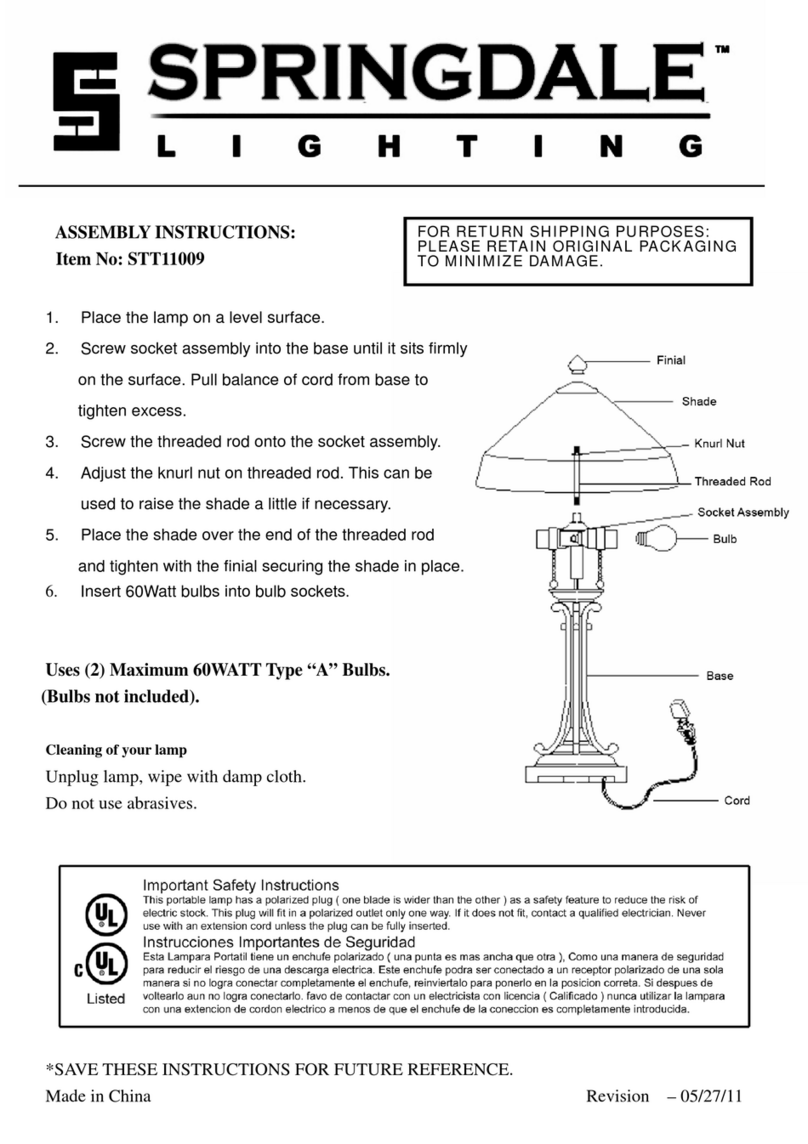
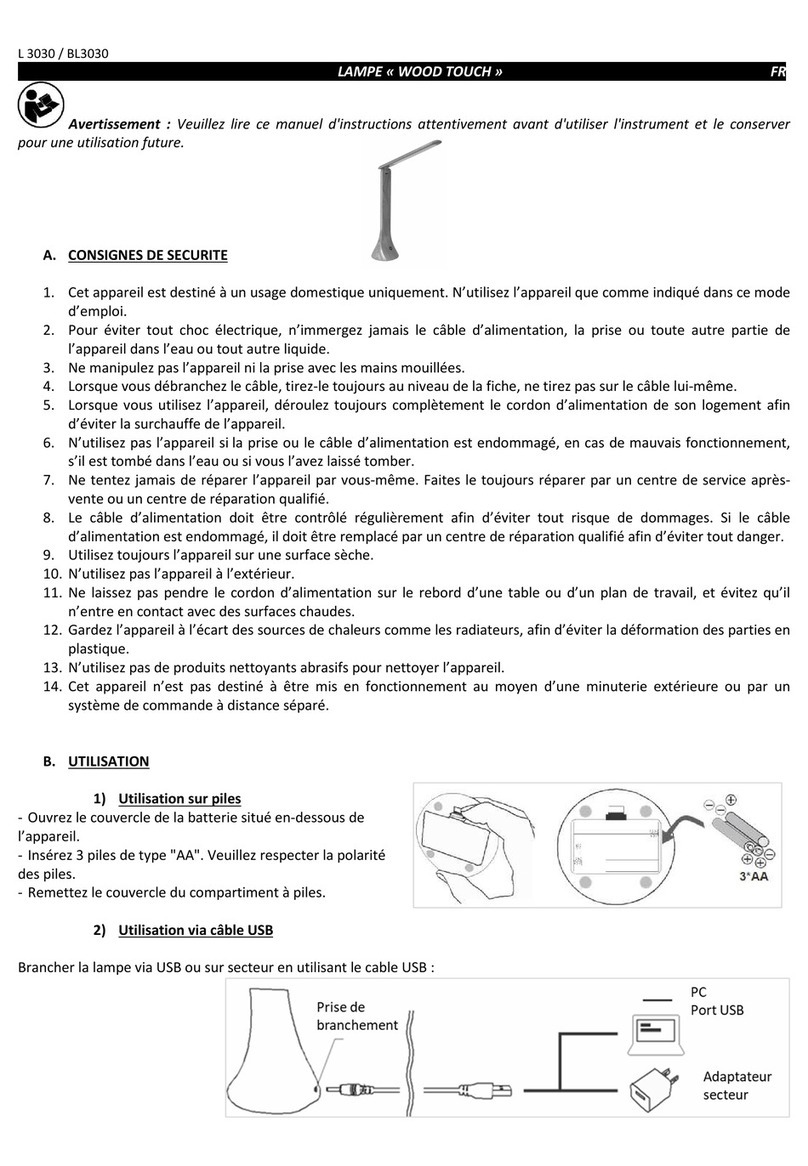
PERLA 28/35
PERLA 28 SC/35 SC
design
Ettore Cimini
Walter Monici
Istruzioni
Hinweisungen
Instructions
Instrucciònes
I
D
E
D
F
E
H
10 cm
G
A
B
A
L
M
N
H
H
C
I
3
2
45
1

I
D
GB
Apparecchio d’illuminazione a sospensione a luce diffusa in alluminio
pressofuso e diffusore in vetro soffiato di due diverse dimensioni e potenze.
Ampliabile in un sistema a cascata il quale prevede la possibilità di connessione
elettrica ad un punto luce singolo per più sorgenti luminose con regolazione
verticale ed orizzontale a mezzo di funi, cavi ed altri accessori di semplice uso.
Molteplici tipi di istallazione per uno o più apparecchi,della stessa o delle due
diverse misure Ø350/Ø285mm.Lampadine: E27 max 100W (Perla 28) o 150W
(Perla 35).
Apparecchio idoneo ad essere montato su superfici normalmente
infiammabili.
Il simbolo indica la distanza minima da rispettare verso l’oggetto
illuminato.
Solo per uso interno.
Si raccomanda di seguire attentamente le istruzioni e di far eseguire il
montaggio da personale specializzato.
Togliere la tensione di alimentazione prima di effettuare qualsiasi operazione
sull’apparecchio.
MONTAGGIO O SOSTITUZIONE LAMPADINA - MANUTENZIONE
In caso di montaggio o sostituzione della lampadina alogena utilizzarne una
alogena autoprotetta .
(Fig. 1) •Attenzione:durante questa operazione tenere saldamente il vetro
diffusore.
•Dalla parte opposta al cavo di alimentazione, svitare le viti (A) e le relative
rondelle dal coperchio (B),usando la chiave a brugola in dotazione.
•Togliere il diffusore in vetro ed eseguire la manutenzione (montaggio o
sostituzione della lampadina,pulizia del vetro,ecc.).
•Rimettere il vetro diffusore in posizione e stringere le viti (A) e relative rondelle.
Per la pulizia dell’apparrecchio non effettuare l’operazione a lampada calda,
usare solo prodotti neutri.
MONTAGGIO (Perla 28 SC - cod.811 e Perla 35 SC - cod.801)
•Montare a soffitto o parete due ganci per tasselli adatti al peso della lampada
(5Kg) ed al tipo di soffitto o parete.
(Fig. 4) •Annodare le funi in dotazione ai ganci ed ai punti di attacco (C).
•Procedere poi come in Fig. 5.
MONTAGGIO (Perla 28 - cod.810 e Perla 35 - cod.800)
(Fig. 2) •Tagliare le funi (D) della lunghezza desiderata, nota: per un taglio
netto avvolgere la fune nel punto di taglio con nastro adesivo.
•Predisporre le asole come mostrato, e chiudere i due gusci (E) avvitando la
vite (F) al dado (G).
•Agganciare i moschettoni (H) alle asole.
(Fig. 3) •Fissare i due sostegni (I) a parete o soffitto usando viti e tasselli adatti
al peso della lampada (5Kg) ed al tipo di soffitto o parete.
(Fig. 4) •Agganciare i moschettoni (H) ai punti di attacco (C) ed ai sostegni (I).
(Fig. 5) •Svitare la vite e la rondella (L) per togliere il copri-rosone (M).
•Fissare la staffa (N) a soffitto o parete,usando la vite ed il tassello in dotazione
od altri adatti.
•Collegare i cavi dell’impianto elettrico alla morsettiera avendo cura di
collegare il cavo giallo-verde al morsetto di terra contrassegnato con .
Nota:il circuito di terra deve essere a norme.
•Avvitare la vite e la rondella (L) per fissare il copri-rosone (M) alla staffa (N).
La sicurezza dell’apparecchio è garantita dalla osservanza di queste
istruzioni pertanto si raccomanda di conservarle.
GARANZIA Per questo apparecchio valgono le condizioni di garanzia valide nella
rispettiva nazione.La garanzia viene riconosciuta soltanto se accompagnata dal
documento giustificativo dell’acquisto.
Hängeleuchte mit diffusem Licht, aus Pressgussaluminium und Diffusor
aus mundgeblasenem Glas, erhältlich in zwei Versionen. Ihre Vielseitigkeit
ermöglicht es sie als System zu installieren.Durch dieVerwendung von Seilen,
Kabel und andere einfache Zubehöre kann man mehrere Beleuchtungskörper
von einem Leitungspunkt aus verbinden. Zahlreiche Anwendungen für eine
odere mehrere Leuchten, mit gleichem oder verschiedenem Durchmesser
von 350 oder 285 mm.
Leuchtmittel:E27 max.100W (Perla 28) oder 150W (Perla 35).
Die Leuchte kann auf normal entzündbaren Flächen verwendet werden.
Das Symbol zeigt den zu beachtenden Mindestabstand zum
beleuchtenden Gegenstand auf.
Nur für Innenbereich geeignet.
Wir empfehlen,die Montageanleitunggenau zubefolgenund dieInstallierung
vom Fachpersonal durchführen zu lassen.
Vor jedem Eingreif an der Leuchte Spannung unterbrechen.
MONTAGE ODER LEUCHTMITTELAUSTAUSCH - INSTANDHALTUNG
Im Fall vom Austausch des Halogenleuchtmittels ein selbstschützendes
Halogenleuchmittel verwenden .
(Abb. 1) •Achtung: Glas fest halten.•Schrauben (A) und Scheiben vom Deckel
(B) entfernen.Verwenden Sie bitte den mitgelieferten Schlüssel.
•Glas entfernen, um Leuchtmittel zu montieren und auszutauschen oder
Leuchte reinigen.
•Glas wieder positionieren und Schraube mit Scheiben (A) anschrauben.
Reinigung: Leuchte nicht im warmen Zustand reinigen und nur neutrale
Reinigungsmittel benutzen.
MONTAGE (Perla 28 SC - Kod.811 und Perla 35 SC - Kod. 801)
•An Wand/Decke mit zwei Haken und Dübel, die hierzu und für das
Leuchtengewicht (5 kg) geeignet sind, montieren.
(Abb. 4) •Die mitgelieferten Seile an beiden Haken und an Befestigungspunkt
(C) verbinden. •Dann Abb.5 folgen.
MONTAGE (Perla 28 - Kod.810 und Perla 35 - Kod. 800)
(Abb. 2) •Die Seile (D) in gewünschte Länge kürzen (Anmerkung: Seile am
Schnittpunkt mit Klebeband umwicklen).
•Die Öse wie gezeigt vorbereiten und die zwei Gehäuse (E) mit Schraube (F)
und Mutter (G) schliessen.
•Die Öse in den Karabinerhaken (H) einhängen.
(Abb. 3) •Die 2 Halterungen (I) an Wand/Decke mit den mitgelieferten
Schrauben und Dübel,die für das Leuchtegewicht (5 kg) und dieWand/Decke
geeignet sind,befestigen.
(Abb. 4) •Karabinerhaken (H) mit Befestigungspunkt (C) und Halterungen (I)
verbinden.
(Abb. 5) •Schraube und Scheibe (L) abschrauben, danach Deckenrosette (M)
entfernen.
•Den Befestigungsbügel (N) an Decke/Wand montieren. Bitte verwenden Sie
die mitgelieferte Schraube und Dübel,oder andere hierzu passende.
•Die Verkabelung der Anlage durchführen und das gelbe-grüne Kabel mit
dem Klemmbrett gekennzeichnet mit verbinden. Anmerkung: Die
Erdung muss den Normen entsprechen.
•Deckenrosette (M) mit Befestigungsbügel (N) mittels Schraube (L) befestigen.
Die Sicherheit dieses Gerätes ist nur gewährleistet,wenn diese
Montageanleitung genau beachtet wird.Wir empfehlen daher diese
aufzubewahren.
GARANTIE Für dieses Gerät gelten die im Kaufland herausgegebenen
Garantiebedingungen. Zur Inanspruchnahme von Garantieleistungen ist in
jedem Fall aber die Vorlage des Kaufbeleges erforderlich.
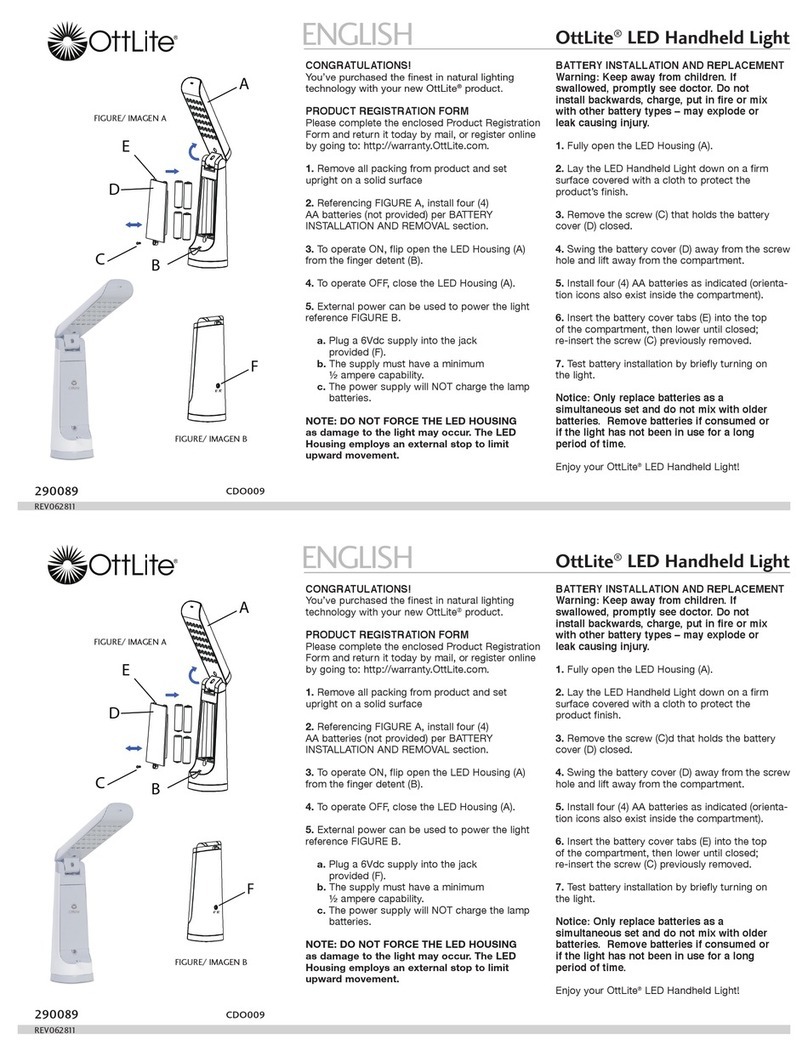
A suspended light fitting for diffused illumination,made of die-cast aluminium
with a diffuser of blown glass, available in 2 sizes and powers. Possibility of
cascaded installations since you can electrically connect several fittings to the
same power connection. Possibility of vertical and horizontal adjustments by
means of ropes and other accessories of simple use.Many installation options
are possible for one or more fittings, either in same or 2 different sizes Ø350/
Ø285mm.
Lamping:E27 socket, 100W (Perla 28) or 150W (Perla35) max. power.
The fitting is suitable for fixing to any normally flammable surface.
The symbol recommends the minimum distance to be kept from
the lighted object.
This light fitting is for indoor use only.
Read and carefully follow this instruction: we recommend that a specialized
technician carries out this job.
Always cut off the current prior to start any operations.
INSTALLING OR REPLACINGTHE BULB - MAINTENANCE
In case of halogen lamp installing or replacement please use a self shielded
tungsten halogen lamp only .
(Pict. 1) •Warning: hold the glass-diffuser firmly during this operation. From
the side opposed to the feeding cable,remove the screws (A) and its washers
from the tap (B) with the Allen key included in box.
•Then remove the glass-diffuser and carry out maintenance works (installing
or replacing the bulb, cleaning of the glass etc.).
•After that put the glass-diffuser at its place again and tighten the screws (A)
and its washers. To clean the fitting: never carry it out when the fitting is still
warm.Only use neutral cleaning products.
ASSEMBLY (Perla 28 SC - code 811 and Perla 35 SC - code 801)
•Ceiling or wall mount,by means of 2 hooks for dowels suitable to the weight
of the lamp (5 kg).
(Pict. 4) •Tie the ropes (included in box) in knots to both the hooks and to the
hitch points (C).After that,go ahead as shown in pict.5.
ASSEMBLY (Perla 28 - code 810 and Perla 35 - code 800)
(Pict. 2) •Cut the ropes (D) to needed length (notice: wrap the cut end with a
tape), with slots as sketched, and close the two shells (E) screwing the bolt (F)
and the nut (G).
•Hook the carabiners (H) to the slots.
(Pict.3) •Mount both rope-holders (I) to wall or ceiling by means of screws and
dowels suitable to the weight of the lamp (5 kg) and the kind of ceiling or wall.
(Pict. 4) •Hook the carabiners (H) to the hitch points (C) and to the rope-
holders (I).
(Pict. 5) •Unscrew the screw and its washer (L) and remove the canopy-cover
(M). •Mount the bracket (N) to ceiling or wall, by means of the screw and
dowel that are included in the box, or with any other one suitable to the kind
of ceiling.
•Connect the wires from the main net to the terminal block taking care to
connect the yellow-green wire to the earth terminal block which is marked
by . Notice:the earth circuit must be in conformity with the safety norms.
•Screw the bolt and its washer (L) to mount the canopy-cover (M) to the
bracket (N).
Carefully read the instructions before assembling the light fitting which
is guaranteed safe and reliable when it has been correctly installed and
properly used.We recommend to conserve the instructions.
GUARANTEE This light fitting is guaranteed under the conditions in force in the
Country of sale. For claims under guarantee,the sales receipt must be shown.

F
AVVERTENZE PER LA SICUREZZA D’UTILIZZO
L’apparecchio di illuminazione che avete acquistato è costruito secondo le
vigenti normative di sicurezza europee ed è stato collaudato e certificato da
un Istituto qualificato per il marchio di qualità.
L’utilizzo sicuro di apparecchi elettrici con parti ad elevata temperatura
richiede, oltre alla normale prudenza, l’osservanza delle seguenti
istruzioni.
Leggere attentamente e conservare le istruzioni allegate all’apparecchio
per future necessità.
Si consiglia di far installare l’apparecchio da personale specializzato.
Non usare l’apparecchio per usi impropri non previsti dal normale utilizzo
secondo la tipologia per la quale è stato progettato.
Non montare lampadine di potenza superiore o diverso tipo da quelle indicate
nelle istruzioni di montaggio e sulle etichette apposte sull’apparecchio
stesso.
Per sostituire la lampadina o pulire l’apparecchio SI DEVE:
a) staccare la spina se l’apparecchio ne è munito o togliere
la tensione elettrica dell’impianto;
b) lasciare raffreddare completamente la lampadina e l’apparecchio
prima di toccarlo con mani.
NON PULIRE MAI l’apparecchio acceso o ancora caldo.
NON UTILIZZARE liquidi infiammabili per la pulizia.
Tenere presente che le parti in vetro, lampadina compresa, possono
rompersi costituendo frammenti taglienti, pertanto usare molta cautela nel
maneggiarli.
Non installare apparecchi in zone ove possano facilmente essere urtati, in
particolar modo tenereli lontano dalla portata dei bambini.
Non montare l’apparecchio troppo vicino a materiali facilmente
infiammabili come tende o altro e non coprire l’apparecchio impedendone
il raffreddamento.
Non consentire ai bambini di giocare con l’apparecchio.
Se il cavo di alimentazione risultasse danneggiato o si verificassero altri guasti
o funzionamenti anomali, far riparare l’apparecchio da un punto vendita
Lumina.
ANWEISUNGEN FÜR DEN SICHEREN GEBRAUCH
Das erworbene Beleuchtungsgerät ist gemäß den derzeit geltenden
Europäischen Sicherheitsnormen konstruirt worden und wurde von einem
qualifizierten Institut für Qualitätszeichen geprüft und zertifiziert.
Der sicherer Gebrauch von elektrischen Geräten mit Teilen in erhöhter
Temperatur, verlangt neben der gewöhnlichen Vorsicht, die Beachtung
der folgenden Anweisungen:
Die dem Gerät beigefügte Gebrauchsanweisungen genau durchlesen
und für zukünftige Bedarfsfälle aufheben.
Es wird empfohlen, das Gerät durch qualifiziertes Personal installieren zu
lassen.
Das Gerät nicht für unangebrachte Zwecke nutzen, die nicht zum normalen
Gebrauch zählen, gemäß der Typologie für welche es geplant wurde.
Keine Leuchtmittel mit höherer Stärke oder anderen Typs verwenden, als in
den Anweisungen und Beschriftungen auf dem Gerät selber angegeben.
Um das Leuchtmittel auszuwechseln oder das Gerät zu reinigen muß man:
a) Stecker ausziehen oder Spannung unterbrechne.
b) Das Leuchtmittel und das Gerät vollständig erkalten lassen, bevor es mit
den Händen berührt wird.
Nie das eingeschaltete oder warme Gerät reinigen.
Keine brennbaren Flüssigkeiten zum Reinigen benutzen.
Zur Kenntnis nehmen, daß die Glasteile, Leuchtmittel eingeschlossen,
zerbrechen können und dadurch scharfe Scherben entstehen können,deshalb
sehr vorsichtig damit umgehen.
Nichtan Stellen installieren,wo sie leicht zu stoßensind,vorallemin Reichweite
von Kindern fernhalten.
Das Gerät nicht zu nahe an leicht brennbaren Materialien wie Gardinen oder
anderem installieren und das Gerät nicht abdecken um die Abkühlung zu
verhindern.
Kindern nicht zulassen, mit dem Gerät zu spielen.
Sollte das Beschickungskabel beschädigt sein oder andere Schäden oder
abweichendes Funktionieren eintreten, sollte das Gerät bei einem Lumina-
Stützpunkthändler repariert werden.
E
Suspension pour éclairage diffusé,en aluminium moulé sous pression et avec
un diffuseur en verre soufflé,disponible dans 2 dimensions et puissances.Elle
peut s’étendre en système en chute par la possibilité de connexion électrique
d’un point unique de lumière,d’autres sources lumineuses,avec réglage dans
les sens horizontal et vertical au moyen de câbles d’acier, chaînes, cordes
et d’autres accessoires très simples. Possibilité d’une multitude de types
différents de raccordement d’une lampe à l’autre, dans la même ou dans les
2 dimensions Ø350/Ø285mm (voir exemple annexé). Source :100W (Perla 28)
ou 150W (Perla35) maxi.Culot E27.
Appareil apte au montage sur des surfaces normalement inflammables.
L’indication se réfère à la distance minimale à garder des objets
illuminés.
Emploi à l’intérieur exclusivement.
Nous recommandons de suivre scrupuleusement les instructions et de faire
effectuer le montage que par des techniciens qualifiés.
Toujours couper le courant du réseau,avant d’effectuer toute opération.
MONTAGE OU REMPLACEMENT DE L’AMPOULE - ENTRETIEN
En cas de montage ou remplacement montez une ampoule“auto-protegée” .
(Fig. 1) •Attention:durant cette opération,tenez le diffuseur solidement.
•Du côté opposé au câble d’alimentation,enlevez les vis (A) et ses rondelles du
couvercle (B) au moyen de la clé Allen incluse.
•En suite, enlevez le diffuseur et procédez avec l’entretien (montage ou
remplacement de l’ampoule,nettoyage du verre,etc.).
•Remettez le diffuseur à sa place et serrez les vis (A) et ses rondelles.
Pour le nettoyage de l’appareil il ne faut absolument jamais l’effectuer lorsque
celui-ci est encore chaud, il faut utiliser que de produits neutres.
MONTAGE (Perla 28 SC - code 811 et Perla 35 SC - code 801)
•Fixation murale ou au plafond aux moyens de 2 crochets pour des tampons
appropriés pour le poids (5Kg) de la lampe et pour le type de plafond ou de
mur.
(Fig.4) •Nouez les cordes livrées dans le carton aux deux crochets et aux points
d’accroche (C).
•Après,continuez suivant Fig. 5.
MONTAGE (Perla 28 - code 810 et Perla 35 - code 800)
(Fig. 2) Coupez les cordes (D) à la longueur souhaitée (notez:pour une coupe
plus nette,enveloppez l’extrémité dans le ruban adhésif).
•Préparez les boucles suivant le croquis, et renfermez les deux coquilles (E)
pour faire ça,serrez la vis (F) à l’écrou (G).
•Accrochez les mousquetons (H) aux boucles.
(Fig.3) •Fixez les 2 soutiens (I) au plafond ou au mur aux moyens des tampons
appropriés pour le poids (5Kg) de la lampe et pour le type de plafond.
(Fig. 4) •Accrochez les mousquetons (H) aux points d’accroche (C) et aux
soutiens (I).
(Fig. 5) •Dévissez l’écrou et ses rondelles (L) pour enlever le couvercle (M).
•Fixez le support (N) au plafond ou au mur,au moyen de la vis et de la rondelle
inclus dans le carton, ou d’autres appropriés.
•Connectez les câbles du réseau aux bornes en prenant garde de connecter le
câble jaune et vert à la borne de terre qui est marquée par . Note: le circuit
de terre doit être conforme aux normes.
•Vissez l’écrou et ses rondelles (L) pour fixer le couvercle (M) au support (N).
La sécurité d’emploi de cette lampe est soumise à l’observation de ces
instructions et il est donc conseillé de les conserver.
GARANTIE Les conditions de garantie sont celles en vigueur dans le Pays dans
lequel l’achat a été effectué.La garantie ne sera appliquée que sur présentation de
la facture d’achat.
Una lámpara en suspensión preparada para iluminación difuminada, hecha
de aluminio troquelado con un difusor hecho de cristal soplado, disponible
en dos tallas y potencias.Tiene la posibilidad de instalación en cascada dado
que se pueden conectar electricamente varios elementos al mismo enchufe.
Posibilidad de ajustes vertical y horizontal mediante cuerdas y otros accesorios
de sencillo uso. Varias opciones de instalación son posibles para uno o más
elementos, cada uno en la misma o en dos tallas diferentes Ø350/Ø285mm.
Bombillas:casquillo E27,100W (Perla 28) o 150W (perla 35) potencia máxima.
Aparato idóneo para el montaje sobre superficies normalmente inflamables.
El símbolo indica la distancia minima que debe mantenerse respeto
a los objetos iluminados.
Aparato idóneo solo para interiores.
Lea y siga cuidadosamente esta recomendación: recomendamos que este
trabajo lo realice un técnico espcializado. Siempre desconecte la corriente
eléctrica antes de realizar cualquier operación.
INSTALAR O REEMPLAZAR LA BOMBILLA - MANTENIMIENTO
(Fig.1) •Atención:mantenga firmemente el difusor de cristal mientras efectúe
esta operación.
•Desatornille los tornillos (A) y sus arandelas de la tapa (B),situados en la cara
opuesta del cable de allimentación,empleando la llave Allen incluida en la caja.
•Después retire le difusor de cristal y efectúe el trabajo de mantenimiento
(instalar o reemplaarz de bombilla,limpieza del cristal, etc.).
•Después sitúe el difusor de cristal en su lugar y atornille los tornillos (A) y sus
tuercas.
En el caso del montaj o remplazo de una lámpara alógena emplee únicamente
una lámpara alógena auto-protegida .
Emplear productos neutros para limpiar el cristal: hacer esta operación con la
lámpara fria y no ponerlo bajo agua corriente.
MONTAJE ( Perla 28 SC - código 811 y Perla 35 SC - código 801)
•Montaje para techo o pared mediante 2 enganches por clavijas que puedan
sostener el peso de la lámpara (5 Kg).
(Fig. 4) •Ate las cuerdas (incluidas en la caja) en nudos a ambos enganches y
a los puntos de enganche (C).A continuación, proceda tal y como se muestra
en la Fig. 5.
MONTAJE ( Perla 28 - código 810 y Perla 35 - código 800)
(Fig. 2) •Corte las cuerdas (D) a la longitud apropiada (nota: enrolle los cabos
cortados y use cinta adhesiva),con las presillas tal y come dibujado, y cierre las
dos tapas (E) empleando el tornillo (F) y la tuerca (G).
•Enganche los mosquestones (H) a las presillas.
(Fig.3) •Monte ambos sostenedores de cuerda (I) a la pared o techo mediante
tornillos y clavijas apropiadas para sostener el peso de la lámpara (5 Kg) y al
tipo de techo o pared.
(Fig. 4) •Enganche los mosquestones (H) a los puntos de enganche (C) y a los
topes de las cuerdas (I).
(Fig. 5) •Desatornille el tornillo y su arandela (L) y quite el cubre base (M).
•Monte el soporte (N) al techo o pared mediante el tornillo y la tuerca que se
incluyen en la caja,o con cualquier otra apropiada al tipo de techo o pared.
•Conecte loscables dela red eléctricaal terminalteniendo cuidadode conectar
el cable amarillo y verde al terminal de tierra,que está marcado mediante .
Aviso: El circuito de tierra debe cumplir las normas de seguridad vigentes.
•Atornille el tornillo y su arandela (L) para montar el cubre base (M) al soporte (N).
La seguridad del aparato está garantizada con la observancia de estas
instrucciones,por lo tanto se recomienda conservarlas.
GARANTIA Para este aparato, rigen las condiciones de garantía vigentes en el
País de venta. Para disfrutar de las condiciones de garantía,es necesario presentar
el recibo de compra.

REMARKS FOR A SAFE USE
The light fitting that you have purchased has been designed and built
according to European security norms in force and is certified by an appointed
Institute for Quality Marks.
The safe use of a light fitting emboding high temperature components
requires, beyond the necessary attention, to carefully follow these
instructions:
Read carefully and conserve the instructions for the correct use of the
light fitting.
We suggest to have the fitting installed by a specialized technician.
Do not use the light fitting for improper applications, that haven’t been
foreseen in the project.
Do not use bulbs of higher power than the one specified in the instructions
and on the labels sticked on the light fitting.
When cleaning or changing the bulb of the light fitting, remember to
previously unplug the same or switch off the main.
Let the light fitting and the bulb cool down before touching it with the
hands.
Moreover, we suggest to remember:
Never clean the light fitting when hot or under tension.
Never use flammable products to clean the light fitting.
Theglass components - bulb included - canbreak and thereforearedangerous
if uncarefully handled.
Light fittings should be installed out of the reach of children and in such a
position where they cannot be hit by anything.
Do not install the light fitting too close to flammable materials (curtains, etc.),
nor cover it,to prevent the normal cooling.
Do not allow children to play with the fitting.
In case of troubles, misworking or damage to the cable, contact your Lumina
dealer for checking and repairing.
NOTICES POUR LA SÉCURITÉ D’EMPLOI
L’appareil éclairant que vous avez acheté est construit suivant les normes de sécurité
en vigueur dans la Communauté Européenne, et il a été testé et certifié par un institut
qualifié pour le marquage de qualité.
Au bout de l’utilisation plus sûre d’appareils éléctriques avec des pièces
composantes qui dégagent des temperatrues très élevées,il faut observer, outre
que la prudence normale,les instructions qui sont reportées ci-dessous:
Lisez et conservez (pour toute eventualité à l’avenir) très soigneusement les
instructions dont l’appareil est équippé.
Nous conseillons de faire installer l’appareil par des techniciens specialisés.
N’utilisez pas l’appareil pour des usages impropres c’est à dire qui ne sont pas prévus
en base à la typologie pour laquelle il a été projeté.
Ne montez pas d’ampoules de puissances supérieures ou de types différents par
rapport à ce qui est indiqué dans les instructions de montage et sur les étiquettes
portées sur l’appareil même.
Pour remplacer l’ampoule ou pour nettoyer l’appareil il faut:
a) debrancher la fiche si l’appareil en est muni ou enlever le courant
éléctrique du reseau;
b) laisser l’ampoule et l’appareil se refroidir complètement avant des les
toucher avec vos mains.
NE JAMAIS NETTOYER l’appareil allumé ou encore chaud.
NE JAMAIS UTILISER des liquides flammables pour le nettoyage.
N’oubliez pas que les parties en verre, y compris l’ampoule, peuvent se casser et
originer des morceaux tranchants: il faut donc faire beaucoup d’attention en les
manipulant.
N’installez pas les appareils aux endroits où ils peuvent ètre heurtés,et surtout tenez-
les hors de portée des enfants.
Ne montez pas l’appareil trop rapproché à des matériaux facilement flammables,
comme les rideaux ou d’autres, et ne couvrez pas l’appareil ce qui en empecherait le
raffroidissement.
Ne permettez pas aux enfants de jouer avec l’appareil.
Dans le cas où le câble d’alimentation s’averait endommagé ou s’ils s’averaient d’autres
défauts ou d’anomalies de fonctionnement, faites effectuer la réparation de l’appareil
par un revendeur de Lumina.
ADVERTENCIA PARA SEGURIDAD DE UTILIZACIÓN
El aparato de iluminación que ha adquirido está costruido según la vigente
normativa de seguridad europea y ha sido probado y certificado por un
conocido Instituto de calidad.
La utilización segura de aparatos eléctricos con partes de elevada
temperatura requiere,además de la prudencia normal, la observancia de
las siguientes instrucciones.
LEER Y CONSERVAR ATENTAMENTE las instrucciones adjuntas al aparato
para necesidades futuras.
Se aconseja hacer instalar el aparato por personal especializado.
No usar el aparato para usos improprios no previstos en la normal utilización
según la tipologia para la cual ha sido proyectado.
No montar bombillas de potencia superior o de distinto tipo a las indicadas
en las instrucciones de montaje y en las etiquetas pegadas sobre el mismo
aparato.
Para sustituir la bombilla o limpiar el aparato SE DEBE:
a) Quitar el enchufe de la toma eléctrica si el aparato va provisto o cortar la
corriente eléctrica de la instalación.
b) Dejar enfriar totalmente la bombilla y el aparato antes de tocarlo con las
manos.
NO LIMPIAR NUNCA el aparato encendido o todavía caliente.
NO UTILIZAR líquidos inflamables para la limpieza.
Tener presente que las partes de vidrio, bombilla incluida, pueden romperse
costituyendo fragmentos cortantes, por lo tanto ser muy prudentes en su
manejo.
No instalar aparatos en zonas donde puedan ser facilmente golpeados en
particular mantenerlos alejados de los niños.
No montar el aparato demasiado cerca de material facilmente inflamable
como cortinas o similares y no cubrirlo impidiendo su refrigeración.
No permitir a los niños de jugar con el aparato.
Si el cable de alimentación resultase dañado o sufriera cualquier otro
desperfecto o funcionamiento anormal, hacer reparar el aparato en un punto
de venta Lumina.
cod. 4000478
LUMINA ITALIA Srl
via Casorezzo, 63
20010 Arluno (MI)
Tel. +39 02 903752.1
Fax +39 02 90376655
LUMINA SCHWEIZ GmbH
Bergstrasse 1/3
CH-4513 Langendorf
Tel. 032 6821959
Fax 032 6823338

Il vetro diffusore di questa lampada, in triplo strato, è realizzato artigia-
nalmente da maestri vetrai mediante soffiatura a bocca. Per questa ca-
ratteristica costruttiva può, quindi, presentare lievi imperfezioni che ne
valorizzano il pregio, arricchendo il prodotto di senzazioni ed emozioni
che solo la tradizione artigiana può suscitare.
Der Glasdiffusor dieser Lampe, in dreifacher Schicht, wurde von Gla-
sermeistem mundgeblasen. Durch diese traditionelle Produktion ent-
stehen Unikate,die sich gerade dadurch auszeichnen,dass Unreinheiten
auftreten können, die den Produkt ihren individuellen vom Handwerk
geprägten Charakter und Charme verleihen.
The three layered glass diffuser of this lamp is a handwork product, that
was made by glass-blowers.Therefore, as a consequence of this handi-
craft procedure, it is possible that this product shows some light flaws
that emphasize its value, bringing the product itself some sensations
and emotions that only a handwork tradition can give.
Le verre diffuseur de cette lampe, en triple couche,a été réalisé de façon
artisanale par des maîtreS vitriers qui l’ont soufflé main. En conséquen-
ce de ce procedé de fabrication il est donc possible que le produit pré-
sente quelques petits défauts, qui doit se considérer comme enriches-
sement de sa valeur, lui apportant des sensations et des émotions que
une tradition artisanale seule peut susciter.
El vidrio difusor soplado de tres capas de esta lámpara es un producto
artesanal realizado por maestros artesanos. Esta forma de fabricación,
permite alguna pequeña imperfección, que debe considerarse un valor
añadido, ya que aporta al producto sensaciónes y emociónes que solo
la tradition artesanal puede suscitar.

SMALTIMENTO DELL’APPARECCHIO - RAEE (direttiva comunitaria 2002/96/EC in vigore per le attrezzature elettriche ed elettroniche)
Questo simbolo sul prodotto o sulla confezione indica che a fine vita, il prodotto è un rifiuto che non deve essere smaltito come
rifiuto urbano ma deve essere destinato alla raccolta differenziata. È responsabilità dell’utente smaltire questa attrezzatura presso
i punti designati per la raccolta di attrezzature elettriche ed elettroniche usate. Per determinare l’ubicazione delle aree pubbliche
di raccolta contattare: il comune di residenza, l’ente di raccolta dei rifiuti o chiedere al venditore. Anche il venditore può ritirare il
vecchio prodotto acquistandone uno nuovo dello stesso tipo. Lo smaltimento errato può causare danni alle persone e all’ambiente per la
possibile presenza di sostanze pericolose.Sono previste sanzioni in caso di smaltimento abusivo dei suddetti rifiuti.
PRODUKTENTSORGUNG NACH - ElektroG (europäischen Richtlinie 2002/96/EG über elektrische und elektronischeGeräte)
Dieses Symbol auf dem Produkt oder seinerVerpackung bedeutet,dass dieses Produkt nicht mit dem Hausmüll zusammen entsorgt
werden darf.Sie sind verpflichtet,dieses Gerät über eine angegebene Sammelstelle für elektrische bzw.elektronische Geräteabfälle
zu entsorgen.Wenn Sie Fragen bzgl. Ihrer nächsten Sammelstelle für solche Abfälle haben, nehmen Sie bitte Kontakt mit den örtli-
chen Behörden, der Müllentsorgungsorganisation für Ihren Haushalt oder mit dem Geschäft, wo Sie das Produkt gekauft haben,
auf. Die falsche Entsorgung kann Menschen und Umwelt schaden. Im Falle von widerrechtlicher Entsorgung o.g. Abfälle ist eine Geldstrafe
vorgesehen.
DISCHARGE OF LUMINAIRE - WEEE (European Directive 2002/96/EC governing used electrical and electronic appliance)
This marking on the product or on its packaging illustrates that this product at its end-life is an electrical waste, and may not be
disposed as a normal household waste.You are responsible of the correct disposal of this equipment through a designated waste
electrical and electronic equipment collection. To determine the locations for dropping off a WEEE contact your local government
office, the waste disposal organisation that serves your house, or the store at which you purchased the product.The store can also
withdraw the product.Wrong disposal may cause damages to people and the environment for the possibility of dangerous substances. San-
ctions are provided for an illegal disposal of electrical waste.
I
D
GB
ELIMINACIÓN DEL APARATO - RAEE (Directiva europea 2002/96/EC que rige los aparados eléctricos y electrónicos)
Esta indicación en el producto o en su embalaje, significa que al fin de su vida util no se puede tirar a la basura. Es su responsabili-
dad reciclarlo correctamente, depositándolo en un punto de recogida de equipos eléctricos y electrónicos designado a tal efecto.
Para determinar las ubicaciones en las que puede deshacerse de tales residuos eléctricos y electrónicos, póngase en contacto con
la oficina gubernamental local, con la organización de residuos que se encarga de recoger la basura doméstica de su zona o con la
tienda en la que compró el producto.La tienda también puede quedarse con el producto. No reciclar adecuadamente puede causar daños al
medioambiente al existir la posibilidad de vertido de substancias inadecuadas. Pueden ser multados al respecto.
REJET DES DÉCHETS DE CET ÉQUIPEMENT - DEEE (directive Européenne 2002/96/EC sur la récupération des équipements électri-
ques et électroniques)
Ce symbole sur le produit ou sur son emballage indique que cet équipement ne soit pas jeté avec les déchets municipaux non
triés. Le symbole indique que ce produit devrait être jeté séparément des déchets ménagers.Il est de votre responsabilité de vous
débarrasser de cet équipement et de tout autre équipement électrique et électronique en vous servant des collecteurs spécifiques
désignés par le gouvernement ou les autorités locales. Le rejet des déchets conforme à ces points ainsi que la réutilisation aidera
à empêcher de potentielles conséquences négatives pour l’environnement et pour la santé humaine. Pour des informations plus détaillées
sur le rejet des déchets de votre vieil équipement, entrez en contact avec vos autorités locales, service des ordures, ou le magasin où vous
avez acheté le produit.Le magasin peut reprendre votre vieux équipement si vous un achetez un nouveau du même type.Des sanctions sont
prévues en cas de rejet illégal de ce type de déchets.
Istruzioni
Hinweisungen
Instructions
Instrucciònes
RAEE
ElektroG
WEEE
DEEE
F
E
cod. 4000456

Perla
ø 65
16,5
12
5
ø 8,5
cod. 821
Lumina Italia Srl - Via Casorezzo, 63 I-20010 Arluno (MI) Italy - inf[email protected] - Tel. (+39) 02 903752.1

PERLA 28 M
PERLA 35 M
design
Ettore Cimini
Walter Monici
Istruzioni
Hinweisungen
Instructions
Instrucciònes
D
E
D
F
E
H
10 cm
G
A
B
A
2
1
Set Ropes
cod. 820

MIN
70 cm
MIN
70 cm
MIN 70 cm
MIN 70 cm
Set Canopy - cod. 825
Set Canopy - cod. 825
6a 6
I
L
M
N
R
H
H
C
I
345
Set Canopy
cod. 825
Set Hooks
cod. 821

O
P
Q
7
8 9 9a

I
Apparecchio d’illuminazione a sospensione a luce diffusa in
alluminio pressofuso e diffusore in vetro soffiato di due diverse
dimensioni e potenze. Ampliabile in un sistema a cascata il quale
prevede la possibilità di connessione elettrica ad un punto luce
singolo per più sorgenti luminose con regolazione verticale ed
orizzontale a mezzo di funi, cavi ed altri accessori di semplice uso.
Molteplici tipi di istallazione per uno o più apparecchi,della stessa
o delle due diverse misure Ø350 - Ø285 mm.
Lampadine: E27 max 100W (Perla 28M) o 150W (Perla 35M).
Apparecchio idoneo ad essere montato su superfici normalmente
infiammabili.
Il simbolo indica la distanza minima da rispettare verso
l’oggetto illuminato.
Solo per uso interno.
ATTENZIONI - CONSIGLI PER L’INSTALLAZIONE
Attenzione:si raccomanda di seguire attentamente le istruzioni e
far eseguire il montaggio da personale specializzato.
Attenzione: togliere la tensione di alimentazione prima di
effettuare qualsiasi operazione sull’apparecchio.
Attenzione: il sistema per alimentazione elettrica cablato in
cascata da singolo punto luce è previsto per una potenza massima
di 600W.
Perla 28 M:Max 6 x 100W - Perla 35 M:Max 4 x 150W.
Attenzione: utilizzare tasselli e ganci adatti al tipo di parete o
soffitto ed al peso totale degli apparecchi installati:
Perla 35 = 5kg, Perla 28 = 3,5kg. Si consiglia di utilizzare i kit di
montaggio cod.820 (fig.2) e cod.821 (fig.3).
Attenzione: nella tipologia di montaggio in tesata orizzontale
come in fig. 6a è consigliato l’utilizzo di tenditori in acciaio (non in
dotazione al prodotto).
Attenzione: per il cablaggio sequenziale è obbligatorio rispettare
le direttive che impone la normativa europea, utilizzando
i componenti in dotazione (cavi di alimentazione elettrica,
passacavi, bloccacavi, morsetti, ecc).
MONTAGGIO CON ALIMENTAZIONE SEQUENZIALE
1) Montare a parete/soffitto i ganci (fig.3) o altri supporti adatti
al tipo di parete/soffitto ed al peso totale della composizione da
effettuare.
2) Predisporre le funi con la lunghezza desiderata (fig.2), nota: per
un taglio netto avvolgere la fune nel punto di taglio con nastro
adesivo.
•Predisporre le asole come mostrato e chiudere i due gusci (E)
avvitando la vite (F) al dado (G).
•Agganciare i moschettoni (H) alle asole.
(Fig. 4)•Agganciare tutte le lampade nella loro posizione, senza
collegarle elettricamente, al fine di stabilire la giusta lunghezza
dei cavi elettrici che devono essere piuttosto abbondanti (almeno
40cm più lunghi rispetto alla distanza tra gli apparecchi).
•Agganciare i moschettoni (H) ai punti di attacco (C) ed ai sostegni (I).
É consigliata tra gli apparecchi una distanza minima di 70cm.
Se la disposizione è soddisfacente, tagliare il cavo elettrico in
eccesso di tutti gli apparecchi.
Attenzione:non tendere le funi oltre la portata MAX: 50kg.
•Sganciare le lampade e adagiarle (a terra o su un piano) così da
poterle collegare elettricamente con facilità.
3) Tenere saldamente il vetro diffusore (fig.1) e svitare le viti (A)
con la chiave in dotazione.
•Smontare il coperchio (B), dal lato dell’alimentazione elettrica,
oppure dalla parte opposta a secondo di dove si vuole entrare con
il cavo della sfera successiva (fig.7).
•Spostare il vetro diffusore e montare la lampadina,riposizionare il
vetro diffusore senza rimontare il coperchio.
In caso di montaggio o sostituzione della lampadina alogena
utilizzarne una alogena autoprotetta .
4) Togliere il tappo (O) da dove si vuol far entrare il cavo di
alimentazione (fig.7).
•Inserire il cavo di alimentazione elettrica attraverso il passacavo (P)
e collegarlo al morsetto, serrandolo con il pressa cavo incorporato
al contenitore del morsetto (Q).
(fig.1) •Chiudere il coperchio (B) avvitando le viti (A).
5) Ripetere i punti 3e 4per collegare tutti gli apparecchi.
6) Con le lampade concatenate (fig.8) e con l’aiuto di uno o più
operatori, agganciare il sistema ai supporti (I) preventivamente
fissati alle pareti o al soffitto.
7) Utilizzare il kit di montaggio - cod 825 (set canopy), (fig.5).
•Svitare la vite e la rondella (L) per togliere il copri-rosone (M).
•Fissare la staffa (N) a soffitto o parete, usando la vite ed il tassello
in dotazione od altri adatti.
•Far passare il cavo elettrico della prima lampada nel copri-rosone
(M) e nel bloccacavo (R).
•Collegare il cavo alla morsettiera e serrare il bloccacavo (R).
•Collegarei cavidell’impianto elettricoalla morsettieraavendocura
di collegare il cavo giallo-verde al morsetto di terra contrassegnato
con .
Nota: il circuito di terra deve essere a norme.
•Avvitare la vite e la rondella (L) per fissare il copri-rosone (M) alla
staffa (N).
Nota: se i coperchi (B) risultassero storti, tenere il punto di attacco
(C) e ruotare il vetro diffusore fino ad ottenere l’equilibrio.
MANUTENZIONE E SOSTITUZIONE LAMPADINA
1) Agganciare i moschettoni come mostrato in fig.9. O munirsi di
una fune ausiliaria di sostegno come in fig.9a, per bypassare la
sfera sulla quale operare ed agganciarla al gancio successivo per
sorreggere gli apparecchi sottostanti, mettendola leggermente in
tensione.
2) Vedi fig.1.
Attenzione: durante questa operazione tenere saldamente il
vetro diffusore.
•Dalla parte opposta al cavo di alimentazione, svitare le viti (A) e
relative rondelle dal coperchio (B), usando la chiave a brugola in
dotazione.
•Togliere il diffusore in vetro ed eseguire la manutenzione
(montaggio o sostituzione della lampadina, pulizia del vetro, ecc.).
•Rimettere il vetro diffusore in posizione e stringere le viti (A) e le
relative rondelle.
Per la pulizia dell’apparrecchio non effettuare l’operazione a
lampada calda, usare solo prodotti neutri.
Nota: se le lampade sono collegate elettricamente tramite lo
stesso coperchio smontare quello opposto ciò semplificherà la
sostituzione della lampadina e la pulitura del vetro.
La sicurezza dell’apparecchio è garantita dalla osservanza di
queste istruzioni pertanto si raccomanda di conservarle.
GARANZIA Per questo apparecchio valgono le condizioni di garanzia
validenella rispettivanazione.La garanziaviene riconosciutasoltanto
se accompagnata dal documento giustificativo dell’acquisto.
AVVERTENZE PER LA SICUREZZA D’UTILIZZO
L’apparecchio di illuminazione che avete acquistato è costruito secondo le
vigenti normative di sicurezza europee ed è stato collaudato e certificato
da un Istituto qualificato per il marchio di qualità.
L’utilizzo sicuro di apparecchi elettrici con parti ad elevata
temperatura richiede, oltre alla normale prudenza, l’osservanza
delle seguenti istruzioni.
Leggere attentamente e conservare le istruzioni allegate
all’apparecchio per future necessità.
Si consiglia di far installare l’apparecchio da personale specializzato.
Non usare l’apparecchio per usi impropri non previsti dal normale utilizzo
secondo la tipologia per la quale è stato progettato.
Non montare lampadine di potenza superiore o diverso tipo da
quelle indicate nelle istruzioni di montaggio e sulle etichette apposte
sull’apparecchio stesso.
Per sostituire la lampadina o pulire l’apparecchio SI DEVE:
a) staccare la spina se l’apparecchio ne è munito o togliere la tensione
elettrica dell’impianto;
b) lasciare raffreddare completamente la lampadina e l’apparecchio
prima di toccarlo con mani.
NON PULIRE MAI l’apparecchio acceso o ancora caldo.
NON UTILIZZARE liquidi infiammabili per la pulizia.
Tenere presente che le parti in vetro, lampadina compresa, possono
rompersi costituendo frammenti taglienti, pertanto usare molta cautela
nel maneggiarli.
Non installare apparecchi in zone ove possano facilmente essere urtati,in
particolar modo tenereli lontano dalla portata dei bambini.
Non montare l’apparecchio troppo vicino a materiali facilmente
infiammabilicometendeoaltroenoncoprirel’apparecchioimpedendone
il raffreddamento.
Non consentire ai bambini di giocare con l’apparecchio.
Se il cavo di alimentazione risultasse danneggiato o si verificassero altri
guasti o funzionamenti anomali, far riparare l’apparecchio da un punto
vendita Lumina.

D
Hängeleuchte mit diffusem Licht, aus Pressgussaluminium und
Diffusor aus mundgeblasenem Glas, erhältlich in zwei Versionen.
Ihre Vielseitigkeit ermöglicht es sie als System zu installieren.
Durch die Verwendung von Seilen, Kabel und andere einfache
Zubehöre kann man mehrere Beleuchtungskörper von einem
Leitungspunkt aus verbinden. Zahlreiche Anwendungen für eine
odere mehrere Leuchten, mit gleichem oder verschiedenem
Durchmesser von 350 oder 285 mm.
Leuchtmittel:E27 max. 100W (Perla 28 M) oder 150W (Perla 35 M).
Die Leuchte kann auf normal entzündbaren Flächen verwendet
werden.
Das Symbol zeigt den zu beachtenden Mindestabstand
zum beleuchtenden Gegenstand auf.
Nur für Innenbereich geeignet.
ACHTUNG - EMPFEHLUNGEN FÜR DIE MONTAGE
Achtung: Wir empfehlen, die Montageanleitung genau zu
befolgen und die Installierung vom Fachpersonal durchführen zu
lassen.
Achtung: Vor jedem Eingreif an der Leuchte Spannung
unterbrechen.
Achtung: Bei Kettenmontage mit einem Leitungspunkt ist die
Maximalstärke 600 W.
Perla 28 M:Max 6 x 100W - Perla35 M:Max 4 x 150W.
Achtung: Dübel und Haken passend zum Wand- oder Deckentyp
und zum Gesamtgewicht der installierten Leuchten verwenden:
Perla 35 = 5 kg, Perla 28 = 3,5 kg. Empfehlen wir die Verwendung
von Montage-Kit Kod.820 (Abb. 2) und Kod.821 (Abb. 3).
Achtung: Bei waagerechter Montage wie in Abbildung 6a
gezeigt, wird die Verwendung von Stahlkabel empfohlen (nicht
mitgeliefert).
Achtung:Für die sequenzielle Verkabelung sind die europäischen
Normen zu beachten und die mitgelieferten Teile zu verwenden
(Leitungskabel, Kabeleinführungen, Kabelsperre, Klemmen, usw.)
MONTAGE MIT KETTENVERBINDUNG
1) Haken auf Wand/Decke montieren (Abb. 3) oder andere Träger
passend zum Wand-/Deckentyp und zum Gesamtgewicht der
gewünschten Zusammenstellung verwenden.
2) Die Seile (D) in gewünschte Länge kürzen (Abb.2),(Anmerkung:
Seile am Schnittpunkt mit Klebeband umwicklen).
•Die Öse wie gezeigt vorbereiten und die zwei Gehäuse (E) mit
Schraube (F) und Mutter (G) schliessen.
•Die Öse in den Karabinerhaken (H) einhängen.
(Abb. 4) •Alle Leuchten ohne Verkabelung in die richtige Position
hängen, um die gewünschte Kabellänge zu fixieren (mindestens
40 cm länger als der Abstand zwischen den Leuchten).
•Die Karabinerhaken (H) an Anschlusspunkt (C) anhängen.
Empfohlener Mindestabstand zwischen den Leuchten 70cm.
Nach Beendigung der Installation überschüssige Kabel
abschneiden.
Achtung:Die Leine über max. 50 kg nicht spannen.
•Leuchte vorsichtig abhängen, so können Sie relativ schnell die
elektrische Verbindung durchführen.
3) Das Glas festhalten (Abb. 1) und Schrauben (A) mit dem
mitgelieferten Schlüssel lösen.
•Deckel (B) von der Seite der Leitung abmontieren, oder von der
Gegenseite, je nach dem in welche Richtung man das Kabel der
nächsten Leuchte hinführen möchte (Abb. 7).
•Glas entfernen und Leuchtmittel montieren, Glas wieder
positionieren, ohne den Deckel zu montieren.
Im Fall vom Austausch des Halogenleuchtmittels ein
selbstschützendes Halogenleuchmittel verwenden .
4) Deckel (O) entfernen von der Seite,wo man das Kabel einführen
möchte (Abb. 7).
•Kabel durch Kabeleinführung (P) einstecken und an die
Klemme verbinden, mit der Kabelsperre in dem Klemmbrett (Q)
verschliessen.
(Abb. 1) •Deckel (B) schliessen und Schrauben (A) festziehen.
5) Punk 3und 4 wiederholen,um alle Leuchten zu verbinden.
6) Mit den verketteten Leuchten (Abb. 8) und mit Hilfe von einer
Person, das System an Halter (I) fassen, die vorher an der Wand
oder Decke befestigt worden sind.
7) Das Montagekit Kod. 825 (Set Canopy) verwenden (Abb. 5).
•Schraube und Scheibe (L) abschrauben, danach Deckenrosette
(M) entfernen.
•Den Befestigungsbügel (N) an Decke/Wand montieren. Bitte
verwenden Sie die mitgelieferte Schraube und Dübel,oder andere
hierzu passende.
•Das Kabel der ersten Leuchte durch die Rosettenabdeckung (M)
und durch Kabelsperre (R) führen.
•Kabel an Klemme verbinden und Kabelsperre (R) schließen.
•Die Verkabelung der Anlage durchführen und das gelbe-grüne
Kabel mit dem Klemmbrett gekennzeichnet mit verbinden.
Anmerkung: Die Erdung muss den Normen entsprechen.
•Deckenrosette (M) mit Befestigungsbügel (N) mittels Schraube
(L) befestigen.
Anmerkung: Sollte der Deckel (B) schief sein, Anschlusspunkt (C)
festhalten und das Glas drehen,bis das Gleichgewicht erreicht ist.
INSTANDHALTUNG UND AUSTAUSCH DES LEUCHTMITTELS
1) Karabinerhaken wie in Abb. 9 gezeigt anhängen oder eine
zweite Leine verwenden (siehe Abb. 9a) um die Kugel, mit der
man arbeiten muss, umzuleiten und sie dann an den nächsten
Hacken hängen. Um die unteren Leuchten zu halten, die Leine
etwas gespannt lassen.
2) Siehe Abb. 1.
•Achtung: Glas fest halten.
•Schrauben (A) und Scheiben vom Deckel (B) entfernen.
Verwenden Sie bitte den mitgelieferten Schlüssel.
•Glas entfernen,um Leuchtmittel zu montieren und auszutauschen
oder Leuchte reinigen.
•Glas wieder positionieren und Schraube mit Scheiben (A)
anschrauben.
Reinigung: Leuchte nicht im warmen Zustand reinigen und nur
neutrale Reinigungsmittel benutzen.
Anmerkung: Wenn die Leuchten mit dem gleichen Deckel
verbunden sind, den Gegendeckel abmontieren, dies erleichtert
den Leuchtmittelaustausch und die Glasreinigung.
Die Sicherheit dieses Gerätes ist nur gewährleistet,wenn
diese Montageanleitung genau beachtet wird.Wir empfehlen
daher diese aufzubewahren.
GARANTIE Für dieses Gerät gelten die im Kaufland herausgegebenen
Garantiebedingungen.ZurInanspruchnahmevonGarantieleistungen
ist in jedem Fall aber die Vorlage des Kaufbeleges erforderlich.
ANWEISUNGEN FÜR DEN SICHEREN GEBRAUCH
Das erworbene Beleuchtungsgerät ist gemäß den derzeit geltenden
Europäischen Sicherheitsnormen konstruirt worden und wurde von
einem qualifizierten Institut für Qualitätszeichen geprüft und zertifiziert.
Der sicherer Gebrauch von elektrischen Geräten mit Teilen in
erhöhterTemperatur,verlangt neben der gewöhnlichenVorsicht,die
Beachtung der folgenden Anweisungen:
DiedemGerätbeigefügte Gebrauchsanweisungengenaudurchlesen
und für zukünftige Bedarfsfälle aufheben.
Es wird empfohlen,das Gerät durch qualifiziertes Personal installieren zu
lassen.
Das Gerät nicht für unangebrachte Zwecke nutzen, die nicht zum
normalen Gebrauch zählen, gemäß der Typologie für welche es geplant
wurde.
Keine Leuchtmittel mit höherer Stärke oder anderen Typs verwenden,
als in den Anweisungen und Beschriftungen auf dem Gerät selber
angegeben.
Um das Leuchtmittel auszuwechseln oder das Gerät zu reinigen muß
man:
a) Stecker ausziehen oder Spannung unterbrechne.
b) Das Leuchtmittel und das Gerät vollständig erkalten lassen, bevor es
mit den Händen berührt wird.
Nie das eingeschaltete oder warme Gerät reinigen.
Keine brennbaren Flüssigkeiten zum Reinigen benutzen.
Zur Kenntnis nehmen, daß die Glasteile, Leuchtmittel eingeschlossen,
zerbrechen können und dadurch scharfe Scherben entstehen können,
deshalb sehr vorsichtig damit umgehen.
Nicht an Stellen installieren, wo sie leicht zu stoßen sind, vor allem in
Reichweite von Kindern fernhalten.
Das Gerät nicht zu nahe an leicht brennbaren Materialien wie Gardinen
oder anderem installieren und das Gerät nicht abdecken um die
Abkühlung zu verhindern.
Kindern nicht zulassen, mit dem Gerät zu spielen.
Sollte das Beschickungskabel beschädigt sein oder andere Schäden
oder abweichendes Funktionieren eintreten, sollte das Gerät bei einem
Lumina-Stützpunkthändler repariert werden.

GB
A suspended light fitting for diffused illumination, made of die-
cast aluminium with a diffuser of blown glass, available in 2 sizes
and powers. Possibility of cascaded installations since you can
electrically connect several fittings to the same power connec-
tion. Possibility of vertical and horizontal adjustments by means
of ropes and other accessories of simple use.Many installation op-
tions are possible for one or more fittings, either in same or 2 dif-
ferent sizes Ø350/Ø285mm.
Lamping: E27 socket, 100W (Perla 28 M) or 150W (Perla35 M) max.
power.
The fitting is suitable for fixing to any normally flammable surface.
The symbol recommends the minimum distance to be
kept from the lighted object.
This light fitting is for indoor use only.
NOTICE - INSTALLATION TIPS
Warning: read and carefully follow this instruction: we recom-
mend that a specialized technician carries out this job.
Warning: always cut off the current prior to start any operations.
Warning: maximum load for this power feeding system is 600W in
case of a cascaded installation down one only light point.
Perla 28 M:Max 6 x 100W - Perla35 M:Max 4 x 150W.
Warning: use hooks and dowels suitable to the kind of ceiling or
wall, and to the total weight of the fittings to be installed:
Perla 35 = 5 kg,Perla 28 = 3,5 kg.We recommend the use of assem-
bly sets code 820 (fig. 2) and code 821 (fig. 3).
Warning: in case of horizontally tensioned mount, as shown in
pict. 6a , we recommend the use of architectural steel cables (not
included in this package).
Warning: For serial wiring it is mandatory to comply with the Eu-
ropean Norms that prescribe the use of the components (feed-
ing wires, cable glands, cable clamps etc.) that are included in this
package.
INSTALLATION WITH SERIAL FEEDING
1) Mount the hooks (fig.3) or some other supports suitable to the
kind of ceiling or wall, and to the total weight of the composition
to be installed.
2) Cut the ropes (D) to needed length (fig. 2) (notice:wrap the cut
end with a tape),with slots as sketched,and close the two shells (E)
screwing the bolt (F) and the nut (G).
•Hook the carabiners (H) to the slots.
(fig. 4) •Place and hook all the fittings prior to carry out electrical
connections, in order to correctly estimate the cable-lengths (al-
ways add 40 cm to the distance between fittings).
•Hook the carabiners (H) to the connection points (C) and to the
supports (I).
We recommend to keep a 70 cm minimum distance between
fittings.
If you find the composition satisfactory, cut all the exceeding feed-
ing cables.
Warning: do not exceed the maximum weight load:50 kg.
•Unhook the fittings and lay them down (on ground or table) for
an easier electrical connection to each other.
3) Hold the diffuser (fig.1) firmly and loose the screws (A) by use of
the key inluded in packaging.
•Remove the cover (B), from the feeding or the other side accord-
ing to your intetention about next fitting entrance (fig.7).
•Shift the diffuser and mount the lamp,put the diffuser at ist place
again but do not yet mount the cover .
In case of halogen lamp installing or replacement please use a self
shielded tungsten halogen lamp only .
4) Remove the cap (O) from the hole you choose for feeding (fig.7).
•The feeding cable must go through the cable gland (P) and get
connected to the terminal clamp: tighten the cable clamp inside
the clamp box (Q).
(fig.1) •Close the cover (B) and tighten the screws (A).
5) Proceed as per points 3and 4again to connect all the fittings
to each other.
6) Once the fittings are connected together as shown (fig.8), you
need the help from one or more people to hook the system to the
supports (I) that you had previously mount to the walls or to the
ceiling.
7) Use the assembly set coded 825 (Set Canopy), (fig.5).
•Unscrew the screw and its washer (L) and remove the canopy-
cover (M).
•Mount the bracket (N) to ceiling or wall, by means of the screw
and dowel that are included in the box, or with any other one suit-
able to the kind of ceiling.
•Thread the feeding cable from the first fitting through canopy-
cover (M) to the cable-clamp (R).
•Connect the cable to the terminal block and tighten the cable-
clamp (R).
•Connect the wires from the main net to the terminal block taking
care to connect the yellow-green wire to the earth terminal block
which is marked by .
Notice: the earth circuit must be in conformity with the safety
norms.
•Screw the bolt and its washer (L) to mount the canopy-cover (M)
to the bracket (N).
Notice: in case of crooked covers (B), hold the connection points
(C) and rotate the diffusers until balance.
MAINTENANCE AND LAMP REPLACEMENT
1) Hook the carabiners as shown in fig.9. Or, otherwise, take a pro-
visional rope to hold as shown in fig.9a, by-pass the operated glo-
be and hook it to the next fitting to support the fittings below,
holding it in slight tension.
2) See Fig.1. Warning: hold the glass-diffuser firmly during this
operation.
•From the side opposed to the feeding cable, remove the screws
(A) and its washers from the tap (B) with the Allen key included
in box.
•Then remove the glass-diffuser and carry out maintenance works
(installing or replacing the bulb, cleaning of the glass etc.).
•After that put the glass-diffuser at its place again and tighten the
screws (A) and its washers.
To clean the fitting: never carry it out when the fitting is still warm.
Only use neutral cleaning products.
Notice: in case of fittings fed through the same cover, open the
opposite one for an easier cleaning and lamp replacement.
Carefully read the instructions before assembling the light
fitting which is guaranteed safe and reliable when it has been
correctly installed and properly used.We recommend to con-
serve the instructions.
GUARANTEE This light fitting is guaranteed under the conditions in
force in the Country of sale. For claims under guarantee, the sales re-
ceipt must be shown.
REMARKS FOR A SAFE USE
The light fitting that you have purchased has been designed and built
according to European security norms in force and is certified by an
appointed Institute for Quality Marks.
The safe use of a light fitting emboding high temperature
components requires, beyond the necessary attention, to carefully
follow these instructions:
Read carefully and conserve the instructions for the correct use of
the light fitting.
We suggest to have the fitting installed by a specialized technician.
Do not use the light fitting for improper applications, that haven’t been
foreseen in the project.
Do not use bulbs of higher power than the one specified in the
instructions and on the labels sticked on the light fitting.
When cleaning or changing the bulb of the light fitting, remember to
previously unplug the same or switch off the main.
Let the light fitting and the bulb cool down before touching it with the
hands.
Moreover, we suggest to remember:
Never clean the light fitting when hot or under tension.
Never use flammable products to clean the light fitting.
The glass components - bulb included - can break and therefore are
dangerous if uncarefully handled.
Light fittings should be installed out of the reach of children and in such
a position where they cannot be hit by anything.
Do not install the light fitting too close to flammable materials (curtains,
etc.),nor cover it, to prevent the normal cooling.
Do not allow children to play with the fitting.
In case of troubles, misworking or damage to the cable, contact your
Lumina dealer for checking and repairing.

NOTICES POUR LA SÉCURITÉ D’EMPLOI
L’appareil éclairant que vous avez acheté est construit suivant les normes de
sécurité en vigueur dans la Communauté Européenne, et il a été testé et certifié
par un institut qualifié pour le marquage de qualité.
Au bout de l’utilisation plus sûre d’appareils éléctriques avec des pièces
composantes qui dégagent des temperatrues très élevées, il faut observer,
outre que la prudence normale, les instructions qui sont reportées ci-
dessous:
Lisez et conservez (pour toute eventualité à l’avenir) très soigneusement les
instructions dont l’appareil est équippé.
Nous conseillons de faire installer l’appareil par des techniciens specialisés.
N’utilisez pas l’appareil pour des usages impropres c’est à dire qui ne sont pas
prévus en base à la typologie pour laquelle il a été projeté.
Ne montez pas d’ampoules de puissances supérieures ou de types différents par
rapport à ce qui est indiqué dans les instructions de montage et sur les étiquettes
portées sur l’appareil même.
Pour remplacer l’ampoule ou pour nettoyer l’appareil il faut:
a) debrancher la fiche si l’appareil en est muni ou enlever le courant éléctrique
du reseau;
b) laisser l’ampoule et l’appareil se refroidir complètement avant des les toucher
avec vos mains.
NE JAMAIS NETTOYER l’appareil allumé ou encore chaud.
NE JAMAIS UTILISER des liquides flammables pour le nettoyage.
N’oubliez pas que les parties en verre, y compris l’ampoule, peuvent se casser et
originer des morceaux tranchants: il faut donc faire beaucoup d’attention en
les manipulant.
N’installez pas les appareils aux endroits où ils peuvent ètre heurtés, et surtout
tenez-les hors de portée des enfants.
Ne montez pas l’appareil trop rapproché à des matériaux facilement flammables,
comme les rideaux ou d’autres,et ne couvrez pas l’appareil ce qui en empecherait
le raffroidissement.
Ne permettez pas aux enfants de jouer avec l’appareil.
Dans le cas où le câble d’alimentation s’averait endommagé ou s’ils s’averaient
d’autres défauts ou d’anomalies de fonctionnement,faites effectuer la réparation
de l’appareil par un revendeur de Lumina.
F
Suspension pour éclairage diffusé, en aluminium moulé sous
pression et avec un diffuseur en verre soufflé, disponible dans 2
dimensions et puissances.Elle peut s’étendre en système en chute
par la possibilité de connexion électrique d’un point unique de
lumière, d’autres sources lumineuses, avec réglage dans les sens
horizontal et vertical au moyen de câbles d’acier, chaînes, cordes
et d’autres accessoires très simples. Possibilité d’une multitude
de types différents de raccordement d’une lampe à l’autre, dans
la même ou dans les 2 dimensions Ø350/Ø285mm (voir exemple
annexé). Source : 100W (Perla 28 M) ou 150W (Perla 35 M) maxi.
Culot E27.
Appareil apte au montage sur des surfaces normalement
inflammables.
L’indication se réfère à la distance minimale à garder des
objets illuminés.
Emploi à l’intérieur exclusivement.
NOTEZ BIEN - SUGGESTIONS POUR L’INSTALLATION
Attention: nous recommandons de suivre scrupuleusement
les instructions et de faire effectuer le montage que par des
techniciens qualifiés.
Attention:toujours couper le courant du réseau,avant d’effectuer
toute opération.
Attention: ce système d’alimentation en chute d’un point unique
de lumière est prévu pour supporter 600W maximum.
Perla 28 M:Max 6 x 100W - Perla 35 M:Max 4 x 150W.
Attention:n’utiliser que des au moyen de tampons et de crochets
appropriés au type de plafond et au poids total des appareils
installés: Perla 35 = 5 kg, Perla 28 = 3,5 kg. Nous reccommandons
l‘emploi des sets code 820 (fig. 2) et code 821 (fig. 3).
Attention:en cas de montage tendu horizontalement suivant fig.
6a nous conseillons l’emploi de tendeurs en acier (non inclus dans
l’emballage).
Attention: en cas de câblage séquentiel il faut obligatoirement
respecter les normes européennes, au moyen des pièces
composantes incluses dans l’emballage (câbles d’alimentation
électrique, presse-câbles, arrêts, etc).
MONTAGE POUR L’ALIMENTATION EN SÉQUENCE
1) Fixez au mur/plafond les crochets (fig.3) ou d’autres supports
aptes au type de mur/plafond et au poids total de la composition
prévue.
2) Coupez les cordes (D) à la longueur souhaitée (fig.2), (notez:
pour une coupe plus nette, enveloppez l’extrémité dans le ruban
adhésif).
•Préparez les boucles suivant le croquis, et renfermez les deux
coquilles (E) pour faire ça, serrez la vis (F) à l’écrou (G).
•Accrochez les mousquetons (H) aux boucles.
(fig. 4)•Accrochez tous les appareils dans leurs positions prévues,
sans les connecter électriquement, pour établir la longueur
correcte des câbles (au moins 40 cm en plus de la distance entre
chaque appareil).
•Accrochez les mousquetons (H) aux points d’accrochement (C) et
aux soutiens (I).
70 cm c’est la distance minimale que nous recommandons
entre les appareils.
Si la disposition est satisfaisante, coupez les câbles électriques en
plus.
Attention:ne tendez pas les cordes outre leur portée: 50 kg MAXI
•Décrochez les lampes et déposez-les (au sol ou sur un plan) pour
les connecter plus facilement.
3) Tenez le verre diffuseur (fig.1) bien en main et desserrez les vis
(A) par la clé incluse dans l’emballage.
•Démontez le couvercle (B), du côté de l’alimentation, ou bien
du côté opposé selon l’entrée souhaitée du câble dans la sphère
suivante (fig.7).
•Déplacez le diffuseur et montez la source, remettez le diffuseur à
sa place sans remonter le couvercle.
En cas de montage ou remplacement montez une ampoule“auto-
protegée” .
4) Enlevez le bouchons (O) du côté de l’entrée souhaitée du câble
(fig.7).
•Laissez glisser le câble d’alimentation à travers le serre- câble (P)
et branchez-le au bloc terminal: pour faire ça, serrez-le au serre-
câble incorporé dans le boitier du bloc terminal (Q).
(fig.1) •Fermez le couvercle (B) et serrez les vis (A).
5) Répétez les passages 3et 4pour brancher tous les appareils.
6) Avec les appareils enchaînés (fig.8) et à l’aide d’un ou de
plusieurs opérateurs, accrochez le système aux supports (I)
préalablement fixés au mur ou au plafond.
7) Utilisez le jeu de montage de la patère code 825 (Set Canopy),(fig.5).
•Dévissez l’écrou et ses rondelles (L) pour enlever le couvercle (M).
•Fixez le support (N) au plafond ou au mur,au moyen de la vis et de
la rondelle inclus dans le carton, ou d’autres appropriés.
•Laissez passer le câble électrique du premier appareil par le
couvercle (M) de la patère et dans le presse- câbles (R).
•Branchez le câble au bordier et serrez le presse- câbles (R).
•Connectez les câbles du réseau aux bornes en prenant garde de
connecter le câble jaune et vert à la borne de terre qui est marquée
par . Note: le circuit de terre doit être conforme aux normes.
•Vissez l’écrou et ses rondelles (L) pour fixer le couvercle (M) au
support (N).
Notez: si les couvercles (B) appariaient de travers, tenez le
point d’accrochement (C) et laissez tourner le diffuseur jusqu’à
l’achèvement de son équilibre.
ENTRETIEN ET REMPLACEMENT DE L’AMPOULE
1) Accrochez les mousquetons suivant fig.9.Ou prenez une corde
de soutien pour vous aider suivant fig.9a, et contournez l’appareil
sur lequel vous allez opérer, pour l’accrocher aux appareils en
dessous,et laissez.la légèrement tendues.
2) Voyez fig.1. Attention:durant cette opération,tenez le diffuseur
solidement.
•Du côté opposé au câble d’alimentation, enlevez les vis (A) et ses
rondelles du couvercle (B) au moyen de la clé Allen incluse.
•Ensuite,enlevezle diffuseuret procédezavecl’entretien(montage
ou remplacement de l’ampoule, nettoyage du verre, etc.).
•Remettez le diffuseur à sa place et serrez les vis (A) et ses rondelles.
Pour le nettoyage de l’appareil il ne faut absolument jamais
l’effectuer lorsque celui-ci est encore chaud, il faut utiliser que de
produits neutres.
Notez bien: si les appareils sont branchés à travers le même
couvercle démontez celui de l’autre côté pour simplifier le
remplacement de la source et le nettoyage du diffuseur.
La sécurité d’emploi de cette lampe est soumise à
l’observation de ces instructions et il est donc conseillé de les
conserver.
GARANTIE Les conditions de garantie sont celles en vigueur dans le
Pays dans lequel l’achat a été effectué. La garantie ne sera appliquée
que sur présentation de la facture d’achat.

ADVERTENCIA PARA SEGURIDAD DE UTILIZACIÓN
El aparato de iluminación que ha adquirido está costruido según la
vigente normativa de seguridad europea y ha sido probado y certificado
por un conocido Instituto de calidad.
La utilización segura de aparatos eléctricos con partes de elevada
temperaturarequiere,ademásdelaprudencia normal,laobservancia
de las siguientes instrucciones.
LEER Y CONSERVAR ATENTAMENTE las instrucciones adjuntas al
aparato para necesidades futuras.
Se aconseja hacer instalar el aparato por personal especializado.
No usar el aparato para usos improprios no previstos en la normal
utilización según la tipologia para la cual ha sido proyectado.
No montar bombillas de potencia superior o de distinto tipo a las
indicadas en las instrucciones de montaje y en las etiquetas pegadas
sobre el mismo aparato.
Para sustituir la bombilla o limpiar el aparato SE DEBE:
a) Quitar el enchufe de la toma eléctrica si el aparato va provisto o cortar
la corriente eléctrica de la instalación.
b) Dejar enfriar totalmente la bombilla y el aparato antes de tocarlo con
las manos.
NO LIMPIAR NUNCA el aparato encendido o todavía caliente.
NO UTILIZAR líquidos inflamables para la limpieza.
Tener presente que las partes de vidrio, bombilla incluida, pueden
romperse costituyendo fragmentos cortantes, por lo tanto ser muy
prudentes en su manejo.
No instalar aparatos en zonas donde puedan ser facilmente golpeados
en particular mantenerlos alejados de los niños.
No montar el aparato demasiado cerca de material facilmente inflamable
como cortinas o similares y no cubrirlo impidiendo su refrigeración.
No permitir a los niños de jugar con el aparato.
Si el cable de alimentación resultase dañado o sufriera cualquier otro
desperfecto o funcionamiento anormal, hacer reparar el aparato en un
punto de venta Lumina.
E
Una lámpara en suspensión preparada para iluminación difuminada,
hecha de aluminio troquelado con un difusor hecho de cristal soplado,
disponible en dos tallas y potencias.Tiene la posibilidad de instalación
en cascada dado que se pueden conectar electricamente varios
elementos al mismo enchufe.Posibilidad de ajustes vertical y horizontal
mediante cuerdas y otros accesorios de sencillo uso. Varias opciones
de instalación son posibles para uno o más elementos, cada uno en la
misma o en dos tallas diferentes Ø350/Ø285mm. Bombillas: casquillo
E27,100W (Perla 28 M) o 150W (perla 35 M) potencia máxima.
Aparato idóneo para el montaje sobre superficies normalmente
inflamables.
El símbolo indica la distancia minima que debe mantenerse
respeto a los objetos iluminados.
Aparato idóneo solo para interiores.
CUIDADO - SUGERENCIAS PARA LA INSTALACIÓN
Atención: lea y siga cuidadosamente esta recomendación:
recomendamos que este trabajo lo realice un técnico espcializado.
Atención: siempre desconecte la corriente eléctrica antes de realizar
cualquier operación.
Atención:el sistema para la alimentacion electrica cableado en cascada
por un mismo enchufe es presupuesto para una una potencia maxima
de 600W.Perla 28M:Max 6 x 100W - Perla35M:Max 4 x 150W.
Atención:emplear tacos y ganchos adecuados al tipo de techo ó pared
y al peso de los aparatos instalados:
Perla 35 = 5 kg, Perla 28 = 3,5 kg. Racomandamos el empleo de los
juegos cód.820 (fig. 2) y cód.821 (fig. 3).
Atención: en las instalaciones tesadas horizontalmente como se
enseña en fig. 6a se aconseja el empleo de tensores de acero (no
incluidos en el producto).
Atención: para el cableado secuencial es forzoso cumplir las normas
europeas, empleando los componentes suministrados (cables de
alimentacion electrica,sujetacables,mordazas,etc).
MONTAJE CON ALIMENTACION SECUENCIAL
1) Montar en el techo ó en la pared los ganches (fig.3) ó otros soportes
usandolos tacosadecuados altipo detechoy alpeso dela composicion
elegida.
2) Corte las cuerdas (D) a la longitud apropiada (fig.2), (nota: enrolle
los cabos cortados y use cinta adhesiva), con las presillas tal y come
dibujado, y cierre las dos tapas (E) empleando el tornillo (F) y la tuerca
(G).
•Enganche los mosquestones (H) a las presillas.
(Fig. 4)•Enganchar todos los aparatos en su posicion, sin connectarlos
electricamente, para elegir la longitud correcta de los hilos electricos
(almenos 40 cm más largos de la distancia entre los aparatos).
•Enganchar los mosquetones (H) en los puntos de connexion (C) y en
los soportes (I).
Se recomienda una distancia minima de 70 cm entre los aparatos.
Si la distribucion es satisfactoria, cortar el hilo electrico excedente de
cada aparato.
Attencion:no tesar las cuerdas más allá de la capacidad MAX:50 kg.
•Desenganchar los aparatos y colocarles suavemente (por terra ó sobre
un plano) para conexiones electricas más faciles.
3) Tener fuerte el diffusor (fig.1) y desatornillar los tornillos (A) con la
llave suministrada.•Desmontar la tapa (B),por el lado de la alimentacion
electrica, ó por el lado opuesto según del sitio elegido como entrada
del hilo en el aparato siguiente (fig.7).•Desplazar el diffusor y montar la
bombilla,reemplazar el diffusor sin reemplazar la tapa.
En el caso del montaj o remplazo de una lámpara alógena emplee
únicamente una lámpara alógena auto-protegida .
4) Quitar el tapón (O) del sitio elegido como entrada del hilo de
alimentacion (fig.7). •Insertar el hilo de alimentación electrica a travès
el sujetacables (P) y conectarlo a la mordaza, asujetandolo con el
sujetacables incorporado en el recipiente de la mordaza (Q).
(fig.1) •Cierre la tapa (B) atornillando los tornillos (A).
5) Repetir los puntos 3y 4para connectar todos los aparatos.
6) Con los aparatos encatenados (fig.8) y con la ayuda de uno ó más
técnicos,enganchar el sistema a los soportes (I) que ya se habían fijados
antes a las paredes ó al techo.
7) Utilize la caja de montaje del rosetón cód. 825 (Set Canopy),(fig.5).
•Desatornille el tornillo y su arandela (L) y quite el cubre base (M).
•Monte el soporte (N) al techo o pared mediante el tornillo y la tuerca
que se incluyen en la caja, o con cualquier otra apropiada al tipo de
techo o pared. •Insertar el hilo de alimentación del primero aparato a
través la tapa del rosetón (M) en el sujetcables (R).•Connectar el hilo a
la mordaza y apretar el sujetcables (R).
•Conecte los cables de la red eléctrica al terminal teniendo cuidado
de conectar el cable amarillo y verde al terminal de tierra, que está
marcado mediante .
Aviso: El circuito de tierra debe cumplir las normas de seguridad
vigentes.
•Atornille el tornillo y su arandela (L) para montar el cubre base (M) al
soporte (N).
Nota: si las tapas (B) parecen inclinadas, tener el punto de connexion
(C) y dar vuelta al diffusor hasta su equilibrio.
MANTENIMIENTOY SUSTITUCION DE LA BOMILLA
1) Enganchar los mosquetones según fig.9.Ó proveerse de una cuerda
auxiliaria de sostén según fig.9a, para circunvalar el aparato que se
quiere manipular enganchandola al ganche siguiente para sostner los
aparatos de abajo, tensionandola ligeramente.
2) Ver fig.1. Atención: mantenga firmemente el difusor de cristal
mientras efectúe esta operación.
•Desatornille los tornillos (A) y sus arandelas de la tapa (B), situados en
la cara opuesta del cable de allimentación, empleando la llave Allen
incluida en la caja.
•Despuésretireledifusordecristalyefectúeeltrabajodemantenimiento
(instalar o reemplaarz de bombilla,limpieza del cristal,etc.).
•Después sitúe el difusor de cristal en su lugar y atornille los tornillos (A)
y sus tuercas.
Emplear productos neutros para limpiar el cristal:hacer esta operación
con la lámpara fria y no ponerlo bajo agua corriente.
Nota:si los aparatos están conectados electricamente a travès la misma
tapa, desmontar la tapa opuesta para sustituir la bombilla y limpiar el
vidrio más sencillo.
La seguridad del aparato está garantizada con la observancia de
estas instrucciones,por lo tanto se recomienda conservarlas.
GARANTIA Para este aparato, rigen las condiciones de garantía vigentes
en el País de venta. Para disfrutar de las condiciones de garantía, es
necesario presentar el recibo de compra.
LUMINA ITALIA Srl
via Casorezzo, 63
20010 Arluno (MI)
Tel. +39 02 903752.1
Fax +39 02 90376655
LUMINA SCHWEIZ GmbH
Bergstrasse 1/3
CH-4513 Langendorf
Tel. 032 6821959
Fax 032 6823338

Il vetro diffusore di questa lampada, in triplo strato, è realizzato artigia-
nalmente da maestri vetrai mediante soffiatura a bocca. Per questa ca-
ratteristica costruttiva può, quindi, presentare lievi imperfezioni che ne
valorizzano il pregio, arricchendo il prodotto di senzazioni ed emozioni
che solo la tradizione artigiana può suscitare.
Der Glasdiffusor dieser Lampe, in dreifacher Schicht, wurde von Gla-
sermeistem mundgeblasen. Durch diese traditionelle Produktion ent-
stehen Unikate,die sich gerade dadurch auszeichnen,dass Unreinheiten
auftreten können, die den Produkt ihren individuellen vom Handwerk
geprägten Charakter und Charme verleihen.
The three layered glass diffuser of this lamp is a handwork product, that
was made by glass-blowers.Therefore, as a consequence of this handi-
craft procedure, it is possible that this product shows some light flaws
that emphasize its value, bringing the product itself some sensations
and emotions that only a handwork tradition can give.
Le verre diffuseur de cette lampe, en triple couche,a été réalisé de façon
artisanale par des maîtreS vitriers qui l’ont soufflé main. En conséquen-
ce de ce procedé de fabrication il est donc possible que le produit pré-
sente quelques petits défauts, qui doit se considérer comme enriches-
sement de sa valeur, lui apportant des sensations et des émotions que
une tradition artisanale seule peut susciter.
El vidrio difusor soplado de tres capas de esta lámpara es un producto
artesanal realizado por maestros artesanos. Esta forma de fabricación,
permite alguna pequeña imperfección, que debe considerarse un valor
añadido, ya que aporta al producto sensaciónes y emociónes que solo
la tradition artesanal puede suscitar.

SMALTIMENTO DELL’APPARECCHIO - RAEE (direttiva comunitaria 2002/96/EC in vigore per le attrezzature elettriche ed elettroniche)
Questo simbolo sul prodotto o sulla confezione indica che a fine vita, il prodotto è un rifiuto che non deve essere smaltito come
rifiuto urbano ma deve essere destinato alla raccolta differenziata. È responsabilità dell’utente smaltire questa attrezzatura presso
i punti designati per la raccolta di attrezzature elettriche ed elettroniche usate. Per determinare l’ubicazione delle aree pubbliche
di raccolta contattare: il comune di residenza, l’ente di raccolta dei rifiuti o chiedere al venditore. Anche il venditore può ritirare il
vecchio prodotto acquistandone uno nuovo dello stesso tipo. Lo smaltimento errato può causare danni alle persone e all’ambiente per la
possibile presenza di sostanze pericolose.Sono previste sanzioni in caso di smaltimento abusivo dei suddetti rifiuti.
PRODUKTENTSORGUNG NACH - ElektroG (europäischen Richtlinie 2002/96/EG über elektrische und elektronischeGeräte)
Dieses Symbol auf dem Produkt oder seinerVerpackung bedeutet,dass dieses Produkt nicht mit dem Hausmüll zusammen entsorgt
werden darf.Sie sind verpflichtet,dieses Gerät über eine angegebene Sammelstelle für elektrische bzw.elektronische Geräteabfälle
zu entsorgen.Wenn Sie Fragen bzgl. Ihrer nächsten Sammelstelle für solche Abfälle haben, nehmen Sie bitte Kontakt mit den örtli-
chen Behörden, der Müllentsorgungsorganisation für Ihren Haushalt oder mit dem Geschäft, wo Sie das Produkt gekauft haben,
auf. Die falsche Entsorgung kann Menschen und Umwelt schaden. Im Falle von widerrechtlicher Entsorgung o.g. Abfälle ist eine Geldstrafe
vorgesehen.
DISCHARGE OF LUMINAIRE - WEEE (European Directive 2002/96/EC governing used electrical and electronic appliance)
This marking on the product or on its packaging illustrates that this product at its end-life is an electrical waste, and may not be
disposed as a normal household waste.You are responsible of the correct disposal of this equipment through a designated waste
electrical and electronic equipment collection. To determine the locations for dropping off a WEEE contact your local government
office, the waste disposal organisation that serves your house, or the store at which you purchased the product.The store can also
withdraw the product.Wrong disposal may cause damages to people and the environment for the possibility of dangerous substances. San-
ctions are provided for an illegal disposal of electrical waste.
I
D
GB
ELIMINACIÓN DEL APARATO - RAEE (Directiva europea 2002/96/EC que rige los aparados eléctricos y electrónicos)
Esta indicación en el producto o en su embalaje, significa que al fin de su vida util no se puede tirar a la basura. Es su responsabili-
dad reciclarlo correctamente, depositándolo en un punto de recogida de equipos eléctricos y electrónicos designado a tal efecto.
Para determinar las ubicaciones en las que puede deshacerse de tales residuos eléctricos y electrónicos, póngase en contacto con
la oficina gubernamental local, con la organización de residuos que se encarga de recoger la basura doméstica de su zona o con la
tienda en la que compró el producto.La tienda también puede quedarse con el producto. No reciclar adecuadamente puede causar daños al
medioambiente al existir la posibilidad de vertido de substancias inadecuadas. Pueden ser multados al respecto.
REJET DES DÉCHETS DE CET ÉQUIPEMENT - DEEE (directive Européenne 2002/96/EC sur la récupération des équipements électri-
ques et électroniques)
Ce symbole sur le produit ou sur son emballage indique que cet équipement ne soit pas jeté avec les déchets municipaux non
triés. Le symbole indique que ce produit devrait être jeté séparément des déchets ménagers.Il est de votre responsabilité de vous
débarrasser de cet équipement et de tout autre équipement électrique et électronique en vous servant des collecteurs spécifiques
désignés par le gouvernement ou les autorités locales. Le rejet des déchets conforme à ces points ainsi que la réutilisation aidera
à empêcher de potentielles conséquences négatives pour l’environnement et pour la santé humaine. Pour des informations plus détaillées
sur le rejet des déchets de votre vieil équipement, entrez en contact avec vos autorités locales, service des ordures, ou le magasin où vous
avez acheté le produit.Le magasin peut reprendre votre vieux équipement si vous un achetez un nouveau du même type.Des sanctions sont
prévues en cas de rejet illégal de ce type de déchets.
Istruzioni
Hinweisungen
Instructions
Instrucciònes
RAEE
ElektroG
WEEE
DEEE
F
E
cod. 4000456
This manual suits for next models
3
Other Lumina Outdoor Light manuals
Popular Outdoor Light manuals by other brands
Premier Range
Premier Range DT MFK6 instruction manual

Gama Sonic
Gama Sonic GS-101 instruction manual

urban ambiance
urban ambiance UQL1244 installation instructions
Home Decorators Collection
Home Decorators Collection JL0905-S Use and care guide

LIGMAN
LIGMAN LI-10021-SB installation manual

ALCO
ALCO 9080-1 instruction manual
