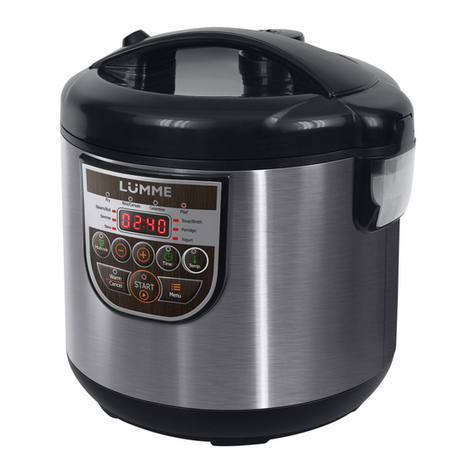
Lumme LU-1451 User manual

/ MULTICOOKER
USER MANUAL
ҦҚҚ
LU-1451
RUS
6
GBR
User manual
13
UKR
17
KAZ
ұққ
19
BLR
21
DEU
Bedienungsanleitung
22
ITA
Manuale d`uso
24
ESP
Manual de instrucciones
26
FRA
27
PRT
Manual de inst
29
EST
Kasutusjuhend
31
LTU
Naudojimo instrukcija
32
LVA
ja
34
FIN
35
ISR
תוארוה הלעפה
37
POL
38
UZB
40

2
RUS *:
1.
2.
3.
4.
5.
6.
7. -
8.
GBR Parts list*:
1. Control panel
2. Lid opening button
3. Handle
4. Steam valve
5. Lid
6. Dew collector
7. Steam container
8. Inner pot
BLR *:
1.
2.
3.
4.
5.
6.
7. -
8.
UKR *:
1.
2.
3.
4.
5.
6.
7. -
8.
KAZ *:
1. қ
2. Қққ
ү
3. ұқ
4. қққ
5. Қққ
6. ғ
ғ
7. -
8. Қққ
ү
POL *:
1. Panel sterowania
2. Przycisk otwierania pokrywy
3. Uchwyt
4.
5. Pokrywa
6. Pojemnik na skropliny
7. Pojemnik-parowar
8. Misa

3
DEU Komplettierung*:
1. Bedienungstafel
2.
3. Griff
4. Dampfklappe
5. Deckel
6.
7. Dampfgarer-
8. Schale
ITA Componenti*:
1. Pannello di comando
2. Pulsante apertura coperchio
3. Maniglia
4. Valvola a vapore
5. Coperchio
6. Raccoglitore di condensa
7. Contenitore vaporiera
8. Coppa
ESP Lista de equipo*:
1. Panel de control
2. abrir la tapa
3. Asa
4.
5. Tapa
6. Recipiente para acumular
el condensado
7. Recipiente para cocinar al
vapor
8. Plato
FRA Lot de livraison*:
1. Panneau de commande
2.
couvercle
3.
4. Clapet vapeur
5. Couvercle
6.
7.
vapeur
8.
PRT Conjunto complete*:
1. Painel de controle
2.
3. Asa
4.
5. Tampa
6. Recipiente para colher o ar
condensado
7. Recipiente da panela de
8. Tigela
UZB
*:
1. Boshqaruv paneli
2. Qopqoqni ochish
tugmachasi
3. Dasta
4. Bug' klapani
5. Qopqoq
6. Kondensatni yig'ish
konteyneri
7. -konteyner
8. Jom
EST Komplektis*:
1. Juhtpaneel
2. Kaane avamise nupp
3. Sang
4. Auruklapp
5. Kaas
6. Kondensaadi kogumise
konteiner
7. Konteiner-
8. Anum
LTU Komplekto *:
1. Valdymo skydas
2.
3. Rankena
4.
5. Dangtis
6. Kondensato talpa
7. Garinimo indas
8. Dubuo
LVA K*:
1.
2.
3. Rokturis
4. Tvaika v
5.
6.
7. Konteineris
katls
8. Kauss
FIN Kokoonpano*:
1. Ohjauspaneeli
2. Kannen avauspainike
3. Kahva
4.
5. Kansi
6.
7.
8. Kulho
* הליבח ISR
חול הרקב .1
ןצחל תחיתפ הסכמ .2
ידית .3
םותסש רוטיק .4
הסכמ .5
לכימ ףוסיאל טסנדנוק .6
ליכמ-ריס יודיא .7
הרעק .8
* / Each appliance assembling parts list might be different depending on particular model.

4
RUS
-
GBR Functions description:
ff and for
chosen program start
for automatic cooking program
selection
4. Auto k
5. Temperatu
6. Auto kfucntion button, chosen program
cancel
7. Cooking program indicator
8. Display
1. 9. Time indicator
10. Temperature indicator
11. Delayfunction indicator
BLR
1. -
2.
3.
4.
5.
6.
7.
8.
9.
10.
UKR
1. -
2.
3.
4.
5.
6.
7.
8.
9.
10.
KAZ Функциялардың сипаттамасы:
1. «Старт» түймешігі
2. «Мәзір» автоматты бағдарламаны таңдау
түймешігі
3. «Шегеру» бағдарламасының түймешігі
4. Ысыту бағдарламасының индикаторы
5. Әзірлеу уақытын орнату түймешігі/ әзірлеу
темературасын орнату түймешігі
6. Таңдалған режимді болдырмауға, кез келген
теңшелімдерді түсіруге/«Ысыту» функциясын
қосуға арналған «Ысыту/болдырмау» түймешігі
7. Бағдарламасының индикаторы
8. Дисплей
9. Уақыттың индикаторы.
10. Қызудың индикаторы.
11. Шегеру функциясын қосу индикаторы
DEU Funktionenbeschreibung:
1. Start-Knopf - Anschalten und Ausschalten des
Programms
2. -Knopf
Programme
3. Programmknopf Aufschub
4. Funktionsanzeige
5. - und Temperatureinstellung
6. Knopf des Programmabbruchs des
des
Abwurfs von Einstellungen
7. Funktionsanzeige der Zubereitungsprogramme
8. Display
9. Zeitanzeige
10. Temperaturanzeige
11. AufschubFunktionsanzeige

5
UZB Displey:
1. - multipishirgichni yoqish va o'chirish
hamda tanlangan dasturni ishga tushirish
2.
3.
4.
5. Vaqt va haroratni o'rnatish tugmalari
6.
qilish yoki parametrlar qiymatlarini bekor qilish
7. Tayyorlash dasturlarining ishlashini ko'rsatuvchi
indikatorlar
8. Displey
9. Vaqt indikatori
10. Harorat indikatori
11.
FRA Presentation des fonctions:
1. -
2. Bouton
programmes automatiques
3.
4.
5.
6.
7. Voyant du fonctionnement des programmes de
cuisson
8. Ecran
9. Afficheur du temps
10.
11.
EST Funktsioonide kirjeldus:
1. Stardinupp- multifunktsionaalse
toiduvalmistaja sisse- ja v
2. - automaatsete programmide
valikuks
3.
4.
5. Aja ja temperatuuri seadistamise nupud
6.
nupp, valitu
7.
8. Kuvar
9.
10.
11.
ESP
1. Arranquepara encender y apagar la
en funcionamiento
el programa seleccionado
2. para seleccionar programas
3. Retraso
4.
Calentamiento
5. Botones para fijar la hora y temperatura
6. a
Calentamiento, cancelar el programa
seleccionado
7. Indicadores de funcionamiento de programas
de cocinar
8. Visualizador
9. Temporizador
10. Indicador de temperatura
11. Retraso
LTU
1. Mygtukas
2. Mygtukas Meniu
3. Programos mygtukas
4. Funkcijos veikimo indikatorius
5. Laiko
6. Programos
7. Gaminimo programos veikimo indikatoriai
8. Ekranas
9. Laiko indikatorius
10.
11. Funkcijos indikatorius
LVA Funkciju apraksts:
1. Poga Starts
2. Poga
3. Programmas poga
4. Funkcijas
5.
6. Programmas
poga
7.
8. Displejs
9. Laika indikators
10.
11. Funkcijas indikators
יתרוא תויצקנופ ISR
ןצחל "לחתה" - הלעפה וביכו .1
ייטלומ קוק תלעפהו תינכות הרחבנ
ןצחל "טירפת" - תריחבל תוינכות .2
תויטמוטוא
ןצחל תינכות "הכרא" .3
.4
.5
.6
.7
.8
.9
.10
.11
FIN Toiminnon kuvaus:
1. Start-painike monitoimikeittimen kytkeminen
2. Menu-painike automaattisen ohjelman
valintaa varten
3. -painike
4. -toiminnon tilan indikaattori
5.
6. -ohjelman peruutuspainike, valitun
7. Ruoanlaitto-ohjelmien tilan indikaattori
8.
9. Ajan indikaattori
10.
11. - toiminnon indikaattori
POL
1. -
uruchomienie wybranego programu
2.
3.
4.
5. Przyciski ustawienia czasu i temperatury
6.
programu
7.
8.
9.
10.
11.
PRT
1. Iniciar: lig
Multicozedura e iniciar o programa selecionado
2. Menu
3. Tempo de atrazo
4. Aquecimento
5.
6. para cancelar o programa Aquecimento,
cancelar o programa selecionado
7.
8. Display
9. Indicador do tempo
10. Indicador da temperatura
11. Indicador de Tempo de atrazo
ITA Descrizione funzioni:
1. - accensione e spegnimento
del robot e start del programma prescelto
2.
automatico
3.
4.
5. Tasti impostazione tempo e temperatura
6.
canclla il programma prescelto
7. Spie dei programmi di cucinatura
8. Display
9. Timer
10. Indicatore temperatura
11.
6
LUMME LU-1451
LUMME !
46
LUMME!
46 (16
6
.
.
-
.
.
180 2
, (
.
LUMME

7
)
LUMME.
-
LUMME

8
: -
LED

9
.
.
.
).
(
.
,
,
.

10
,
:
,
)
.
.
-
.

11
.
.
.
E1-E4

12
220-240
500
2,2 / 2,4
275 x 277 x 270
)
---
7-
MARTA TRADE INC
c/o Commonwealth Trust Limited, P.O. Box 3321, Road Town, Tortola, United Kingdom,
:
COSMOS FAR VIEW INTERNATIONAL LIMITED
Room 701, 16 apt, lane 165, Rainbow North Street, Ningbo, China
-2334
: -
ENG USER MANUAL
MULTICOOKER LUMME LU-1451
LUMME multicookers are high-tech kitchen appliances for easy and healthy cooking!
46 COOKING PROGRAMS
Automatic cooking programs are convenient, fast and delicious way to cook! Make a brand new step into a cookery world with LUMME automatic cooking programs!
46 cooking programs (16 automatic programs and 30 manual settings) let you cook a large variety of dishes! You could cook not only typical for multicookers meal, but yoghurt, ragout, aspic, make jam and kissel.
Optimal time and temperature settings are made for every automatic cooking program and the settings load automatically when you choose necessary program. You will find next automatic programs in our
multicookers:
Stew/
For fish, vegetables and meat stewing
Pilaw
For pilaw cooking
Pasta/
For boiling pasta
Rice/Cereals/
For rice, buckwheat or any other garnish from cereals cooking
Omelette/
For omelette cooking
Jam/
For jam cooking
Soup
For soup cooking
Yoghurt
For yoghurt making or dough proving

13
Cake/
For pastry, cakes, pies and bread baking
Galantine/
For meat or fish jelly cooking
Steam
For fish, meat or vegetables steaming or for dietary dishes and baby menu cooking
Porridge/
For porridge cooking
Boil
For meat, fish, vegetables boiling
Fry
For vegetables, meat, fish frying with oil. Please cook with an open lid always
Bake
For fish, meat, vegetables baking
Multicook/
For cooking any dish with your time and temperature settings
MULTICOOK
Our multicooker has a program , which allows setting any value of temperature and time you wish. Time range for is from 1 minute to 24 hours with an interval 1 minute. Temperature
180 provides you more opportunities to cook your favorite dishes. You feel absolutely free with . Any recipe gets a new life and pleases you
will help you to create your best recipe!
AUTO KEEP WARM (TEMPERATURE MAINTAINING FOR COOKED MEAL)
Our multicooker has function which follows automatically cooking programs and keeps cooked meal warm up to 24 hours. Function is unavailable in and programs.
AUTO KEEP WARM SWITCH OFF
It is possible to switch off function before, during and after cooking process. You could check the state of function with function indication. We have
provided that function for keeping to specific dishes cooking technology. You could decide by yourself whether you need or not at any cooking process moment.
WARM UP
You could warm your meal up with LUMME multicooker.
DELAY
D function lets you delay start of cooking program up to 24 hours. Make your breakfast on the eve! Function is unavailable in programs.
EXTRA FEATURES
You could use mulitcooker next options in addition to standard use
Cheese making
Brynza making
Cottage-cheese making
Pasteurization
Sterilization
Dough proving
Baby meal warming up
LUMME MULTICOOKERS MAKE YOUR DIET HEALTHY AND YOUR MOOD GOOD WITHOUT ANY EFFORT. COOK EASY!
IMPORTANT SAFEGUARDS
This User Manual contains information on the use and care of this product. Please read User Manual carefully before using the appliance and save it for future reference.
Before first use, check the appliance specifications and the power supply in your network.
Use only for domestic purposes according to the User Manual. It is not intended for industrial use.
For indoor use only.

14
Do not use with damaged cord, plug or other injuries.
Keep the power cord away from sharp edges and hot surfaces.
Do not pull the cord. Always take the plug. t reel the cord around the appliance body.
Never attempt to dissemble and repair the appliance by yourself. If you encounter problems, please contact customer service center.
Using accessories or replacement parts which are not recommended or sold by the manufacturer may cause damage to the appliance.
Always unplug the appliance and let it cool down before cleaning and removing parts. Keep unplugged when not in use.
To avoid electric shock and fire, do not immerse the appliance in water or other liquids. If that occurs, immediately unplug the appliance and contact service center for inspection.
The appliance is not intended for use by persons (including children) with reduced physical, sensory or mental capabilities, or with lack of experience and knowledge, unless they have been given supervision
or instruction concerning use of the appliance by a person responsible for their safety.
Place the multicooker on a stable, horizontal and level surface. Position it far from flammable materials including curtains, walls, and fabric upholstered furniture.
Do not place the multicooker near heat-emitting devices such as heaters, cooktops or electric burners.
Make sure that there is enough space around. The multicooker should stand more than 15 cm far from such flammable objects as furniture, curtains etc.
appliance near explosive objects.
Don
Do cover the steam valve and the lid while the multicooker is operating. It may cause malfunction in multicooker work.
While you are cooking the multicooker lid and outer surface might becomet hot. Handle or move the multicooker carefully. When you open the multicooker lid, wait while steam goes out and then you could
get closer.
While cooking avoid using sharp utensils not to damage the pot inner surface. Please use the spoon which comes with the multicooker. You may use also wooden, plastic or silicone utensils.
Beware of hot steam that comes out of the steam vent while cooking. Keep hands and face away from the multicooker when you open it to avoid being burnt by hot steam.
Pour water only into the inner
Always check if there are no foreign objects between the pot bottom and heating plate. Foreign objects may cause smell of burning, strange sounds and cause the multicooker malfunction.
If any unusual sounds, odour or any other disruption happens, switch the multicooker off. Make sure if there are no any object or liquid between the pot and heating plate. If malfunction reason
please call customer service. Never attempt to dissemble and repair the multicooker by yourself.
Let the multicooker pot cool before washing to avoid pot inner coating damage.
BEFORE FIRST USE
Please unpack your appliance. Remove all packing materials. Remove all stickers from the lid and housing.
Please check if all parts of the multicooker are in a set. Please check that every part is not damaged.
Wash all removable parts in warm soapy water. Rinse and dry all parts thoroughly. Wipe the stainless steel outer housing with a clean damp cloth.
NEVER immerse the outer housing in water or any other liquid.
Before first use pour 3,5 L of water into the multicooker pot and start program Time is 60 minutes.
DISPLAY
Display has red led. In program running mode display shows cooking program temperature and cooking time countdown. In programs countdown starts when
system reaches operational temperature.
DISPLAY INDICATION
Delay function indication

15
Cooking time adjustment indication
Cooking temperature adjustment indication
Cooking time indication and delay time indication
COOKING WITH THE MULTICOOKER
Make sure that the multicooker is clean inside and outside. Check if there are foreign objects inside or between the pot and heating plate.
Place the inner pot into the multicooker.
Rotate the pot a bit. Make sure that the pot has intimate contact with the heating plate.
Put ingredients into the pot.
Close the lid.
Connect power cord socket into the multicooker socket.
Plug the multicooker in
PROGRAM SELECTION
Press button to switch the multicooker on.
Press button to choose cooking program until you see indication near required cooking program.
You see preset for certain program cooking time and temperature values on the display.
to change temperature and time settings press and cooking process starts. In most programs time countdown starts with cooking program start. Except programs
where countdown starts when system reaches operational temperature.
When cooking program is over you hear beep signal and efunction starts. function is unavailable in programs. So keep warm
To switch the multicooker off press and keep it pressed for 5 seconds.
FUNCTIONS
AUTO KEEP WARM
All programs except / and / have keep w function which means that keep warm function follows cooking program. If Auto keep warmfollows cooking program you
see indication above keep warm. If there is no indication then there is no keep warm after program finish. You could switch Auto keep warmfunction off at any moment of cooking process when you choose
cooking program, when program is running and when the program is over. To cancel Auto keep warmplease keep button pressed for 5 seconds.
Note: In spite of the fact that eep warmfunction is available for 2 for a long time. That may cause meal spoilage.
Note: If temperature in any cooking program exceeds normal or stipulate then the appliance automatically goes to keep warm state and keep warm indicator is on.

16
WARM UP
If you need cooked meal to be warmed up press button and button (without any cooking program selection). Indication above keep warm will be on and the multicooker will start warming up meal.
DELAY
Use this function to delay time of cooking process start. Press button . Display shows indication and time starts flashing. Set up necessary time with buttons for hours
for minutes. Press start (if cooking program is already chosen) or to choose the program.
e/
some products could spoil. Please mind product features when you plan delay time.
PROGRAM CANCEL
Press button to cancel selected program or settings.
TROUBLESHOOTING
Case
Cause
Solution
There is no incoming power
Check power
Dish is not cooked in time
There is no incoming power
Check power
The pot is set unevenly
Set the pot evenly
Heating plate is dirty
Unplug the appliance and let it cool. Clean the heating plate.
There is a strange object between the pot and heating plate
Remove the object
Meal is burnt
Liquid and cereals disproportion
Follow recommended proportions
Display shows E1-E4
System error
Contact authorized service center.
CLEANING AND MAINTENANCE
Always unplug the appliance before cleaning.
Let the appliance cool down completely.
Wash the pot using detergent, rinse with water and dry with soft material.
Do not use dishwasher for inner pot washing.
Do not use chemical and abrasive cleaners for washing the appliance and accessories.
Do not put the pot into cold water right after cooking. Let the pot cool down. Do not place very cold products on hot surface.
CAUTION: do not let water get inside the appliance.
Clean the appliance housing if required with warm water and soft material, do not use any chemical and abrasive cleaners or dish washing detergent.
Clean the steam valve after cooking. Detach it carefully. Rinse with running water, dry and set back.

17
SPECIFICATION
Power supply
220-240 V, 50 Hz
Power
500 W
Net weight / Gross weight
2,2 kg / 2,4 kg
Package size (L W H)
275 x 277 x 270 mm
WARRANTY DOES NOT APPLY TO CONSUMABLES (FILTERS, CERAMIC AND NON-STICK COATING, RUBBER SEALS, ETC.)
Production date is available in the serial number located on the identification sticker on the gift box and/or on sticker on the device. The serial number consists of 13 characters, the 4th and 5th characters indicate the month, the 6th and 7th indicate the year of device
production.
Producer may change the complete set, appearance, country of manufacture, warranty and technical characteristics of the model without any notice. Please check when purchasing device.
Production branch:
COSMOS FAR VIEW INTERNATIONAL LIMITED
Room 701, 16 apt, lane 165, Rainbow North Street, Ningbo, China
UKR
-
.

18
-
-
.
220-240 50
500
2,2 / 2,4
275 77 270
.
----
:
COSMOS FAR VIEW INTERNATIONAL LIMITED
Room 701, 16 apt, lane 165, Rainbow North Street, Ningbo, China

19
KAZ ПАЙДАЛАНУ БОЙЫНША НҦСҚАУЛЫҚ
ҚАУІПСІЗДІК ШАРАЛАРЫ
Аспапты пайдаланар алдында осы нұсқаулықты мұқият оқыңыз және кейін анықтама алу үшін сақтап қойыңыз.
Алғашқы қосу алдында бұйымның таңбалауында кӛрсетілген техникалық сиаттамалары жергілікті желіңіздегі электр қоректенуге сәйкес келетінін тексеріңіз.
Тек тұрмыстық мақсатта пайдаланыңыз. Аспап ӛнеркәсіәпте қолдануға арналмаған.
Бӛлменің сыртында пайдаланбаңыз.
Жұмыс істеп тұрған аспапты қараусыз қалдырмаңыз.
Желілік бауы зақымданған немесе басқа зақымдары бар аспапты пайдаланбаңыз.
Желілік бау ӛткір шеттер мен ыстық беттерге тимеуін байқаңыз.
Желілік бауды аспап корпусының айналасына орамаңыз, бұрамаңыз және тартпаңыз.
Аспапты қоректену желісінен ажыратқанда желілік бауды тартпай, тек ашадан ұстаңыз.
Аспапты ӛз бетімен жӛндеуге тырыспаңыз. Ақау туындаған жағдайда жақын орналасқан сервистік орталыққа жолығыңыз.
Кеңес берілмеген қосымша керек-жарақты пайдалансаңыз, қауіп тӛнуі немесе аспап зақымдануы мүмкін.
Аспапты тазалау алдында және оны пайдаланбасаңыз ылғи электр желіден ажыратыңыз.
НАЗАР АУДАРЫҢЫЗ: Аспапты су толған ванна, раковина немесе басқа ыдыстардың қасында пайдаланбаңыз.
Электр тоқ соқпау және тұтанбау үшін аспапты суға немесе басқа сұйықтыққа батырмаңыз. Егер бұл бола қалса, оны бірден электр желіден ажыратып, тексеру
үшін сервистік орталыққа жолығыңыз.
Аспап физикалық және психикалық шектеулері бар, осы аспапты пайдалану тәжірибесі жоқ адамдармен (соның ішінде балалармен) пайдаланылуға
арналмаған. Бұл жағдайда пайдаланушыны оның қауіпсіздігіне жауап беретін адам алдын ала үйрету керек.
Аспаппен жұмысты бастаудың алдында мультипісіргішті тегіс тұрақты бетке орнатыңыз.
Аспапты ыстық газ және электр плитаға, духовкіге қоймаңыз; оны кез келген жылу кӛздері қасына орналастырмаңыз.
Құрылғының айналасында жеткілікті бос кеңістік барына кӛз жеткізіңіз. Мультипісіргіш жиһаз, перде және т.б. сияқты потенциалды ӛртке қауіпті нысаннан кем
дегенде 15 см аралықта орнатылуы керек.
Аспапты жарылатын және жеңіл тұтанатын материалдардың тура қасында қоспаңыз.
Аспап электр желіге қосылып тұрғанша оны кӛтермеңіз және жылжытпаңыз.
Азық-түлікті немесе суды мультипісіргіштің ішіне ұзақ уақытқа қалдырмаңыз.
Аспапты балалар қол жеткізе алмайтын жерде сақтау керек.
Аспапты жұмыс істеп тұрғанда ештеңемен жаппаңыз, бұл аспап ақауының себебіне айналуы мүмкін.
Тостағаны бос мультипісіргішті ешқашан ӛшірмеңіз.
Сұйықтықты мультипісіргіш корпусының ішіне тигізбеңіз. Суды тек әзірлеу тостағанына құйыңыз.
Бӛтен зат пен сұйықтықты тостаған түбі мен қыздыру элементі арасындағы кеңістікке түсірмеңіз! Бұл ережені ұстанбасаңыз, күйіктің иісі, оғаш дыбыс шығып,
аспап зақымдануы мүмкін.
Мультипісіргіштің қалыпты жұмысы үшін әдеттегіден тыс шу, иіс, түтін немесе аспап жұмысының басқа анық бұзылыстары туындағанда оны бірден желіден
ажырату керек. Тостаған мен қыздыру элементі арасында бӛтен зат немесе сұйықтық жоқтығына кӛз жеткізіңіз. Егер ақау себебі анықталмаса, сервистік
орталыққа жолығу керек. Аспапты ӛз бетімен жӛндеуге тырыспаңыз.
Аспаппен жұмыс аяқталысымен әзірлеу тостағанын бірден суық суға салмаңыз – температура кенет ауысса, ішкі жабынды зақымдануы мүмкін. Тостағанды жуу
алдында суытыңыз.
Тостағанның ішкі беті мұқият және абайлап жұмыс істеуді талап ететін жабындымен жабылған. Тостаған жабындысын зақымдамау үшін ӛндіруші
мультипісіргішпен бірге келетін керек-жарақты пайдалануға кеңес береді. Сонымен қатар, ағаш, пластик немесе силикон керек-жарақты пайдалануға болады.
НАЗАР АУДАРЫҢЫЗ: Мультипісіргішпен жҧмыс істегенде абай болыңыз – ыстық бу мен мультипісіргіштің ыстық бӛлшектері бет пен қолды қатты
кҥйдіруі мҥмкін. Мультипісіргішті пайдаланғанда қауіпсіздік техника ережелерін ҧстаныңыз. Қақпақты ашу тҥймешігін басып, қақпақ толық ашылғанын
және бу толық шыққанын кҥтіңіз және тек сонда ғана ас дайындығы дәрежесін тексеріңіз.

20
АЛҒАШҚЫ ПАЙДАЛАНУ АЛДЫНДА
Аспапты орамынан шығарып, барлық жапсырманы алып тастаңыз.
Аспаптың барлық құрамдастары барын және зақым жоқтығын тексеріңіз.
Барлық құрамдасты «Тазалау және күту» тарауына сәйкес тазалаңыз.
Барлық бӛлшекті құрғатып сүртіңіз және аспап жұмысқа дайын болатындай орнатыңыз.
Аспапты алғашқы пайдаланар алдында тостағаны суға 70% толған «Варка» бағдарламасын 60 минут мерзіміне қосу керек.
ТАЗАЛАУ ЖӘНЕ КҤТУ
Аспапты тазалаудың алдында міндетті түрде электр желісінен ажыратыңыз.
Аспапты толық суытыңыз.
Ас әзірлеу тостағанын жуу құралымен жуыңыз, сумен шайып, жұмсақ матаның кӛмегімен кептіріңіз.
Ас әзірлеу тостағанын ыдыс жуатын машинада жумаңыз.
Аспап пен керек-жарақты тазалау үшін абразивті тазартқыштар мен агрессивті жуу заттарын пайдаланбаңыз.
Аспаптың ішіне ешқандай жағдайда су тигізбеңіз.
Конденсатты жинау контейнері қақпақты ашқанда конденсат тамшыларын жинауға арналған, оны пайдаланған сайын шешіп, жуыңыз.
Бу шығу клапанын аспап пайдаланылған сайын тазалау керек. Клапанды абайлап шешіңіз, бұл кезде кӛп күш салмаңыз. Клапанды бұзып, ағынды суда мұқият
жуыңыз, одан кейін мұқият кептіріңіз, керісінше тәртіппен жинаңыз және орнына орнатыңыз.
Аспап корпусы мен қақпағын ылғал матамен сүртіңіз, одан кейін таза құрғақ матамен кептіріңіз.
Әзірлеу аяқталысымен әзірлеу тостағанын бірден суық суға салмаңыз, бұл ішкі жабындыны зақымдауы мүмкін. Суытыңыз. Қатты суық азықты қызып тұрған
бетке бірден салмау керек.
Аспап корпусын қажет болғанда тазалаңыз, бұл кезде таза жылы су мен жұмсақ мата пайдаланыңыз, абразивті жуу құралдары мен ыдысты жуу құралдарын
пайдаланбаңыз.
ТЕХНИКАЛЫҚ СИПАТТАМАЛАРЫ
Электр қоректену
220-240 Вольт 50 Герц
Қуаты
500 Ватт
Нетто / брутто салмағы
2,2 кг / 2,4 кг
Қорап ӛлшемдері (Ұх Ех Б)
275 мм х 277 мм х 270 мм
КЕПІЛДІК ШЫҒЫН МАТЕРИАЛДАРЫНА (СҤЗГІЛЕР, КЕРАМИКАЛЫҚ ЖӘНЕ КҤЮГЕ ҚАРСЫ ЖАБЫНДЫЛАР, РЕЗИНА НЫҒЫЗДАУЫШТАР МЕН БАСҚАЛАР) ТАРАЛМАЙДЫ.
Аспап жасалу күнін бұйым қорабындағы сәйкестендіру стикерінде және/немесе бұйымның ӛзіндегі стикерде табуға болады. Сериялық нӛмір 13 белгіден тұрады, 4-ші және 5-ші белгі аспаптың жасалу айын,
6-шы және 7-ші белгі жылын білдіреді. Ӛндіруші аспаптың дизайны мен техникалық сипаттамаларын алдын ала ескетпей ӛзгерту құқығын ӛзінде қалдырады.
Ӛндіруші зауыт:
COSMOS FAR VIEW INTERNATIONAL LIMITED
Room 701, 16 apt, lane 165, Rainbow North Street, Ningbo, China
Other manuals for LU-1451
1
Table of contents
Other Lumme Kitchen Appliance manuals

Lumme
Lumme LU-1800 User manual

Lumme
Lumme LU-1831 User manual

Lumme
Lumme LU-3653 User manual

Lumme
Lumme LU-1835 User manual

Lumme
Lumme LU-1250 User manual

Lumme
Lumme LU-1446 CHEF PRO User manual

Lumme
Lumme LU-1448 User manual

Lumme
Lumme LU-1833 User manual

Lumme
Lumme MT-1872 User manual

Lumme
Lumme LFD-108PP User manual