LunaSafe
Safety
Products
TM
www.lunasea.com1-800-272-0170
LL63
INSTRUCTIONS
Transmitter
Press once to turn on strobe.
Press again to turn on blue monitor light.
Press again to turn o.
When in blue monitor mode, blue LED will glow for approx
2 hours before automatically switching to strobe mode. You
can change back to monitor mode by pressing the button.
Strobe will be at full brightness for a minimum of 8 hours
even after the blue monitor mode is run for two hours after
full charge.
When in blue monitor mode, strobe will automatically start
when device is submerged in water and continue until
battery is depleted or user turns o via button push.
If unit is in o mode, strobe will automatically start when
device is submerged in water and continue until battery is
depleted or user turns o via button push.
Device charge time is approximately 1 hour 45 minutes to
full charge from being fully depleted. Less time is needed if
device has some charge left.
Any QI certied charger (similar to cell phone chargers) can
be used.
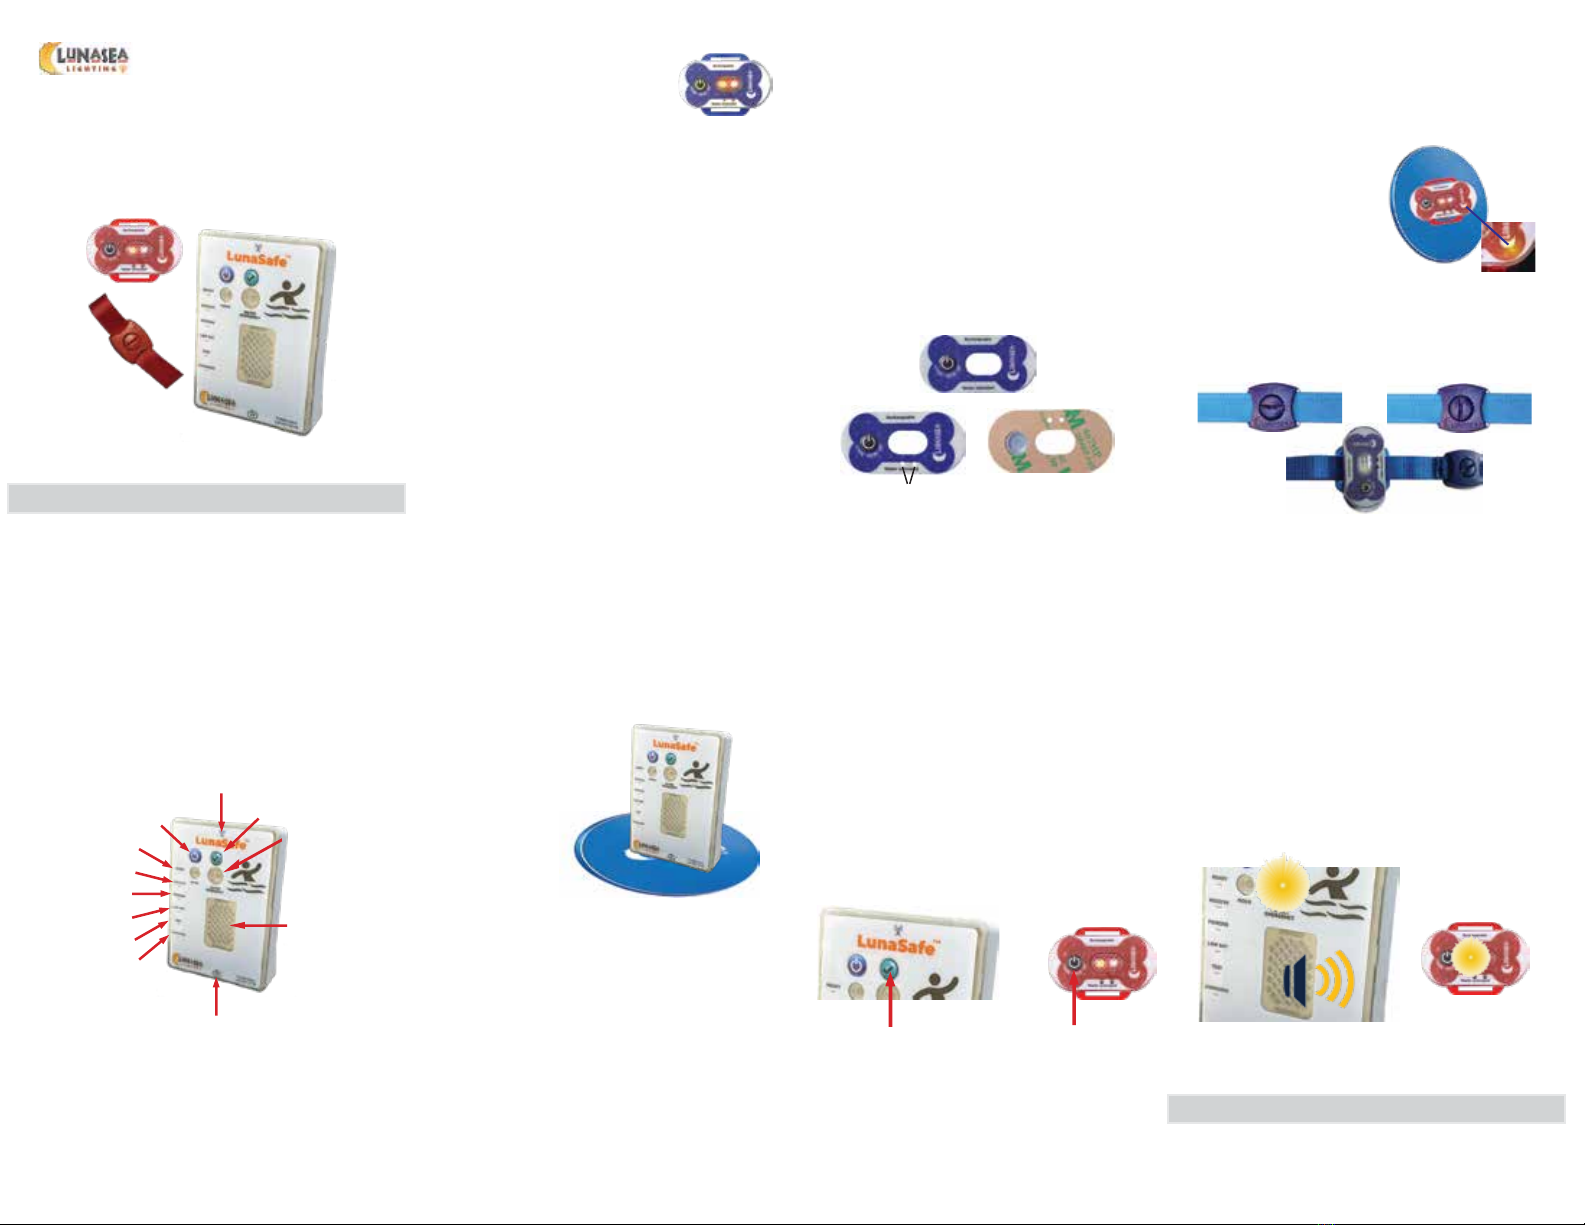
Transmitter Functions
Applying Graphic Label
Choose Graphic Label you would prefer.
Make sure the center and two holes where gold water
sensor pins will protrude are punched out.
Remove protective backer from label. Apply label to unit
making sure the gold pins push through the label
completely. Use your ngernail or dull blunt object to
secure around pins and on balance of label.
Test that sensor pins are not obstructed by wetting nger
and making contact across pins.
WARNING: LABEL CAN NOT BE REMOVED ONCE PLACED.
DOING SO WILL DAMAGE SEAL AND DEVICE WILL NO
LONGER BE WATERPROOF.
Holes Clear Remove Backer
Unlocked Position Locked Position
After threading the nylon strap through safety device and
back through the locking connector, turn locking button 90
degrees as shown using a coin or screwdriver.
Locking Wrist Strap
Place safety device on wireless charge pad so it is in the
center. You will see a green light show through the graphic
indicating that the unit is charging.
Most wireless charge pads
have LED indicators showing
when charging is taking place.
Charging Transmitter
Receiver/Alarm
Wireless Charge Area
Internal Antenna
Pairing Indicator
Receive Indicator
Low Battery Indicator
Ready Indicator
Test Indicator
On/O Button Pair/Reset Button
Charge Indicator
Emergency Strobe Light
Audioable Alarm
Make sure the unit is fully charged by placing it standing up
on a charge pad. Then wait
until Charging Light goes o.
Charging Receiver
Momentarily press On/O Button to turn on. Unit initializes
and then Ready indicator blinks showing unit is in normal
operation.
Turn Receiver On
When battery becomes low the Low Bat Indicator will Blink.
Place unit on Charge Pad until battery is fully charged.
Charging light will then go o indicating full charge.
Low Battery
Press and hold the Check Button for 5 seconds then simply
press the Manual-On button on the tranmitter. You will see
Pairing indicator blink multiple times showing the the
device has been paired. You can do this with up to 25
tranmitters.
To delete all pairing information, press and hold the Check
Button for 10 seconds. This will erase all pairing memory.
You may now pair new units to the receiver.
Each time you turn on your transmitter either in strobe or
monitor you will here a conrming beep from the receiver to
assure you that they are working.
Pairing Receiver with Transmitter
Check Button Manual-On Button
When Transmitter is placed in water the Strobe Light on
the Transmitter activates, the Strobe Light on the Receiver
activates and a Lound Alarm on the Receiver activates. To
reset the Strobe on the Transmitter simply push the
Manual-On Button. Transmitter will need to be dry to reset.
To reset the Receiver, press the Pair/Reset Button or the
On/O Button.
If On/O Button is pressed the unit will not be in o state
and will no longer monitor.
Alarm in Progress
www.lunasea.com
LL63 Instructions Rev 5