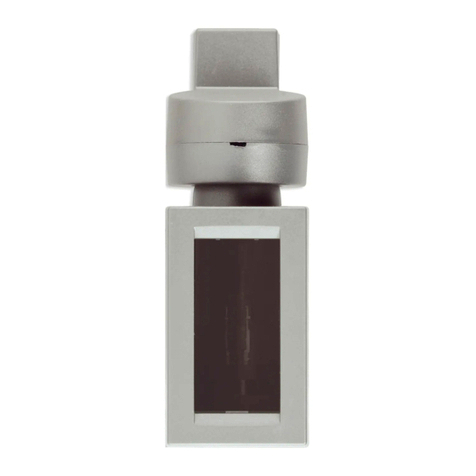
Lutron Electronics Aurora Z3-1BRL Setup guide

1
0301916b 1/2020
Aurora
Aurora Always Ready
Smart Bulb Dimmer
Z3-1BRL
Thank you for purchasing the Aurora Always Ready Smart Bulb Dimmer from Lutron. This document will guide
you through several additional installation topics beyond those covered in the quick-start guide included with
your product.
Table of Contents
Installation Using a PhilipsRHueRBridge ...................................................................Page 2 - 4
Installation Without a Bridge (Standalone) .................................................................Page 5
Multi-location Setup without a Bridge ........................................................................Page 6
Restoring Factory Defaults ..........................................................................................Page 7
Converting from Standalone to a Bridge System.......................................................Page 8
Mounting ........................................................................................................................Page 9
Battery Replacement ....................................................................................................Page 10
Troubleshooting and LED Feedback ...........................................................................Page 11
Removing Base from Knob ..........................................................................................Page 12
Reliability Issues ...........................................................................................................Page 13
Difficulty Mounting to a Toggle Switch .......................................................................Page 14
Unpairing Bulbs / Resetting Bulbs to Factory Defaults .............................................Page 15
Installation Using an Unsupported ZigbeeRHub .......................................................Page 16
Advanced Installation Guide

2
Aurora
1Install 5Install your lights
2Search “PhilipsRHueR” and download the app
Installation Using a PhilipsRHueRBridge
4Update software
6Add your lights to the system
3
Follow the on-screen prompts to commission your
PhilipsRHueRbridge
PhilipsRHueRbridge
Update the PhilipsR HueRbridge software to the latest version.
The Aurora dimmer will not show up in the app without the latest
PhilipsR HueRbridge software.
Select "Settings" and then
select "Light setup" from the
Settings page.
Select “Search” to populate a
list of available lights.
Note: If your light is not found,
you can select “Add serial
number” and enter the serial
number; which can be found
on the individual lights.
Select "Add light."
Install your PhilipsRHueRbridge by following the manufacturer's
instructions.
Screw in and power on your HueRlamps.
b
c
d
a
NOTE: Only compatible with PhilipsRHueRsquare-shape bridge
V2. Not compatible with round-shape Bridge V1.

3
Aurora
Installation Using a PhilipsRHueRBridge (continued)
7Create and assign rooms 8Add Aurora dimmer
Settings > Accessory Setup > Add Accessory >
Friends of HueRSwitch
Create rooms and assign your lights to the appropriate room.
Select "Settings" and then
select "Accessory setup" from
the Settings page.
Select "Settings" and then
select "Rooms & zones" from
the Settings page.
First name your room at the
top, then select the lights that
you wish to add to the room.
Then save your settings.
Select "Create new."
Select "Create new room."
Select "Friends of Hue switch." Select "Lutron Aurora" from the
list of Friends of Hue switches.
Select "Add accessory."
Add your Aurora dimmer to the system and select the room you
want the dimmer to control.
b
c
c
d
e
f
a
a
d
e
b

4
Aurora
Installation Using a PhilipsRHueRBridge (continued)
8Add Aurora dimmer (continued)
As indicated on the app
screen, quickly double-press
the center button on the Aurora
to begin connecting.
Either select "Done" to
complete the setup, or select
"Change settings" if you want
to change the scene which
will be activated by the Aurora
dimmer.
From the list of rooms that you
have previously created, select
the room you want the Aurora
dimmer to control.
Select the icon under the
header "Press" to pick from a
list of scenes.
Select your desired scene, or
choose to have the dimmer
recall your last light level. Save
your settings.
f
gb
a
h
9Select scene for dimmer to activate (Optional)

5
Aurora
Installation Without a Bridge (Standalone)
1Turn the desired lights OFF and then back ON
2 Connect the light
a
b
c
<4 in (10 cm)
63
6 sec +3 sec
NOTE: This allows the lights to connect with controls for about
15 minutes.
NOTE: If you want more than one Aurora dimmer to control the
same set of lights, see the Multi-location Setup Without a
Bridge section on the next page.
While holding the Aurora dimmer as close as possible to
the bulb, press and hold the button on the Aurora dimmer.
The LED on the Aurora dimmer will begin to blink; continue
holding for approximately 9 seconds.
After approximately 6 seconds, the selected light will flash to
indicate which one you are connecting. If the light is correct,
continue holding the button down. If it is the incorrect light,
release the button and start over. Try holding the Aurora
dimmer closer to the light you are trying to connect.
Continue holding the button until the LED on the Aurora
dimmer begins to rapidly flash (should be about 3 seconds
after light flashed). When the LED stops flashing, Aurora is
ready for use.
Repeat steps a–b for all additional lights you wish to control
with your Aurora dimmer.
NOTE: When pairing an Aurora dimmer directly to multiple PhilipsR
HueRbulbs (standalone), it may be easier to pair each of the bulbs
one at a time in a table lamp before installing the bulbs in their
final location so that you are able to get the Aurora dimmer close
enough to the bulb. Additionally, having only one bulb powered
at a time will ensure that the desired bulb is paired to your Aurora
dimmer.

6
Aurora
Multi-location Setup without a Bridge
1Connect lights to first unit
2Pair units to each other
3Connect lights to second unit
Hold both units so they are as close together as possible.
Simultaneously press & hold the button on both units until the LED
on both Aurora dimmers flash rapidly; approx. 12 seconds.
NOTE: It is important to connect the Aurora dimmers to each
other. If you do not, the second Aurora dimmer will steal the lights
away from the first Aurora dimmer when they are connected to the
second unit. To add more than two Aurora dimmers, continue to
connect additional factory-new or factory-default Aurora dimmers
to the first unit.
On the second unit, repeat Step 1 for all lights that the dimmer
will control.
a
b
c
d
While holding the Aurora dimmer as close as possible to
the light, press and hold the button on the Aurora dimmer.
The LED on the Aurora dimmer will begin to blink, continue
holding for approximately 9 seconds.
After approximately 6 seconds, the light will flash to indicate
which one you are connecting. If the light is correct,
continue holding the button down. If it is the incorrect light,
release the button and start over. Try holding the Aurora
dimmer closer to the light you are trying to connect.
Continue holding the button until the LED on the Aurora
dimmer begins to rapidly flash.
Repeat steps a–c for all additional lights you wish to control
with your Aurora dimmer.
Multiple Aurora dimmers can be used to control the same group
of lights in standalone mode. Special steps need to be taken to
allow more than one Aurora dimmer to control the same set of
lights. Without following these steps, programming a second
Aurora dimmer to lights which have previously been connected
to another Aurora dimmer, will result in the second Aurora
dimmer stealing the lights away from the first Aurora dimmer.
Please follow the steps below carefully.
NOTE: Up to 6 Aurora dimmers can be programmed to control
the same set of lights in a standalone system.
<4 in (10 cm)
63
6 sec +3 sec
<4 in (10 cm)
63
6 sec +3 sec

7
Aurora
Restoring Factory Defaults
1Tap button quickly 3x
2
On the third tap, continue holding until LED blinks
(6 seconds)
3
Once LED is blinking quickly tap button 3x again.
LED will flash rapidly to show success.
66 sec
3x
Follow the instructions below to erase device settings (including
light or bridge pairings) and return to factory defaults.
3x

8
Aurora
Converting from Standalone to a Bridge System
NOTE: Please see the previous section for how to Restore Factory
Defaults to your Aurora dimmer.
NOTE: The lights that were previously connected directly to an
Aurora dimmer will not be automatically discovered by the app.
These can be added to the system by manually typing the serial
number on the light into the app.
If you previously had an Aurora dimmer connected to a lamp
without a bridge, and you wish to add it to a bridge system,
please follow the steps below, or reset the lights to factory
defaults as described on page 15.
1Restore the Aurora dimmer to the factory defaults
2
Add the Aurora dimmer by following the prompts on
the app (see page 2)

9
Aurora
1 Make sure light is ON
2
While the light is ON, place base over the toggle
switch as shown
3 Install mounting base
Mounting
4Attach knob to mounting base
OR
AND
While holding the base against the wallplate, use a Phillips
head screwdriver to turn the screw until the clamp has securely
attached to the toggle switch.
Align opening with
toggle switch
Snap knob on to the mounting base.
NOTE: To mount the knob on the base, it is important to align the
knob properly. The cutout in the back of the product is made to
accommodate your toggle switch. If the knob doesn't snap on
easily, double check the alignment.
NOTE: If there is more than one switch which controls a set
of lights, some of the switches on that circuit will be "up"
in the On position, and some will be "down" in the position
which usually indicates the switch is Off. Rotate the base
until it is as shown above.
CORRECT
INCORRECT

10
Aurora
Battery Replacement
Using a #1 Phillips head
screwdriver, loosen the screw in
the battery door. Unscrew just
enough that the battery door
comes loose but the screw
remains attached.
Place a rubber band between your finger and the battery to
improve your grip.
Stick a piece of scotch tape to the battery and pull to remove.
Pull down gently to open the
battery door.
Slide the battery straight up
to remove.
1 Pull knob away from base
Option 1
Option 2
2 Loosen screw and open battery door
3 Slide to remove/install
WARNING: Risk of fire, explosion, and burns. May
result in serious injury or death. DO NOT recharge,
disassemble, crush, puncture, heat above 212 °F (100
°C) or incinerate the battery.
The battery in this device contains Perchlorate material,
special handling may apply. For more information, visit
www.dtsc.ca.gov/hazardouswaste/perchlorate
+
Grab the outside of
the knob and pull it
straight away from
the mounting base to
remove.
Tips for Removing the Battery
Selecting a Battery
NOTE: Due to natural oils on your finger, it can be difficult to slide
the battery out for removal. Many common household items
can help.
The Aurora dimmer is designed and tested with Panasonic
CR2032 batteries. For the best performance, it is recommended
that batteries are replaced using the same Panasonic battery.

11
Aurora
Troubleshooting and LED Feedback
Two slow blinks after a press
(Not connected/Light is switched off)
Double blink after a press
(Communication failure)
Slowly fading in and out
(Connecting is in progess)
Red LED blinks after a press
(Low battery)
Red LED continuously blinks without using unit
(Unit resetting, replace battery. If issue persists,
contact Lutron Customer Assistance).
Blinks rapidly
(Connecting successful)
2x
2x

12
Aurora
Removing Base from Knob
1 Use screwdriver to pull knob away from base
Gently insert flathead screwdriver in small slot between the
mounting base and the knob.
If for any reason your base is attached to your knob when the
base is not attached to your switch, here is how to separate the
two pieces.
a
c
b
Twist the flathead screw driver to unsnap the mounting base
from the knob.

13
Aurora
Reliability Issues
If you are experiencing issues with responsiveness of your lights
to button presses or rotary dimming, you may have RF range or
interference issues.
a
b
Ensure your PhilipsRHueRbridge is located per the
manufacturer's recommendations. If using in a standalone
system, ensure that the Aurora dimmer is located within 30
ft (9 m) of the closest smart light to which it is connected.
Zigbee Channel Changing - since the device operates in the
same 2.4 GHz wireless band as other common household
products, missed button presses or rotary dimming may be
caused by interference. If you are experiencing interference,
you can change the RF channel that your system is using.
Select "Settings" and then
select "Hue Bridges."
Select the information icon
"i" next to the Hue bridge on
which you wish to change the
Zigbee channel.
a
bc
d
f
Select "Zigbee channel
change."
Ensure all lights are powered,
then select "Change channel."
NOTE: Channel changing will take approximately 30 seconds.

14
Aurora
Difficulty Mounting to a Toggle Switch
Aurora toggle tape is a solution for attaching the rotary dimmer to
older toggle switches made from a material to which the clamp
may have difficulty attaching.
Toggle tape may be required for switches manufactured before
1980. Toggle tape is optional and should only be used if the user
has tried to attach the mounting base, but was unable to securely
attach to the switch.
1 Clean the toggle switch
2 Apply tape
3 Install rotary dimmer as normal
Lightly apply isopropyl alcohol on a clean cloth and use it to
clean the switch. If you do not have isopropyl alcohol, damp-
ening a clean cloth with water is an acceptable substitute.
Ensure the toggle switch is dry, then apply the toggle tape to the
bottom of the toggle switch and carefully wrap around the top of
the switch (shown below).
With the tape now applied, squeeze the toggle switch between
your fingers to ensure it is firmly attached to the switch.
NOTE: Do NOT use scotch tape or any other household tape.
It will not work as directed.
NOTE: If you do not have toggle tape, please contact Lutron
Customer Assistance.
Install rotary dimmer as per instructions in the Mounting section.

15
Aurora
Unpairing Bulbs / Resetting Bulbs to Factory Defaults
1 Turn power to the light OFF and then back ON
Follow the instructions below to erase all of a bulb’s pairings (to
remotes and/or a hub) and reset it to the “factory default” state.
NOTE: This allows the lights to connect with controls for about
15 minutes.
NOTE: Power must be removed and then re-applied to bulb by
toggling the wall switch, by turning the lamp switch OFF and then
ON, or by unscrewing and then re-screwing in the lamp (being
careful to make sure it’s not hot).
2 Hold the Aurora dimmer as close as possible to
the bulb
<4 in (10 cm)
3Tap button quickly 3x
3x
4 On the third tap, continue holding button for a long
time (19 seconds total)
a
b
c
<4 in (10 cm)
63
16 sec +3 sec
The Aurora LED will “slow-flash” during this hold time – keep
holding the button.
After about 16 seconds of holding, the light should flash to
indicate which one you are selecting. If this is the correct
light, KEEP HOLDING the button. If it is not the correct light,
release the button and start again from Step 2.
After about 3 seconds of additional holding, the LED on
Aurora should start to rapidly flash – once this happens, the
bulb has been reset to factory defaults and you can release
the button. If the Aurora LED doesn’t rapidly flash, but
instead simply stops flashing, then release the button and try
the procedure again from Step 2.

16
Aurora
Installation Using an Unsupported ZigbeeRHub
Follow the instructions below to pair an Aurora dimmer to a
third-party ZigbeeRhub that doesn’t have app support for the
Aurora dimmer. If you have PhilipsRHueRor other compatible
ZLL lamps in the same ZigbeeRhub system, then this procedure
should enable you to control the lamps both from the Aurora
dimmer and from the hub (via app, etc. like you controlled it
before). The Aurora dimmer may not show in the third-party app
after completing the steps below.
1 Start with a new or factory default Aurora
2 Add bulbs to the system 6 Pair to lamps
7 Finish
3 Put hub into “Add ZigbeeRDevice” mode
If the Aurora dimmer has already been paired to bulbs or
another system before, first reset it to factory defaults (see
instructions on page 7).
Add any desired Hue (or other compatible ZLL*) bulbs to the
hub system (if they aren’t already part of system). Now you can follow the procedure described in the section
“Installation Without a Bridge (Standalone)” on page 5 to pair the
Aurora directly to the desired bulbs.
NOTE: If you want more than one Aurora to control the same
lights, you should follow the “Installation Using an Unsupported
Zigbee Hub” procedure for each one. You should NOT perform the
“Multi-location Setup without a Bridge” procedure in this case.
You should now be able to control the paired bulbs from an
Aurora, and from the hub app (or the other ways you previously
controlled the bulbs through the hub).
* Non-PhilipsRZigbeeRLight Link (ZLL) lights on the market may
not work with an Aurora dimmer. The results will vary depending
on the particular make and model of bulb. Contact Lutron
Customer Assistance if issues are encountered with a particular
ZLL bulb.
Remove the Aurora’s battery for 10 seconds, and then re-insert
it. This is a workaround to help synchronize the Aurora with the
unsupported hub type - this MUST be done if your unit was
manufactured before October 2019, otherwise the next step
won’t work. If your Aurora was manufactured on or after October
2019, you shouldn’t need to perform this step. To verify if this step
is needed, look at the sticker on the back of the Aurora device.
There should be a small 3-digit code on the left side, e.g. “4C0”.
The middle digit is the year, where C = 2019, D = 2020, and
E = 2021. The left and right digits together are the week of the
year that your unit was manufactured - if those digits are 40 or
greater, or if your letter is “D” or greater, then your unit is new
enough that it doesn’t need this step.
Quickly double-press the center button on the Aurora to make
it connect to the hub. The Aurora LED will start showing a slow
“breathing” (fading up and down) animation while it is trying
to connect. The Aurora will give “fast flash” LED feedback if it
successfully joins the hub network (it usually takes
5-15 seconds, but in rare cases it can take up to 3 minutes).
The hub’s app may or may not give some sort of feedback
about a device joining/being added.
In the hub’s app, go to “Add Device” mode (which could
be called “Add Switch”, “Add Remote”, “Add Other”, or
even “Add Bulb”, depending on the app) to make hub start
scanning for new ZigbeeRdevices.
NOTE: If the hub supports multiple wireless protocols (e.g.,
ZigbeeRand Z-WaveR), you will need to ensure that it is put into
a mode where it is scanning for new ZigbeeRdevices.
4Tap button quickly 2x
2x
5 Remove battery

Lutron Contact Numbers
)Lutron, Lutron and Aurora are trademarks or registered trademarks of Lutron Electronics Co., Inc. in the US and/or other countries.
Apple and the Apple logo are registered trademarks of Apple Inc. App Store is a service mark of Apple Inc.
All product names, logos, and brands are property of their respective owners.
WORLD HEADQUARTERS
USA
Lutron Electronics Co., Inc.
7200 Suter Road
Coopersburg, PA 18036-1299
TEL: +1.610.282.3800
FAX: +1.610.282.1243
Customer Assistance: 1.844.LUTRON1
www.lutron.com/support
North & South America Technical Hotlines
USA, Canada, Caribbean:
1.844.LUTRON1
Mexico:
+1.888.235.2910
Central/South America:
+1.610.282.6701
Go to www.lutron.com/smartbulbdimmers for additional information.
Lutron Electronics Co., Inc.
7200 Suter Road
Coopersburg, PA 18036-1299 U.S.A.
P/N 0301916 Rev. B 01/2020
Other manuals for Aurora Z3-1BRL
1
Table of contents
Other Lutron Electronics Home Automation manuals

Lutron Electronics
Lutron Electronics Energi TriPak Family PowPak Fixture Controls User manual

Lutron Electronics
Lutron Electronics RadioRA RALK-2W-SD User manual

Lutron Electronics
Lutron Electronics Maestro IR MIR-600 User manual

Lutron Electronics
Lutron Electronics Caseta Pico Paddle Remote User manual

Lutron Electronics
Lutron Electronics RadioRA2 RRD-H2RLD User manual

Lutron Electronics
Lutron Electronics Caseta Diva Smart Dimmer User manual

Lutron Electronics
Lutron Electronics Caseta Pico PD-6WCL User manual