RadioRA®Setup Guide Addendum for the RS232 Interface 5
Section 1 - Installation
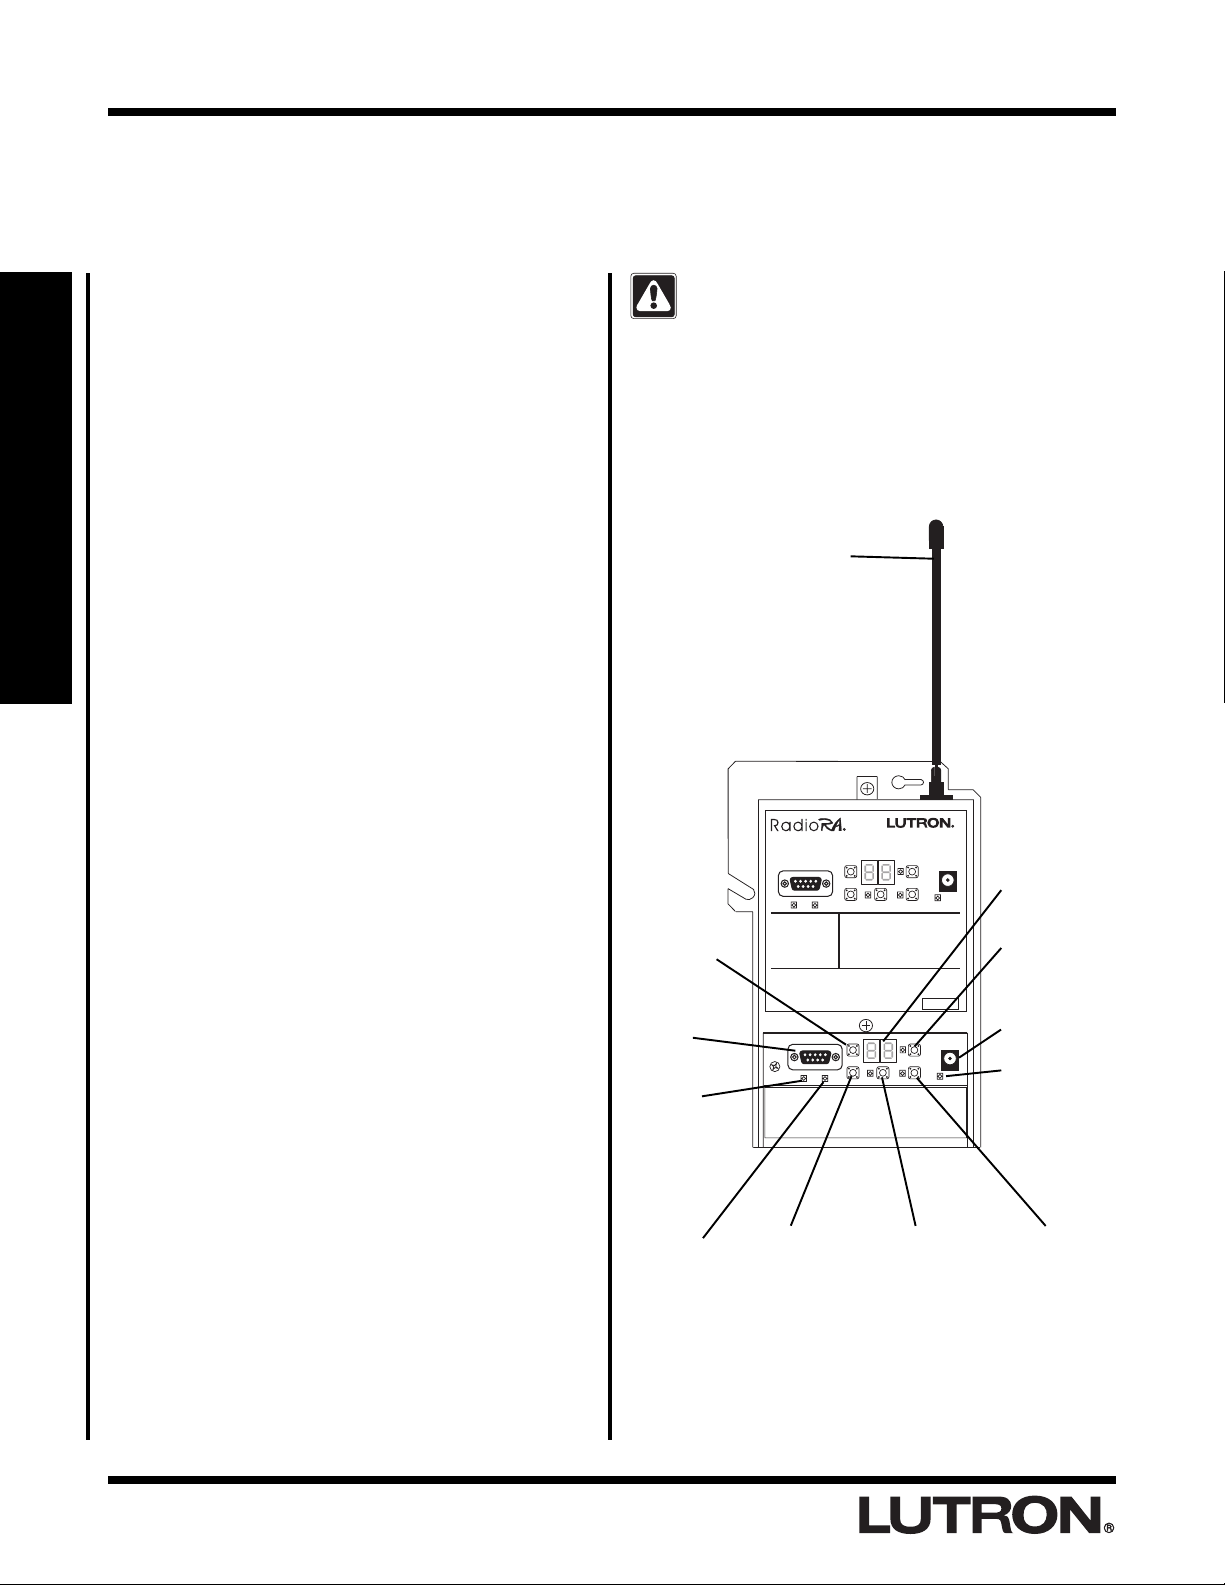
Installing an RS232 Interface
Step 4 Connect the RS232 cable
Connect a DB-9 male RS232 cable to the
RS232 connector.
Step 5 Plug in the power supply
Plug the power supply into a 120VAC, 60Hz
wall receptacle.
Up
Down
Assignment Mode
Level Set Mode PowerSelect
TX RX
Coopersburg, PA USA
Infrered Interface
RA-RS232
Up
Down
Assignment
Mode
Level Set
Mode
PowerSelect
Power
9V
AC IN
Display
Programming Mode
U1 - ROOM/SCENE Selection
Assign LED – SCENE
Level Set LED – ROOM
U2 – Dimmer Number Assignment
U3 – Master Control Number Assignment
U4 – Hardware Handshaking
Assign LED – ON
Level Set LED – OFF
Display
1–15 Phatom Button
Number
16 ALL ON
17 ALL OFF
RS232 Connector
TX RX
See the RA-RS232 Setup
Guide for programming
and operating instructions.
For additional assistance call the
Lutron Hotline:
(800) 523-9466
RadioRA is a trademark of Lutron Electronics Co. Inc.
This product may be covered by one or more of the following
U.S. patents: 5,248,919; 5,399,940; 5,736,965; 5,798,581;
5,838,226; 5,848,054; 5,905,442, 5,982,103
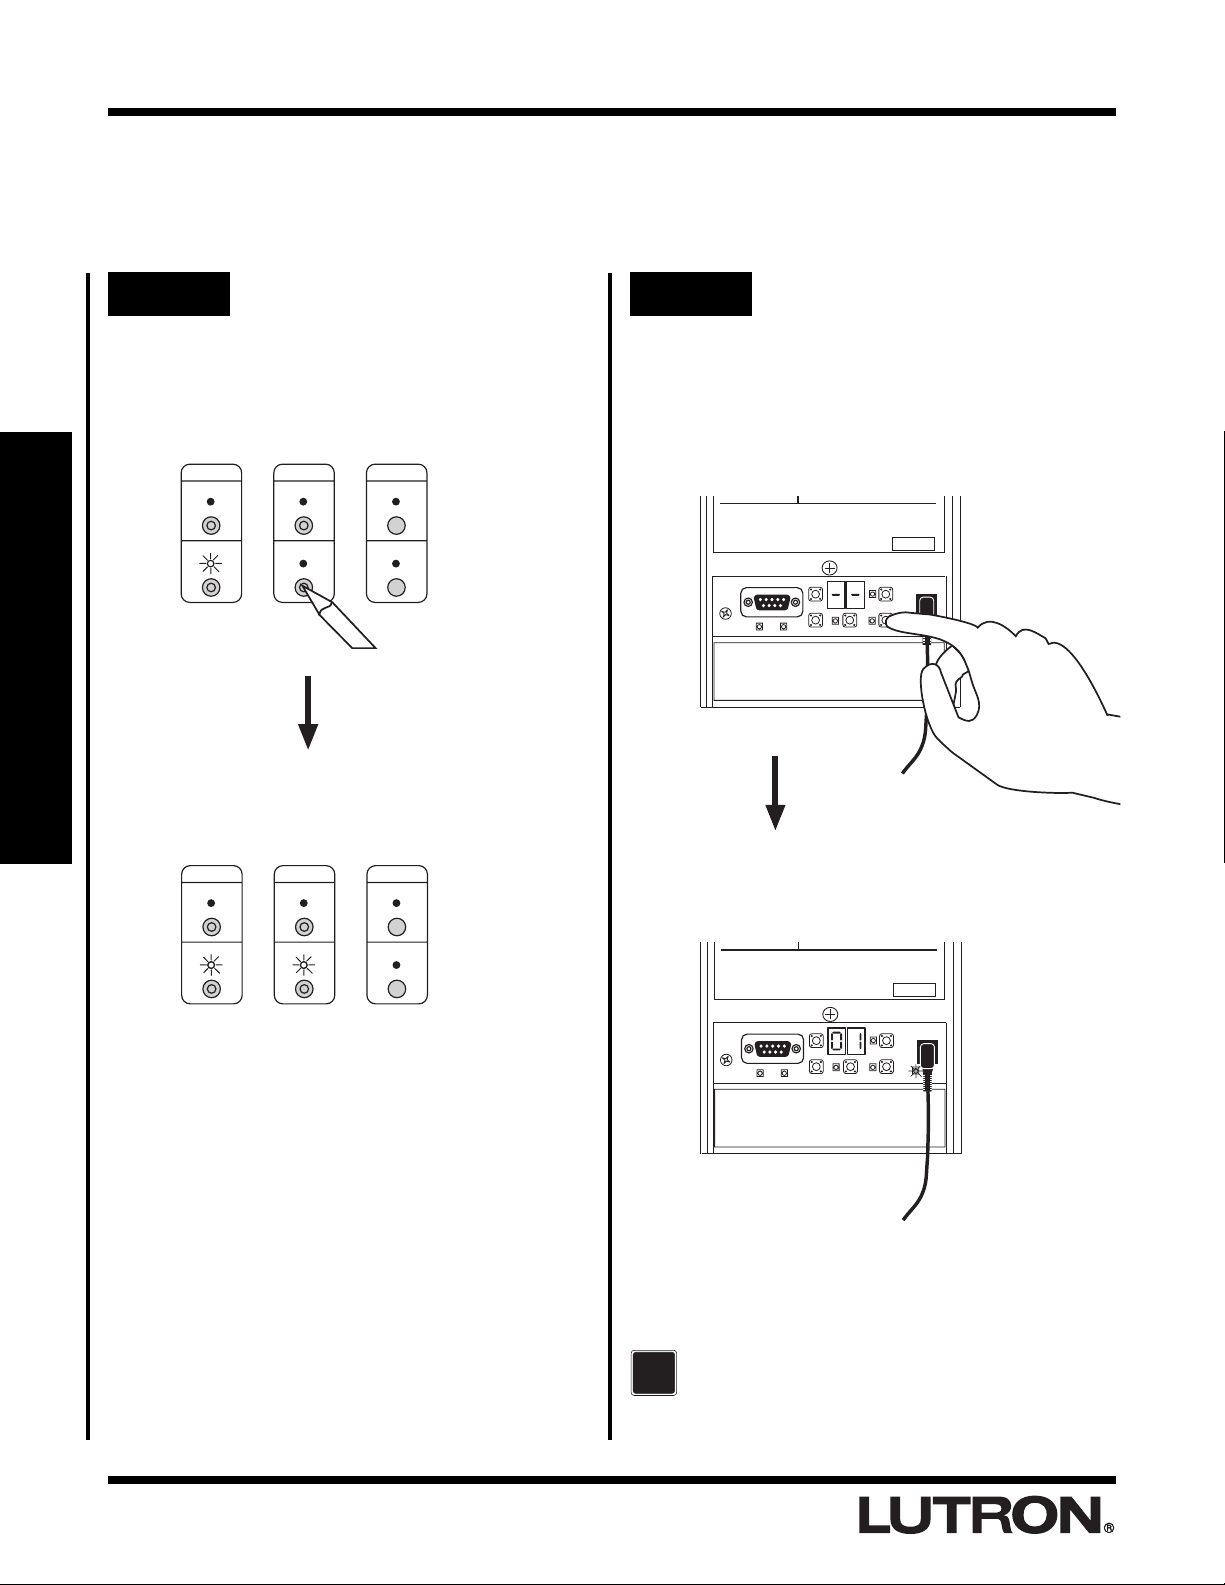
Step 3 Attach the power supply
Remove terminal cover. Attach the power
supply cord to the RS232 Interface (jack
located in the bottom right corner). Power
supply cord must enter unit through a knockout
hole located on either side of the unit. Place the
provided grommet in the knockout hole before
wiring. Note: Terminal cover is only necessary
during shipping.
Remove terminal
cover.
Feed power supply
cord through
knockout hole.
DANGER -
• Do not connect line voltage power to the
RS232 Interface.
• Connecting line voltage power or improper
wiring can result in personal injury or damage
to the control or to other equipment.
Up
Down
Assignment Mode
Level Set Mode PowerSelect
Coopersburg, PA USA
Infrered Interface
RA-RS232
Up
Down
Assignment
Mode
Level Set
Mode
PowerSelect
Power
9V
AC IN
Display
Programming Mode
U1 - ROOM/SCENE Selection
Assign LED – SCENE
Level Set LED – ROOM
U2 – Dimmer Number Assignment
U3 – Master Control Number Assignment
U4 – Hardware Handshaking
Assign LED – ON
Level Set LED – OFF
Display
1–15 Phatom Button
Number
16 ALL ON
17 ALL OFF
RS232 Connector
TX RX
See the RA-RS232 Setup
Guide for programming
and operating instructions.
For additional assistance call the
Lutron Hotline:
(800) 523-9466
RadioRA is a trademark of Lutron Electronics Co. Inc.
This product may be covered by one or more of the following
U.S. patents: 5,248,919; 5,399,940; 5,736,965; 5,798,581;
5,838,226; 5,848,054; 5,905,442, 5,982,103
Up
Down
Assignment Mode
Level Set Mode PowerSelect
TX RX
Coopersburg, PA USA
Infrered Interface
RA-RS232
Up
Down
Assignment
Mode
Level Set
Mode
PowerSelect
Power
9V
AC IN
Display
Programming Mode
U1 - ROOM/SCENE Selection
Assign LED – SCENE
Level Set LED – ROOM
U2 – Dimmer Number Assignment
U3 – Master Control Number Assignment
U4 – Hardware Handshaking
Assign LED – ON
Level Set LED – OFF
Display
1–15 Phatom Button
Number
16 ALL ON
17 ALL OFF
RS232 Connector
TX RX
See the RA-RS232 Setup
Guide for programming
and operating instructions.
For additional assistance call the
Lutron Hotline:
(800) 523-9466
RadioRA is a trademark of Lutron Electronics Co. Inc.
This product may be covered by one or more of the following
U.S. patents: 5,248,919; 5,399,940; 5,736,965; 5,798,581;
5,838,226; 5,848,054; 5,905,442, 5,982,103
To select the proper RS232 cable for your
application, see the RadioRA RS232 Protocol
and Programming Guide (P/N 044-006).
Power Jack
RS232 Connector
To External Device