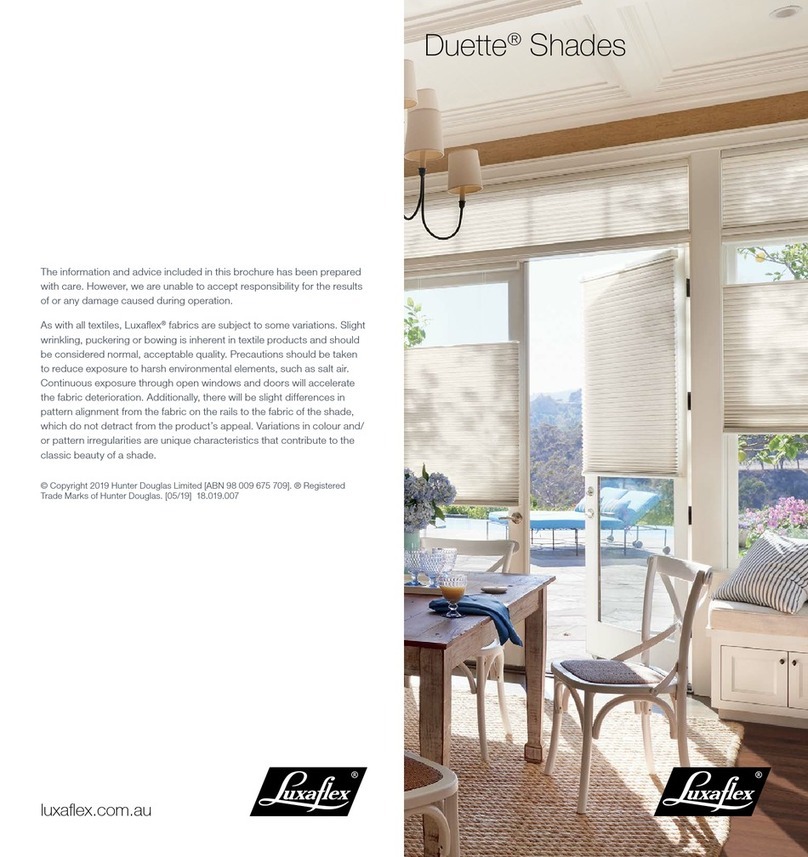
LuxaFlex Duette Parts list manual

Installation
•
Operation
•
Care
Duette
®
Honeycomb
Shades
UltraGlide
®
Lifting
System

CONTENTS
Getting Started:
Product View........................................................................1
Tools and Fasteners Needed ................................................2
Installation:
Installation Overview ..........................................................3
MounttheInstallationBrackets—InsideMount................4
MounttheInstallationBrackets—OutsideMount..............5
MounttheInstallationBrackets—EndMount..............7
Install the Shade...................................................................8
Level the Rail(s),If Necessary ............................................9
Operation:
Operate the Shade............................................................. 10
Troubleshooting................................................................ 11
Care:
Removing the Shade, If Necessary................................... 12
Cleaning Procedures......................................................... 12
Child Safety:
Warning....................................................................14
Questions?
Call the Luxaflex Customer Service at
0800 223 224
©2018Hunter Douglas all rightsreserved.AlltrademarksusedhereinarethepropertyofHunter Douglas or
their
respective owners.

1
GETTINGSTARTED
Product View
Installation
Brackets
UltraGlide
®
Standard
Wand
Top-Down/Bottom-Up
Day/Night
™

2
GETTING STARTED
Thank
you
for
purchasing
Luxaflex
Duette
®
UltraGlide
®
honeycomb
shades.
With
proper installation,
operation, and care, your new shades will provide years of beauty and performance.
Please thoroughly review this instruction booklet and the enclosed packing list before beginning
the
installation.
Tools and Fasteners Needed
■
Flat blade and Phillipsscrewdrivers
■
Level (laser level isrecommended)
■
Measuring tape and pencil
■
Power drill, 2.5mm drill bit, and 6.5mm hex driver
In addition, you will need fasteners designed to work with your specific mounting surface(s).
■
#6 Hex Head Screws (Provided).
Two 40mmscrews are provided per installation bracket.
■
Longer#6HexHeadScrews(NotProvided).
Ifusingspacerblocks,use#6screwslong
enough
for a secureattachment.
■
#6Flat Head Screws (Provided).
Ifend mountingtheshade,usetwo 40mm screws per
installation bracket.
■
SpeedNutsandScrews(Provided).
Extensionbracketscomewithspeednutsandscrews.
■
DrywallAnchors(NotProvided).
Usedrywallanchorswhenmountingintodrywall.
#6 x 40mm
Hex
Head Screw
(Provided)
Longer#6HexHeadScrew
forUsewithSpacerBlocks
(NotProvided)
#6 Flat Head Screw
forUsewithEndMounts
(Provided)
SpeedNut
andScrew
(Provided with Each
Extension Bracket)

3
INSTALLATION
Installation Overview
■
Yourorderwillincludethecorrectnumberofinstallation
bracketsforyourshade width,asshowninthetable.
➤
Therearetwosizesofinstallationbrackets,onefor
10mm and 20mm pleatsizes.
➤
Forendmounts,onlytwobracketsareuseduptothe
maximum width of 1830mm.
Installation
Bracket
End Mount
Brackets
Mounting Types and Window Terminology
Iftheinstallationbracketsaremountedcorrectly,therestoftheinstallationprocessfollows easily.
Toprepareforthisimportantfirststep,reviewthemountingtypesandbasicwindow
terminology
illustrated below.
Molding
■
Refer to the appropriate page below based on your order:
➤
Inside Mount —Page 4
➤
Outside Mount —Page 5
➤
End Mount —Page 7
Shade
Width
(mm)
Brackets
Required
305 - 915
2
916 - 1830
3
1831 –2743
4
2744 –3658
5
3659 - 4420
6
Outside Mount
Shade mounts outside
window opening.
Inside Mount
Shade fits within
window opening.
Collectively, thesill and
jambs are called the
“window casement.”
Sill
Jamb
Jamb
HeadJamb

Proceed to “Install the Shade” onpage8.
4
INSTALLATION
Mount the Installation Brackets —Inside Mount
■
Measure 50mm from each jamb for bracket location.
➤
Ifmorethantwoinstallationbracketscamewithyourorder,spaceadditionalbracket(s)
evenly
betweenthetwoendbracketsandmarktheirlocation.Mountintowood whenever
possible.
50mm
Space Evenly
Space Evenly
50mm
Jamb
Jamb
■
Center the brackets onyour marks,then mark the screw holes.
➤
Theminimumcasementdepthformountingtheinstallationbracketsis 13mm.Markbothof
the
winged screw holes with shallow mounting depths.
➤
Theminimumcasementdepthforafullyrecessedmountis 57mmfor 10mm and 20mm
pleat sizes.Markthecenterscrewhole
when depth permits.
IMPORTANT:
Thefrontedgesofthebracketsmustbelevelandalignedtoeachother.
■
Drill the screw holes using a 2.5mm drill bit.
CAUTION:
Use drywall anchors when mounting into drywall.
■
Usealeveltocheckthatthemountingsurfaceislevel.Shimthebracketsifnecessary.
■
Attach the installation brackets using the screws provided.
Minimum
13mm
Use Center Hole
When Depth Permits

5
INSTALLATION
Mount the Installation Brackets —Outside Mount
■
Centertheheadrailoverthewindowopeningatthedesiredheight.Useapenciltolightly
mark
each end of the headrail on the mounting surface.
➤
Alternatively,measurethewidthoftheheadrailandusethatwidthtomarktheheadrail
end
points over the windowopening.
■
Mark 50mm from each end of the headrail.
➤
Ifmorethantwoinstallationbracketscamewithyourorder,spaceadditionalbracket(s)
evenly
betweenthetwoendbracketsandmarktheirlocation.Mountintowood whenever
possible.
■
Centertheinstallationbracketsonyourmarksandmarkwheretodrillthescrewholes.
➤
Aminimumflatverticalsurfaceof 32mmforinstallationbracketsorextensionbrackets
is
required.
➤
Thetopoftheinstallationbracketsorextensionbracketsshouldbeatthedesiredheight.
The brackets should be level and aligned.
➤
When using extension brackets, mark two screw holes per bracket.
CAUTION:
Therearofthebracketsmustbeflushagainstaflatmountingsurface.Donot
mount
brackets on curvedmolding.
■
Drill the screw holes using a 2.5mm
drill bit.
CAUTION:
Use drywall anchors when mounting into drywall.
HeadrailEndMarks
2"
Space Evenly
Space Evenly
2"
WindowOpening
50mm
50mm

Proceed to “Install the Shade” onpage8.
6
Maximum
40mm
Longer Screw
(Not Provided)
INSTALLATION
■
Attach the installation orextension brackets using the screws provided.
IMPORTANT:
Thefrontedgesofthebrackets
mustbelevelandalignedtoeachother.
■
If using spacer blocks, first attach the installation bracket to the 13mm
spacer block before stacking additional spacer blocks
together.
➤
Insertthelegsoftheinstallationbracketintothetabsonthe
spacer block.
➤
Then rotate the installation bracket back.
■
Attachthespacerblockandinstallationbracketto aflat
verticalmountingsurfacewitha#6mounting
screw
longenoughforasecureinstallation.
➤
Amaximumof 40mm ofspacerblocksper
installationbracketisrecommended.
➤
Thetopofthespacerblocksshouldbeatthe
desired shade height.
IMPORTANT:
Thefrontedgesoftheinstallation
bracketsmustbelevelandalignedtoeachother.
CAUTION:
Use drywall anchors when mounting
into drywall.
■
Ifusingextensionbrackets,attachaninstallation
bracket to the underside of each extension bracket
usingtheprovidedscrewsandspeednuts.
Tab

7
INSTALLATION
Mount the Installation Brackets —End Mount
Endmounttheheadrailwhenconventionalmountingtechniqueswillnotwork—forexample,in
an
arched window opening.
■
Positiontheendmountbracketssothatthetopoftheattachedinstallationbracketsareat
the
ordered height of theshade.
CAUTION:
Bothbracketsmustbeinstalledatthe
same depth andheight.
■
Mark both screw holes.
➤
Themountingsurfacemustbeverticalandflat,
not
part of an arched curve.
➤
Minimummountingdepthis 32mmfor 10mm
and 20mm
pleatsizes.Minimummountingdepth
fora
fullyrecessedendmountis 60mmfor
10mmand 20mm
pleat sizes.
■
Drill the screw holes using a 2.5mm
drill bit.
■
Attachtheendmountinstallationbracketsusingtheflat
screws provided.
CAUTION:
Drywall mounting is not recommended.
IMPORTANT:
For instructions on installing an
arch over a rectangular shade, see the Installation,
Operation, and Care instructions that came with
your
arch shade.
Proceed to “Install the Shade” on page 8.
head
32mm
Minimum
Ordered
Shade
Height

8
INSTALLATION
Install the Shade
■
Fitthefrontchannelontopoftheheadrailontothefrontlip
of
the installationbrackets.
■
Pushtheheadrailupandbackuntilitsnapsintoplace.
■
Checktoensuretheheadrailissecurelyinthebrackets.
➤
Checkthatthebottomoftheheadrailissnappedinto
the
base of eachbracket.
➤
Checkthatthefrontlipofeachbracketisinthefront
channel of theheadrail.
■
If any brackets are not installed correctly, release the shade
and
reinstall.See“Removing theShade,IfNecessary”on
Thefrontofthebracket
fitsunderthegroove.
Bracket
Headrail
Snap
in Place
page12.
The back of the headrail
snaps into the bracket.
Good
Bad

9
INSTALLATION
Level the Rail(s), If Necessary
■
Liftthebottomrailtolocatethepocketsonthe
underside of therail.
➤
WiththemiddlerailonTop-Down/Bottom-Up
shades,thepocketsareonthetopsideof the
rail.
➤
Seebelowforthemiddlerailadjustmenton
Day/Night
™
shades.
■
Gentlypulldownonthebottomrail(oruponthe
middlerail)tofullyinsertthe 3mmEasyAdjust
keyintothepocket.Thekeyisfullyinserted when
theringonthekeyabutstothepocket.
➤
Lift upthe rail slightlybeforeturningthe
EasyAdjustkey.Turnthekeyclockwise to
raisethatsideofthe rail,orcounter-
clockwise to lowerit.
➤
Onequarterturnofthekeyequals
approximately 32mm.
Pocket
Underside of Bottom Rail
(or Top Side of Middle Rail)
IMPORTANT:
TheEasyAdjustkeymustbefullyinsertedtoavoidstrippingthe
mechanism.Donot pull down on the rail while turning the key.
■
If there are more than two pockets, adjust the outer pockets first. Then adjust inner pockets as
necessary, to maintain equal tension across the rail. As pocket adjustments are made, it
is
recommendedthattheshadeberaisedandloweredtocheckthatitislevel.
Adjusting the Day/Night Middle Rail
■
Hexpocketsarefoundattheendsofthe
middlerail,whichislocatedinthetopcellof
the lower fabricpanel.
■
Insert the Easy Adjust key so that its hex-
shapedportionisabouthalfwayintothepocket.
■
Turnthekeyclockwisetoraisethatendofthe
rail
orcounter-clockwise to lower it.
➤
Onefullturnofthekeyequals
approximately 3.2mm.
Lower
Raise
Adjusts
Center
Cord
■
Onshadesover 1524mmwide,therewillbetwohexpocketsintherightendofthemiddlerail.
Usetherearhexpockettoadjustthetensioninthecentercordafteradjustingtheouter
cords to
level the rail.
Lower
Raise
EasyAdjustKey

10
OPERATION
Operate the Shade
Forsmoothoperation,keepthewandclosetothefabricwhenraisingandloweringtheshade.
To Lower the Shade
■
Pullthewandtowardthecenteroftheshadeatabouta 45°
angle.Thelockingmechanismatthetopofthewand releases
witha“click.”Theshadelowersasyouallowthe
wand to
return to the vertical position.
IMPORTANT:
Thewandmustbepulledinclosetothefront of
theshade.Donotpullthewandoutawayfromtheshade.
■
Tostoptheshadewhilelowering,movethewandback
toward
theverticalpositionandgiveaslightdownwardpull
to engage
the locking mechanism.
To Lower
: Pull the wand toward
the center of the shade
and release.
■
Iftheshadehitsanobstructionasitislowereditwillstop,whichmaycausethecordsin
eachcord
routtobecomemisaligned.Thismaycausetheshadetobeangledortiltedwhen
fully raised.If this
occurs, do the following:
➤
Raise the shade slightly.
➤
Lowertheshadecompletelytothesill.Insomecases,pullgentlyonthebottomrailto
get it to
dropcompletely.
IMPORTANT:
Iftheshadeistiltedwhenfullyraised,donotpullharderonthewand.Itdoes
not
correct the tilt and may make it worse.
To Raise the Shade
■
Pull the wand straight down or slightly toward the outside.
➤
With each stroke the shade partially raises.
➤
Allow the wand to retract after each downward stroke.
➤
Use multiple strokes until the shade reaches the
desired position.
Day/Night
™
and Top-Down/Bottom-Up Shades
■
Tooperate Day/Night
™
and Top-Down/
Bottom-Up shades, the right wand
operatesthemiddlerailandtheleftwand
To Raise
: Pull the wand straight
down with short strokes.
This wand
operatesthe
middlerail.
operatesthebottomrail(unlessreverse
controlswerespecifiedontheorder).
IMPORTANT:
You must first lower the
bottom rail before lowering the middle
rail.Likewise,youmustfirstraisethe
middlerailbeforeraisingthebottomrail.
This wand
operatesthe
bottomrail.
Middle
Rail
Bottom Rail

1
1
OPERATION
Troubleshooting
Problem
The shade is hard to raise or lower, or will not raise or lower.
Solution
Makesurethattheshadefabricisnotcaughtbetweentheinstallationbracket
and the
headrail.
Checkthattheheadrailandinstallationbracketsarelevelandaligned.Shimthe
installation brackets to level the headrail, if necessary.
Problem
The shade raises orlowers unevenly, or the bottom rail is uneven when
fully
raised.
Solution
Checkthattheheadrailandinstallationbracketsarelevelandaligned.Shimthe
installation brackets to level the headrail, if necessary.
Checktoseeifthereisanobstructionintheshade’s path.Iftheshadehits an
obstructionasitislowereditwillstop,butthecordsineachcordroutmay
becomemisaligned.See“OperatetheShade”onpage10.Thismaycausethe shadeto
beangledortiltedwhenfullyraised.Ifthisoccurs,dothefollowing:
➤
Raise the shade slightly.
➤
Lowertheshadecompletelytothesill.Insomecases,pullgentlyonthe
bottom rail to get it to drop completely.
IMPORTANT:
Iftheshadeistiltedwhenfullyraised,donotpullharderonthe
wand.Itdoes not correct the tilt and may make it worse.
Adjust the shade. See “Level the Rail(s), If Necessary” on page 9.
Problem
The shade will not fit into the installation brackets.
Solution
Check that the installation brackets are level and aligned. Shim the installation
brackets to
level the headrail, if necessary.
Be sure the heads of the screws are flush against the installation bracket.
Check that the headrail is completely inserted into the installation brackets.
See
“Install the Shade” on page 8.

12
CARE
Removing the Shade, If Necessary
■
Lowertheshadeapproximately
102mm.
■
While holding the headrail, push
backonthebottomtabofthe
installationbracketwithaflat
headscrewdrivertoreleasethe
bottom of the headrail.
■
Thenrollthebackoftheheadrail
downandoutfromthebracket.
Bracket
Cleaning Procedures
Luxaflex
Duette
®
honeycomb
shades
are
made
of
anti-static,
dust-resistant
fabric
which
repelsdirtanddust.
Formosthoneycombfabrics,thefollowingcleaningoptionsareavailable.
Dusting
■
Regularlightdustingwithafeatherdusterisallthecleaningthatisneededinmost
circumstances.
Vacuuming
CAUTION:
Do not vacuum Elan
®
fabrics.
■
For deeper cleaning, vacuum gently with a brush attachment.
Compressed Air/Hair Dryer (Cool Setting)
■
Usecompressedairorahair-dryeronacoolsettingtoblowdustanddirtoffshades.
Spot-Cleaning
CAUTION:
Donotspot-cleanAlexa,Elan and India Silk
fabrics.
■
Prepare a solution of warm water and a mild detergent.
■
Dampen a clean cloth in the solution and wring it out.
■
Dabthe spotwiththedampened clothuntilitisremoved.Donotrubthe fabric.
■
Allow the shade to dry in the completely lowered position.
Remove
Back of
Shade
Headrail
Bottom
Tab

1
3
CARE
Bathtub Cleaning/Water Immersion
CA
UTION:
Do
not
immerse
Alexa,
Elan
®
,
India
Silk,
Panache
™
and
all
opaque
fabrics.
■
Immersetheshadeinabasinorbathtubfilledwithwarmwaterandamilddetergent.
IMPORTANT:
Never immerse the headrail into the solution.
■
Rinse with clean water.
■
Beforeremovingfromtherinsewater,fullyraisetheshadeandtiltittoallowexcesswater
to
drain off.
■
Dry the shade completely in the lowered position.
Ultrasonic Cleaning
CAUTION:
Do not ultrasonically clean Sheer and all
opaque fabrics.
■
Specify that a mild detergent solution be used.
IMPORTANT:
Never immerse the headrail into the solution.
■
Dry the shade completely in the lowered position.
Injection/Extraction Cleaning
Thistypeofprofessionalcleaninginjectsacleaningsolutionintothefabricandextractsthedirty
solution
in the samemotion.
■
Useonlythe dry method ofinjection/extraction forElan fabrics.
■
If using injection/extraction for Alexa fabrics, specify
that no chemicals are used (water only).
Headrail Cleaning
CAUTION:
Never use abrasive cleaning methods or harsh chemicals.
■
Dampen a soft, clean cloth in warm water and wring it out.
■
Gently wipe the headrail to remove dirt and dust.
CHILD SAFETY

Young children can wrap cords around their necks and STRANGLE.
■
Always keep cords out of the reach of children.
■
Move cribs, playpens and other furniture away from cords. Children can climb
furniture to get tocords.
WARNING
Formoresafetyinformationcall0800 223 224
NOTE:
Thewarninglabelsonthebottomrailsofcordedwindowcoveringscontain
important safety
information. These warning labels are designed to be permanent, in
accordancewiththeindustry’s
safetystandards,andmustnotberemoved.
Other manuals for Duette
4
This manual suits for next models
1
Table of contents
Other LuxaFlex Indoor Furnishing manuals
LuxaFlex
LuxaFlex Duette User manual

LuxaFlex
LuxaFlex Duette User manual

LuxaFlex
LuxaFlex Roller Blinds XL User manual

LuxaFlex
LuxaFlex Modern Roman User manual
LuxaFlex
LuxaFlex Silhouette Series User manual

LuxaFlex
LuxaFlex Roman Shades User manual
LuxaFlex
LuxaFlex Pirouette User manual
LuxaFlex
LuxaFlex PolySatin User manual

LuxaFlex
LuxaFlex Duette Parts list manual

LuxaFlex
LuxaFlex PowerView User manual