manuals.online logo
Brands
  1. Home
  2. •
  3. Brands
  4. •
  5. Teknik
  6. •
  7. Indoor Furnishing
  8. •
  9. Teknik Barrister Home Credenza 5421458 User manual

Teknik Barrister Home Credenza 5421458 User manual

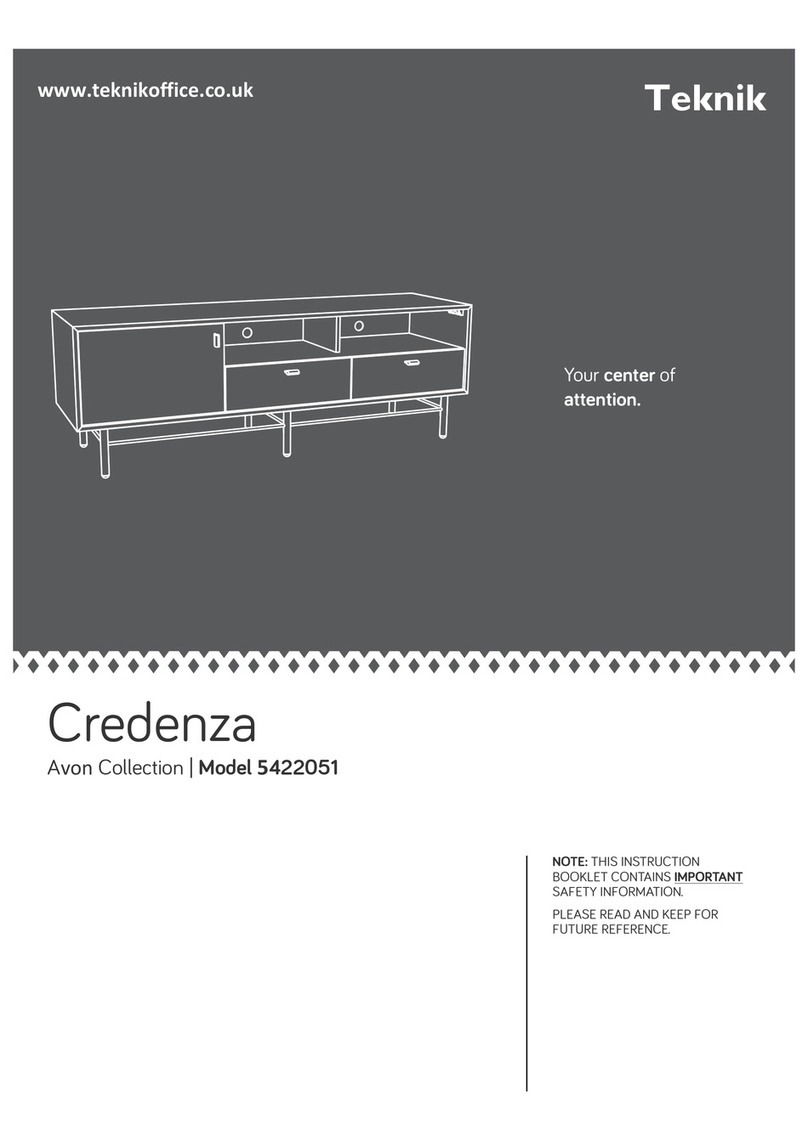
Credenza
Barrister Home Collection | Model 5421458
NOTE: THIS INSTRUCTION
BOOKLET CONTAINS IMPORTANT
SAFETY INFORMATION.
PLEASE READ AND KEEP FOR
FUTURE REFERENCE.
Your center of
attention.
Teknik
www.teknikoffice.co.uk
Table of Contents Assembly Tools Required
Part Identification
Hardware Identification
Assembly Steps
Safety
No. 2 Phillips Screwdriver
Tip Shown Actual Size
3
4
5-22
23
Skip the power trip.
This time.
70 lbs.
70 lbs.
18-3/4"
18-3/4"
59-1/4"
59-1/4"
WARNING
!
Use of a TV that is too heavy or lare is hazardous. A TV that is too heavy will create a risk of a tip-over that can cause severe injury or
death. A TV that is too lare for the available space miht be accidentally pushed or bumped o the furniture, or subject to tip-over.
• Check the size and weiht of your TV. Compare it to the diaram below – before you begin assembly!
• This Sauder unit is desined for use with televisions weihin less than 70 pounds. Never use with a TV that weihs more.
• The size of the television, front-to-back and side-to-side, must fit within the space defined in the diaram.
• Never place the front ede of the TV past the front ede of the TV support shelf (or stop moldin – if equipped)
• Never allow the sides of the TV to extend past the side edes of the TV support surface.
• If the TV has a CRT picture tube, the picture tube cone may extend past the rear of the support shelf.
• Be sure to apply the warnin label as instructed in the last assembly step. The label provides important safety related information.
Pae 2
Straiht Ede Screwdriver
Part Identification
åWhile not all parts are labeled, some of the parts will have a label or an inked letter on the ede
to help distinuish similar parts from each other. Use this part identification to help identify similar parts.
Now you know
our ABCs.
A RIGHT END (1)
B LEFT END (1)
C UPRIGHT (1)
D SHELF (1)
E BOTTOM (2)
F TOP (1)
G TOP FRAME (1)
H SHELF FRAME (1)
I UPPER BOTTOM FRAME (1)
J BOTTOM FRAME (1)
K BACK (2)
L LEG (6)
M GLASS DOOR (2)
A
B
C
D
E
F
G
H
I
J
K
L
E
K
L
L
L
L
L
M
M
Pae 3
Hardware Identification
åScrews are shown actual size. You may receive extra hardware with your unit.
BLACK 1/2" LARGE PAN HEAD SCREW - 88
14 BLACK 1/2" SMALL PAN HEAD SCREW - 8
15
BLACK 1/2" FLAT HEAD SCREW - 24
13
(Refer to the last step for proper location and application)
WARNING LABEL - 1
9
522,68 22,68
70 lbs. 31,75 kg 31,75 kg
BLACK 1-1/2" FLAT HEAD SCREW - 2
11
WOOD DOWEL - 4
3
KNOB - 4
5
16 BLACK 12" MACHINE SCREW  4
BLACK 7/8" WAFER HEAD SCREW - 8
12
STOP BRACKET - 4
4
BLACK 2-1/4" PAN HEAD SCREW - 4
10
CAM COVER CARD - 1
7
DOOR GLIDE - 4
6
BLACK SCREW - 4
8
HIDDEN CAM - 2
1CAM SCREW - 2
2
Pae 4
Step 1
å Assemble your unit on a carpeted floor or on the empty
carton to avoid scratchin your unit or the floor.
å Push two HIDDEN CAMS (1) into the UPRIGHT (C).
å Turn two CAM SCREWS (2) into the TOP (F).
Pae 5
2
Arrow
The arrow in the HIDDEN
CAM must point toward the
hole in the ede of the board.
Hole
Arrow
1
C
F
Step 2
Pae 6
å Stand the UPPER BOTTOM FRAME (I) onto its lon ede as shown.
å Slide three LEGS (L) throuh the holes in the UPPER BOTTOM
FRAME (I) as shown in the upper diaram.
å Fasten the LEGS (L) to the UPPER BOTTOM FRAME (I). Use three
BLACK 1/2" FLAT HEAD SCREWS (13).
å NOTE: Be sure to use the second hole from the capped ends of the LEGS.
å Then, carefully flip the assembly over. Slide three LEGS (L) throuh the
holes in the UPPER BOTTOM FRAME (I) as shown in the lower diaram.
å Fasten the LEGS (L) to the UPPER BOTTOM FRAME (I). Use three
BLACK 1/2" FLAT HEAD SCREWS (13).
å NOTE: Be sure to use the second hole from the capped ends of the LEGS.
Some assembly
(and snacks) required.
L
L
L
Ede with holes
BLACK 1/2" FLAT HEAD SCREW
(6 used in this step)
13
The brackets will be
even with this ede.
L
L
L
I
Use the second
hole from the
capped end of
the LEGS.
Capped end
Capped end
I
Step 3
Pae 7
å Fasten a BOTTOM (E) to the UPPER BOTTOM FRAME (I).
Use twelve BLACK 1/2" LARGE PAN HEAD SCREWS (14)
throuh the tabs on the UPPER BOTTOM FRAME and
into the holes in the BOTTOM.
å NOTE: You may want to start each SCREW a few turns
before completely tihtenin any of them.
I
E
BLACK 1/2" LARGE PAN HEAD SCREW
(12 used in this step)
14
Surface with holes
Tab
Do not stand the unit upriht without the
BACKS fastened. The unit may collapse.
Caution
Step 4
Pae 8
å Fasten the BOTTOM FRAME (J) to the remainin
BOTTOM (E). Use twelve BLACK 1/2" LARGE PAN HEAD
SCREWS (14) throuh the tabs on the BOTTOM FRAME
and into the holes in the BOTTOM.
Surface with holes
E
The tab is closer
to this ede.
J
BLACK 1/2" LARGE PAN HEAD SCREW
(12 used in this step)
14
Step 5
Pae 9
L
L
L
L
L
L
J
Surface with holes
å Slide the BOTTOM FRAME (J) onto the LEGS (L).
å Fasten the LEGS (L) to the BOTTOM FRAME (J). Use six
BLACK 1/2" FLAT HEAD SCREWS (13).
BLACK 1/2" FLAT HEAD SCREW
(6 used in this step)
13
The holes should be
closer to this ede.
å Fasten the STOP BRACKETS (4) to the ENDS (A
and B) exactly as shown. Use four BLACK 1/2" SMALL
PAN HEAD SCREWS (15).
å Fasten the DOOR GLIDES (6) to the ENDS (A and B)
exactly as shown. Use four BLACK 7/8" WAFER HEAD
SCREWS (12).
Step 6
Pae 10
A
B
6
6
4
4
BLACK 7/8" WAFER HEAD SCREW
(4 used in this step)
12
BLACK 1/2" SMALL PAN HEAD SCREW
(4 used for the STOP BRACKET)
15
å Insert four WOOD DOWELS (3) into the edes of the
UPRIGHT (C) as shown.
å Fasten the STOP BRACKET (4) to the UPRIGHT (C). Use
two BLACK 1/2" SMALL PAN HEAD SCREWS (15).
å Fasten the DOOR GLIDE (6) to the UPRIGHT (C). Use two
BLACK 7/8" WAFER HEAD SCREWS (12).
å Flip the UPRIGHT (C) over and fasten a STOP BRACKET (4)
to the UPRIGHT. Use two BLACK 1/2" SMALL PAN HEAD
SCREWS (15).
å Then, fasten the DOOR GLIDE (6) to the UPRIGHT (C). Use
two BLACK 7/8" WAFER HEAD SCREWS (12).
Step 7
Pae 11
3
4
F
L
I
P
O
V
E
R
3
BLACK 1/2" SMALL PAN HEAD SCREW
(4 used for the STOP BRACKET)
15
C
6
6
BLACK 7/8" WAFER HEAD SCREW
(4 used in this step)
12
4
Surface with
HIDDEN CAMS
Surface without
HIDDEN CAMS
C
å Fasten the SHELF FRAME (H) to the SHELF (D). Use
twelve BLACK 1/2" LARGE PAN HEAD SCREWS (14)
throuh the tabs on the SHELF FRAME and into the holes
in the SHELF.
Step 8
Pae 12
Surface with more holes
D
BLACK 1/2" LARGE PAN HEAD SCREW
(12 used in this step)
14
H
The tab is closer
to this ede.
å Fasten the ENDS (A and B) to the SHELF FRAME (H)
exactly as shown. Use four BLACK 2-1/4" PAN HEAD
SCREWS (10).
Step 9
Pae 13
Now miht be a
ood time to refresh
your drink.
A
B
H
Ede with holes
D
Ede without
STOP BRACKET
Ede without
STOP BRACKET
BLACK 2-1/4" PAN HEAD SCREW
(4 used in this step)
10
å Slide the SHELF FRAME (H) assembly onto the LEGS (L).
å Fasten the SHELF FRAME (H) to the LEGS (L). Use six
BLACK 1/2" FLAT HEAD SCREWS (13).
Step 10
Pae 14
H
Ede with holes
L
L
L
L
BLACK 1/2" FLAT HEAD SCREW
(6 used in this step)
13
L
L
A
B
å Turn four BLACK SCREWS (8) into the exact holes shown
in the TOP FRAME (G). Use a Straiht Ede Screwdriver.
Step 11
Pae 15
G
8
Open end
å Slide the TOP FRAME (G) onto the LEGS (L).
å Fasten the TOP FRAME (G) to the LEGS (L). Use six
BLACK 1/2" FLAT HEAD SCREWS (13).
å NOTE: Be sure the SCREWS in the TOP FRAME insert
into the holes in the ENDS (A and B).
Step 12
Pae 16
Ede with holes
G
L
L
L
L
L
L
BLACK 1/2" FLAT HEAD SCREW
(6 used in this step)
13
A
B
Step 13
Pae 17
å Unfold the BACKS (K) and lay them over your unit.
å Fasten the BACKS (K) to your unit usin forty BLACK 1/2"
LARGE PAN HEAD SCREWS (14).
å NOTE: Be sure to position the BACKS exactly as shown.
å NOTE: Perforations have been provided for access
throuh the BACKS. Carefully cut out the holes needed.
Do not stand the unit upriht without the
BACKS fastened. The unit may collapse.
Caution
K
K
BLACK 1/2" LARGE PAN HEAD SCREW
(40 used in this step)
14
å Carefully stand your unit upriht.
å Fasten the UPRIGHT (C) to the SHELF (D). Use two
BLACK 1-1/2" FLAT HEAD SCREWS (11).
å NOTE: Be sure the WOOD DOWELS in the UPRIGHT
insert into the holes in the SHELF.
Step 14
Pae 18
D
C
Surface with
HIDDEN CAMS
BLACK 1-1/2" FLAT HEAD SCREW
(2 used in this step)
11
Ede with
STOP BRACKET
å Fasten the TOP (F) to the UPRIGHT (C). Tihten two
HIDDEN CAMS.
å NOTE: Be sure the WOOD DOWELS in the UPRIGHT insert
into the holes in the TOP.
å Fasten the TOP (F) to the TOP FRAME (G). Use twelve BLACK
1/2" LARGE PAN HEAD SCREWS (14) throuh the tabs on the
TOP FRAME and into the holes in the TOP.
å Now, peel a CAM COVER from the CAM COVER CARD (7)
and stick one onto each HIDDEN CAM in the UPRIGHT (C).
Step 15
Pae 19
C
F
1
2
BLACK 1/2" LARGE PAN HEAD SCREW
(12 used in this step)
14
G
7
Tab
å Fasten the KNOBS (5) to the DOORS (M). Use four
BLACK 1/2" MACHINE SCREWS (16).
Step 16
Pae 20
M
M
5
5
BLACK 1/2" MACHINE SCREW
(4 used in this step)
16
The hooks
should be here.

Other Teknik Indoor Furnishing manuals

Teknik Barrister Home Lift Up 5420329 User manual

Teknik

Teknik Barrister Home Lift Up 5420329 User manual

Teknik 5425655 User manual

Teknik

Teknik 5425655 User manual

Teknik Hampstead 5426504 User manual

Teknik

Teknik Hampstead 5426504 User manual

Teknik 5427455 User manual

Teknik

Teknik 5427455 User manual

Teknik Barrister Home 5420176 User manual

Teknik

Teknik Barrister Home 5420176 User manual

Teknik 5423912 User manual

Teknik

Teknik 5423912 User manual

Teknik Craft 5421407 User manual

Teknik

Teknik Craft 5421407 User manual

Teknik 5420276 User manual

Teknik

Teknik 5420276 User manual

Teknik 5425907 User manual

Teknik

Teknik 5425907 User manual

Teknik 5431916 User manual

Teknik

Teknik 5431916 User manual

Teknik Hampstead Park 5420731 User manual

Teknik

Teknik Hampstead Park 5420731 User manual

Teknik 5423505 User manual

Teknik

Teknik 5423505 User manual

Teknik Hampstead Park Compact Desk 5420284 User manual

Teknik

Teknik Hampstead Park Compact Desk 5420284 User manual

Teknik Wide Bookcase 5420282 User manual

Teknik

Teknik Wide Bookcase 5420282 User manual

Teknik 5427427 User manual

Teknik

Teknik 5427427 User manual

Teknik Canal Heights 5419228 User manual

Teknik

Teknik Canal Heights 5419228 User manual

Teknik City Center 5425658 User manual

Teknik

Teknik City Center 5425658 User manual

Teknik Canal Heights Console 5419230 User manual

Teknik

Teknik Canal Heights Console 5419230 User manual

Teknik Montreal Swivel Recliner User manual

Teknik

Teknik Montreal Swivel Recliner User manual

Teknik 5427872 User manual

Teknik

Teknik 5427872 User manual

Teknik 5424943 User manual

Teknik

Teknik 5424943 User manual

Teknik 5420649 User manual

Teknik

Teknik 5420649 User manual

Teknik Elstree Executive Desk 5426918 User manual

Teknik

Teknik Elstree Executive Desk 5426918 User manual

Teknik 5427412 User manual

Teknik

Teknik 5427412 User manual
Popular Indoor Furnishing manuals by other brands

Coaster Marion 207050Q B1 Assembly instructions

Coaster

Coaster Marion 207050Q B1 Assembly instructions

KEUCO Plan 33096 1550 Series Instructions for use

KEUCO

KEUCO Plan 33096 1550 Series Instructions for use

Julian Bowen Limited ROM101 Assembly instructions

Julian Bowen Limited

Julian Bowen Limited ROM101 Assembly instructions

Furniture of America CM6216-LV Assembly instructions

Furniture of America

Furniture of America CM6216-LV Assembly instructions

Next MALVERN C63091 Assembly instructions

Next

Next MALVERN C63091 Assembly instructions

Office Star Products Pro-Line II 92893 user manual

Office Star Products

Office Star Products Pro-Line II 92893 user manual

Jahnke LOOP TV 180 88TV18 Assembly instructions

Jahnke

Jahnke LOOP TV 180 88TV18 Assembly instructions

Next MURPHY 104343 Assembly instructions

Next

Next MURPHY 104343 Assembly instructions

Mikado CB/4728-V 120 manual

Mikado

Mikado CB/4728-V 120 manual

Flexa 1477900 Assembly instructions

Flexa

Flexa 1477900 Assembly instructions

Datum Trak-Slider instructions

Datum

Datum Trak-Slider instructions

Innostor IP2BIN52 Fitting instructions

Innostor

Innostor IP2BIN52 Fitting instructions

Redgum KATIE SIDE FOLDING TABLE RG63SFT user manual

Redgum

Redgum KATIE SIDE FOLDING TABLE RG63SFT user manual

MoDRN Refined Industrial Atoll HYN-ALLNGE-TN Assembly instructions

MoDRN

MoDRN Refined Industrial Atoll HYN-ALLNGE-TN Assembly instructions

meubar TOMBA DR6 Assembly instruction

meubar

meubar TOMBA DR6 Assembly instruction

Hillsdale Furniture 2179-420MY manual

Hillsdale Furniture

Hillsdale Furniture 2179-420MY manual

Arthauss Furniture GABI Assembly instructions

Arthauss Furniture

Arthauss Furniture GABI Assembly instructions

gbo Joyce 2P Sliding doors 2600 manual

gbo

gbo Joyce 2P Sliding doors 2600 manual

manuals.online logo
manuals.online logoBrands
  • About & Mission
  • Contact us
  • Privacy Policy
  • Terms and Conditions

Copyright 2025 Manuals.Online. All Rights Reserved.