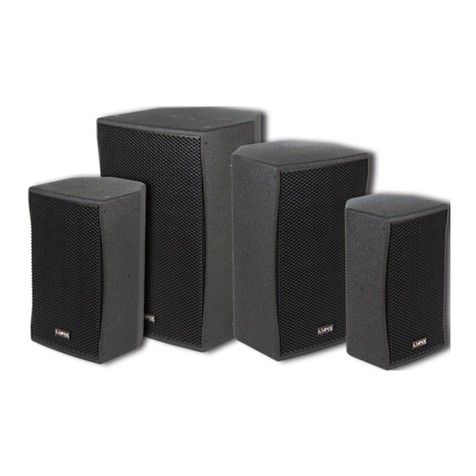
Lynx ADP-15M User manual

USER MANUAL
V.12.12
ADP-15M
Lynx Pro Audio S.L.
Valencia, Spain - www.lynxproaudio.com - info@lynxproaudio.com

LYNX Pro Audio S.L. - Valencia, Spain - www.lynxproaudio.com -info@lynxproaudio.com
ADP-15M
Class D Powered (bi-amplified)
Integrated Digital Processing
Internal temperature control
Electronic protection
High quality components
Online monitoring available

Manufacturer
CB SCHEME, IEC SYSTEM FOR CONFORMITY TESTING AND CERTIFICATION
OF ELECTRICAL EQUIPMENT
CE CERTIFICACTION, EUROPEAN PRODUCT
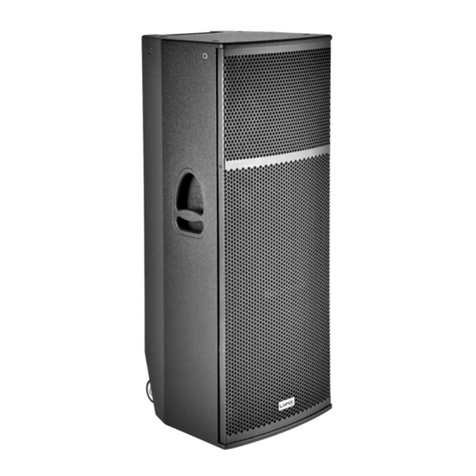
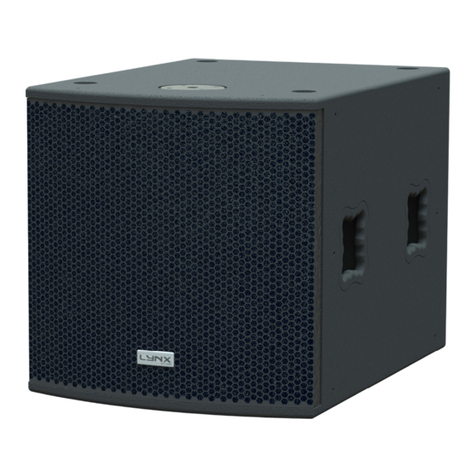
ADP-15M stage monitor
LYNX Pro Audio S.L.
Calle 7 - Pol. Ind. Picassent
E-46220 Picassent (Valencia)
This user manual is property of Lynx Pro Audio S.L. Any reproduction of this manual, by any means is strictly prohibited.
Copyright 2012. All rights reserved.

LYNX Pro Audio S.L. - Valencia, Spain - www.lynxproaudio.com -info@lynxproaudio.com
ADP-15M
CONTENTS
-SAFETYPRECAUTIONS 5
-CABINET INTRO
SPECIFICATIONS 6
BACKPANEL 7
CONNECTORSANDCONNECTIONS 7
-CONFIGURINGTHECABINET DSPOPTIONS
PRESETLIST 9
FIRFILTERS 9
CONFIGURATIONPANEL 10
SELECTANDRUNPRESET 10
-ONLINECONTROLSYSTEM 11
-CONFIGURINGETHERNET 12
-GUARANTEE 18

LYNX Pro Audio S.L. - Valencia, Spain - www.lynxproaudio.com -info@lynxproaudio.com
ADP-15M
Before starting tousethisdevice, please readthisinstructionmanual carefully.
Keep theseinstructionsin the place where theequipment will be usedand with easy access to them.
- Electrical appliance.
Theexclamation mark within atriangle identifies the presenceof electricity. Use the system carefully
without wet handsor feet.Avoid installing the speaker inwet or excesivellyhumidplaces.Do not place
material that contains liquid onornear theunit.Avoiddrippingor splashingwater or anyliquidover the
unit. Regularly check the condition of the cables and make sure these are not being walked on or
pinched. Connect the speaker to bipolar, earthed mains. The mains plug must be connected to the
appropriate protection (fuse or breaker). Connection to any other type of mains could result in an
electricalshockandviolatelocal electrical codes.CAUTION:DONOTCONNECTORDISCONNECT
THEACPOWERCONNECTORS UNDERLOAD.
- Heavy equipment.
Apply back protection when using thesystem.Avoid loading andunloadingat heights.
-Electrical shockrisk.
Thediagonal mark within a triangle identifiesthepresence of dangerousvoltage.
Do not open or handle the interior of the box. These parts are not to be adjusted by the user. For
maintenance and/or repair pleasego to an authorized service centre.
In order to reduce the risk of electric shock, disconnect fromAC before plug in or unplugging Audio
signal cables. Reconnect toAC only if all signal connectionsare made andsecured.
Nevermanipulatethegroundtypeplugprovided.
TheAC mainsplugsshould always remain accessible for operation.
Unplug theloudspeaker during stormsor when it’s being used for a long time.
- Hearing damage risk.
These systems can reproduce large quantities of sound pressure which can damage hearing. Take
precautionsif you aregoing to benear them for extended amounts of time and do not get tooclose.
- Hanging – Flying.
Donot hangthecabinetsfrom thehandlesor from anyother partotherthanthe designatedhanging
point.Whenflyingthissystempleaseobservethetechnicaland“LynxOnStage”softwaredatacarefully.
Never exceedthemaximum safe workingloads or ignoretheinstructionsincluded withinthismanual.
Use Only flying accessoriesprovided by Lynx ProAudio S.L.
Rigging mustbe always carried out by professionals.
- Delicate Material.
Pleaseensurenoforeignobject orwaterentersthespeaker. Onlyclean theunitwithdrycloths.Donot
usesolvents.
-Overheating – Fire risk.
Toreduce therisk of thespeaker over heating, avoiddirectcontact withsunlight.Avoidplacingtheunit
closeto heat inducing objects such asradiators. Do not cover the equipment in use and donot block
anyventilationopenings. Do not put nakedflame, suchas lighted candles, close oron top of theunit.
- Electromagnetic and interferente emissions.
Avoid placing objects which through electromagnetic waves can damage the unit, such as mobile
phones, lap tops, magnetic strip cards etc.
Thissystem complieswith normatives EN55103-1(1)
EN55103-2(2)
(1) Thisdevice may not causeharmful interferences.
(2) Thisdevice may receive interference includinginterferencesthat may causeundesired working.
-IMPORTANT NOTE.
This Equipment must be used in accordance with these instructions and by trained professional
personnelonly.
Thisequipmentshouldnotbeusedinplaceswithextremetropicalclimates.Don’texposethisapparatus
toextremehumidityandortemperaturevalues.
5
LYNX Pro Audio S.L. - Valencia, Spain - www.lynxproaudio.com -info@lynxproaudio.com
ADP-15M
INTRODUCTION
Tofacilitate,correct andreliable useof the stagemonitorADP-15M we have designedthisinstruction manual.Please
readthe manual carefully beforeproceedingto install thesystem.
Pleaseobserve the technical data carefully anddo not ignore the instructionsincluded within thismanual.
SPECIFICATIONS:
FREQUENCY RANGE 60Hz -20KHz
FREQUENCY RESPONSE 70Hz- 18KHz ± 3dB
HORIZONTAL COVERAGE 90º
VERTICAL COVERAGE 90º
MAX SPL 130 dB/ 133dB peak 1w@ 1m
CROSSOVER 1500 Hz
TRANSDUCERS LF/MF: 15" Coaxial Custom Neod.+Nomex Cone
HF: 1.4" Neodimium driver + Titanium diaphragm
SHAPE Trapezoidal
POWER AMPLIFIER 1500W Class D with Switching Power supply
750W Low/Mid + 750W High
DSP Internal Lynxlprocessor DSPB-22® with FIR filters
CABINET ADJUSTMENT Back panel LCD screen
INTERNAL CONTROLS Temperature sensor / Fan Speed control
SIGNAL CONNECTION NEUTRIK connectors XLR Male Input
XLR Female Loop Thru
CONTROL CONNECTIONS USB (DSP programming),
ETHERNET* (Online Monitoring System OMS®)
AC POWER 230v / 115v selectable. 50/60 Hz 5A
AC CONNECTIONS 16A NEUTRIK POWERCON with Looping Output
CONSTRUCTION 15 mm Premium Birch plywood
FINISH High resistant water-based black paint
FRONT DESIGN Black antirust steel grille
DIMENSIONS (H x W x D) 434 x 620 x 618 mm
WEIGHT 26 Kg (57 lbs)
*Ethernet connection is optional.
6

LYNX Pro Audio S.L. - Valencia, Spain - www.lynxproaudio.com -info@lynxproaudio.com
ADP-15M
CONNECTORS AND CONNECTIONS
12
34 5
ADP-15M BACK PANEL.-
OUTPUTS
1.- EARTH
2.- LIVE (+)
3.- LIVE (-)
1
3
2
INPUTS
1.- EARTH
2.- LIVE (+)
3.- LIVE (-)
2
3
1
XLRSOCKETCONNECTORS
XLRAEREALCONNECTORS
Connecttooutput
Connecttoinput
2 Live(+)
3 Live(-)
1 Earth
3 Live(-)
1 Earth
2 Live(+)
7
7
6
1.- SIGNAL INPUT
2.- SIGNAL LINK
3.- AC INPUT
4.- AC LINK
5.- DSP CONTROL
6.- USB
7.- ETHERNET (optional)

LYNX Pro Audio S.L. - Valencia, Spain - www.lynxproaudio.com -info@lynxproaudio.com
ADP-15M
SOCKET POWERCON CONNECTORS
L - Line
N - Neutral
- Earth
CONNECTION EXAMPLE: 3 ADP-15M CABINETS
Connect to signaloutput
ConnecttoACoutput
CAUTION: Do not connect or
disconnect the AC Power
connectors under load.
8

LYNX Pro Audio S.L. - Valencia, Spain - www.lynxproaudio.com -info@lynxproaudio.com
ADP-15M
CONFIGURING THE CABINET DSP OPTIONS
From the buttons below the display on the cabinet’s back panel you are able to configure the Basic adjustment
functionsof theinternalDSP.Dependingonthe model,youcanfindthe followingconfigurations:
Note:
You mustapply the desiredconfiguration in eachonecabinet.Thisis doneviathe buttons locatedonthe back panel
of thecabinet and requires electrical power to work.
FIRFILTERS
Finite ImpulseResponse (FIR) filtersare used in the signal processing of theADP-15M cabinet. FIRis atype of
digital filter with linear phase characteristics. This frees system designers from the constraintsof phase anomalies
associated with analogue filters or their digital versions (IIR,Infinite Impulse Response). When properly used, FIR
filteringcanaudibly improve a system’simpulseresponseandreducecrossover interference.
9

LYNX Pro Audio S.L. - Valencia, Spain - www.lynxproaudio.com -info@lynxproaudio.com
ADP-15M
Fig 1
Fig 2 Fig 3 Fig 4
CONFIGURATIONPANEL
On the back panel you will see 3 buttons and an information screen, on which you can read the established
parametersandinformation such as amplification module temperature, input signal level and name of the current
preset (Fig1). If changesarenot made thedisplaywill automaticallydim tosave energyandavoidunnecessary light
in situationswhere light is not wanted. To re-activate the light simply press the OK button.
SELECT ANDRUNPRESET
To change thepreset configurationjust press the up button (Fig2(1))and down button (Fig2(2)) until yousee the
title andpresent number required. Once found, pressOK (Fig2(3)) until the progress bar finishes (Fig3). The
display will indicate “LoadingDSP”(Fig4)
Note:
In case of a power cut, the DSP will save its last configuration when restarted.
10

LYNX Pro Audio S.L. - Valencia, Spain - www.lynxproaudio.com -info@lynxproaudio.com
ADP-15M
11
ONLINE CONTROL SYSTEM
Who is it for?
Usersof Self poweredDSPincorporatedLynx ProAudioCabinetswherethe userhasrequestedthe cabinetsbe
supplied with the Ethernet Module kit.
What is it for?
Obtain detailedinformationof cabinet behaviour and monitor thecabinet/sin real time.You can changethe
preset, gain, mute, polarity and phase. You can also activate the air absorption compensation and select the
«SOLO»mode.
How does it work?
Via Ethernet (cable or wireless). Once installed, the O.C.S. software automatically detects all the cabinets
connected to the network and displaysthem in the O.C.S. windowon the users PC.
What does it show?
As well as displayingthe cabinet model and IP address the O.C.S will be monitoring in real time and theuser will
beable to viewRMS levels, Input clip,power module temperature,compression levels,air absorption
compensation andcabinetangulation.

LYNX Pro Audio S.L. - Valencia, Spain - www.lynxproaudio.com -info@lynxproaudio.com
ADP-15M
CONFIGURING ETHERNET TO WORK WITH THE ADP-15M
Thereare two possible ways to connect:
1.-ConnectingthroughanETHERNET SWITCH/HUB::
-Youwill needanormalCAT5 Cable.
2.- Connectingthrough aWirless ETHERNET.
Letus nowproceedto configure the Ethernet network, settingthe IPaddressof thecomputer as static. Todo thisgo
to:
START > CONFIGURATION> NETWORK CONFIGURATION
12
We will launch the properties of "Local
Area Connection" by clicking the right
mousebuttonandclickingonproperties.

LYNX Pro Audio S.L. - Valencia, Spain - www.lynxproaudio.com -info@lynxproaudio.com
ADP-15M
Select "Internet Protocol (TCP / IP)" and click on
properties.
13
Select: “Use next IP Address” And write as you wish, in
ordertoconfigureyournetwork.
Normally, Ip valueswill besomethinglike this:
IPAddress:192.168.2.xxx
Subnet Mask:255.255.255.0
Where xxx will be a number between 1and 254
Accept to quit the network settings and again to apply
them at thenext screen. Depending on the WindowsVer-
sion, you will be asked to reboot or not.
Oncethe Computer isconfigured with a static IP proceed
to connect to the line array system through the O.M.S.
(onlinemonitoring system) software.
Open the O.M.S Software and from the Initial Screen
chooseETHERNET.
It will opena different screen, asfollows, thereyou can seeyourNetwork configuration, and the cabinets currently
connected.

LYNX Pro Audio S.L. - Valencia, Spain - www.lynxproaudio.com -info@lynxproaudio.com
ADP-15M
Inthiscase,wecan seethat the cabinet donot have thesameIPenvironment asthe PC.So,select thecabinetand
modify the assignedIP in order to be able to connect to it.
By default, the Cabinet will have this IP 192.168.2.100 (Versions before 2009 could been asigned with IP
10.10.25.101orIP192.168.1.100)
TheNetworkenviromentconsistsinthefirst3setsofthreenumbersseparatedbydots. Inordertodetect/communicate
with the cabinets, the software and thecabinets must have the same Network settings.
If it isnotin the same environment WindowsProfesional (2000, XP, VISTA) will detect it, but is not goingtobe able
to establish connection. In WindowsHome, the processoris not goingto bedetecteduntil thesame enviroment is
applied.
In order tochangethe IP settings to have thesame configuration as thePC, we can changethe IP address of the
cabinets by clicking in the Assign IP to select Device button after writing in the box above the desired data.
Remember there cannot be twodevices with exactly the same IP address, the last set of three numbershasto be
different andunique toeach one of thedevices.
14

LYNX Pro Audio S.L. - Valencia, Spain - www.lynxproaudio.com -info@lynxproaudio.com
ADP-15M
forexample, write 192.168.2.101andclick "Assign IP to select Device" button.
The OMS software will send the new IP to the cabinet and it will scan the network again showing the same
information as before, plus more informationsuchasPc name, IP addressandPort in which thecommunication is
established.
When we have a lot of cabinets connected in the network we can use the button“Identify Device” to see which
box is selected (twoactivity LEDS will blink for one second).With that information then we can “Change NAME”
assignedto this Cabinet by clickingin the “Assign NAME to select Device”button after writing in the box above
thedesiredName.
We can sort all the detected cabinets by Name or IPAddress.
Returningtothemainscreen,wecanseeeachcabinetshowing:Model,IPaddressandName,aswellasmonitoring:
RMS Level, Input Clip,Cabinetangulation,amplifier temperatureandfanspeed.
15

LYNX Pro Audio S.L. - Valencia, Spain - www.lynxproaudio.com -info@lynxproaudio.com
ADP-15M
If you need to know the PC Network settings go to:
START > ALL PROGRAMS > ACCESSORIES > Command Prompt
It will openthe cmd.exefrom whereyoucantypethe IPCONFIGcommand (ipconfig + Enter),which will showyour
actual IP settings.
Here we can see that this PC has IP set as 192.168.2.99.
16

LYNX Pro Audio S.L. - Valencia, Spain - www.lynxproaudio.com -info@lynxproaudio.com
ADP-15M
You can also use the command promt to know if an IP is already in use by another device. In this case type "ping
IP" (ping 192.168.2.xxx)and pressenter. If there isno devicewith thisIP you will seethe following information:
If the IP is in use, the device will respond to the Ping, and we will obtain this information:
You nowhavetheCabinets workingintheETHERNETNetworkEnviroment.
17

LYNX Pro Audio S.L. - Valencia, Spain - www.lynxproaudio.com -info@lynxproaudio.com
ADP-15M
LYNXPROAUDIO GUARANTEE
Lynx productsare guaranteedagainsteverykind of manufacturingfault 2yearafterthe dateof sale. Whenproducts
are under guarantee, therepairingand thefreesupplyingof thedevice partsin orderto correctanykindof defect are
guaranteedby Lynx ProAudioS.L. Inthe case that theproduct couldnot be returned tothe factoryfor checkingand
repairing, Lynx ProAudio S.L. would supply all the necessary parts.
Lynx ProAudio S.L. is not responsible for anydamage ordefect caused duringthe transport or caused by anundue
orimproper handling y anon-authorizedpersonduringthelife of thisguarantee.
All ourproductsundergorigoroustestsandqualitycontrols.Weguaranteethecharacteristicsdescribedherewithin
andtheirqualityagainstanyfabricationdefect.
Theuserlosesallwarrantyrightsifheincorporatesorcarriesoutanymodificationtotheproduct,ifheusesitoutside
ofthestatedsafeworkingloadsordoesnotsecurethesystemproperlyusingallthepinsintheircorrespondingholes.
For anyquestion regarding theproduct, theuser must quote themodel andserial number.
18
Table of contents
Other Lynx Speakers manuals

Lynx
Lynx ionic-5CX User manual

Lynx
Lynx pro-audio GR-18S User manual

Lynx
Lynx LX-V8 User manual

Lynx
Lynx LX-218S User manual

Lynx
Lynx HR-SERIES User manual

Lynx
Lynx KR Series User manual

Lynx
Lynx CPS Series User manual

Lynx
Lynx QB SERIES User manual

Lynx
Lynx GR-12 User manual

Lynx
Lynx Ionic Series User manual